创建eureka子工程
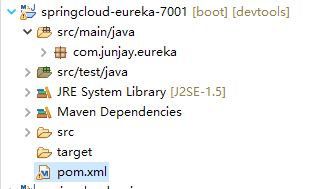
创建完毕后;
1:导入依赖,修改pom.xml文件
<?xml version="1.0"?><projectxsi:schemaLocation="http://maven.apache.org/POM/4.0.0 https://maven.apache.org/xsd/maven-4.0.0.xsd"xmlns="http://maven.apache.org/POM/4.0.0"xmlns:xsi="http://www.w3.org/2001/XMLSchema-instance"><modelVersion>4.0.0</modelVersion><parent><groupId>com.junjay</groupId><artifactId>SpringCloud</artifactId><version>0.0.1-SNAPSHOT</version></parent><groupId>com.junjay</groupId><artifactId>springcloud-eureka-7001</artifactId><version>0.0.1-SNAPSHOT</version><name>springcloud-eureka-7001</name><url>http://maven.apache.org</url><properties><project.build.sourceEncoding>UTF-8</project.build.sourceEncoding></properties><dependencies><dependency><groupId>junit</groupId><artifactId>junit</artifactId><scope>test</scope></dependency><!-- 导包eureka --><!-- https://mvnrepository.com/artifact/org.springframework.cloud/spring-cloud-starter-eureka-server --><dependency><groupId>org.springframework.cloud</groupId><artifactId>spring-cloud-starter-eureka-server</artifactId><version>1.4.6.RELEASE</version></dependency><!-- 热部署工具 --><dependency><groupId>org.springframework.boot</groupId><artifactId>spring-boot-devtools</artifactId></dependency><dependency><groupId>org.mybatis.spring.boot</groupId><artifactId>mybatis-spring-boot-starter</artifactId></dependency><dependency><groupId>org.springframework.boot</groupId><artifactId>spring-boot-starter-web</artifactId></dependency></dependencies></project>
2:编写配置文件
server:port: 7001#Eureka 配置eureka:instance:hostname: localhost #首先声明eureka服务端名字client:register-with-eureka: false #是否向eureka中心注册自己fetch-registry: false #如果fetch-registry为false,则表示自己是注册中心service-url: #监控页面#使用${}动态获取yml配置文件中值#defaultZone 默认http://localhost:8761/eurekadefaultZone: http://${eureka.instance.hostname}:${server.port}/eureka/
3:开启jar包功能
一般为@EnableXXX ,启用什么什么
package com.junjay.eureka;import org.springframework.boot.SpringApplication;import org.springframework.boot.autoconfigure.EnableAutoConfiguration;import org.springframework.boot.autoconfigure.SpringBootApplication;import org.springframework.boot.autoconfigure.jdbc.DataSourceAutoConfiguration;import org.springframework.cloud.netflix.eureka.server.EnableEurekaServer;@SpringBootApplication//开启启动eureka,注解肯定是enable+eureka。。。@EnableEurekaServer // @EnableEurekaServer服务的启动类,可以接收别人注册进来//在Spring// boot的启动引导类上增加@EnableAutoConfiguration(exclude={DataSourceAutoConfiguration.class}),阻止Spring// boot自动注入dataSource@EnableAutoConfiguration(exclude = { DataSourceAutoConfiguration.class })public class EurekaService_7001 {public static void main(String[] args) {SpringApplication.run(EurekaService_7001.class, args);}}
4:该功能配置类
启动eureka服务,访问配置好的地址:http://localhost:7001/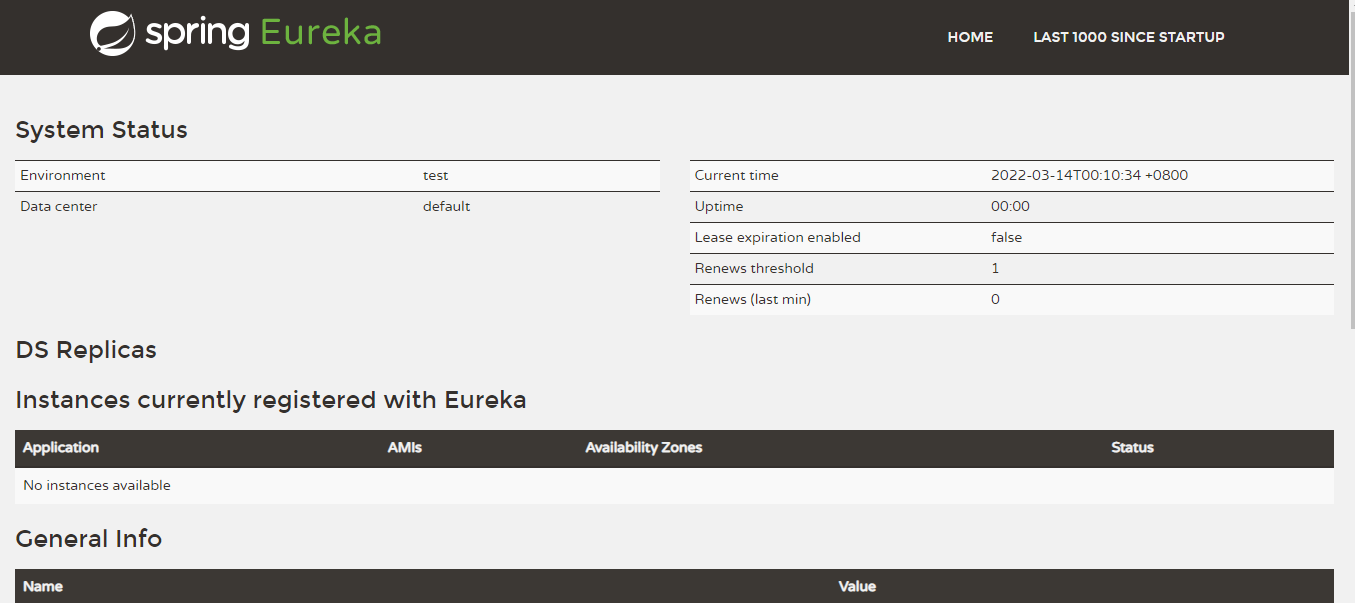
5:在服务提供者中加入eureka依赖
springcloud-provider-dept-8081/pom.xml
<!-- 加入eureka依赖进行服务注册 --><!-- https://mvnrepository.com/artifact/org.springframework.cloud/spring-cloud-starter-eureka --><dependency><groupId>org.springframework.cloud</groupId><artifactId>spring-cloud-starter-eureka</artifactId><version>1.4.6.RELEASE</version></dependency>
配置服务提供者yml文件
#eureka 的配置eureka:client:service-url:# 服务注册到哪里 打开eureka服务配置以配置中的地址为准# eureka配置好之后,开启eureka功能注解defaultZone: http://localhost:7001/eureka
在springboot启动类中开启eureka注解
package org.springcloud;import org.springframework.boot.SpringApplication;import org.springframework.boot.autoconfigure.SpringBootApplication;import org.springframework.cloud.netflix.eureka.EnableEurekaClient;// 启动类@SpringBootApplication// 开启eureka 在服务启动后自动将服务注册到eureka中@EnableEurekaClientpublic class DeptProvider_8081 {public static void main(String[] args) {SpringApplication.run(DeptProvider_8081.class, args);}}
启动eureka7001服务
启动8001服务提供者
使得服务者注册至eureka服务中
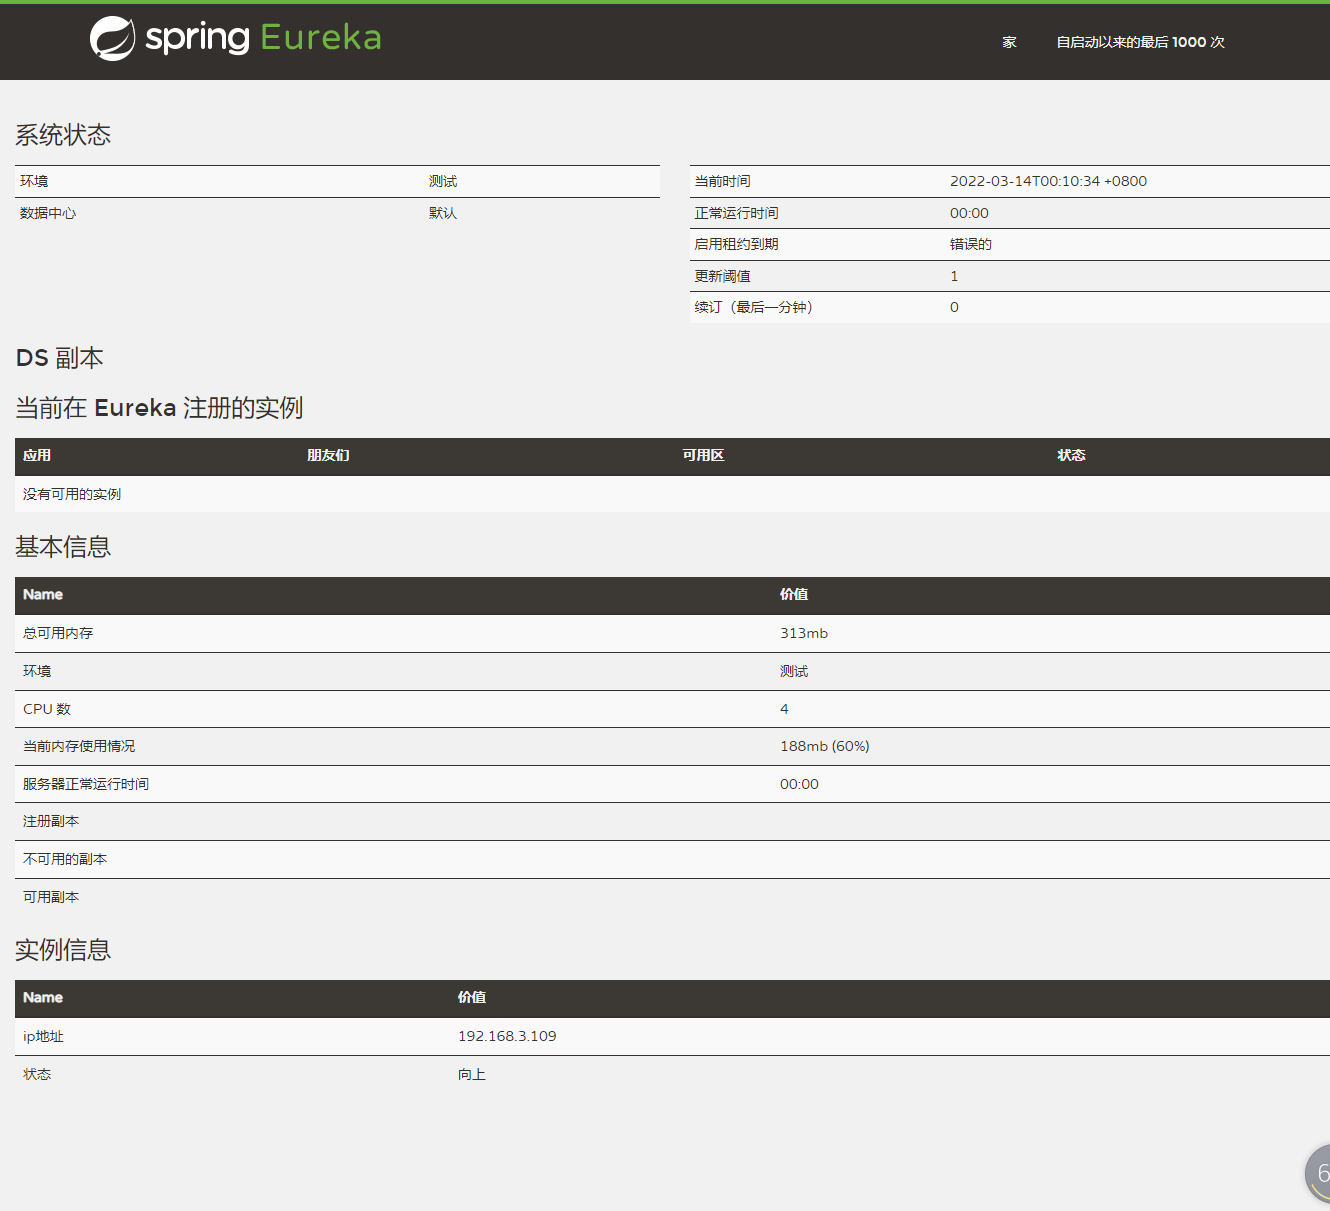
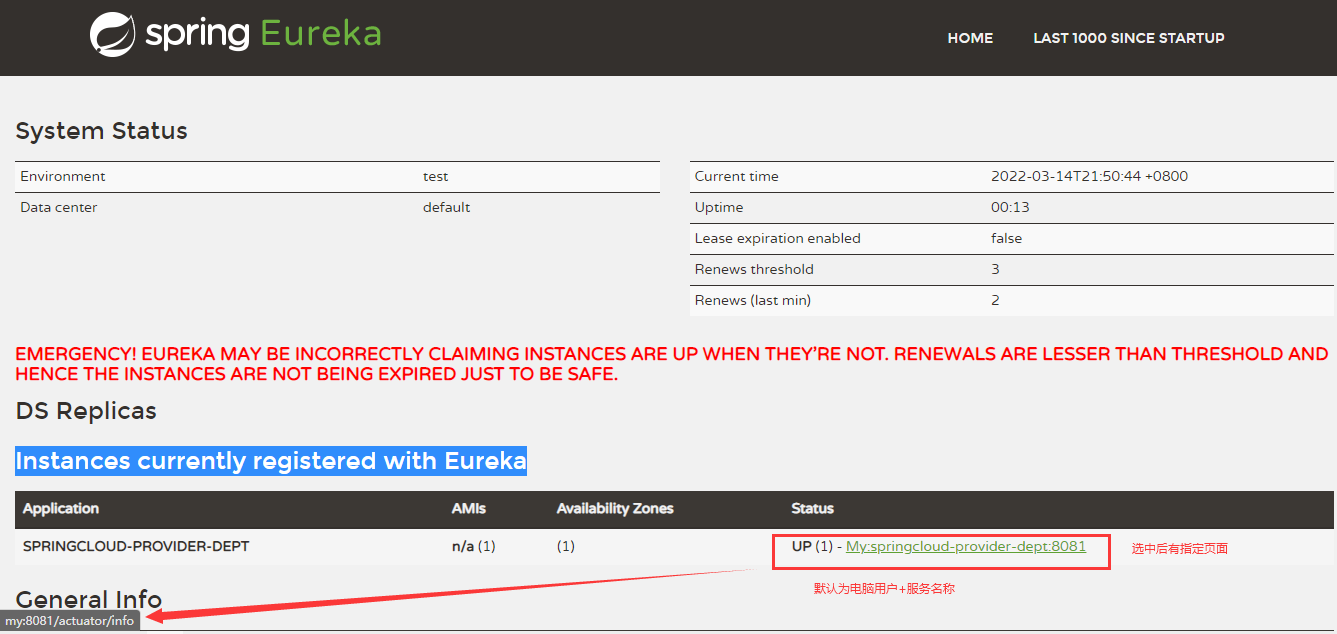
再次访问http://localhost:7001/eureka 地址 查看是否完成服务注册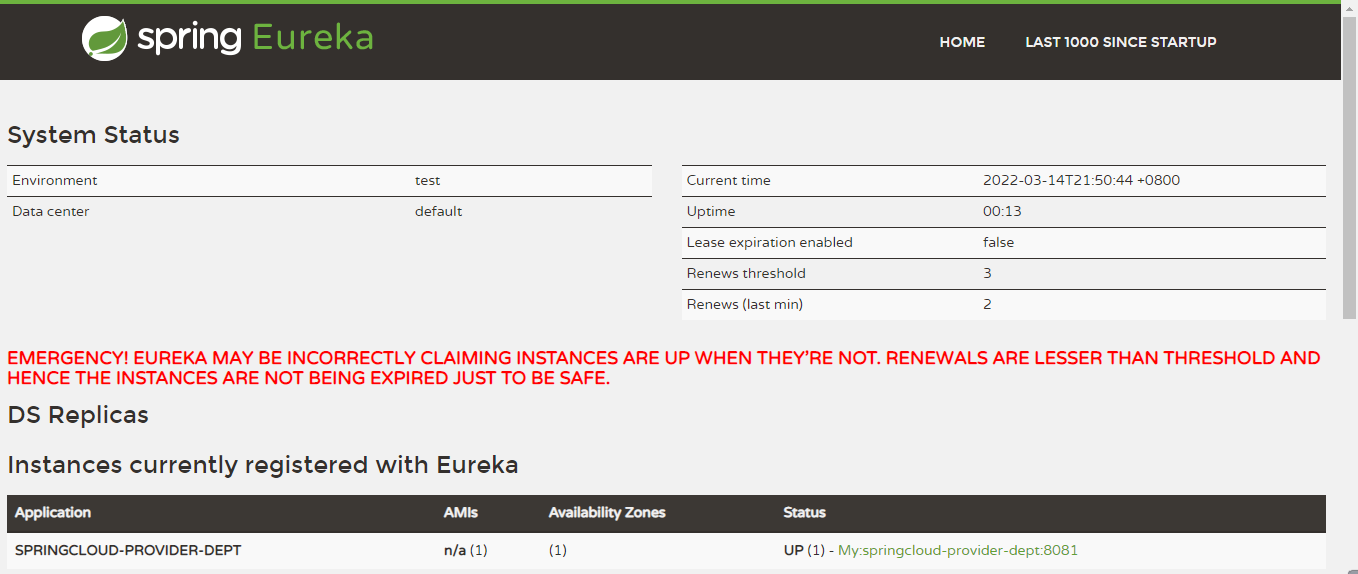
Instances currently registered with Eureka(当前已注册到Eureka的实例)列表
application 则取之于 yml中的
#spring配置spring:application:name: springcloud-provider-dept
服务注册eureka成功
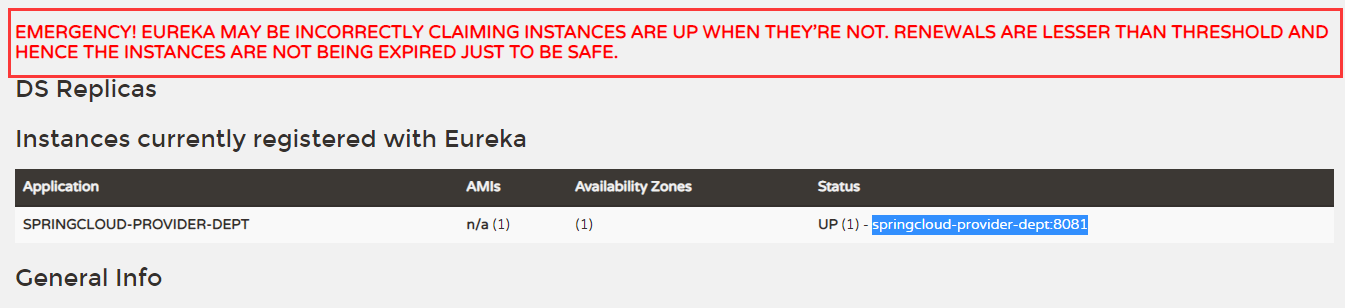
EMERGENCY! EUREKA MAY BE INCORRECTLY CLAIMING INSTANCES ARE UP WHEN THEY’RE NOT. RENEWALS ARE LESSER THAN THRESHOLD AND HENCE THE INSTANCES ARE NOT BEING EXPIRED JUST TO BE SAFE.
紧急!Eureka可能错误地声称实例已经启动,而实际上它们并没有。更新小于阈值,因此实例不会过期,只是为了安全。
解决方案https://blog.csdn.net/u012373281/article/details/89601509
因为Eureka有自我保护机制,在默认的情况下,如果Eureka server 在一定的时候内,没有接受到某个微服务的心跳,就会注销该实例,默认时间是90秒。但是当网络发生故障的情况下,微服务和EurekaServer就无法通讯,这样就很危险,因为微服务本身是健康的,此时不应该注销该服务,而EurekaServer通过注销该服务来达到自我保护机制,当网络健康的时候,EurekaServer就会自动退出自我保护机制。
eureka修改描述
通过编辑yml中的eureka配置需改Status
#eureka 的配置eureka:client:service-url:# 服务注册到哪里 打开eureka服务配置以配置中的地址为准# eureka配置好之后,开启eureka功能注解defaultZone: http://localhost:7001/eurekainstance:# 修改eureka——Status up 描述instance-id: provider-dept-8081

eureka监控信息描述
点击provider-dept-8081 页面地址为:http://my:8081/actuator/info
https://jingyan.baidu.com/article/eb9f7b6d42566d869364e8f4.html 相关配置
instance prefer-ip-address 是否使用主机ip
提示错误,搜索actuator,监控信息不完善,修改pom完善监控信息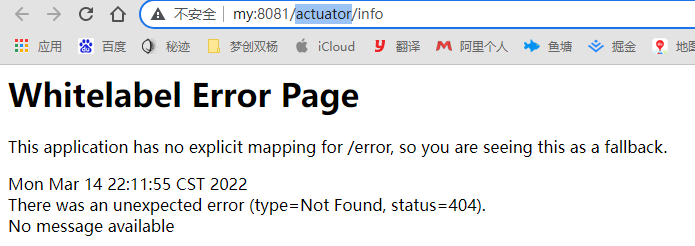
<!-- actuator 完善监控信息 --><dependency><groupId>org.springframework.boot</groupId><artifactId>spring-boot-starter-actuator</artifactId></dependency>
# actuator 监控配置info:app.name: provider-deptcompany.name: blog.junjay.com# 服务开发者名称(作者)author: junjay
Spring Boot Actuator:健康检查、审计、统计和监控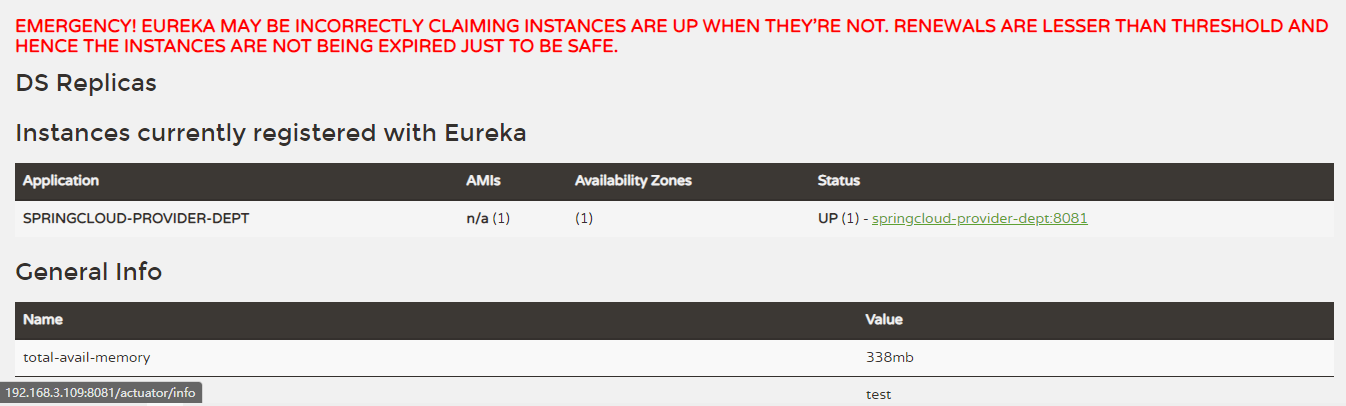
再次点击springcloud-provider-dept:8081
可以在此配置改微服务是做什么的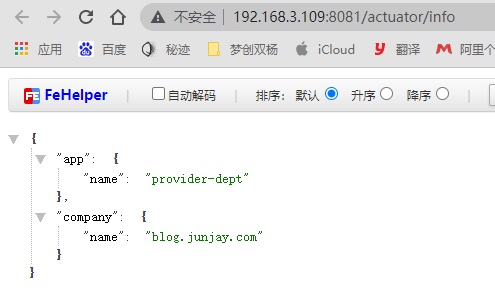
eureka自我保护机制
自我保护机制:好死不如赖活着
-句话总结:某时刻某一个微服务不可以用了,eureka不会立刻清理,依1日会对该微服务的信息进行保存!
- 默认情况下,如果Eurekaserver一定时间内没有接收到某个微服务实例的心跳,Eurekaserver将会注销该
实例(默认90秒)。但是当网络分区故障发生时,微服务与Eureka之间无法正常通行,以上行为可能变得非
常危险了-因为微服务本身其实是健康的,此时本不应该注销这个服务。Eureka通过 自我保护机制 来解决这
个问题—当Eurekaserver节点在短时间内丢失过多客户端时(可能发生了网络分区故障),那么这个节点就会
进入自我保护模式。一旦进入该模式,Eurekaserver就会保护服务注朋表中的信息,不再删除服务注朋表中
的数据(也就是不会注销任何微服务)。当网络故障恢复后,该Eurekaserver节点会自动退出自我保护模
式。 - 在自我保护模式中,Eurekaserver会保护服务注册表中的信息,不再注销任何服务实例。当它收到的心跳数
重新恢复到阈值以上时,该EurekaServer节点就会自动退出自我保护模式。它的设计哲学就是宁可保留错误
的服务注册信息,也不盲目注销任何可能健康的服务实例。一句话:好死不如赖活蒼 - 综上,自我保护模式是一种应对网络异常的安全保护措施。它的架构哲学是宁可同时保留所有微服务(健康的
微服务和不健康的微服务都会保留),也不盲目注销任何健康的微服务。使用自我保护横式,可以让Eureka集群更加的健壮和稳定 - 在Springcloud中,可以使用 eureka.server.enable-se1f-preservation = false 禁用自我保护横式
【不推荐关闭自我保护机制】服务发现机制
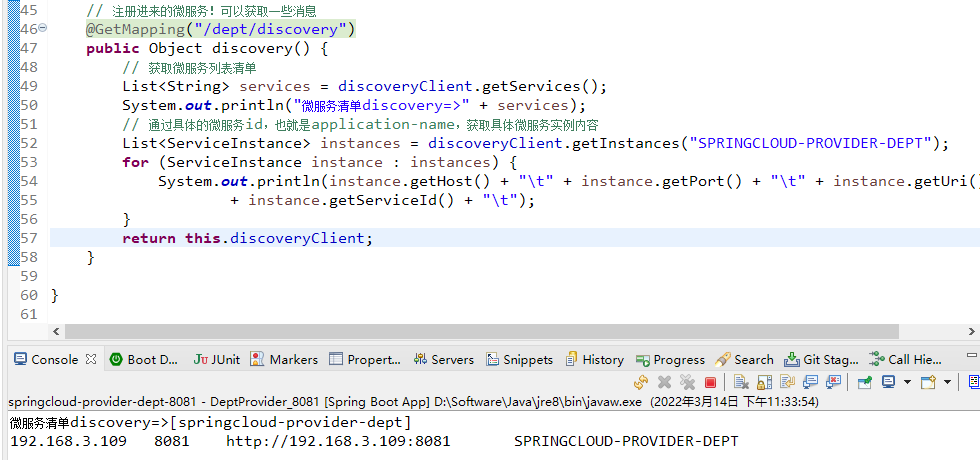
服务提供者controller层添加方法// 注册进来的微服务!可以获取一些消息@GetMapping("/dept/discovery")public Object discovery() {// 获取微服务列表清单List<String> services = discoveryClient.getServices();System.out.println("微服务清单discovery=>" + services);// 通过具体的微服务id,也就是application-name,获取具体微服务实例内容List<ServiceInstance> instances = discoveryClient.getInstances("SPRINGCLOUD-PROVIDER-DEPT");for (ServiceInstance instance : instances) {System.out.println(instance.getHost() + "\t" + instance.getPort() + "\t" + instance.getUri() + "\t"+ instance.getServiceId() + "\t");}return this.discoveryClient;}
在springboot启动类中添加@EnableDiscoveryClient 注解 ```java package org.springcloud;
import org.springframework.boot.SpringApplication; import org.springframework.boot.autoconfigure.SpringBootApplication; import org.springframework.cloud.client.discovery.EnableDiscoveryClient; import org.springframework.cloud.netflix.eureka.EnableEurekaClient;
// 启动类 @SpringBootApplication // 开启eureka 在服务启动后自动将服务注册到eureka中 @EnableEurekaClient // 服务发现及DeptController中的discovery方法 @EnableDiscoveryClient public class DeptProvider_8081 {
public static void main(String[] args) {SpringApplication.run(DeptProvider_8081.class, args);}
}
```
通过提供者服务访问:http://localhost:8081/dept/discovery 获得服务实例信息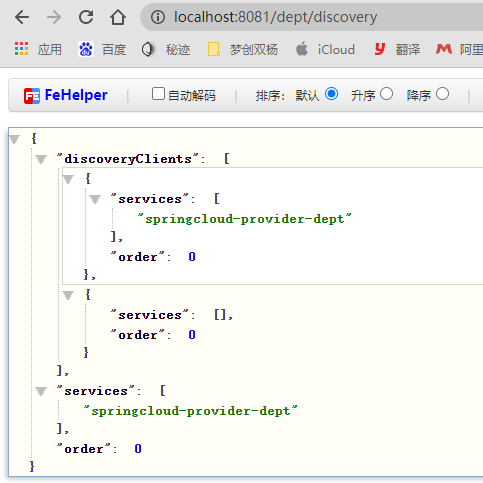

若有收获,就点个赞吧
0 人点赞
