关于SpringBoot启动类
@SpringBootApplication注解
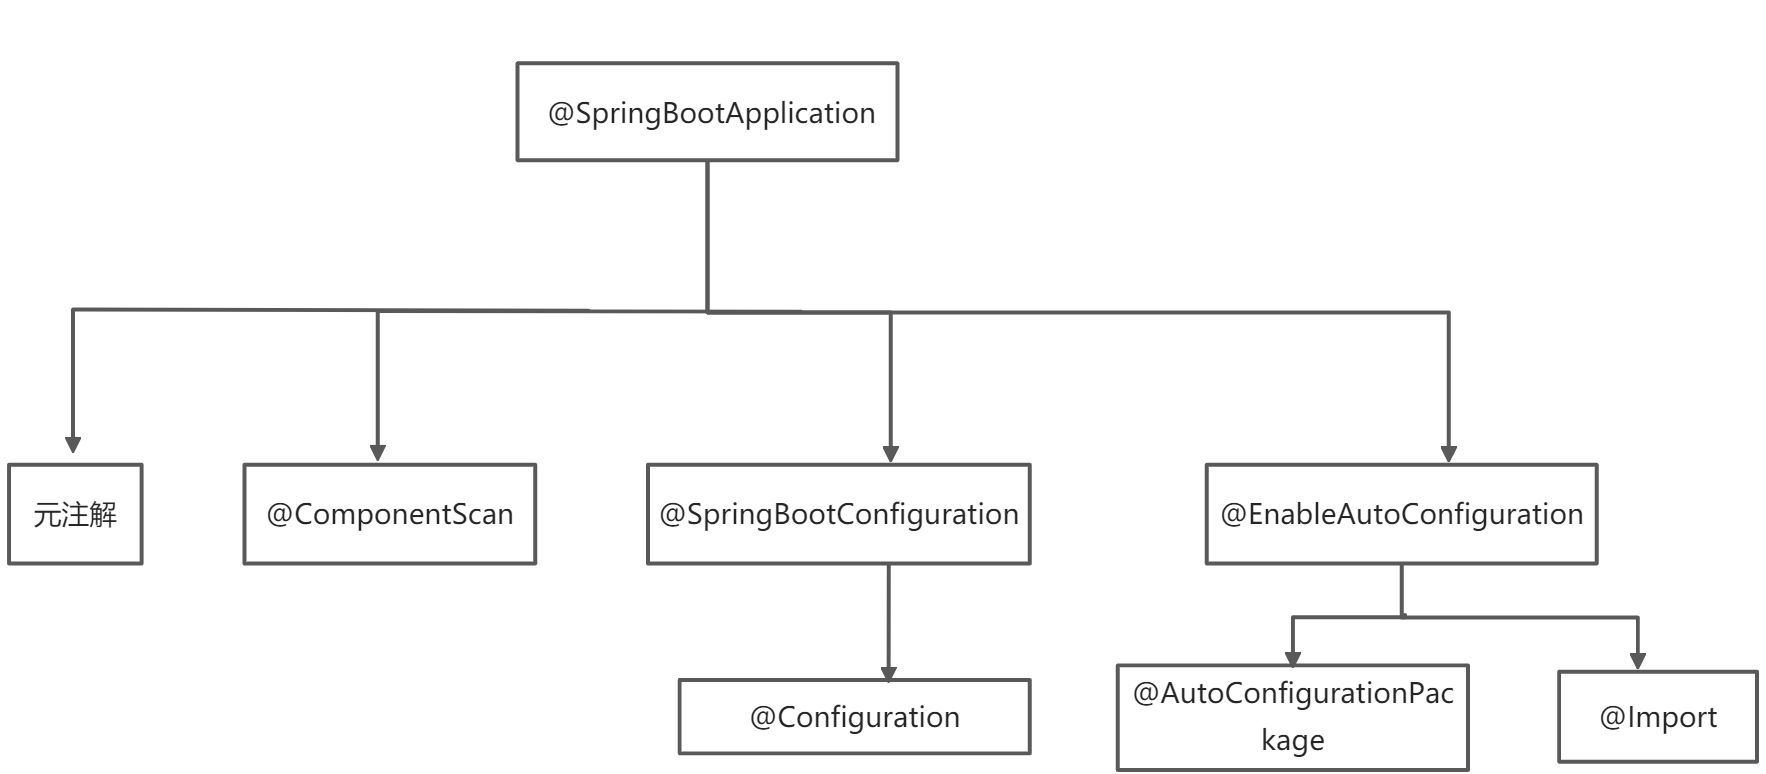
元注解
**@Target({ElementType.TYPE})**
标记该注解只能做用在类中
**@Retention(RetentionPolicy.RUNTIME)**
标记该注解在运行时生效
**@Documented**
标记该注解是否会出现在JavaDoc中
**@Inherited **
标记该注解是或否可被继承
@ComponentScan注解
对应XML配置中的元素,@ComponentScan的功能其实就是自动扫描并加载符合条件的组件(比如@Component和@Repository等)或者bean定义,最终将这些bean定义加载到IoC容器中。可以通过basePackages等属性来细粒度的定制@ComponentScan自动扫描的范围,如果不指定,则默认Spring框架实现会从声明@ComponentScan所在类的package进行扫描。
进行排除,当springBoot启动时,会实例化很多的对象, SpringBoot内部兼容了很多的第三方框架,但是其中个别加入之后会影响整个代码流程,所以通过这样的方式将个别的类排除在外。
@ComponentScan(excludeFilters = {@Filter(type = FilterType.CUSTOM,classes = {TypeExcludeFilter.class}), @Filter(type = FilterType.CUSTOM,classes = {AutoConfigurationExcludeFilter.class})})
@SpringBootConfiguration注解
源码:
@Target({ElementType.TYPE})@Retention(RetentionPolicy.RUNTIME)@Documented@Configuration@Indexedpublic @interface SpringBootConfiguration {@AliasFor(annotation = Configuration.class)boolean proxyBeanMethods() default true;}
用于标识配置文件/配置类,作用整合第三方框架(进行配置),简化了配置文件
**@Configuration**注解,一般标识类文件,可替换xml配置文件,告知SpringBoot这个类是用于整合第三方框架或者配置的
**@SpringBootConfiguration**注解,修饰主启动方法,表示主启动类也为一个配置类,会自动进行第三方框架整合,无需手动配置。会自动扫描用户自己的配置类,并会将当前类内声明的一个或多个以@Bean注解标记的方法的实例纳入到spring容器中,并且实例名就是方法名。
@EnableAutoConfiguration注解
源码:
@Target({ElementType.TYPE})@Retention(RetentionPolicy.RUNTIME)@Documented@Inherited@AutoConfigurationPackage@Import({AutoConfigurationImportSelector.class})public @interface EnableAutoConfiguration {String ENABLED_OVERRIDE_PROPERTY = "spring.boot.enableautoconfiguration";Class<?>[] exclude() default {};String[] excludeName() default {};}
**@AutoConfigurationPackage**,自动配置了包扫描的路径,会动态获取主启动类当前的包,然后开启包扫描。所以项目文件包应当与主启动类同级或者与主启动类当前的包的子包中,这样主启动类进行包扫描才会将项目文件进行包扫描。
**@Import({AutoConfigurationImportSelector.class})**,借助**AutoConfigurationImportSelector**,**@EnableAutoConfiguration**可以帮助SpringBoot应用将所有符合条件的**@Configuration**配置都加载到当前SpringBoot创建并使用的IoC容器。,而**@Import**作用就是根据依赖信息,扫描加载进来的启动器,而Spring Boot中具有非常多的启动器,但并不是所有启动器都会使用,因此**@Import**会依次匹配用户加载的依赖,将匹配到的依赖进行实例化加载。
IOC详解
Spring容器内部维护一个Map集合用于存放对象
Spring管理对象的结构为Map结构,Map(Key,Value)
K为对象的ID,Value为实例化的对象。
示例:Key:方法名,Value:方法返回值 Map(user,new User())
Key:首字母小写
IOC管理对象方式:
**@Controller**等注解**@Bean**注解
**@Configuration** + **@Bean**组合使用可以将自己需要的对象交给Spring容器管理,Spring管理的对象即为bean。
**@Configuration** 作用:作用于类,标识此类为配置类,将自己需要的对象交给Spring容器管理
**@Bean** 作用:将方法的返回值对象交给Spring管理
package com.jt.config;import com.jt.pojo.User;import org.springframework.context.annotation.Bean;import org.springframework.context.annotation.Configuration;//作用将自己需要的对象交给Spring容器管理@Configuration//标识这是一个配置类public class UserConfig {/*@Configuration + @Bean组合使用Spring管理的对象即为bean@Bean作用:将方法的返回值对象交给Spring管理*/@Beanpublic User user() {return new User(101, "马钊");}}
DI依赖注入
原理:
1.当测试类执行时,会根据SpringBoot的配置,动态启动Spring容器.
2.当spring容器启动时,会加载所有的注解和配置类,最终将所有的对象
交给Spring容器管理 Map集合
3. **@SpringBootTest ** 通过这个注解,可以动态的从spring容器中
获取对象
依赖注入方式有两种:
- 按类型注入(默认方式)使用
**@Autowirde**注解
根据属性类型,查找Map集合中是否与注入的类型的对象,如果有则进行注入
- 按名称注入
**@Autowired**+**@Qualifier("user")**组合使用
根据属性的name,去Map集合中查找对应的Key,获取其Value进行依赖注入
package com.jt.test;import com.jt.pojo.User;import org.junit.jupiter.api.Test;import org.springframework.beans.factory.annotation.Autowired;import org.springframework.beans.factory.annotation.Qualifier;import org.springframework.boot.test.context.SpringBootTest;@SpringBootTestpublic class TestSpring {@Autowired@Qualifier(value = "user")private User user;@Testpublic void testUser() {System.out.println(user.toString());}}
自动装配规则:
- 如果对象在进行实例化.如果对象中的属性被
**@Autowired**注解修饰,则说明应该先注入属性. - 先根据属性的类型,查找Map集合中是否有该类型的对象.
- 如果根据类型查找没有找到,则根据属性的名称按照name查找对象.
- 如果上述的方式都没有找到,则报错实例化对象失败.
注意:Spring容器中接口一般单实现,因此Spring容器要求接口必须单实现,若有多实现则需要使用**@Qualifier**注解进行区分。
跳过测试类打包
maven执行打包命令时, 默认条件下,会执行测试类中的方法. 并且这些方法都要执行. 隐患 可能某些测试方法由于种种原因 执行报错. 则install的操作执行失败.
解决方法:
使用install打包时跳过测试类打包,需要在pom文件中进行配置。
<properties><!--指定JDK版本--><java.version>1.8</java.version><!--跳过测试类打包--><skipTests>true</skipTests></properties>
整合Mybatis
配置文件
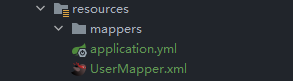
将mybaits的配置写入SpringBoot的配置文件application.yml文件
数据库连接url中各个字段意义:
serverTimezone=GMT%2B8 时区useUnicode=true 是否使用unicode编码characterEncoding=utf-8 字符集使用utf8autoReconnect=true 自动重连allowMultiQueries=true 运行批量操作
application.yml配置
spring:profiles:active: devdatasource:#如果使用高版本驱动 则添加cjdriver-class-name: com.mysql.cj.jdbc.Driverurl: jdbc:mysql://localhost:3306/jt?serverTimezone=GMT%2B8&useUnicode=true&characterEncoding=utf8&autoReconnect=true&allowMultiQueries=trueusername: rootpassword: root#mybatis配置mybatis:#指定映射文件的位置mapper-locations: classpath:mappers/*.xml#开启驼峰规则configuration:map-underscore-to-camel-case: true---#开发环境server:port: 8090servlet:context-path: /testspring:profiles: dev---#生产环境server:port: 8080servlet:context-path: /spring:profiles: prod
Spring管理Mapper接口的方式
在Mapper接口上使用
@Mapper注解@Mapper/*继承BaseMapper接口必须添加泛型对象,否则映射表报错自己创建的接口不要与接口方法重名*/public interface UserMapper extends BaseMapper<User> {List<User> findAll();}
在启动类上使用
@MapperScan("dao层包名")注解@SpringBootApplication@MapperScan("com.jt.dao")public class SpringBootDemo3Application {public static void main(String[] args) {SpringApplication.run(SpringBootDemo3Application.class, args);}}
常见BUG
org.apache.ibatis.binding.BindingException: Invalid bound statement (not found):映射文件扫描错误,若xml文件与yml文件同级即在resources根目录下,应当修改yml配置文件的mybatis映射文件路径。一般不要将映射文件写在根目录下。
改为:
mybatis:#指定映射文件的位置mapper-locations: classpath*:/*.xml#开启驼峰规则configuration:map-underscore-to-camel-case: true
ORM思想
对象关系映射,简称为ORM。用于实现面向对象编程语言中不同类型系统数据间的转换。即以对象的方式操作数据库。
- 以对象方式实现数据库CRUD(增删改查)操作。
- 所以需要使用某种机制将对象动态的转换为SQL,然后实现数据库操作。
总结:以面向对象的方式操作数据库。
Mybatis优缺点
优点:
- Mybatis内部整合了JDBC,简化了持久层开发。
- Mybatis可以自动地封装结果集的对象,满足ORM中的一个条件,Myabtis称之为半自动化的ORM映射机制。
- Mybatis具有缓存机制,可以提高用户查询效率。
- Mybatis支持多种类型的数据库,整合方便简单。
缺点:
- 实现数据的封装,resultMap封装复杂。
- 单表的CRUD操作不够便捷,需要进行手写SQL。
- 个别情况下二级缓存会失效。

若有收获,就点个赞吧
0 人点赞
