5.2 红黑树
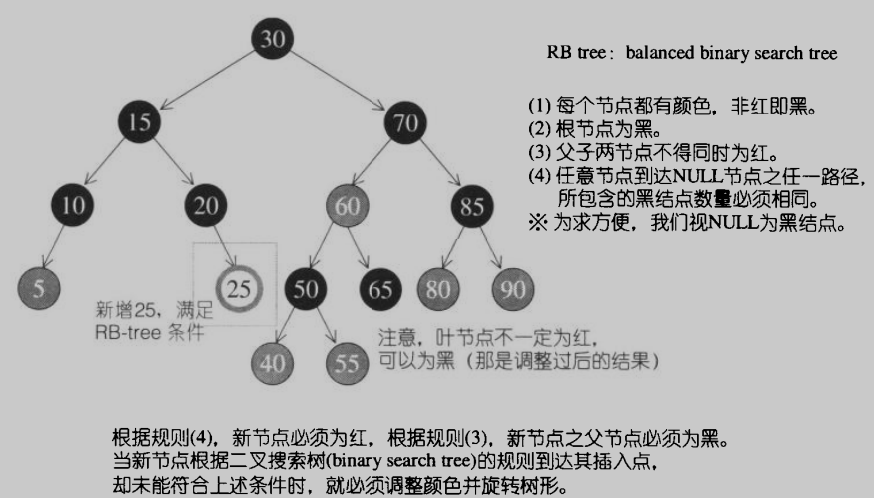
红黑树不仅是二叉搜索树,而且满足以下规则:
- 每个节点不是红色就是黑色;
- 根节点为黑色;
- 如果节点为红色,其子节点必须为黑;
- 任一节点到 NULL 的任何路径所含的黑色节点数必须相同。(NULL 被视作黑节点)
5.2.1 插入节点
假设为上图的红黑树分别插入 3 , 8 , 35 , 75 ,根据二叉搜索树的规则,落点如下,需要调整(由于新增节点必定为红色,所以会破坏规则):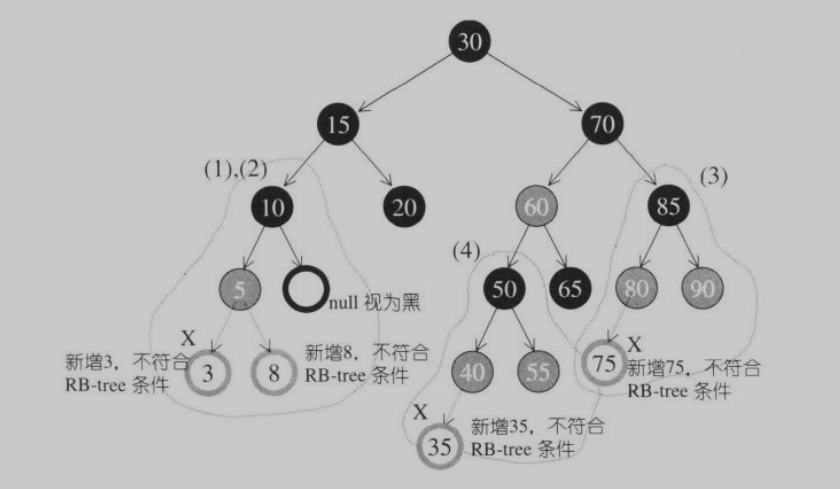
假设规则如下:新节点为X,其父节点为P,祖父节点为G,父节点兄弟为S,曾祖父节点为GG。根据二叉搜索树规则,新节点必为叶子节点,根据红黑树规则4,X 必为红。若 P 也为红则违反规则3,需要调整树形,则 G 必为黑。于是根据 X 的插入位置以及外围节点(S 和 GG)的颜色,有了以下四种情况:
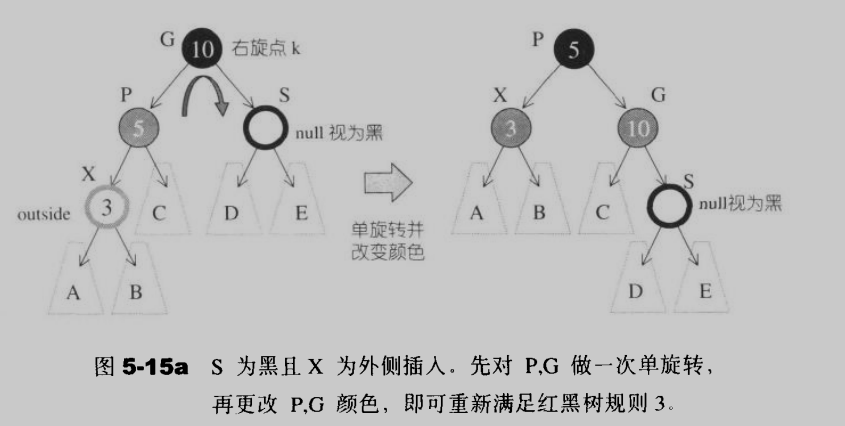
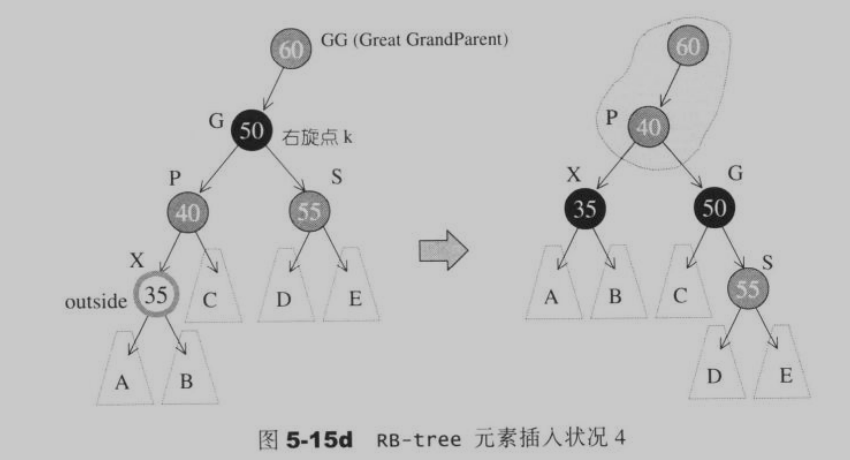
- S 为黑且 X 为外侧插入。先对 P,G 做一次单选转,再更改 P,G 颜色即可:
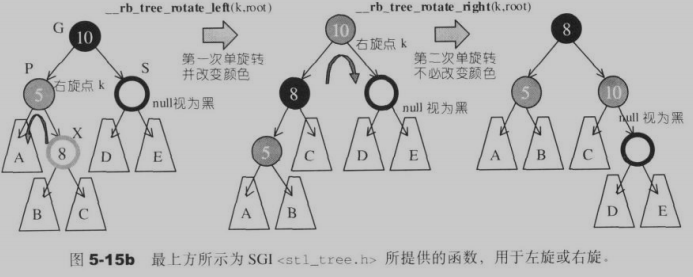
- S 为黑且 X 为内侧插入。必须先对 P,X 做一次单旋转并更改 G,X 颜色再将结果对G 做一次单旋转并即可:
- S 为红且 X 为外侧插入。先对 P 和 G 做一次单旋转,并改变 X 的颜色。此时需要判断 GG 的颜色:
- 若 GG 为黑,到此为止:

- 若 GG 为红,要继续往上做,直到不再有父子连续为红的情况:
5.2.2 一个由上而下的程序
为了避免最后一种情况父子结点皆为红色的情况持续向 RB-tree 的上层结构发展,降低效率。可以构建一个由上而下的程序:假设新增节点为 A,那么就沿着 A 的路径,只要看到有某节点 X 的两个子节点皆为红色,就把 X 改为红色,并把两个子节点改为黑色: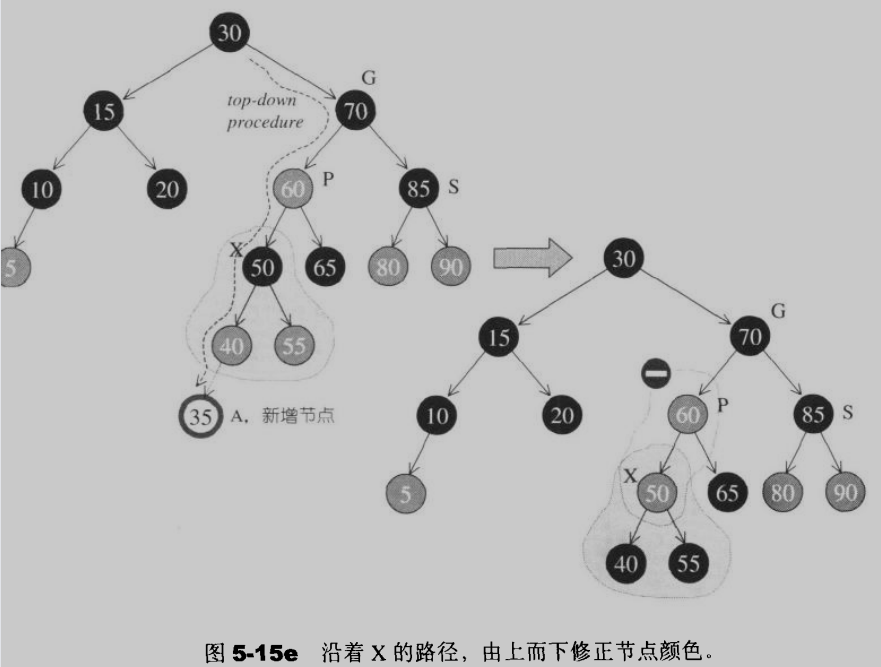
但是如果 A 的父节点 P 也为红色,就得像情况1 一样做一次单旋转并改变颜色,或者像情况2 一样做一次双旋转并改变颜色。
接着新节点35 的插入就简单了,要么直接插入,要么插入后再一次单旋转即可:
5.2.3 红黑树的节点设计
由于红黑树的各种操作时常常需要上溯其父节点,所以特别在数据结构中安排了一个parent指针:
//红色为0,黑色为1typedef bool __rb_tree_color_type;const __rb_tree_color_type __rb_tree_red = false;const __rb_tree_color_type __rb_tree_black = true;struct __rb_tree_node_base{typedef __rb_tree_color_type color_type;typedef __rb_tree_node_base* base_ptr;color_type color; //节点颜色base_ptr parent; //RB树的许多操作必须知道父节点base_ptr left; //指向左节点base_ptr right;static base_ptr minimum(base_ptr x){while(x->left != 0)x = x->left;return x;}static base_ptr maximum(base_ptr x){while(x->right != 0)x = x->right;return x;}};template<class Value>struct __rb_tree_node : public __rb_tree_node_base{typedef __rb_tree_node<Value>* link_type;Value value_field; //节点值};
5.2.4 RB-tree 的迭代器
SGI 将 RB-tree 迭代器实现为两层,其中__rb_tree_node继承自__rb_tree_node_base,__rb_tree_iterator继承自__rb_tree_base_iterator:
RB-tree 迭代器属于双向迭代器,但不具备随机定位能力,注意,RB-tree 的迭代器前进和后退操作operator++()和operator--()调用了基层迭代器的increment()和decrement(),逻辑完全依据二叉搜索树的节点排列规则:
//基层迭代器struct __rb_tree_base_iterator{typedef __rb_tree_node_base::base_ptr base_ptr;typedef bidirectional_iterator_tag iterator_category;typedef ptrdiff_t difference_type;base_ptr node; //用来与容器之间产生连接关系void increment(){;//省略}void decrement(){;//省略}};//RB-tree正规迭代器template<class Value, class Ref, class Ptr>struct __rb_tree_iterator : public __rb_tree_base_iterator{typedef Value value_type;typedef Ref reference;typedef Ptr pointer;typedef __rb_tree_iterator<Value, Value&, Value*> iterator;typedef __rb_tree_iterator<Value, const Value&, const Value*> const_iterator;typedef __rb_tree_iterator<Value, Ref, Ptr> self;typedef __rb_tree_node<Value>* link_type;__rb_tree_iterator(){}__rb_tree_iterator(link_type x){ node = x;}__rb_tree_iterator(const iterator& it){ node = it.node;}reference operator*()const{return link_type(node)->value_field;}pointer operator->()const{return &(operator*());}self& operator++() {increment(); return *this;}self operator++(int){self tmp = *this;increment();return tmp;}//operator--的前置和后置版本类似};
5.2.5 RB-tree 的数据结构
rb-tree 中定义有专属的空间配置器,每次配置一个节点大小。
template<class Key, class Value, class KeyOfValue, class Compare, class Alloc = alloc>class rb_tree{protected:typedef void* void_pointer;typedef __rb_tree_node_base* base_ptr;typedef __rb_tree_node<Value> rb_tree_node;typedef Simple_alloc<rb_tree_node, Alloc> rb_tree_node_allocator;typedef __rb_tree_color_type color_type;public:typedef Key key_type;typedef Value value_type;typedef value_type* pointer;typedef const value_type* const_pointer;typedef value_type& reference;typedef const value_type& const_reference;typedef rb_tree_node* link_type;typedef size_t size_type;typedef ptrdiff_t difference_type;protected:link_type get_node() {return rb_tree_node_allocator::allocate();}void put_node(link_type p){rb_tree_allocator::deallocate();}link_type create_node(const value_type& x) {link_type tmp = get_node();__STL_TRY{construct(&tmp->value_field, x);}__STL_UNWIND(put_node(tmp));return tmp;}void destroy_node(link_type p) {destroy(&p->value_field);put_node(p);}protected://RB-tree 只以三个数据表现size_type node_count;link_type header;Compare key_compare;//......public:typedef __rb_tree_iterator<value_type, reference, pointer> iterator;//.......};
5.2.6 RB-tree 的构造与内存管理
RB-tree 定义的专属空间配置器
template<class Key, class Value, class KeyOfValue, class Compare, class Alloc = alloc>class rb_tree{protected:typedef __rb_tree_node<Value> rb_tree_node;typedef Simple_alloc<rb_tree_node, Alloc> rb_tree_node_allocator;};
RB-tree 有两种构造方式:
- 以现有的 RB-tree 复制一个 RB-tree;
产生一个空树。
rb_tree<int, int, identity<int>, less<int>> itree;//会调用默认构造函数rb_tree(const Compare& comp = Compare()):node_count(0), key_compare(comp){init();}//其中 init() 实现如下:private:void init(){header = get_node();//令 header 为红色,区分 header 和 root(在iterator.operator++中)color(header) = __rb_tree_red;root() = 0;leftmost() = header;rightmost() = header;}
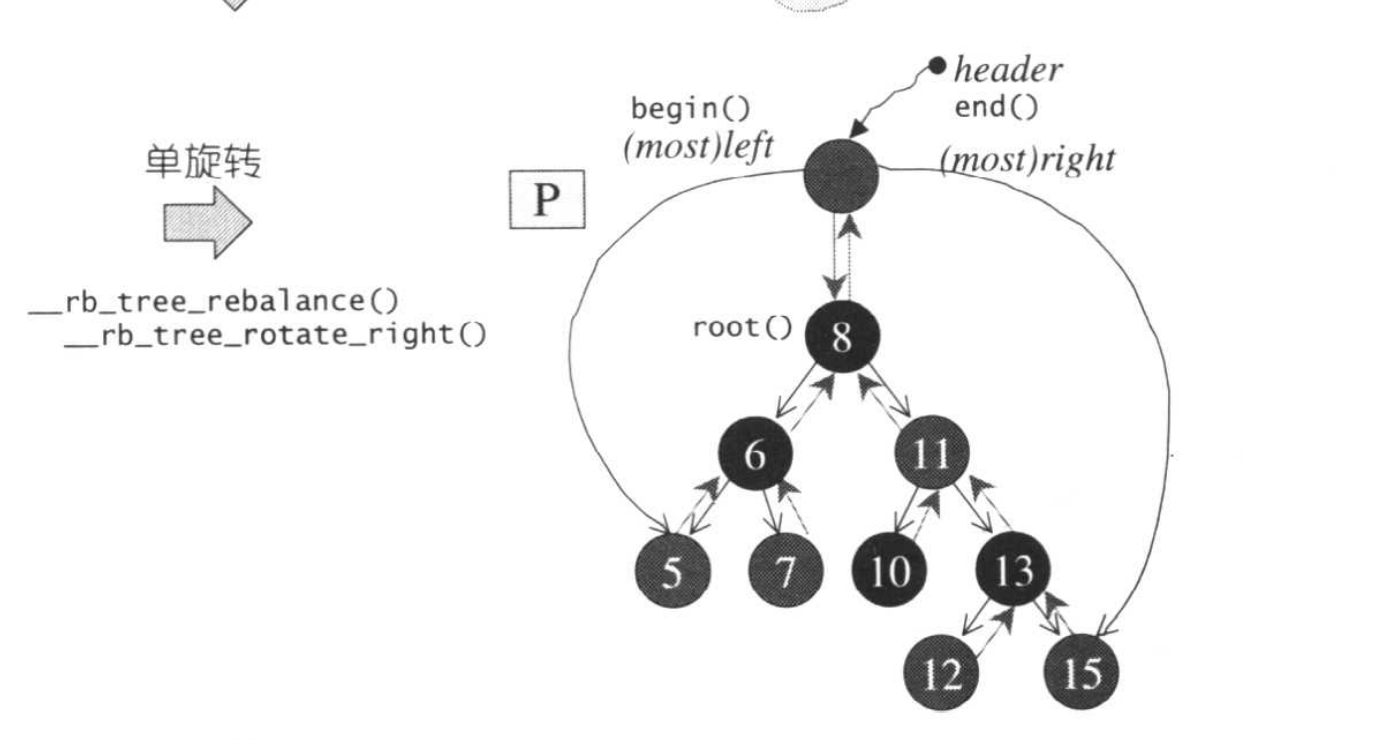
为了简化边界情况的处理,SGI STL 为根节点
root设计了一个父节点header:
接下来每次插入新节点时,要依照 RB-tree 的规则调整,并且要维护header的正确性:使其父节点指向根节点,左子节点指向最小节点,右子节点指向最大节点。
5.2.7 RB-tree 的元素操作
RB-tree有两种插入操作:
insert_unique:插入节点的 key 在树中必须独一无二;insert_equal:插入节点的 key 在树中可以重复。
insert_equal()
template<class Key, class Value, class KeyOfValue, class Compare, class Alloc>typename rb_tree<Key, Value, KeyOfValue, Compare, Alloc::iteratorrb_tree<Key, Value, KeyOfValue, Compare, Alloc>::insert_equal(const Value& v) {link_type y = header;link_type x = root();while(x != 0) {y = x;x = key_compare(KeyOfValue()(v), key(x)) ? left(x) : right(x);}// x 为新值插入点,y 为插入点的父节点, v 为新值return __insert(x, y, v);}
insert_unique()
template<class Key, class Value, class KeyOfValue, class Compare, class Alloc>pair<typename rb_tree<Key, Value, KeyOfValue, Compare, Alloc>::iterator, bool>rb_tree<Ley, Value, KeyOfValue, Compare, Alloc>::insert_unique(const Value& v) {link_type y = header;link_type x = root();bool comp = true;while(x != 0) {y = x;comp = key_compare(KeyOfValue()(v), key(x));x = comp ? left(x) : right(x);}//离开 while 循环后,y 所指即插入点的父节点iterator j = iterator(y);//离开 while 时 comp 为真————遇“大”,插入于左侧if(comp)//如果插入点的节点是最左节点if(j == begin())return pair<iterator, bool>(__insert(x, y, v), true);//否则(插入节点不是最左节点),调整 jelse--j;//小于新值(遇“小”),将插入于右侧if(key_compare(key(j.node), KeyOfValue()(v)))return pair<iterator, bool>(__insert(x, y, v), true);return pair<iterator, bool>(j, false);}
真正的执行插入执行程序 __insert()
template<class Key, class Value, class KeyOfValue, class Compare, class Alloc>typename rb_tree<Key, Value, KeyOfValue, Compare, Alloc>::iteratorrb_tree<Key, Value, KeyOfValue, Compare, Alloc>::__insert(base_ptr x_, base_ptr y_, const Value& v) {//参数x_为新值插入点,参数y_为插入点的父节点,参数v为新值link_type x = (link_type) x_;link_type y = (link_type) y_;link_type z;if(y == header || x != 0 || key_compare(KeyOfValue()(v), key(y))) {z = create_node(v);left(y) = z;if(y == header) {root() = z;rightmost() = z;}else if (y == leftmost())leftmost() = z;}else {z = create_node(v);right(y) = zif(y == rightmost())rightmost() = z;}parent(z) = y; //设置新节点的父节点left(z) = 0;right(z) = 0;__rb_tree_rebalance(z, header->parent);++node_count;return iterator(z);}
调整 RB-tree(旋转及改变颜色)
任何插入操作完毕后都要做一次调整操作:__rb_tree_rebalance()。
//全局函数//参数一为新增节点,参数二为 rootinline void __rb_tree_rebalance(__rb_tree_node_base* x, __rb_tree_node_base*& root) {x->color = __rb_tree_red;//新节点必为红//父节点为红while(x != root && x->parent->color == _rb_tree_red) {//父节点为祖父节点的左子节点if(x->parent == x->parent->parent->left) {//令 y 为伯父节点__rb_tree_node_base* y = x->parent->parent->right;//伯父节点存在 且为红if(y && y->color == __rb_tree_red) {x->parent->color = __rb_tree_black;//更改父节点为黑y->color = __rb_tree_black;//更改伯父节点为黑x->parent->parent->color = __rb_tree_red;//更改祖父节点为红x = x->parent->parent;//继续往上层检查} else { //无伯父节点,或伯父节点为黑//如果新节点为父节点的右子节点if(x == x->parent->right) {x = x->parent;//第一参数为左旋点__rb_tree_rotate_left(x, root);}x->parent->color = __rb_tree_black;//改变颜色x->parent->parent->color = __rb_tree_black;__rb_tree_rotate_right(x->parent->parent, root);//第一参数为右旋点}} else { //父节点为祖父节点的右子节点;//(与上面的代码对称)}}//while结束//根节点永远为黑root->color = __rb_tree_black;}
以下是左旋和右旋函数:
RB-tree 左旋函数
//全局函数//新节点必为红节点,如果插入处的父节点亦为红节点,就违反规则,必须进行旋转inline void __rb_tree_rotate_left(__rb_tree_node_base* x, __rb_tree_node_base*& root) {//x 为旋转点__rb_tree_node_base* y = x->right;//令 y 为旋转点的右子节点x->right = y->left;if(y->left != 0)y->left->parent = x;y->parent = x->parent;//令 y 完全顶替 x 的地位(将 x 对其父节点的关系完全接收过来)//x 为根节点if(x == root)root = y;//x 为其父节点的左子节点else if(x == x->parent->left)x->parent->right = y;//x 为其父节点的右子节点else x->parent->right = y;y->left = x;x->parent = y;}
RB-tree 右旋函数
//全局函数inline void __rb_tree_rotate_right(__rb_tree_node_base* x, __rb_tree_node_base*& root) {//x 为旋转点//y 为旋转点的左子节点__rb_tree_node_base* y = x->left;x->left = y->right;if(y->right != 0)y->right->parent = x;y->parent = x->parent;if(x == root)root = y;else if(x == x->parent->right)x->parent->right = y;else x->parent->left = y;y->right = x;x->parent = y;}
元素的搜寻


5.3 set
不可以通过set的迭代器改变set的元素值,因为set的元素值就是其 key 值,关系到set元素的排列规则,所以**set**源码中的**std<T>::iterator**被定义为底层 RB-tree 的**const_iterator**,拒绝写入。
set拥有与list某些相同性质:进行insert或erase操作时,操作之前的所有迭代器在操作完成之后都依然有效,除了被删除的那个元素的迭代器。
5.4 map
map的所有元素都是pair,同时拥有实值(value)和键值(key)。
<stl_pair.h>中pair的定义:
template <class T1, class T2>struct pair {typedef T1 first_type;typedef T2 second_type;T1 first;T2 second;pair() : first(T1()), second(T2()) {}pair(const T1& a, const T2& b) : first(a), second(b) {}};
可以通过map的迭代器修改value而不可以修改key,因此map的iterator既不是一种 constant iterator,也不是一种 mutable iterator。
map拥有与list某些相同性质:进行insert或erase操作时,操作之前的所有迭代器在操作完成之后都依然有效,除了被删除的那个元素的迭代器。
map的insert操作采用底层 RB-tree 的insert_unique(),multimap才使用insert_equal()
**map**的**insert()**函数
pair<iterator, bool> insert(const value_type& x) {return t.insert_unique(x);}
此操作将工作直接转给底层 RB-tree 的**insert_unique()**执行,不过返回类型是一个**pair**,由一个迭代器和一个**bool**值组成,后者表示插入的成功与否,成功的话前者即指向被插入的那个元素。
**map**的下标**[]**操作符
有两种用法,可能作为左值引用(内容可被修改),也可能作为右值(内容不可被修改):
map<string, int> simap;simap[string("myzhu")] = 1; //左值int number = simap[string("myzhu")]; //右值
左值与右值都适用的关键在于:返回值采用传引用方式。
template <class Key. class T, class Compare = less<Key>, class Alloc = alloc>class map {public:typedef Key key_type;typedef pair<const Key, T> value_type;public:T& operator[](const key_type& k) {return (*((insert(value_type(k, T()))).first)).second;}};
5.7 hashtable
二叉搜索树具有对数平均时间的表现,但是这样的表现建立在一个假设上:输入数据有足够的随机性。而散列表(hashtable)这种结构在插入、删除、搜寻等操作上具有常数平均时间。
使用散列函数可能将不同的元素映射到相同的位置(即有相同的索引)——哈希碰撞。解决碰撞问题的方法有:线性探测、二次探测、开链等等。
线性探测
负载系数(loading factor)——元素个数除以表格大小。除非采用开链法,否则永远在 0~1 之间。
当哈希函数计算得出某个元素的插入位置,而该位置上的空间被占用时,继续往后查看有无可用空间即可。
而元素的删除,则必须使用懒惰删除,只标记删除记号,实际删除操作要等待表格重新整理,因为 hashtable 中的每一个元素不仅仅代表它自己,也关系到其他元素的排列。
有可能平均插入成本的成长幅度远高于负载系数的成长幅度。
二次探测
其中有一个运算技巧,去除耗时的乘法和除法运算: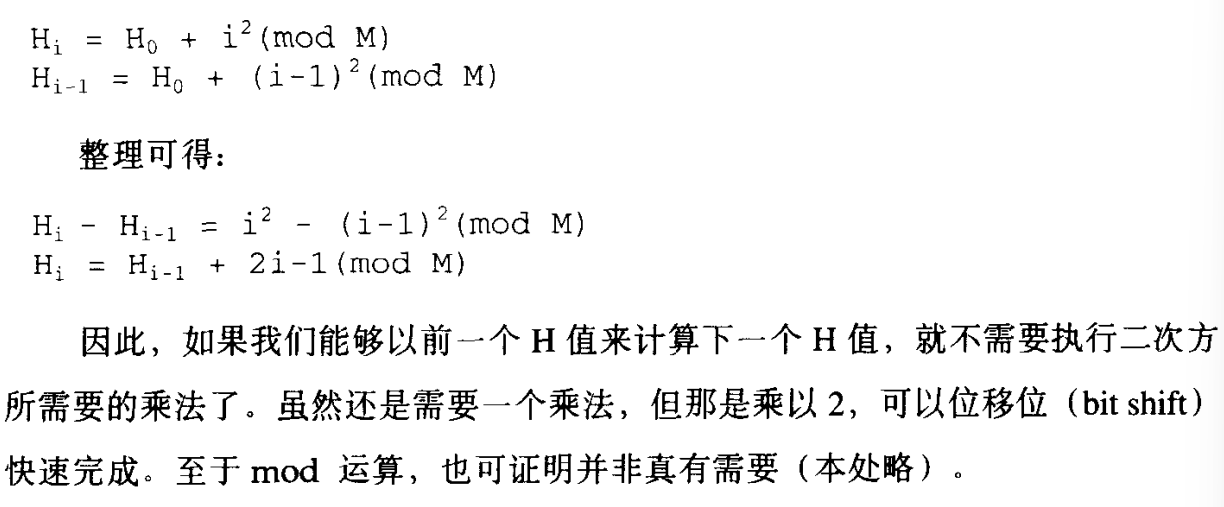
开链
在每一个表格元素中维护一个list,然后在那个list上执行元素的插入、搜寻、删除等操作。
5.7.2 hashtable 的 buckets 和 nodes
SGI STL 以开链法实现 hashtable,hashtable 表格内的元素为桶(bucket):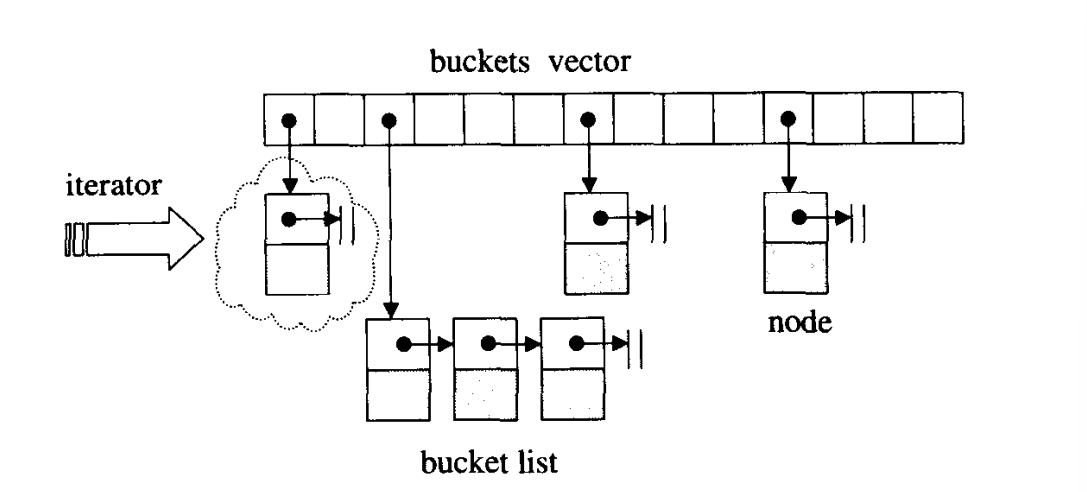
hashtable 的节点定义:
template<class Value>struct __hashtable_node {__hashtable_node* next;Value val;};
5.7.3 hashtable 的迭代器
hashtable 的迭代器类型是forward_iterator_tag,没有后退操作,其前进操作是首先尝试从目前所指的节点出发,前进一个位置,由于节点被安置在list内,所以利用节点的next指针即可轻易达成前进操作。
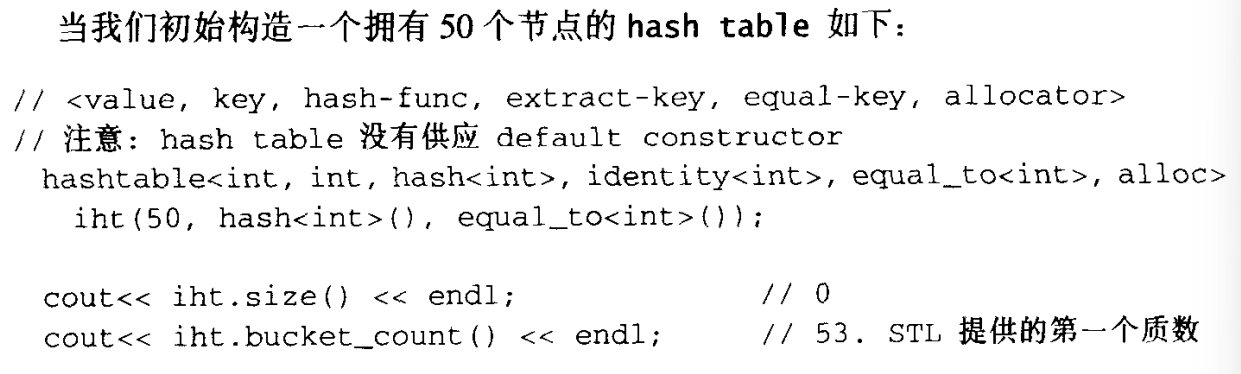
5.7.4 hashtable 的数据结构
template<class Value, class Key, class HashFcn,class ExtractKey, class EqualKey, class Alloc = alloc>//注意给的是判等,而不是比大小class hashtable {public:typedef HashFcn hasher;typedef EqualKey key_equal;typedef size_t size_type;private:hasher hash;key_equal equals;ExtractKey get_key;typedef __hashtable_node<Value> node;typedef simple_alloc<node, Alloc> node_allocator;vector<node*, Alloc> buckets;size_type num_elements;public:size_type bucket_count() const {return buckets.size();}};
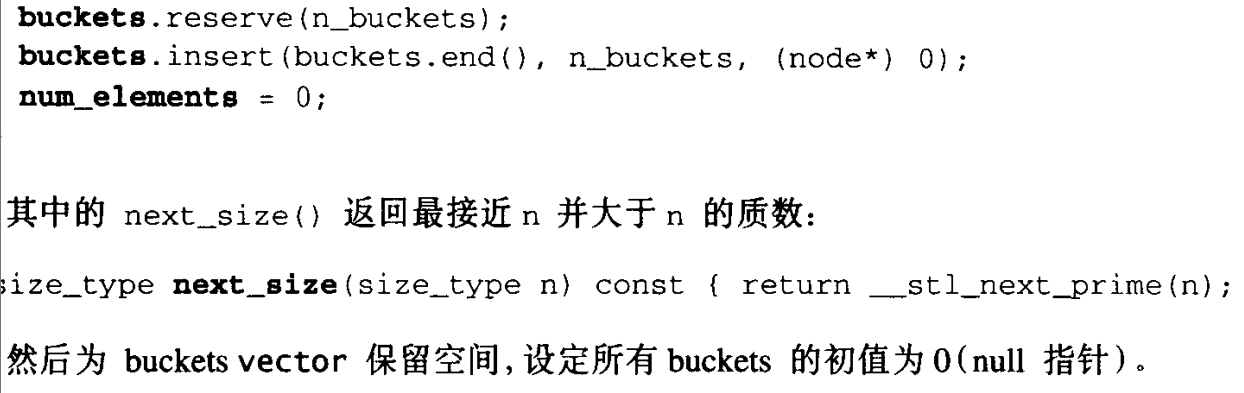
虽然开链法并不要求表格大小必须为质数,但是 SGI STL 仍然以质数来设计表格大小,并且先将 28 个质数计算好,以便随时访问,并提供一个函数查询在这些质数当中,最接近某数并大于某数的质数: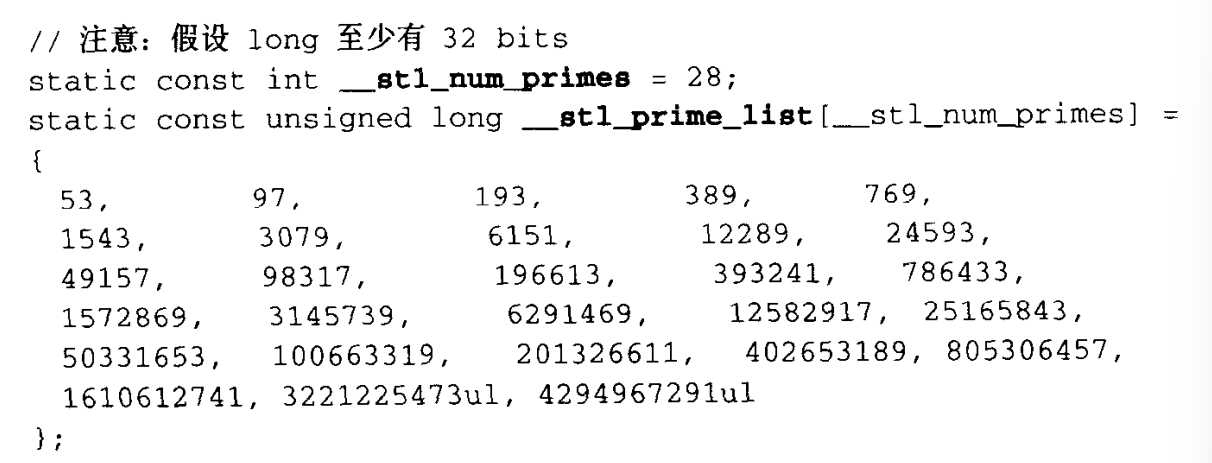

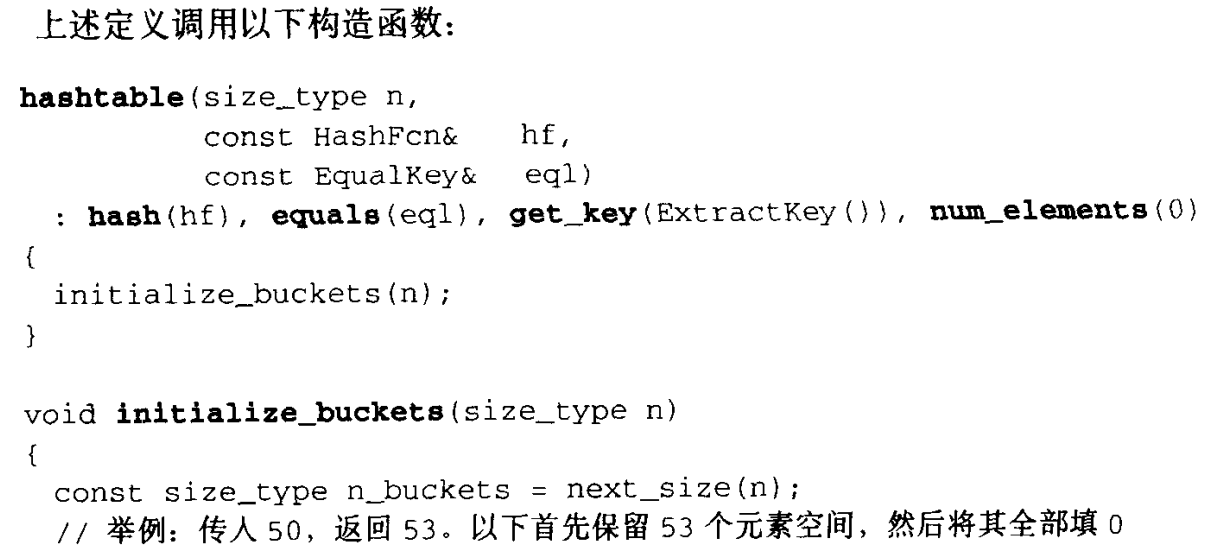
5.7.5 hashtable 的构造与内存管理
hashtable 的专属节点配置器:
typedef simple_alloc<node, Alloc> node_allocator;
节点配置函数与释放函数:
node* new_node(const value_type& obj) {node* n = node_allocator::allocate();n->next = 0;__STL_TRY {construct(&n->val, obj);return n;}__STL_UNWIND(node_allocator::deallocate(n));}void delete_node(node* n) {destroy(&n->val);node_allocator::deallocate(n);}
插入操作(insert)与表格重整(resize)
当插入元素时: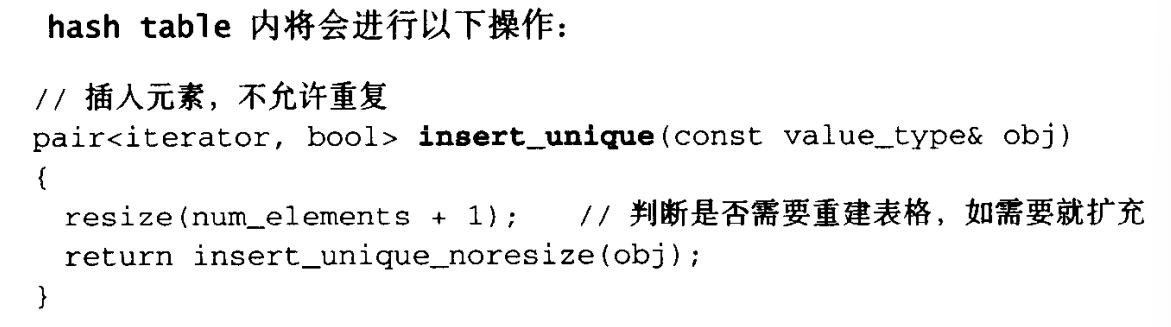

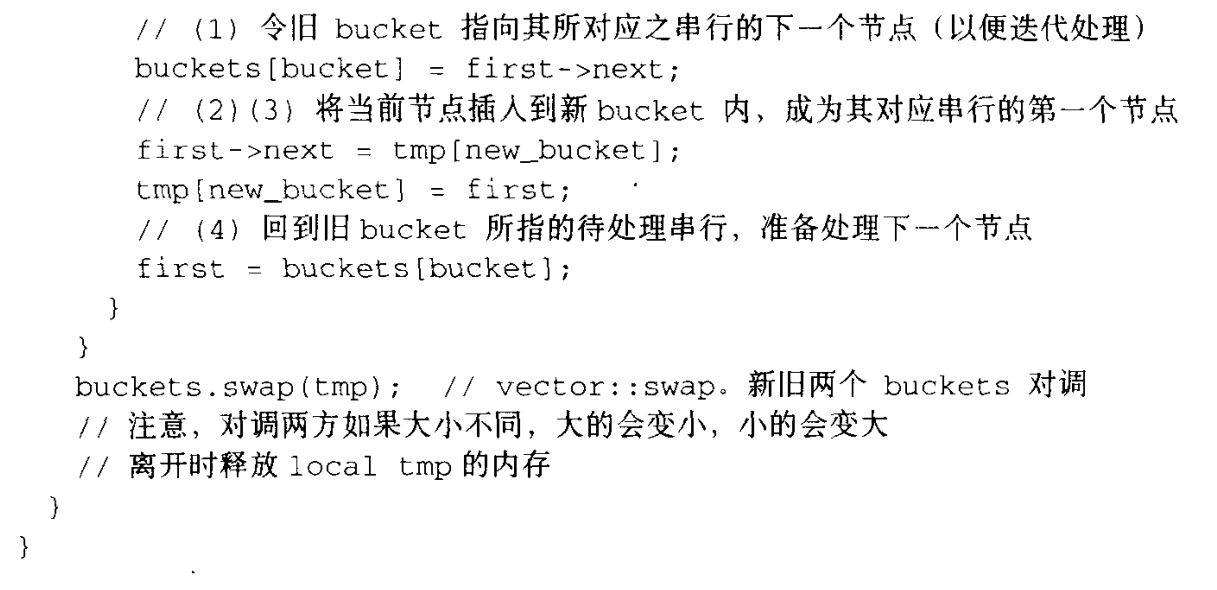

resize()函数中的表格重建工作如下: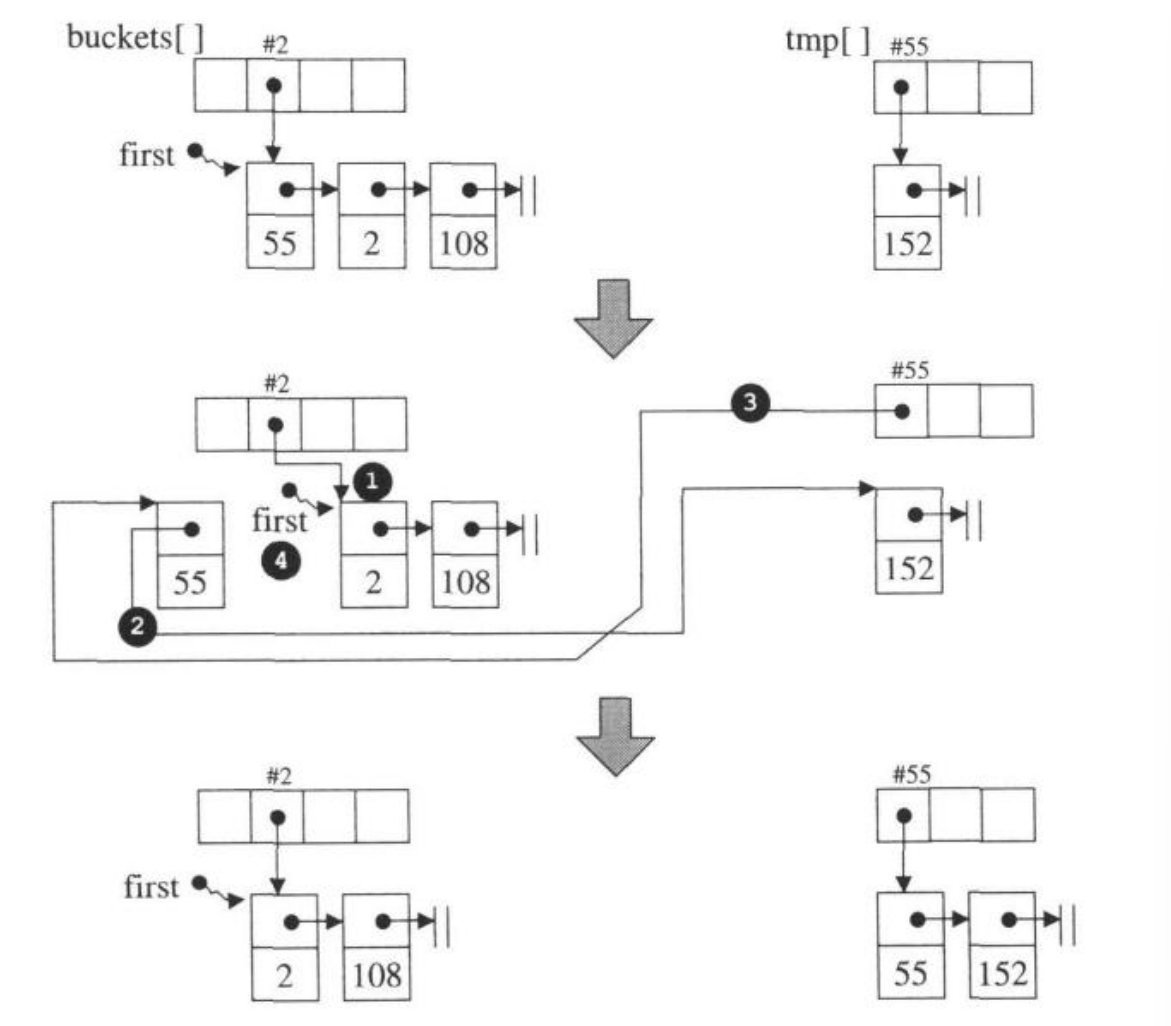
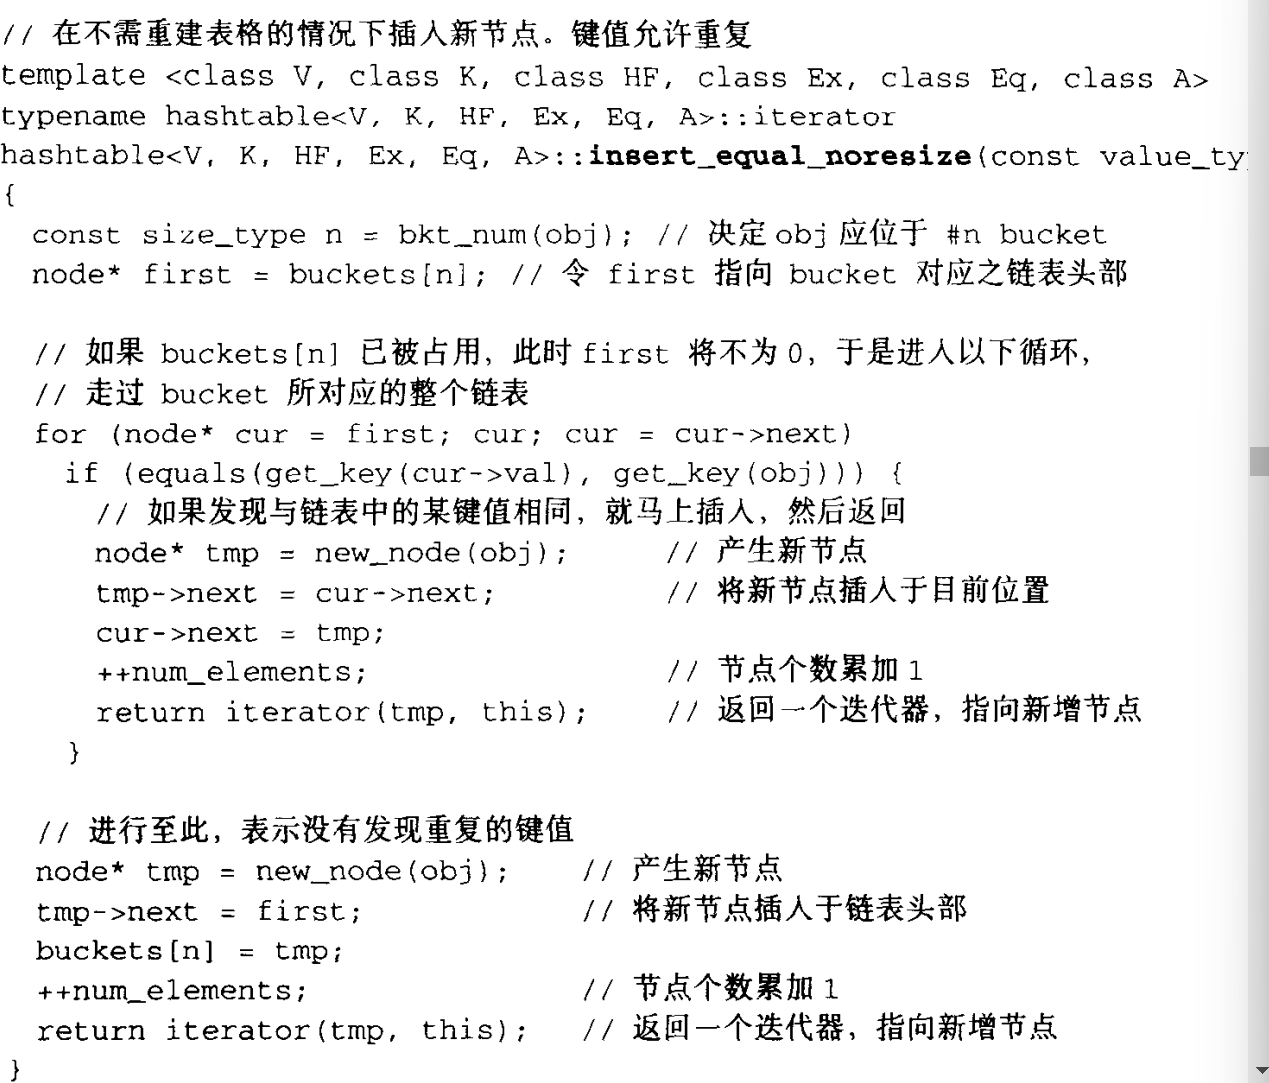
此外,还有一种允许重复的插入方式:insert_equal。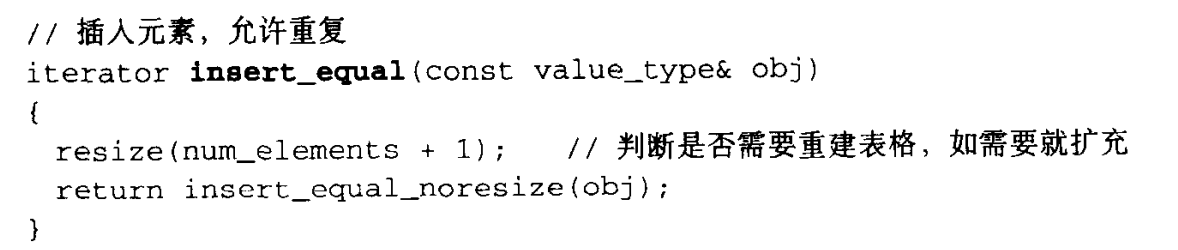
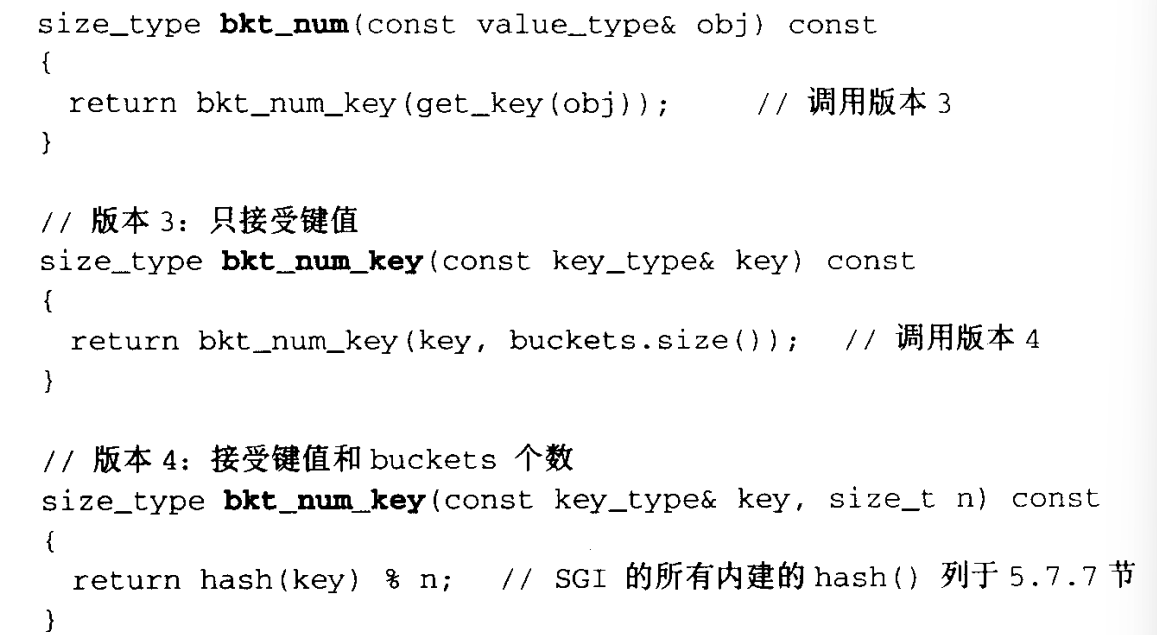
获得元素的落脚处(bkt_num)
SGI STL 把这个任务包装了一层,先交给bkt_num()函数,再调用 hash function,取得一个可执行取模运算的数值。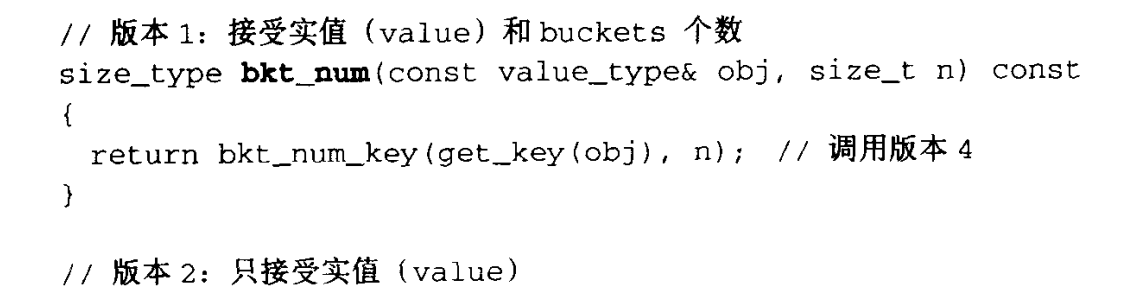
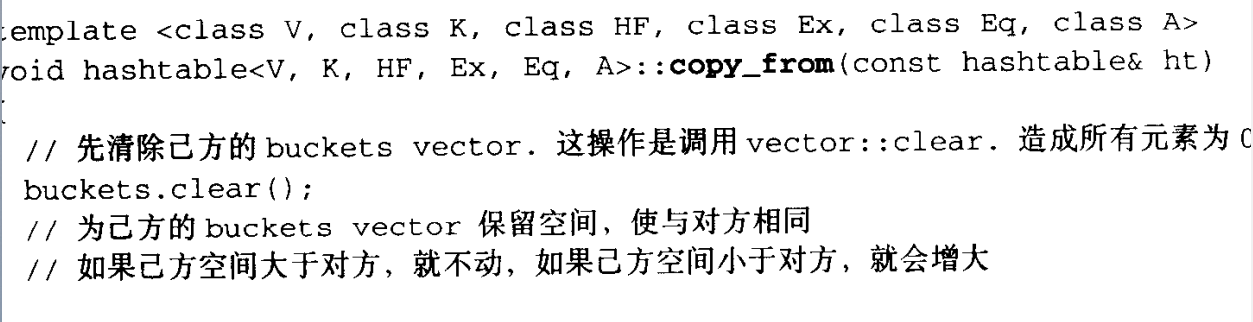
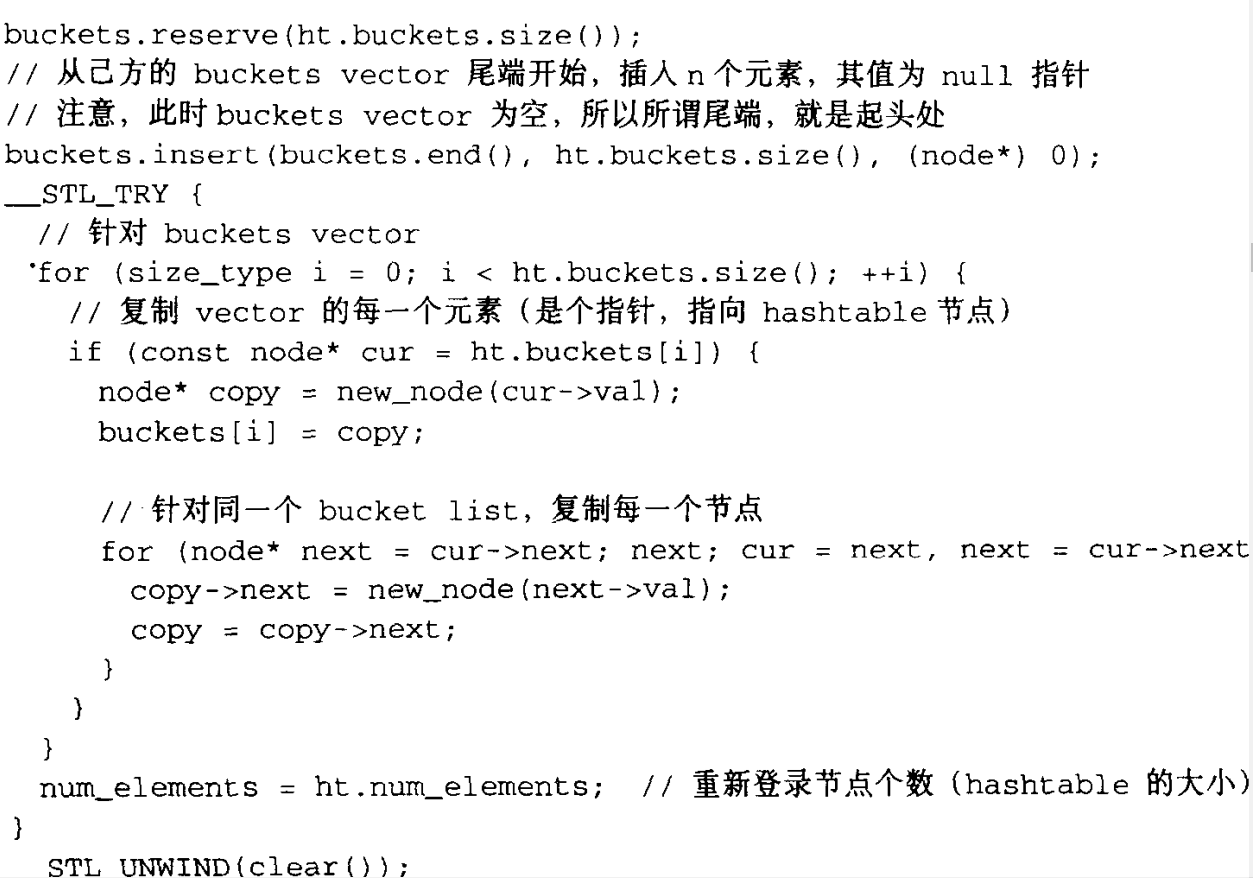
复制和整体删除
由于hashtable由vector和linked-list组成,所以复制和整体删除都需要注意内存的释放问题。

若有收获,就点个赞吧
0 人点赞
