入门
倒排索引
正序排列是 id +content
倒序排列就是 content + id
使用http操作ES
索引操作
put 请求 创建索引:http://127.0.0.1:9200/test test是索引名 get 请求 获取索引:http://127.0.0.1:9200/test get 请求 获取所有索引 :http://127.0.0.1:9200/_cat/indices?v
get请求 获取所有索引: http://127.0.0.1:9200/_all delete 请求 删除索引: http://127.0.0.1:9200/test post 请求 关闭索引: http://127.0.0.1:9200/test/_close post请求 打开索引:http://127.0.0.1:9200/test/_open
操作映射
数据类型
1、简单数据类型
# 字符串text # 可以分词,不能聚合keyword # 不会分词,可以聚合# 数字byteshortintegerlongfloathalf_floatscaled_floatdouble# 二进制binary# 布尔boolean# 范围integer_rangelong_rangefloat_rangedouble_rangedate_range
2、复杂的数据类型
# 数组 []# 对象e.g:{"mappings": {"properties": {"name": {"type": "text"},"age": {"type":"integer"},"sex": {"type": "keyword"},"address":{"properties": {"name":{"type":"text"}}}}}}
映射操作
//1.创建索引 put key_index //2.创建映射 put key_index/_mapping { "properties" : { "name" : { //字段名称 "type" : "text", //字段类型 "index" : true //是否作为索引 }, "sex" : { "type" : "keyword", "index" : " true" }, "tel" : { "type" : "keyword", "index" : "false" } } } //3.查询映射 get key_index/_mapping //4.创建索引并添加映射 PUT /key_index { "mappings": { "properties": { "name": {"type": "text"}, "age": {"type":"integer"}, "sex": {"type": "keyword"}, "address":{ "properties": { "name":{"type":"text"} } } } } } //5.修改索引,添加新字段 PUT /key_index { "properties": { "name": {"type": "text"}, "age": {"type":"integer"}, "sex": {"type": "keyword"}, "address":{ "properties": { "name":{"type":"text"} } } } }
文档操作
# 添加文档 指定idPUT /user/_doc/1{"name": "张三","age": 20,"sex": "男","address": {"name":"北京市海淀区"}}# 添加文档 不指定idPOST /user/_doc{"name": "李四","age": 30,"sex": "男","address": {"name":"北京市朝阳区"}}# 查询文档GET /user/_doc/1# 查询所有文档GET /user/_search# 删除文档DELETE /user/_doc/AAOGUIEBbH_Qq13_jJFD# 修改文档 全量更新PUT /user/_doc/1{"name": "张三","age": 20,"sex": "男","address": {"name":"北京市海淀区"}}# 修改文档 局部更新POST /user/_update/1{"doc": {"name": "王五"}}
修改数据
1、使用put全量修改(新数据覆盖所有旧数据)
http://127.0.0.1:9200/test/_doc/1001 ,路径是·资源对应的url,我们需要将新数据设置在请求体中
# 全量修改,必须设置所有参数,否则会造成属性丢失例如原本数据为{"title": "小埋","size": "big","age": "18"},使用全量修改必须设置请求体为{"title": "小埋","size": "big","age": "19"}如果缺少属性,如{"title": "小埋","age": "18"},那么下次查询该数据时,会丢失size属性结果为{"_index": "test","_type": "_doc","_id": "1001","_version": 5,"_seq_no": 4,"_primary_term": 1,"found": true,"_source": {"title": "小埋","age": "19"}}
2、使用post局部更新
http://127.0.0.1:9200/test/_update/1001 ,需要指定为_update,在请求体重设置要更新的属性
// 局部修改,只需要设置需要更新的属性即可例如原本数据为{"title": "小埋","size": "big","age": "18"},我们要修改size为morebig,使用局部修改设置请求体为{"doc": {"size" :"morebig"}}
查询进阶
#match_all查询GET test/_search{"query": {"match_all": {}}}#match查询GET test/_search{"query": {"match": {"name": {"query": "可","operator": "or"}}}}# term查询GET test/_search{"query": {"term": {"sex": {"value": "女"}}}}#模糊查询#模糊分词查询GET test/_search{"query": {"wildcard": {"name": {"value": "可*"}}}}#模糊正则查询GET test/_search{"query": {"regexp": {"name": "张*"}}}#模糊前缀查询GET test/_search{"query": {"prefix": {"name": {"value": "可"}}}}#范围查询GET test/_search{"query": {"range": {"age": {"gte": 18,"lte": 20}}}}# 排序 sort字段GET test/_search{"query": {"range": {"age": {"gte": 0,"lte": 30}}},"sort": [{"age": {"order": "desc"}}]}#分页 from 和 sizeGET test/_search{"query": {"range": {"age": {"gte": 0,"lte": 30}}},"sort": [{"age": {"order": "desc"}}],"from": 0,"size": 20}
条件查询
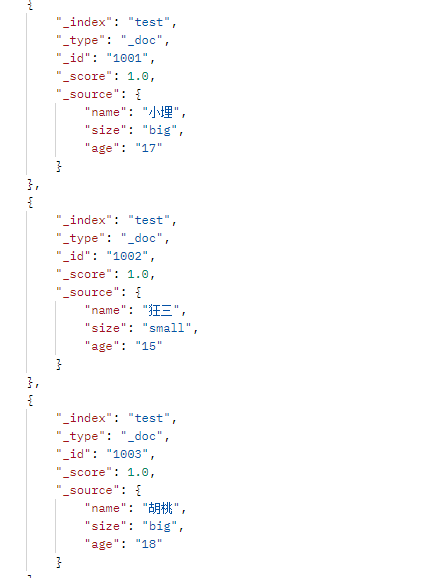
我们先准备三条数据
我们知道,_search会查询索引下所有数据,那么我们添加条件,即可根据条件查询
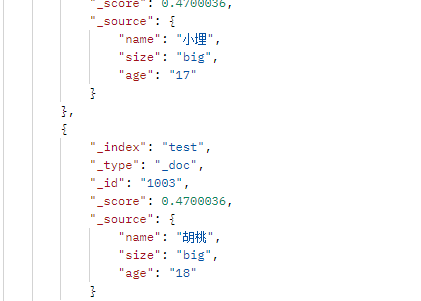
http://127.0.0.1:9200/test/_search?q=size:big ,匹配test中所有 size 是big的数据
但是,将条件写在url中,会有一些弊端,譬如中文乱码,所以我们使用另一种方式写条件,将条件写在请求体中
// 指定类型为 query ,指定匹配条件 match,这样效果同写在url中{"query" : {"match" : {"size" : "big"}}}// 多个条件同时成立 must{"query" : {"bool" : {"must": [{"match" : {"size" : "big"}},{"match" : {"age" : "18"}}]}}} // 匹配 size是big和age是18的数据// 多个条件任意成立即可 should{"query" : {"bool" : {"should": [{"match" : {"size" : "big"}},{"match" : {"age" : "17"}}]}}}// 范围查询 filter// 扩展 :大于 gt 小于 lt 等于 eq 小于等于 le 大于等于 ge 不等于 ne{"query" : {"bool" : {"should": [{"match" : {"size" : "big"}},{"match" : {"age" : "17"}}],"filter" : {"range" : {"price" :{ # 该属性范围值必须是数字"gt" : 5000}}}}}}
分页查询和查询排序
// 使用match_all,表示匹配所有,即查询当前索引下全部,但是弊端是一次性查询的数据过多,可以设置分页{"query" : {"match_all" : {}}}// 分页查询和排序{"query" : {"match_all" : {}},"from" : 0, // 第几页"size" : 2, // 分页大小"_source" : ["name"], // 查询结果只看哪个字段,数组可以设置多个"sort" : { // 排序"name.keyword" : "desc" // 字段是数字,写字段名即可,如果是字符,则需要在名字后面加.keyword}}// 扩展 asc 升序 desc 降序
检索
// 全文检索,使用match会检索所有含有条件字符的数据,如下就会匹配size含有b字符和m字符的数据{"query" : {"match" : {"size" : "bm"}}}// 完全匹配 match_phrase,严格匹配含有bm的数据{"query" : {"match" : {"size" : "bm"}}}
聚合操作
{"aggs" : {"group_name" : { //分组名称,随便起"trems" : { //分组标签"field" : "size" //分组字段}}}"size" : 0 //不含有原始数据}
平均操作
{"aggs" : {"avg_name" : { //分组名称,随便起"avg" : { //分组标签"field" : "size" //分组字段}}}"size" : 0 //不含有原始数据}
Java API 7 Java High Level REST Client
索引操作
@Autowiredprivate RestHighLevelClient client;@Testvoid creatIndex(){IndicesClient indices = client.indices();CreateIndexRequest indexRequest = new CreateIndexRequest("test");String map = "{\n" +" \"properties\": {\n" +" \"name\": {\"type\": \"text\"},\n" +" \"age\": {\"type\":\"integer\"},\n" +" \"sex\": {\"type\": \"keyword\"}\n" +" }\n" +" }";indexRequest.mapping(map, XContentType.JSON);try {CreateIndexResponse response = indices.create(indexRequest, RequestOptions.DEFAULT);System.out.println(response.isAcknowledged());} catch (IOException e) {e.printStackTrace();}}@Testvoid getIndex(){IndicesClient indices = client.indices();GetIndexRequest getIndexRequest = new GetIndexRequest("test");try {GetIndexResponse getIndexResponse = indices.get(getIndexRequest, RequestOptions.DEFAULT);System.out.println(getIndexResponse.getMappings().get("test").sourceAsMap());} catch (IOException e) {e.printStackTrace();}}@Testvoid deleteIndex(){IndicesClient indices = client.indices();DeleteIndexRequest test = new DeleteIndexRequest("test");try {System.out.println(indices.delete(test, RequestOptions.DEFAULT).isAcknowledged());} catch (IOException e) {e.printStackTrace();}}
文档操作
@Testvoid putDoc(){ESUser esUser = new ESUser();esUser.setName("张三");esUser.setSex("男");esUser.setAge(20);String data = JSONUtil.toJsonStr(esUser);IndexRequest indexRequest = new IndexRequest("test").id("1").source(data,XContentType.JSON);try {IndexResponse response = client.index(indexRequest, RequestOptions.DEFAULT);System.out.println(response.getId());} catch (IOException e) {e.printStackTrace();}}@Testvoid getDoc(){GetRequest getRequest = new GetRequest("test","1");try {GetResponse response = client.get(getRequest, RequestOptions.DEFAULT);System.out.println(response.getSourceAsString());} catch (IOException e) {e.printStackTrace();}}@Testvoid deleteDoc(){DeleteRequest deleteRequest = new DeleteRequest("test","1");try {DeleteResponse delete = client.delete(deleteRequest, RequestOptions.DEFAULT);System.out.println(delete.getId());} catch (IOException e) {e.printStackTrace();}}
文档查询
es8.0+新版客户端API使用
一、配置新客户端对象
二、索引操作


