RabbitMQ的优势
RabbitMQ的劣势
RabbitMQ的安装(Linux Centos7)
- 我们下载最新版的rpm包

rpm -ivh rabbitmq-server-3.6.8-1.el7.noarch.rpm
然后我们先安装RabbitMQ的依赖erlang,之后在安装RabbitMQ
如果在安装的时候提示缺少socat,使用下面的命令安装
yum install socat logrotate -y
- 常用的命令 ```bash RabbitMQ默认的用户名和密码是guest,但是只能从本地localhost登录,所以我们需要添加新的用户
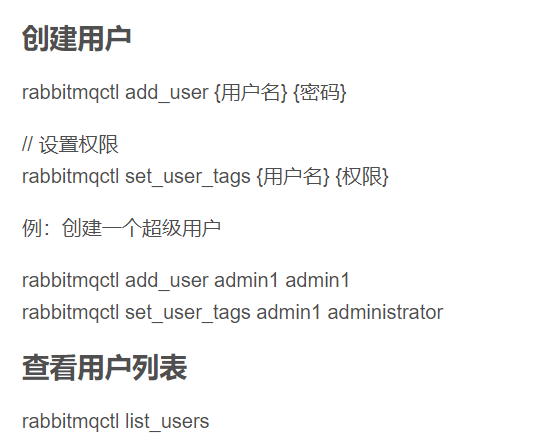
rabbitmqctl add_user user_name user_passwd #设置用户名和密码
rabbitmqctl set_user_tags user_name administrator #设置用户标签
rabbitmqctl set_permissions -p ‘/‘ user_name ‘.’ ‘.’ ‘.’ #设置权限
systemctl status rabbitmq-server #查看RabbitMQ服务状态
rabbitmqctl list_users #列出所有用户
开启管理页面插件,才可以使用web管理端
rabbitmq-plugins enable rabbitmq_management
开启rabbitMQ连接端口
firewall-cmd —zone=public —add-port=15672/tcp —permanent
程序或者其他机器交互使用时:
firewall-cmd —zone=public —add-port=5672/tcp —permanent
firewall-cmd —reload
```java#启动流程rabbitmq-plugins enable rabbitmq_managementsystemctl start rabbitmq-serversystemctl status firewalld #查看防火墙状态firewall-cmd --list-ports --permanent #查看永久开放端口firewall-cmd --add-port=15672/tcp --permanent #添加永久开放端口systemctl restart firewalld #重启防火墙rabbitmqctl add_user adminrabbitmqctl set_permissions -p / admin ".*" ".*" ".*"rabbitmqctl set_user_tags admin administrator
入门
生产者
package com.rabbitmq.producer;import com.rabbitmq.client.Channel;import com.rabbitmq.client.Connection;import com.rabbitmq.client.ConnectionFactory;import java.io.IOException;import java.util.concurrent.TimeoutException;public class Producer_Hello {public static void main(String[] args) throws IOException, TimeoutException {//创建链接工厂ConnectionFactory factory = new ConnectionFactory();//设置参数factory.setHost("192.168.47.129");factory.setPort(5672);factory.setVirtualHost("/sky");factory.setUsername("admin");factory.setPassword("admin");//创建链接Connection connection = factory.newConnection();//创建ChannelChannel channel = connection.createChannel();//创建队列Queuechannel.queueDeclare("hello",true,false,false,null);//发送消息String msg = "helloworld";channel.basicPublish("","hello",null,msg.getBytes());//释放资源channel.close();connection.close();}}
消费者
package com.rabbitmq.consumer;import com.rabbitmq.client.*;import java.io.IOException;import java.util.concurrent.TimeoutException;public class Consumer_Hello {public static void main(String[] args) throws IOException, TimeoutException {//创建链接工厂ConnectionFactory factory = new ConnectionFactory();//设置参数factory.setHost("192.168.47.129");factory.setPort(5672);factory.setVirtualHost("/sky");factory.setUsername("admin");factory.setPassword("admin");//创建链接Connection connection = factory.newConnection();//创建ChannelChannel channel = connection.createChannel();//创建队列Queuechannel.queueDeclare("hello",true,false,false,null);DefaultConsumer consumer = new DefaultConsumer(channel){@Overridepublic void handleDelivery(String consumerTag, Envelope envelope, AMQP.BasicProperties properties, byte[] body) throws IOException {System.out.println(consumerTag);System.out.println(new String(body));}};channel.basicConsume("hello",true,consumer);}}
工作模式WorkQueues
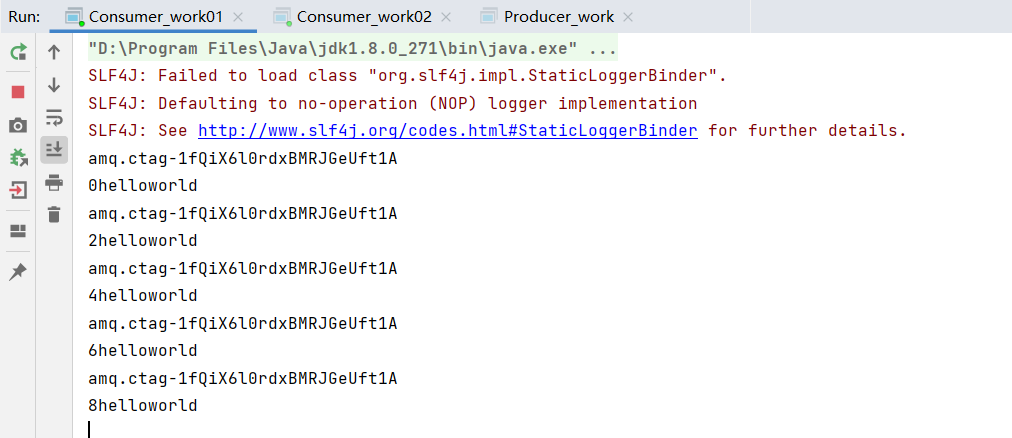
package com.rabbitmq.producer;import com.rabbitmq.client.Channel;import com.rabbitmq.client.Connection;import com.rabbitmq.client.ConnectionFactory;import java.io.IOException;import java.util.concurrent.TimeoutException;public class Producer_work {public static void main(String[] args) throws IOException, TimeoutException {ConnectionFactory factory = new ConnectionFactory();factory.setHost("192.168.47.129");factory.setPort(5672);factory.setVirtualHost("/sky");factory.setUsername("admin");factory.setPassword("admin");Connection connection = factory.newConnection();Channel channel = connection.createChannel();channel.queueDeclare("work",true,false,false,null);for (int i = 0; i < 10; i++) {String msg = i+"helloworld";channel.basicPublish("","work",null,msg.getBytes());}channel.close();connection.close();}}package com.rabbitmq.consumer;import com.rabbitmq.client.*;import java.io.IOException;import java.util.concurrent.TimeoutException;public class Consumer_work01 {public static void main(String[] args) throws IOException, TimeoutException {ConnectionFactory factory = new ConnectionFactory();factory.setHost("192.168.47.129");factory.setPort(5672);factory.setVirtualHost("/sky");factory.setUsername("admin");factory.setPassword("admin");Connection connection = factory.newConnection();Channel channel = connection.createChannel();channel.queueDeclare("work",true,false,false,null);DefaultConsumer consumer = new DefaultConsumer(channel){@Overridepublic void handleDelivery(String consumerTag, Envelope envelope, AMQP.BasicProperties properties, byte[] body) throws IOException {System.out.println(consumerTag);System.out.println(new String(body));}};channel.basicConsume("work",true,consumer);}}
订阅模式pub/sub
channel.exchangeDeclare(“pubsub”, BuiltinExchangeType.FANOUT,true,false,false,null); type是fanout
package com.rabbitmq.producer;import com.rabbitmq.client.BuiltinExchangeType;import com.rabbitmq.client.Channel;import com.rabbitmq.client.Connection;import com.rabbitmq.client.ConnectionFactory;import java.io.IOException;import java.util.concurrent.TimeoutException;public class Producer_pubsub {public static void main(String[] args) throws IOException, TimeoutException {ConnectionFactory factory = new ConnectionFactory();factory.setHost("192.168.47.129");factory.setPort(5672);factory.setVirtualHost("/sky");factory.setUsername("admin");factory.setPassword("admin");Connection connection = factory.newConnection();Channel channel = connection.createChannel();//创建交换机channel.exchangeDeclare("pubsub", BuiltinExchangeType.FANOUT,true,false,false,null);/*** DeclareOk exchangeDeclare(String exchange, BuiltinExchangeType type, boolean var3, boolean var4, boolean var5, Map<String, Object> var6)** exchange 交换机的名称* type 交换机类型* DIRECT("direct"), 定向* FANOUT("fanout"), 扇形* TOPIC("topic"), 通配符方式* HEADERS("headers"); 参数匹配* 是否持久化* 是否自动删除* 内部使用 一般false* 参数列表*///创建队列channel.queueDeclare("q1",true,false,false,null);channel.queueDeclare("q2",true,false,false,null);//绑定交换机和队列channel.queueBind("q1","pubsub","");channel.queueBind("q2","pubsub","");channel.basicPublish("pubsub","",null,"1231".getBytes());channel.close();connection.close();}}
package com.rabbitmq.consumer;import com.rabbitmq.client.*;import java.io.IOException;import java.util.concurrent.TimeoutException;public class Consumer_pubsub01 {public static void main(String[] args) throws IOException, TimeoutException {ConnectionFactory factory = new ConnectionFactory();factory.setHost("192.168.47.129");factory.setPort(5672);factory.setVirtualHost("/sky");factory.setUsername("admin");factory.setPassword("admin");Connection connection = factory.newConnection();Channel channel = connection.createChannel();channel.queueDeclare("q1",true,false,false,null);DefaultConsumer consumer = new DefaultConsumer(channel){@Overridepublic void handleDelivery(String consumerTag, Envelope envelope, AMQP.BasicProperties properties, byte[] body) throws IOException {System.out.println(consumerTag);System.out.println(new String(body));}};channel.basicConsume("q1",true,consumer);}}
路由工作模式
channel.exchangeDeclare(“rote”, BuiltinExchangeType.DIRECT,true,false,false,null); type 是direct
package com.rabbitmq.producer;import com.rabbitmq.client.BuiltinExchangeType;import com.rabbitmq.client.Channel;import com.rabbitmq.client.Connection;import com.rabbitmq.client.ConnectionFactory;import java.io.IOException;import java.util.concurrent.TimeoutException;public class Producer_roting {public static void main(String[] args) throws IOException, TimeoutException {ConnectionFactory factory = new ConnectionFactory();factory.setHost("192.168.47.129");factory.setPort(5672);factory.setVirtualHost("/sky");factory.setUsername("admin");factory.setPassword("admin");Connection connection = factory.newConnection();Channel channel = connection.createChannel();//创建交换机channel.exchangeDeclare("rote", BuiltinExchangeType.DIRECT,true,false,false,null);/*** DeclareOk exchangeDeclare(String exchange, BuiltinExchangeType type, boolean var3, boolean var4, boolean var5, Map<String, Object> var6)** exchange 交换机的名称* type 交换机类型* DIRECT("direct"), 定向* FANOUT("fanout"), 扇形* TOPIC("topic"), 通配符方式* HEADERS("headers"); 参数匹配* 是否持久化* 是否自动删除* 内部使用 一般false* 参数列表*///创建队列channel.queueDeclare("q1",true,false,false,null);channel.queueDeclare("q2",true,false,false,null);//绑定交换机和队列channel.queueBind("q1","rote","error");channel.queueBind("q2","rote","");channel.basicPublish("rote","error",null,"q1接收".getBytes());channel.basicPublish("rote","",null,"q2接收".getBytes());channel.close();connection.close();}}
通配符工作模式
type 是topic
package com.rabbitmq.producer;import com.rabbitmq.client.BuiltinExchangeType;import com.rabbitmq.client.Channel;import com.rabbitmq.client.Connection;import com.rabbitmq.client.ConnectionFactory;import java.io.IOException;import java.util.concurrent.TimeoutException;public class Producer_topic {public static void main(String[] args) throws IOException, TimeoutException {ConnectionFactory factory = new ConnectionFactory();factory.setHost("192.168.47.129");factory.setPort(5672);factory.setVirtualHost("/sky");factory.setUsername("admin");factory.setPassword("admin");Connection connection = factory.newConnection();Channel channel = connection.createChannel();//创建交换机channel.exchangeDeclare("topic", BuiltinExchangeType.TOPIC,true,false,false,null);channel.queueDeclare("q1",true,false,false,null);channel.queueDeclare("q2",true,false,false,null);//绑定交换机和队列/*** * 表示一个单词* # 表示多个单词*/channel.queueBind("q1","topic","*.error");channel.queueBind("q1","topic","order.*");channel.queueBind("q2","topic","#.#");channel.basicPublish("topic","order.aa",null,"q1接收".getBytes());channel.basicPublish("topic","",null,"q2接收".getBytes());channel.close();connection.close();}}
Spring整合RabbitMQ
生产者配置以及代码
#rabbitmq的配置rabbitmq.host=192.168.47.129rabbitmq.port=5672rabbitmq.username=adminrabbitmq.password=adminrabbitmq.virtual-host=/sky #虚拟机名称
<?xml version="1.0" encoding="UTF-8"?><beans xmlns="http://www.springframework.org/schema/beans"xmlns:xsi="http://www.w3.org/2001/XMLSchema-instance"xmlns:context="http://www.springframework.org/schema/context"xmlns:rabbit="http://www.springframework.org/schema/rabbit"xsi:schemaLocation="http://www.springframework.org/schema/beanshttp://www.springframework.org/schema/beans/spring-beans.xsdhttp://www.springframework.org/schema/contexthttp://www.springframework.org/schema/context/spring-context.xsdhttp://www.springframework.org/schema/rabbithttp://www.springframework.org/schema/rabbit/spring-rabbit.xsd"><!-- 加载配置文件--><context:property-placeholder location="classpath:rabbitmq.properties"/><context:annotation-config/><!-- 定义连接工厂--><rabbit:connection-factory id="connectionFactory"host="${rabbitmq.host}"port="${rabbitmq.port}"username="${rabbitmq.username}"password="${rabbitmq.password}"virtual-host="${rabbitmq.virtual-host}"/><!-- id是bean的名称 name是队列的名称 auto-declare是自动创建 auto-delete是最后一个客户端断开连接后自动删除队列--><!-- 定义交换机--><rabbit:admin connection-factory="connectionFactory"/><rabbit:queue id="spring_hello" name="spring_hello" auto-declare="true"/><rabbit:queue id="spring_work1" name="spring_work1" auto-declare="true"/><rabbit:queue id="spring_work2" name="spring_work2" auto-declare="true"/><rabbit:queue id="spring_fanout1" name="spring_fanout1" auto-declare="true"/><rabbit:queue id="spring_fanout2" name="spring_fanout2" auto-declare="true"/><rabbit:fanout-exchange name="spring_exchangefanout" id="spring_exchangefanout" auto-declare="true"><rabbit:bindings><rabbit:binding queue="spring_fanout1"/><rabbit:binding queue="spring_fanout2"/></rabbit:bindings></rabbit:fanout-exchange><!-- key是指路由key--><rabbit:queue id="spring_route1" name="spring_route1" auto-declare="true"/><rabbit:queue id="spring_route2" name="spring_route2" auto-declare="true"/><rabbit:direct-exchange name="spring_exchangedirect" id="spring_exchangedirect" auto-declare="true"><rabbit:bindings><rabbit:binding key="error" queue="spring_route1"/><rabbit:binding queue="spring_route2"/></rabbit:bindings></rabbit:direct-exchange><rabbit:queue id="spring_topic1" name="spring_topic1" auto-declare="true"/><rabbit:queue id="spring_topic2" name="spring_topic2" auto-declare="true"/><!-- pattern是指匹配规则--><rabbit:topic-exchange name="spring_exchangetopic" id="spring_exchangetopic" auto-declare="true"><rabbit:bindings><rabbit:binding pattern="order.*" queue="spring_topic1"/><rabbit:binding pattern="order.#" queue="spring_topic2"/></rabbit:bindings></rabbit:topic-exchange><!-- rabbitTemplate是用来发送数据的--><rabbit:template id="rabbitTemplate" connection-factory="connectionFactory"/></beans>
import org.junit.Test;import org.junit.runner.RunWith;import org.springframework.amqp.rabbit.core.RabbitTemplate;import org.springframework.beans.factory.annotation.Autowired;import org.springframework.test.context.ContextConfiguration;import org.springframework.test.context.junit4.SpringJUnit4ClassRunner;@RunWith(SpringJUnit4ClassRunner.class)@ContextConfiguration(locations = "classpath:application.xml")public class Spring_Producer {@Autowiredprivate RabbitTemplate rabbitTemplate;//发送简单工作模式@Testpublic void test01(){rabbitTemplate.convertAndSend("spring_hello","helloworld");}//发送广播@Testpublic void fanout(){rabbitTemplate.convertAndSend("spring_exchangefanout","","广播发送!!");}@Testpublic void direct(){rabbitTemplate.convertAndSend("spring_exchangedirect","error","路由发送!!");}@Testpublic void topic(){rabbitTemplate.convertAndSend("spring_exchangetopic","order.a.a","topic发送!!");}}
消费者配置以及代码
<?xml version="1.0" encoding="UTF-8"?><beans xmlns="http://www.springframework.org/schema/beans"xmlns:xsi="http://www.w3.org/2001/XMLSchema-instance"xmlns:context="http://www.springframework.org/schema/context"xmlns:rabbit="http://www.springframework.org/schema/rabbit"xsi:schemaLocation="http://www.springframework.org/schema/beanshttp://www.springframework.org/schema/beans/spring-beans.xsdhttp://www.springframework.org/schema/contexthttp://www.springframework.org/schema/context/spring-context.xsdhttp://www.springframework.org/schema/rabbithttp://www.springframework.org/schema/rabbit/spring-rabbit.xsd"><!-- 加载配置文件--><context:property-placeholder location="classpath:rabbitmq.properties"/><context:annotation-config/><!-- 定义连接工厂--><rabbit:connection-factory id="connectionFactory"host="${rabbitmq.host}"port="${rabbitmq.port}"username="${rabbitmq.username}"password="${rabbitmq.password}"virtual-host="${rabbitmq.virtual-host}"/><!-- 定义监听器类 --><bean id="SpringQueueHello" class="com.springrabbit.HelloListener"/><!-- 配置监听器容器 ,每一个监听器对应监听的队列 --><rabbit:listener-container connection-factory="connectionFactory" auto-declare="true"><rabbit:listener ref="SpringQueueHello" queue-names="spring_hello"/></rabbit:listener-container></beans>
#监听类需要实现MessageListener接口并且重写onMessage方法package com.springrabbit;import org.springframework.amqp.core.Message;import org.springframework.amqp.core.MessageListener;public class HelloListener implements MessageListener {@Overridepublic void onMessage(Message message) {System.out.println(new String(message.getBody()));}}
Springboot整合RabbitMQ
#首先在配置文件中配置RabbitMQspring:rabbitmq:host: 192.168.47.129port: 5672username: adminpassword: adminvirtual-host: /sky
生产者
springboot的生产者是一个配置类,在配置类中我们配置各种类型的交换机以及队列,然后定义绑定关系
package com.sbmq.config;import org.springframework.amqp.core.*;import org.springframework.beans.factory.annotation.Qualifier;import org.springframework.context.annotation.Bean;import org.springframework.context.annotation.Configuration;@Configurationpublic class RabbitMQConfig {private static final String EXCHANGENAME="boot_exchange";@Bean("bootExchange")public Exchange bootExchange(){return ExchangeBuilder.directExchange(EXCHANGENAME).durable(true).build();}@Bean("bootQueue")public Queue bootQueue(){return QueueBuilder.durable("bootqueue").build();}@Beanpublic Binding bind(@Qualifier("bootQueue") Queue queue,@Qualifier("bootExchange") Exchange exchange){return BindingBuilder.bind(queue).to(exchange).with("boot").noargs();}}
消费者
package com.sbmq.config;import org.springframework.amqp.core.Message;import org.springframework.amqp.rabbit.annotation.RabbitListener;import org.springframework.stereotype.Component;@Componentpublic class Listener {@RabbitListener(queues = "bootqueue")public void listener(Message message){System.out.println(message);}}编写一个监听类,使用@RabbitListener注解注明监听的队列,然后方法中接收一个Message类型的参数,里面就是消息
RabbitMQ高级
消息可靠投递
confirm
1.首先我们需要开启付,默认是关闭的<rabbit:connection-factory id="connectionFactory"host="${rabbitmq.host}"port="${rabbitmq.port}"username="${rabbitmq.username}"password="${rabbitmq.password}"virtual-host="${rabbitmq.virtual-host}"publisher-confirms="true"/>2.设置回调函数@Testpublic void test01(){rabbitTemplate.setConfirmCallback(new RabbitTemplate.ConfirmCallback() {/**** @param correlationData 相关配置信息* @param b 是否成功* @param s 失败的原因*/@Overridepublic void confirm(CorrelationData correlationData, boolean b, String s) {System.out.println("huidioa");}});rabbitTemplate.convertAndSend("spring_hello","helloworld");}
return
@Testpublic void test01(){/*** 1:开启服务* 2:设置回调函数* 3:设置模式* 默认失败丢弃消息* 失败返回消息*/rabbitTemplate.setMandatory(true);rabbitTemplate.setReturnCallback(new RabbitTemplate.ReturnCallback() {/**** @param message 消息数据* @param i 错误码* @param s 错误信息* @param s1 交换机* @param s2 路由key*/@Overridepublic void returnedMessage(Message message, int i, String s, String s1, String s2) {System.out.println("return");}});rabbitTemplate.convertAndSend("spring_hello12","helloworld");}
ACK 消息可靠性接收
<rabbit:listener-container connection-factory="connectionFactory" auto-declare="true" acknowledge="manual"><rabbit:listener ref="SpringQueueHello" queue-names="spring_hello"/></rabbit:listener-container>acknowledge="manual"manual 手动auto 根据异常none 自动接收
package com.springrabbit;import com.rabbitmq.client.Channel;import org.springframework.amqp.core.Message;import org.springframework.amqp.core.MessageListener;import org.springframework.amqp.rabbit.listener.api.ChannelAwareMessageListener;import java.io.IOException;public class HelloListener implements ChannelAwareMessageListener {@Overridepublic void onMessage(Message message, Channel channel) throws Exception {long deliveryTag = message.getMessageProperties().getDeliveryTag();try {Thread.sleep(1000);System.out.println(message);/*** 当前标签* true签收所有消息*/channel.basicAck(deliveryTag,true);} catch (Exception e) {channel.basicNack(deliveryTag,true,true);//第三个参数true是返回队列重新发送}}}
消费端限流(削峰填谷)
只需要设置监听容器新增加一个属性<rabbit:listener-container connection-factory="connectionFactory" auto-declare="true"acknowledge="manual" prefetch="1"><rabbit:listener ref="SpringQueueHello" queue-names="spring_hello"/></rabbit:listener-container>## 1:需要设置手动签收消息## 2:prefetch 里面的数表示一次接收几个消息,签收后才继续接收消息
TTL(Time To Live)存活/过期
##1:对队列设置过期时间使用参数x-message-ttl,单位ms<rabbit:queue id="spring_topic1" name="spring_topic1" auto-declare="true"><rabbit:queue-arguments><entry key="x-message-ttl" value="10000" value-type="java.lang.Integer"/></rabbit:queue-arguments></rabbit:queue>##2:对消息单独设置过期时间@Testpublic void test01(){MessagePostProcessor messagePostProcessor = new MessagePostProcessor() {@Overridepublic Message postProcessMessage(Message message) throws AmqpException {message.getMessageProperties().setExpiration("50000");//过期时间return message;}};rabbitTemplate.convertAndSend("spring_hello","","helloworld",messagePostProcessor);}
死信队列
# 生产者配置<!-- 死信队列1:正常的队列和交换机2:死信队列和交换机--><!-- 正常队列--><rabbit:queue id="dead_queue" name="dead_queue" auto-declare="true"><rabbit:queue-arguments><!-- 绑定死信交换机--><entry key="x-dead-letter-exchange" value="deaded_exchange"/><!-- 设置发送消息的路由key--><entry key="x-dead-letter-routing-key" value="deaded.test"/><!-- 设置正常队列消息死亡时间以及长度--><entry key="x-message-ttl" value="10000" value-type="java.lang.Integer"/><entry key="x-max-length" value="10" value-type="java.lang.Integer"/></rabbit:queue-arguments></rabbit:queue><rabbit:topic-exchange name="dead_exchange" id="dead_exchange" auto-declare="true"><rabbit:bindings><rabbit:binding pattern="dead.*" queue="dead_queue"/></rabbit:bindings></rabbit:topic-exchange><!-- 死信队列--><rabbit:queue id="deaded_queue" name="deaded_queue" auto-declare="true"/><rabbit:topic-exchange name="deaded_exchange"><rabbit:bindings><rabbit:binding pattern="deaded.*" queue="deaded_queue"/></rabbit:bindings></rabbit:topic-exchange>
# 消费者配置以及代码<bean id="DeadQueue" class="com.springrabbit.DeadListener"/><bean id="DeadedQueue" class="com.springrabbit.DeadedListener"/><rabbit:listener-container connection-factory="connectionFactory" auto-declare="true" acknowledge="manual" prefetch="1"><rabbit:listener ref="SpringQueueHello" queue-names="spring_hello"/><rabbit:listener ref="DeadQueue" queue-names="dead_queue"/><rabbit:listener ref="DeadedQueue" queue-names="deaded_queue"/></rabbit:listener-container>package com.springrabbit;import com.rabbitmq.client.Channel;import org.springframework.amqp.core.Message;import org.springframework.amqp.rabbit.listener.api.ChannelAwareMessageListener;public class DeadedListener implements ChannelAwareMessageListener {@Overridepublic void onMessage(Message message, Channel channel) throws Exception {//接收死信队列的消息long deliveryTag = message.getMessageProperties().getDeliveryTag();System.out.println(new String(message.getBody())+"死信");channel.basicAck(deliveryTag,true);}}package com.springrabbit;import com.rabbitmq.client.Channel;import org.springframework.amqp.core.Message;import org.springframework.amqp.rabbit.listener.api.ChannelAwareMessageListener;public class DeadListener implements ChannelAwareMessageListener {@Overridepublic void onMessage(Message message, Channel channel) throws Exception {long deliveryTag = message.getMessageProperties().getDeliveryTag();try {System.out.println(new String(message.getBody()));int i = 1/0;channel.basicAck(deliveryTag,true);} catch (Exception e) {channel.basicNack(deliveryTag,true,false);}}}
延时队列
日志与监控
消息追踪
# 开启 ,默认开启/虚拟机[root@localhost rabbitmq]# rabbitmqctl trace_on# 关闭[root@localhost rabbitmq]# rabbitmqctl trace_off
更强大的插件 rabbitmq_tracing
# 开启rabbitmq-plugins enable rabbitmq_tracing# 查看所有插件rabbitmq-plugins list


