俗称 Spring 全家桶。为什么大家都要用它?因为它好用啊。
- 在 Spring 容器中引入 Bean
- Spring + MyBatis
- 模板引擎(后端渲染 HTML)
- 前后端分离和后端渲染
1. Spring 中 Bean 配置与 Spring+MyBatis 实战
先说个宏观印象,每个需要 @Autowired 的 Bean 之所以是个 Bean,一定是某种方式通知了 Spring 这是个 Bean,一般要么通过配置文件(查看上一篇笔记),要么在 Bean 的类上添加五花八门的注解,之所以五花八门,自然是希望传达更多的角色分工的信息,而他们所传达的最基本的信息仍然是:告诉 Spring 这里的类是一个 Bean。
一般分为三层:
(HTTP)
- Controller【负责 HTTP 请求和响应】
- Service【业务代码】
- Dao【负责和数据库交互】
(数据库)
接下来,做一个 Rank 排行榜的页面。
在上一篇的 Spring boot Web 基础上继续增加 Mabatis 相关依赖,H2 的依赖。
https://mybatis.org/spring-boot-starter/mybatis-spring-boot-autoconfigure/
pom.xml:
<?xml version="1.0" encoding="UTF-8"?><project xmlns="http://maven.apache.org/POM/4.0.0" xmlns:xsi="http://www.w3.org/2001/XMLSchema-instance"xsi:schemaLocation="http://maven.apache.org/POM/4.0.0 https://maven.apache.org/xsd/maven-4.0.0.xsd"><modelVersion>4.0.0</modelVersion><groupId>com.example</groupId><artifactId>my-spring-boot</artifactId><version>0.0.1-SNAPSHOT</version><name>spring-boot</name><description>Demo project for Spring Boot</description><parent><groupId>org.springframework.boot</groupId><artifactId>spring-boot-starter-parent</artifactId><version>2.2.2.RELEASE</version><relativePath/> <!-- lookup parent from repository --></parent><properties><java.version>1.8</java.version></properties><dependencies><dependency><groupId>org.springframework.boot</groupId><artifactId>spring-boot-starter-web</artifactId></dependency><dependency><groupId>org.springframework.boot</groupId><artifactId>spring-boot-starter-freemarker</artifactId></dependency><dependency><groupId>org.mybatis.spring.boot</groupId><artifactId>mybatis-spring-boot-starter</artifactId><version>2.1.1</version></dependency><dependency><groupId>org.springframework.boot</groupId><artifactId>spring-boot-starter-test</artifactId><scope>test</scope><exclusions><exclusion><groupId>org.junit.vintage</groupId><artifactId>junit-vintage-engine</artifactId></exclusion></exclusions></dependency><dependency><groupId>com.h2database</groupId><artifactId>h2</artifactId><version>1.4.200</version></dependency></dependencies><build><plugins><plugin><groupId>org.springframework.boot</groupId><artifactId>spring-boot-maven-plugin</artifactId></plugin><plugin><groupId>org.flywaydb</groupId><artifactId>flyway-maven-plugin</artifactId><version>6.4.3</version><configuration><url>jdbc:h2:file:${project.basedir}/target/test</url><user>root</user><password>root</password></configuration></plugin></plugins></build></project>
增加 src/java/main/resources/application.properties 文件:
spring.datasource.url=jdbc:h2:file:/Users/peng/IdeaProjects/tmp/my-first-spring/target/test
spring.datasource.username=root
spring.datasource.password=root
spring.datasource.driver-class-name=org.h2.Driver
mybatis.config-location=classpath:db/mybatis/config.xml
引入 Flyway 插件,方便数据库快速迁移。
<plugin>
  <groupId>org.flywaydb</groupId>
  <artifactId>flyway-maven-plugin</artifactId>
  <version>6.4.3</version>
  <configuration>
    <url>jdbc:h2:file:${project.basedir}/target/test</url>
    <user>root</user>
    <password>root</password>
  </configuration>
</plugin>
然后resources/db/migration/V1__CreateTables.sql 创建两张表,一张用户表(User),一张比赛表(Match),联表查询即可得到 Rank 排行榜。
create table user
(
    id   bigint primary key auto_increment,
    name varchar(100)
);

create table match
(
    id      bigint primary key auto_increment,
    user_id bigint,
    score   int
);

insert into user(id, name)
values (1, 'AAA');
insert into user(id, name)
values (2, 'BBB');
insert into user(id, name)
values (3, 'CCC');

insert into match(id, user_id, score)
values (1, 1, 1000);
insert into match(id, user_id, score)
values (2, 1, 2000);
insert into match(id, user_id, score)
values (3, 2, 500);
insert into match(id, user_id, score)
values (4, 3, 300);
然后运行 mvn flyway:migrate ,会自动创建一个 H2数据库,并且执行刚才的 sql。
在 Spring 的 application.properties 文件指定 Mybatis 配置文件的路径,并创建 Mybatis 的配置文件,以及基于注解的 mapper 和基于 xml 的 mapper:
<?xml version="1.0" encoding="UTF-8" ?>
<!DOCTYPE configuration
        PUBLIC "-//mybatis.org//DTD Config 3.0//EN"
        "http://mybatis.org/dtd/mybatis-3-config.dtd">
<configuration>
    <settings>
        <setting name="logImpl" value="LOG4J"/>
    </settings>
    <mappers>
        <mapper resource="db/mybatis/MyMapper.xml"/>
        <mapper class="hello.dao.UserMapper"/>
    </mappers>
</configuration>
// 这里的 UserMapper 只在这里测试连接的时候用到了,后面都没用到
package hello.dao;

import hello.entity.User;
import org.apache.ibatis.annotations.Mapper;
import org.apache.ibatis.annotations.Param;
import org.apache.ibatis.annotations.Select;

@Mapper
public interface UserMapper {

    @Select("select * from user where id = #{id}")
    User getUserById(@Param("id") Integer id);
}
下面演示使用基于注解的 mapper,把 UserMapper 引入进来,然后使用 @Autowired 自动进行装配(IDEA可能提示找不到UserMapper bean,alt+enter 进行忽略,因为动态运行,静态检查难免无力)(注意,现在为了方便,暂时没有引入 Service 层):
package hello;

import hello.dao.UserMapper;
import org.springframework.beans.factory.annotation.Autowired;
import org.springframework.web.bind.annotation.RequestMapping;
import org.springframework.web.bind.annotation.ResponseBody;
import org.springframework.web.bind.annotation.RestController;

@RestController
public class HelloController {

    @Autowired
    private UserMapper userMapper;

    @RequestMapping("/")
    @ResponseBody
    public Object search() {
        return userMapper.getUserById(1);
    }
}
现在访问 http://localhost:8080/ 已经有返回了。
增加 RankItem、RankDao、RankService,代码解释往下看:
package hello.entity;

public class RankItem {
    private int score;
    private User user;

    public int getScore() {
        return score;
    }

    public void setScore(int score) {
        this.score = score;
    }

    public User getUser() {
        return user;
    }

    public void setUser(User user) {
        this.user = user;
    }
}
package hello.dao;

import hello.entity.RankItem;
import org.apache.ibatis.session.SqlSession;
import org.springframework.beans.factory.annotation.Autowired;
import org.springframework.stereotype.Service;

import java.util.List;

@Service
public class RankDao {

    @Autowired
    private SqlSession sqlSession;

    public List<RankItem> getRank() {
        return sqlSession.selectList("MyMapper.selectRank");
    }
}
package hello.service;

import hello.dao.RankDao;
import hello.entity.RankItem;
import org.springframework.beans.factory.annotation.Autowired;
import org.springframework.stereotype.Service;

import java.util.List;

@Service
public class RankService {
    @Autowired
    RankDao rankDao;

    public List<RankItem> getRank() {
        return rankDao.getRank();
    }
}
Spring 如何知道这是一个 Bean?传统方式是配置 xml(上一篇中有提到),而更方便的方法是,假如这是一个 Service,那么直接使用 @Service 注解告诉 Spring 即可,然后 Spring 进一步根据 Bean 中的 @Autowired 注解来对 Bean 进行识别、自动装配、注入(Spring Bean 默认都是单例模式)。
如果想配置非常复杂的 Bean,可以额外引入配置,使用 @Configuration,比单纯使用 @Service 更灵活复杂(下一篇再细说,本篇先简单使用 @Service 即可)。
接下来处理一下最重要的数据库操作,选出 用户id、用户总分、用户名(并按照用户总分降序排列)数据。
由于比较复杂,所以使用 Mybatis 的 xml mapper,并使用了 resultMap 映射出存在嵌套对象的 RankItem 对象(其代表最终的一行排名信息)。
<?xml version="1.0" encoding="UTF-8" ?>
<!DOCTYPE mapper
        PUBLIC "-//mybatis.org//DTD Mapper 3.0//EN"
        "http://mybatis.org/dtd/mybatis-3-mapper.dtd">
<mapper namespace="MyMapper">
    <select id="selectRank" resultMap="rankItem">
        select t.user_id, t.score_sum, user.name as user_name
        from
        (
        select user_id, sum(score) as score_sum from match
            group by user_id
            order by score_sum desc
        ) t
         inner join user on t.user_id = user.id;
    </select>

    <resultMap id="rankItem" type="hello.entity.RankItem">
        <result property="score" column="score_sum"/>
        <association property="user" javaType="hello.entity.User">
            <result property="id" column="user_id"/>
            <result property="name" column="user_name"/>
        </association>
    </resultMap>
</mapper>
接下来问题来了,之前学习 Mybatis 基于 xml mapper 时,需要用 SqlSessionFactory 创建出一个 SqlSession(sql 会话),然后执行相应的操作类型,以及具体的 xml sql mapper,例如:
// 仅供演示之前做法
public List<Order> getInnerJoinOrders() {
    try (SqlSession session = sqlSessionFactory.openSession()) {
        return session.selectList("MyMapper.getInnerJoinOrders");
    }
}
现在既然使用了 Spring,也依赖了基于 Spring 的 Mybatis 包,那么只需要在需要一个 SqlSession 的时候使用@Autowired 注解即可,由 Spring 启动后负责创建实例。
另外,目前为止,看似 RankService 比较尴尬,该 Service 只是作为了 Dao 和 Controller 之间“多余”的一层桥梁,这里是完全可以直接在 Controller 中引用 Dao 的。但别忘了,以后业务逻辑逐渐复杂时,就体现出 Service 层的必要性了。
把前面的 HelloController 改为以下,验证以下 Controller、Service、Dao 三者之间递进的分层关系:
package hello;

import hello.service.RankService;
import org.springframework.beans.factory.annotation.Autowired;
import org.springframework.web.bind.annotation.RequestMapping;
import org.springframework.web.bind.annotation.ResponseBody;
import org.springframework.web.bind.annotation.RestController;

@RestController
public class HelloController {

    @Autowired
    private RankService rankService;

    @RequestMapping("/")
    @ResponseBody
    public Object search() {
        return rankService.getRank();
    }
}
如果没写错的话,再次启动 Spring,访问 http://localhost:8080/ 可以看到返回的 RankItem 列表:
[
    {
        "score": 3000,
        "user": {
            "id": 1,
            "name": "AAA"
        }
    },
    {
        "score": 500,
        "user": {
            "id": 2,
            "name": "BBB"
        }
    },
    {
        "score": 300,
        "user": {
            "id": 3,
            "name": "CCC"
        }
    }
]
2. Web 页面生成原理
这里再说下 MVC,即 数据模型(Model)、视图(View)、控制器(Controller)。
Web 页面的生成简单分为两种:
- 后端渲染,后端提前填充好数据,返回包含全量信息的 HTML 文件/字符串。
- 前端渲染,后端返回精简的 HTML 字符串,其中包含了关键的 标签,通过在前端浏览器中执行 JavaScript 脚本,发出 AJAX 请求拿到数据,然后操作 DOM,填充数据。
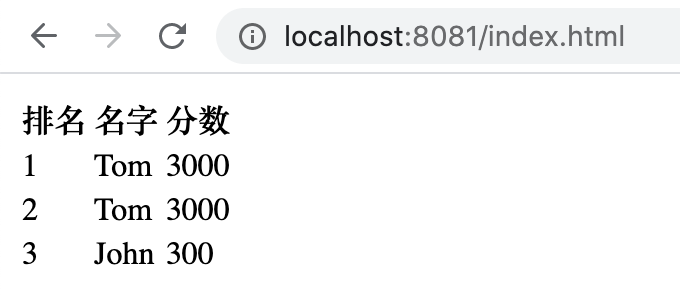
src/java/resources/static 目录会被 Spring 处理成静态资源服务,写个 index.html 文件放入该目录下,然后访问 localhost:8080/index.html 即可看到返回的 html 文件:
<!doctype html>
<html lang="en">
<head>
    <meta charset="UTF-8">
    <title>Document</title>
</head>
<body>
    <table>
        <tr>
            <th>排名</th>
            <th>名字</th>
            <th>分数</th>
        </tr>
        <tr>
            <td>1</td>
            <td>Tom</td>
            <td>3000</td>
        </tr>
        <tr>
            <td>2</td>
            <td>Tom</td>
            <td>3000</td>
        </tr>
        <tr>
            <td>3</td>
            <td>John</td>
            <td>300</td>
        </tr>
    </table>
</body>
</html>
但这样的 html 是写死的文件,为了动态的进行后端渲染,需要模板引擎,常见的有 FreeMaker、JSP 等,JSP 已经过时了,下面以 FreeMaker 为例。
3. 使用 FreeMaker 进行后端渲染
这里有 FreeMaker + SpringBoot 的教程,pom.xml 中引入 spring-boot-starter-freemarker 依赖。
按照目录约定,视图模板放在 resources/templates 下面,且注意如果使用的是最新版的Spring Boot (2.2+),默认的 Freemarker 扩展名变成了 ftlh ,如果仍然使用 ftl 会报错404!
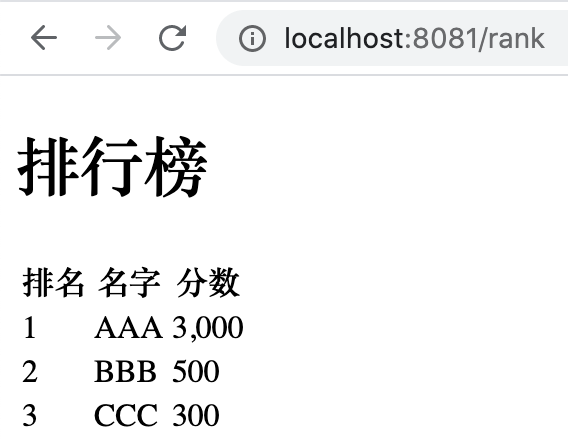
rank.ftlh,使用了遍历语法,具体可查看官方文档:
<!doctype html>
<html lang="en">
<head>
    <meta charset="UTF-8">
    <title>Document</title>
</head>
<body>
<h1>排行榜</h1>
<table>
    <tr>
        <th>排名</th>
        <th>名字</th>
        <th>分数</th>
    </tr>

    <#list items as item>
        <tr>
            <td>${item?index + 1}</td>
            <td>${item.user.name}</td>
            <td>${item.score}</td>
        </tr>
    </#list>
</table>
</body>
</html>
然后在 controller 中增加一条请求映射:
@RequestMapping("/rank")
public ModelAndView rank() {
    List<RankItem> items = rankService.getRank();
    Map<String, Object> model = new HashMap<>();
    model.put("items", items);
    return new ModelAndView("rank", model);
}
4. 使用 JS 和 JSON 异步请求进行前端渲染
既然是前端渲染,那就请求骨架 html,然后等待 ajax 请求返回的数据,然后往 dom 中塞即可。
所以继续在 resources/static 目录下放一个 html 文件,然后写点 js 代码即可:
<!doctype html>
<html lang="en">
<head>
    <meta charset="UTF-8">
    <title>Document</title>
</head>
<body>
<h1>排行榜</h1>
<table id="rank">
    <tr>
        <th>排名</th>
        <th>名字</th>
        <th>分数</th>
    </tr>>
</table>


<script>
  var renderRank = function (data) {
    var table = document.getElementById('rank');
    data.forEach(function (item, index) {
      var trString = `<tr>
                <td>${index + 1}</td>
                <td>${item.user.name}</td>
                <td>${item.score}</td>
            </tr>`;
      table.querySelector('tbody').innerHTML += trString;
    });
  };

  var xhr = new XMLHttpRequest();
  xhr.onreadystatechange = function () {
    if (xhr.readyState === 4) {
      if ((xhr.status >= 200 && xhr.status < 300) || xhr.status === 304) {
        var json = xhr.responseText;
        console.log(JSON.parse(json));
        renderRank(JSON.parse(json));
      } else {
        console.log('服务器异常');
      }
    }
  };
  xhr.open('GET', '/rankData'); // rankData 便是接口地址
  xhr.send();

</script>
</body>
</html>
然后在 Controller 中提供接口(默认即可序列化为 json 字符串):
@RequestMapping("/rankData")
@ResponseBody
public Object search() {
    return rankService.getRank();
}
现在访问 localhost:8080/rank.html 即可看到效果(截图略,最终视觉结果和前面一样)。

若有收获,就点个赞吧
0 人点赞
