在 webpack 中集成了 http-proxy-middleware,通过这个中间件可以将请求转发到其他服务。
我们通过 yarn dev 启动设定的端口是 3000,在 webpack.config.js 中配置过。
简单代理
创建新服务
在根目录下创建一个新服务,端口为 4000。
webpack 自带 express。
/** ./server.js **/let express = require('express');let app = express();app.get('/user', function(req, res){res.json({name: 'jingyu' });})app.listen(4000);
请求服务
在入口文件中发起请求
/** ./src/index.js **/const xhr = new XMLHttpRequest();xhr.open('get', '/user', true);xhr.onload = () => {console.log(xhr.response);};xhr.send();// 或者用 fetch//fetch('/api/user').then((r) => r.json()).then((value) => console.log(value));
观察我们的 index 文件,我们是在 webpack 的 devServer 中启动的程序,服务端口是 3000,而我们想要访问的是 4000 端口的 user 路由,显然是获取不到的。
访问结果如下: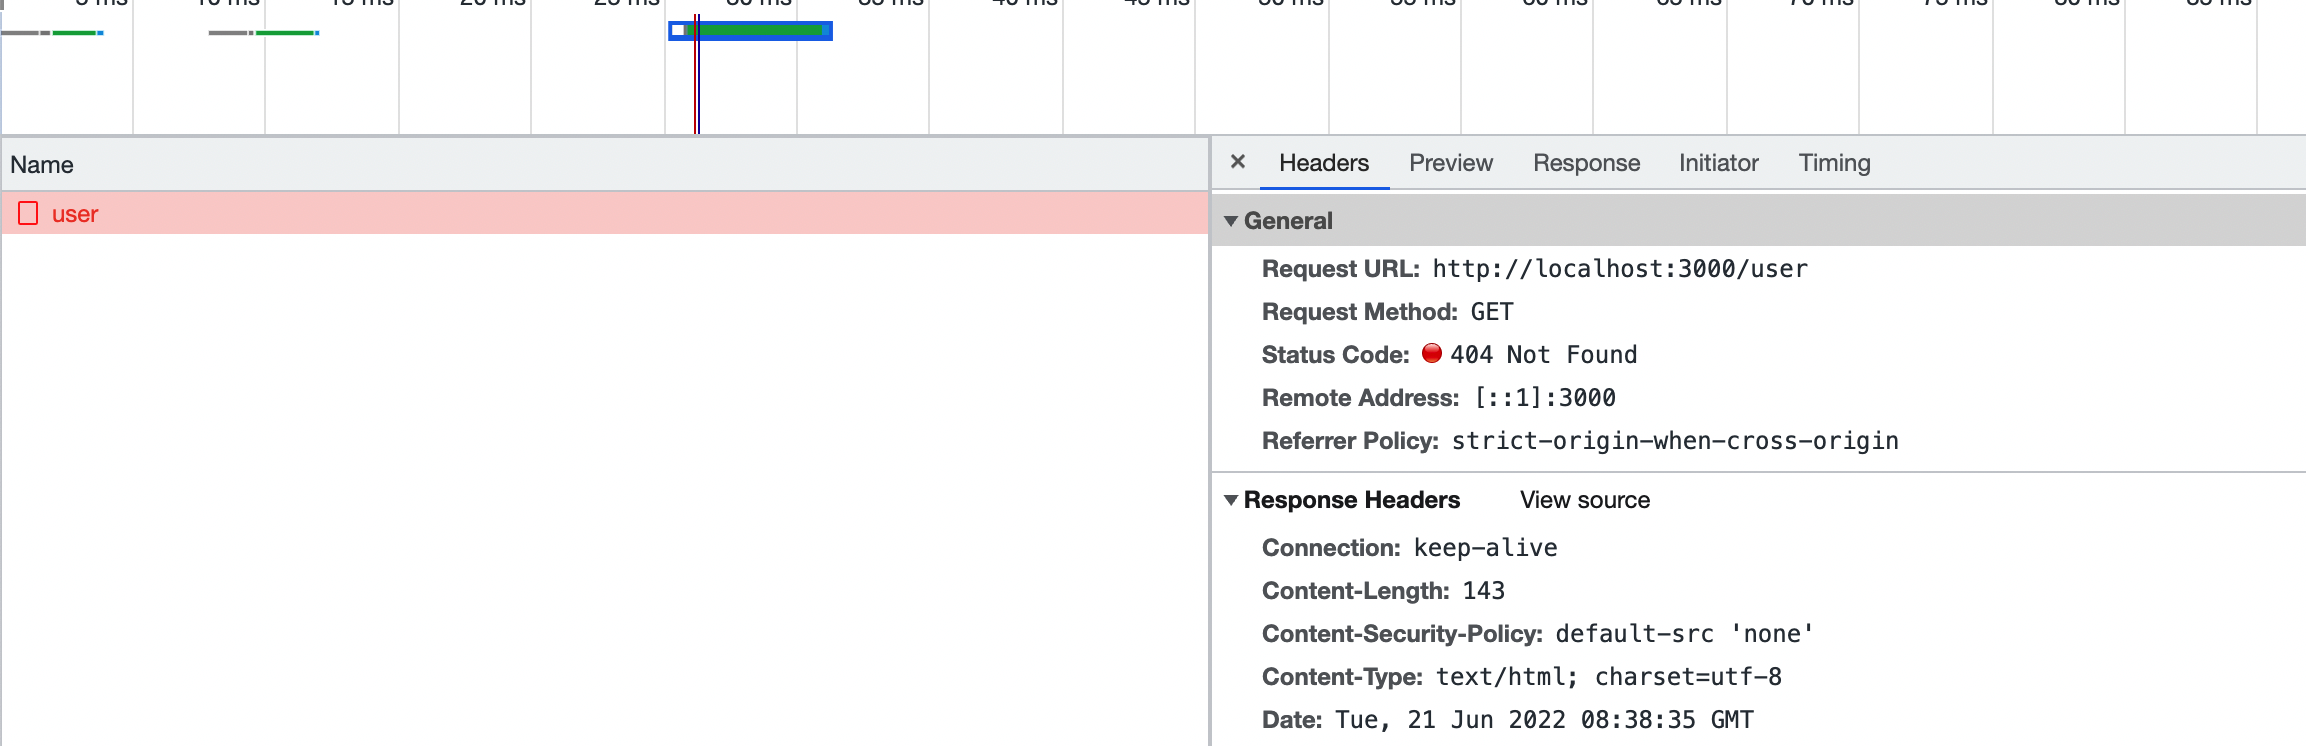
webpack 代理
如果想要获取到 4000 端口服务的路由信息,就必须将访问 3000 端口代理到 4000 端口。webpack 集成了这种功能,如下:
//...module.exports = {devServer: {port: 3000, //打开端口open: true, //是否打开浏览器compress: true, //是否压缩static: './dist',proxy: {'/user':'http://localhost:4000'}}}//...
添加 9-10 行,然后我们再试一下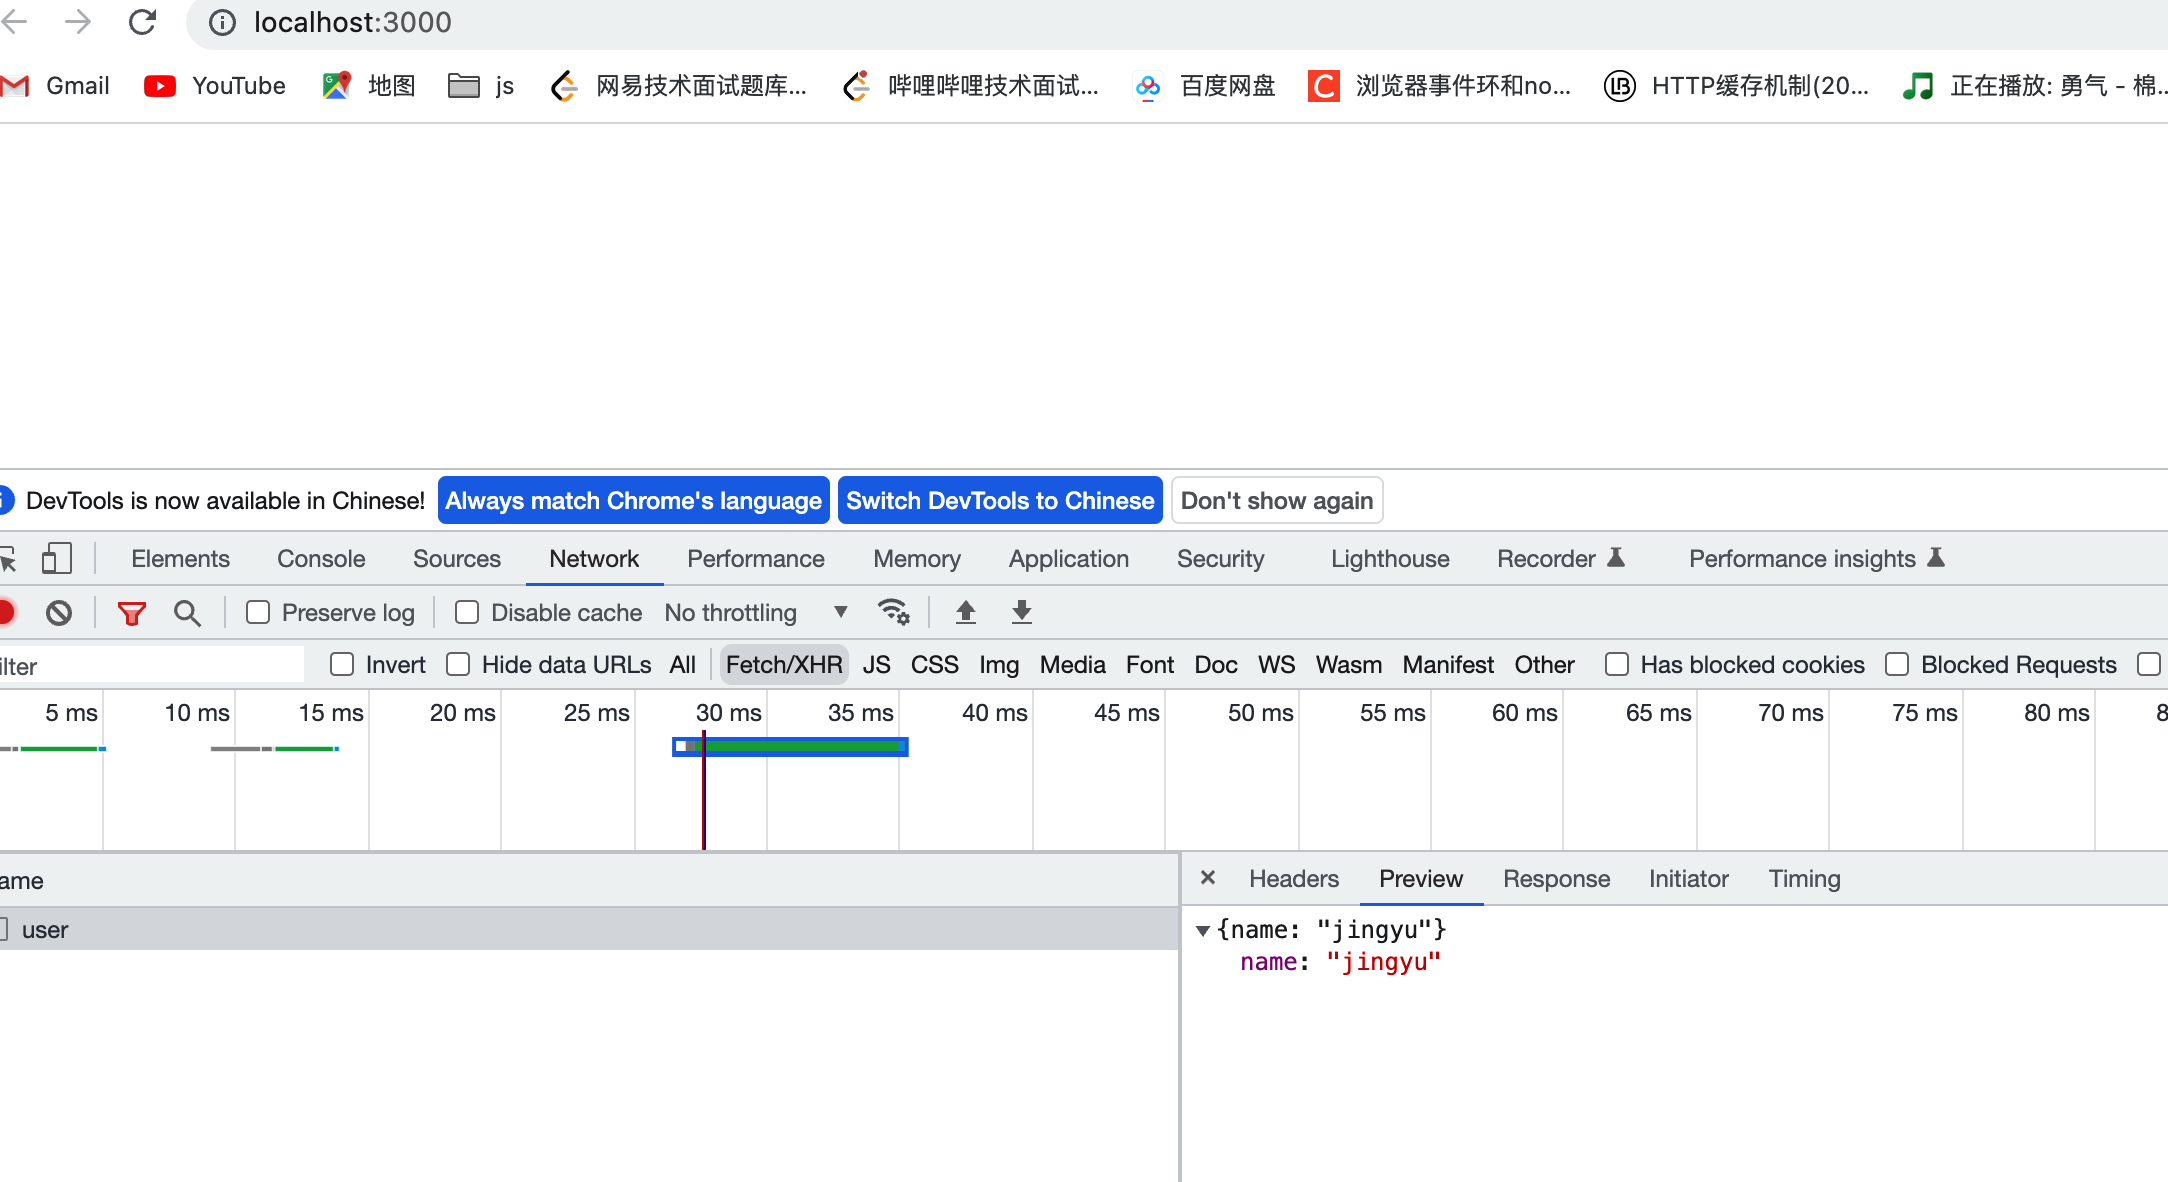
发现已经成功的请求到了。
裁剪url
但是当我们有多个接口的话,这种方式肯定不合理,如下:
/** ./webpack.config.js **///...module.exports = {devServer: {port: 3000, //打开端口open: true, //是否打开浏览器compress: true, //是否压缩static: './dist',proxy: {'/user':'http://localhost:4000','/user2':'http://localhost:4000','/user3':'http://localhost:4000',//...}}}//...
这个时候我们前端通常采用在 url 前加一个 api 前缀再访问,如下:
/** ./src/index.js **/const xhr = new XMLHttpRequest();xhr.open('get', '/api/user', true); // 添加一个 /api 前缀xhr.onload = () => {console.log(xhr.response);};xhr.send();
但是后端不会变还是没有 /api 的,所以在实际请求时需要裁剪掉这个api,实现如下:
/** ./webpack.config.js **///...module.exports = {devServer: {port: 3000, //打开端口open: true, //是否打开浏览器compress: true, //是否压缩static: './dist',proxy: {'/api':{ //跨域并且重写路径target:'http://localhost:4000',pathRewrite: { '^/api': '' }// 重写路径}}}}//...
这样子代码清爽了,接口又能正常访问,结果如下,和之前一致:

这种添加 api 的方式通常用于开发环境,生产环境不添加api,可以通过环境变量来控制。
代理https
/** ./webpack.config.js **///...module.exports = {devServer: {port: 3000, //打开端口open: true, //是否打开浏览器compress: true, //是否压缩static: './dist',proxy: {'/api':{ //跨域并且重写路径target:'https://localhost:4000',secure:false, //代理的是 httpspathRewrite: { '/api': '' }// 重写路径}}}}//...
解决跨域
我们在服务中打印一下 headers。
let express = require('express');let app = express();app.get('/user', function(req, res){console.log(req.headers);// 打印 headersres.json({name: 'jingyu' });})app.listen(4000);
{'if-none-match': 'W/"11-iy4ymcWRvFhbIwT9wbxYChwvRL0"','accept-language': 'zh-CN,zh;q=0.9','accept-encoding': 'gzip, deflate, br',referer: 'http://localhost:3000/','sec-fetch-dest': 'empty','sec-fetch-mode': 'cors','sec-fetch-site': 'same-origin',accept: '*/*','sec-ch-ua-platform': '"macOS"','user-agent': 'Mozilla/5.0 (Macintosh; Intel Mac OS X 10_15_7) AppleWebKit/537.36 (KHTML, like Gecko) Chrome/102.0.0.0 Safari/537.36','sec-ch-ua-mobile': '?0','sec-ch-ua': '" Not A;Brand";v="99", "Chromium";v="102", "Google Chrome";v="102"',connection: 'close',host: 'localhost:3000'}
这时我们发现 host 为 localhost:3000。
然后我们在 proxy 中 添加一个 changeOrigin 参数为 true
/** ./webpack.config.js **/
//...

module.exports = {
  devServer: {
    port: 3000, //打开端口
    open: true, //是否打开浏览器
    compress: true, //是否压缩
    static: './dist',
    proxy: {
      '/api':{ //跨域并且重写路径
        target:'https://localhost:4000',
        //secure:false, //代理的是 https
        changeOrigin: true, //主要是把 host 改成访问的服务器地址
        pathRewrite: { '/api': '' }// 重写路径
      }
    }
  }
}

//...
我们打印下 headers
{
  'if-none-match': 'W/"11-iy4ymcWRvFhbIwT9wbxYChwvRL0"',
  'accept-language': 'zh-CN,zh;q=0.9',
  'accept-encoding': 'gzip, deflate, br',
  referer: 'http://localhost:3000/',
  'sec-fetch-dest': 'empty',
  'sec-fetch-mode': 'cors',
  'sec-fetch-site': 'same-origin',
  accept: '*/*',
  'sec-ch-ua-platform': '"macOS"',
  'user-agent': 'Mozilla/5.0 (Macintosh; Intel Mac OS X 10_15_7) AppleWebKit/537.36 (KHTML, like Gecko) Chrome/102.0.0.0 Safari/537.36',
  'sec-ch-ua-mobile': '?0',
  'sec-ch-ua': '" Not A;Brand";v="99", "Chromium";v="102", "Google Chrome";v="102"',
  connection: 'close',
  host: 'localhost:4000'
}
这时我们就发现 host 变成了 localhost:4000。
这样可以避免服务器设置 host 限制的情况。
其它一些常用的参数

若有收获,就点个赞吧
0 人点赞
