①对称加密(同一密钥)
②非对称加密(公钥和私钥)
③哈希算法(单向生成摘要)
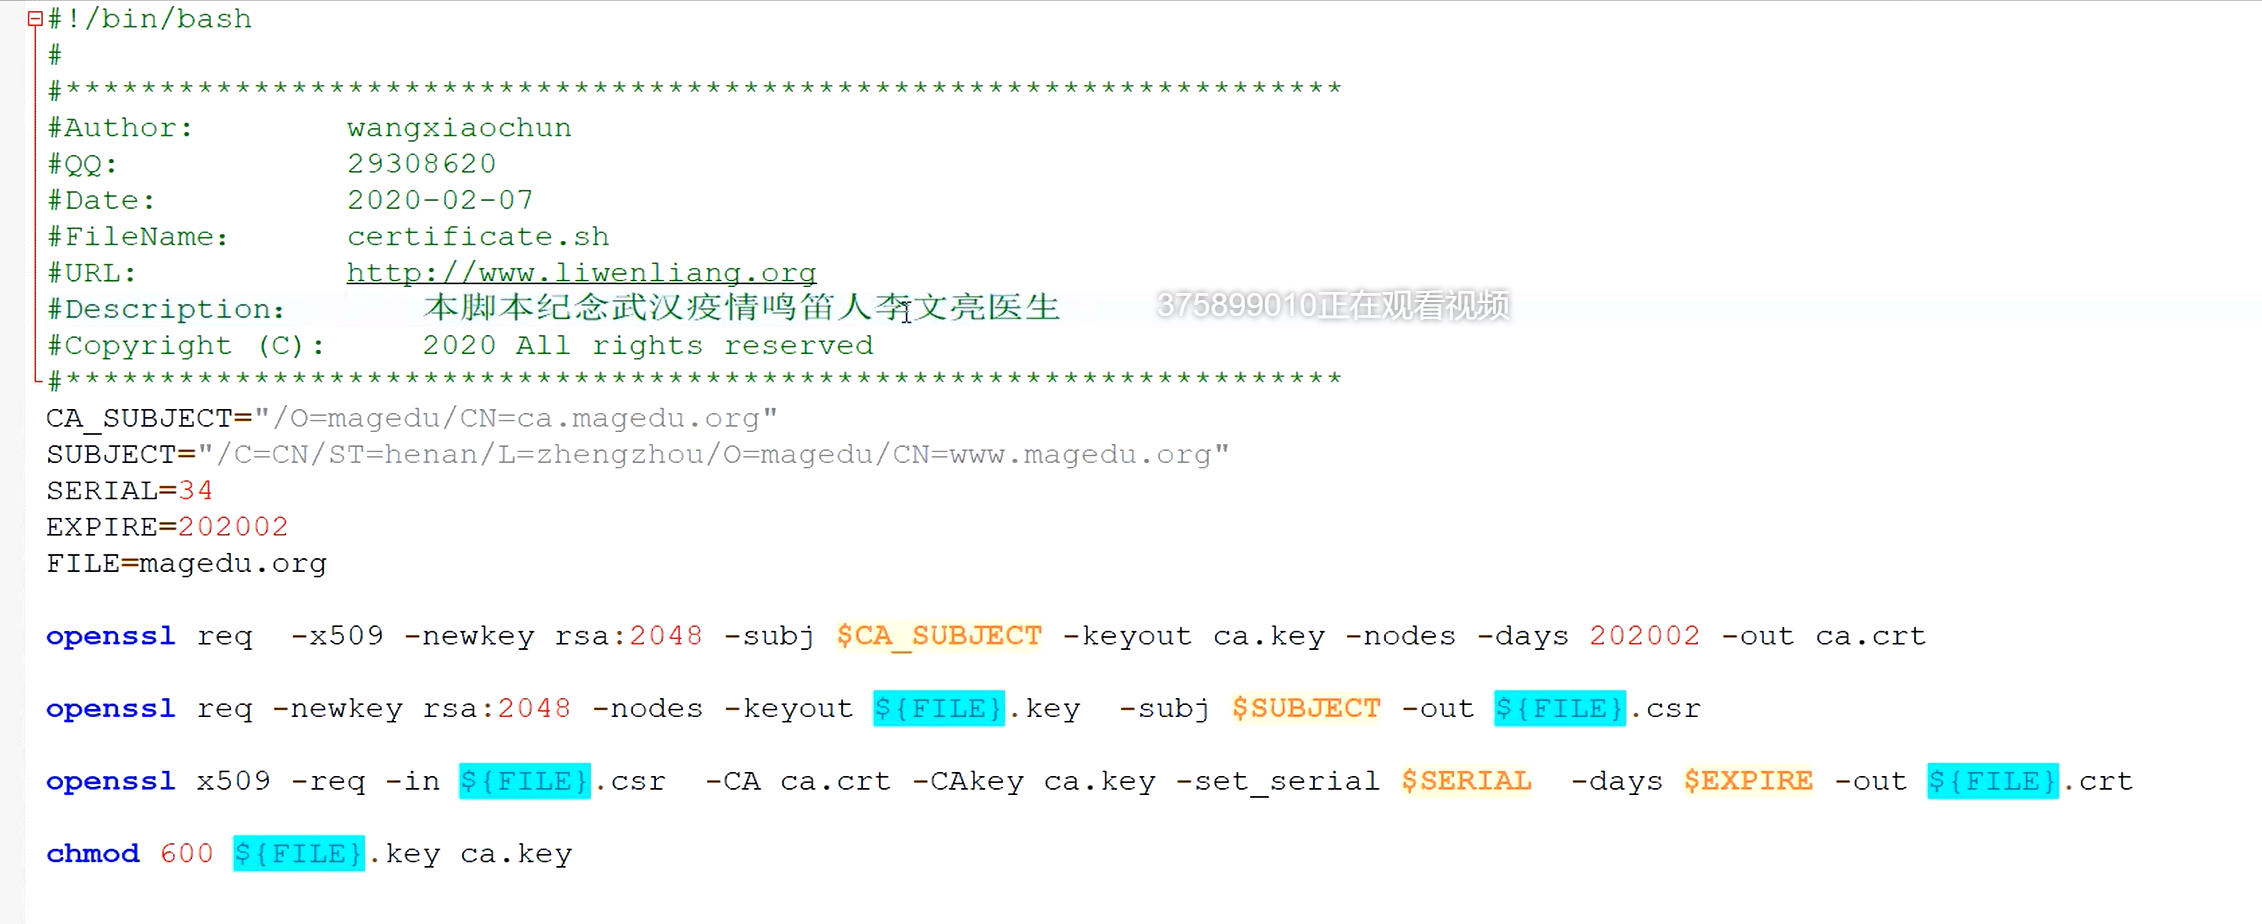
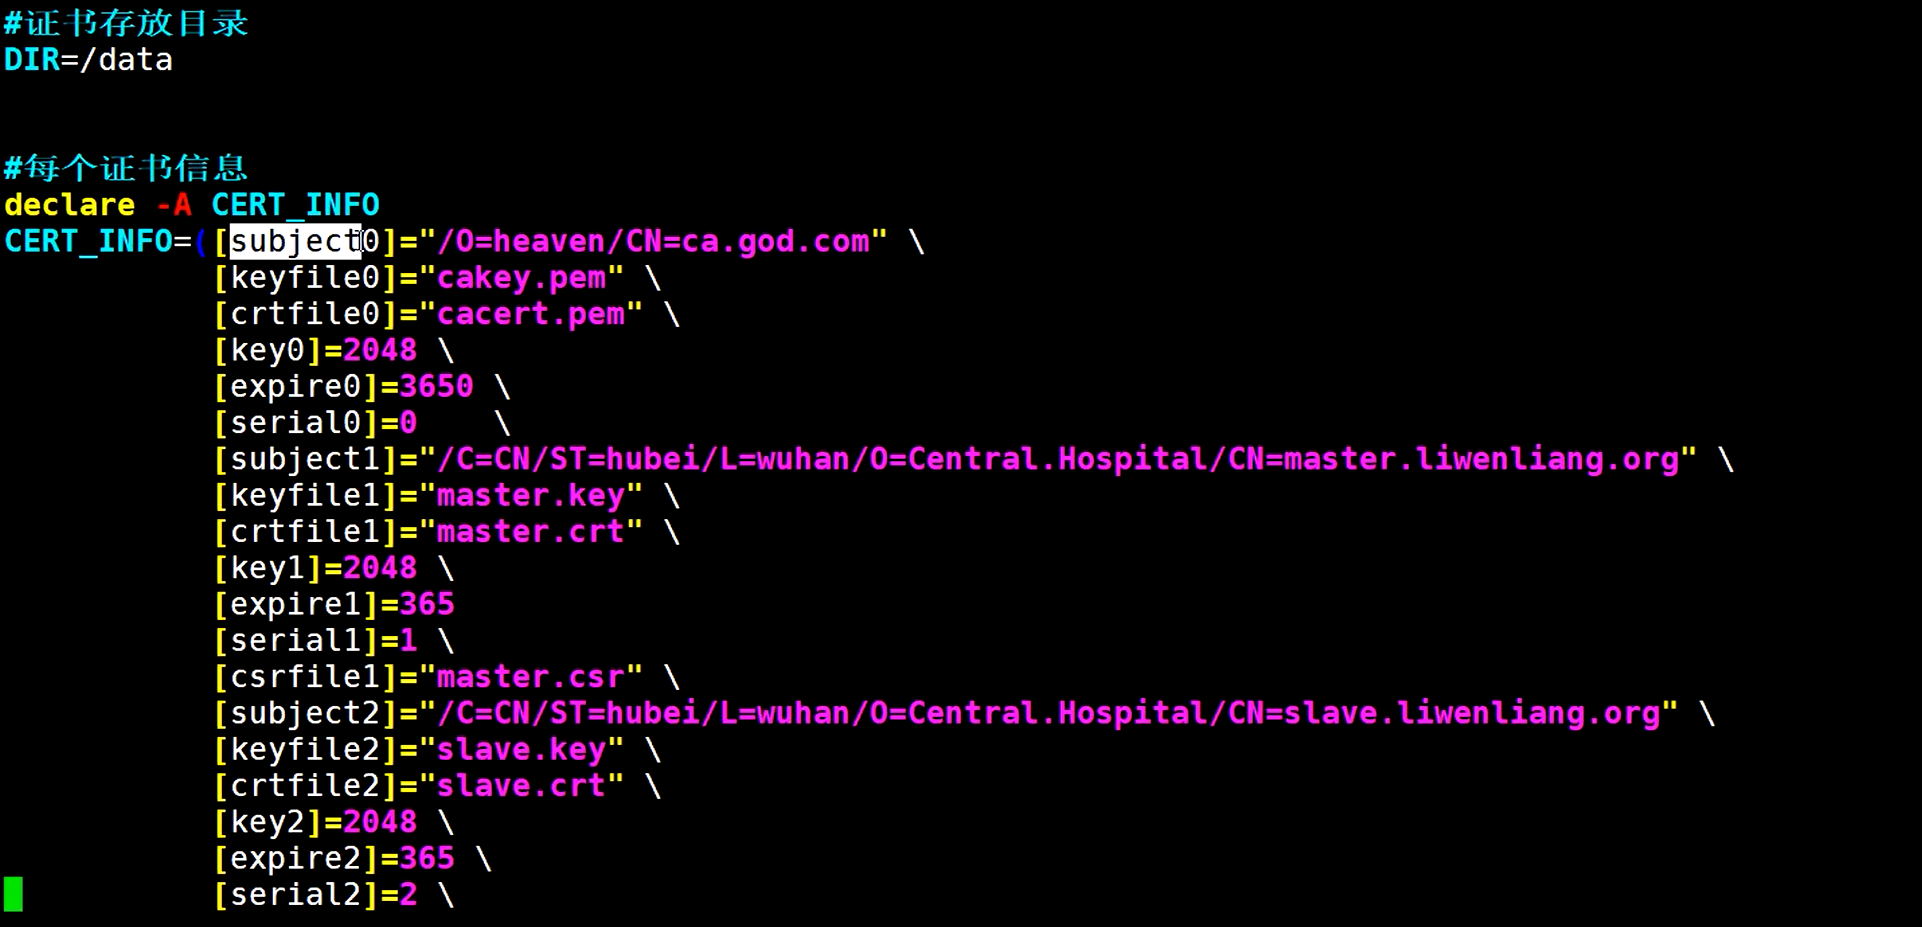
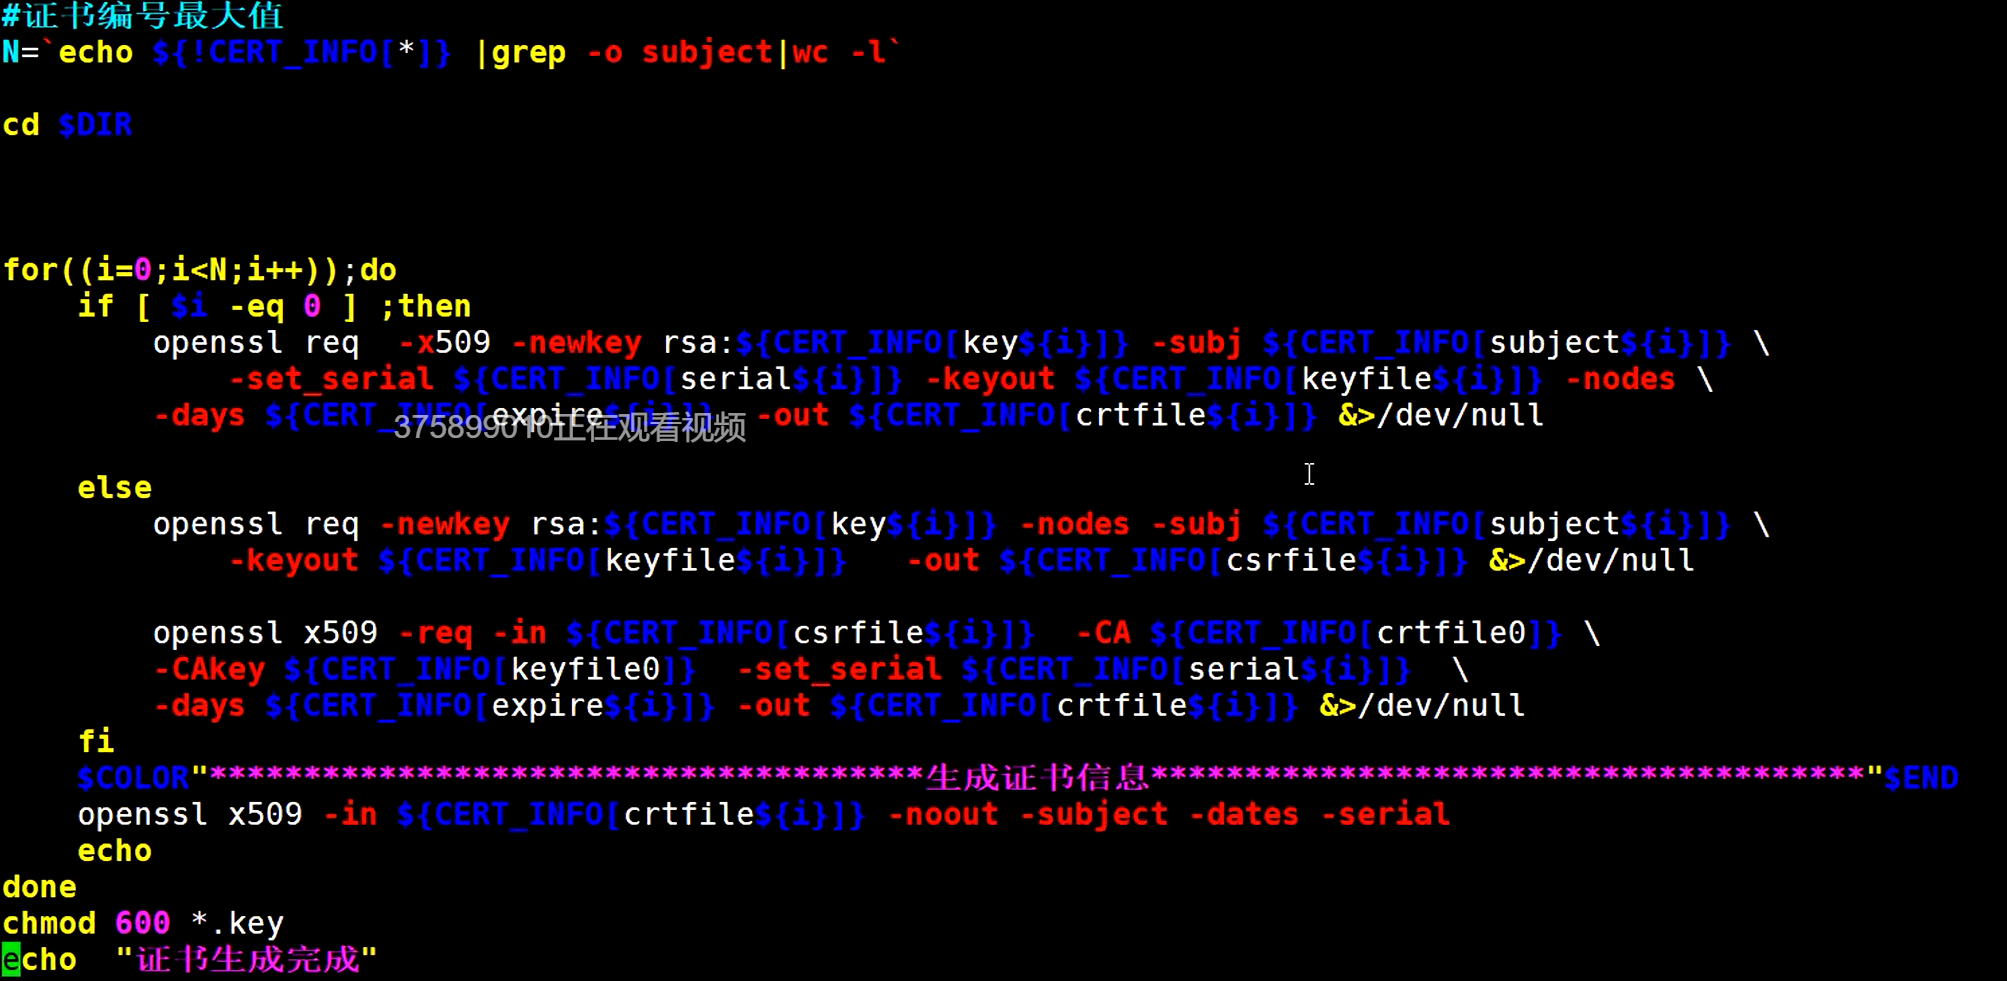
创建私有CA
[root@cent8 ~]$ echo welcom to learn ssl > /var/www/html/index.html★创建CA相关目录和文件[root@cent8 /etc/pki/CA]$ touch /etc/pki/CA/index.txt[root@cent8 /etc/pki/CA]$ echo 01 > /etc/pki/CA/serial★创建CA的私钥[root@cent8 /etc/pki/CA]$ openssl genrsa -out /etc/pki/CA/private/cakey.pem 2048Generating RSA private key, 2048 bit long modulus (2 primes)..............................................................................................................................+++++..................................................+++++e is 65537 (0x010001)★创给CA颁发自签名证书[root@cent8 /etc/pki/CA]$ openssl req -new -x509 -key /etc/pki/CA/private/cakey.pem -days 3650 -out /etc/pki/CA/cacert.pemYou are about to be asked to enter information that will be incorporatedinto your certificate request.What you are about to enter is what is called a Distinguished Name or a DN.There are quite a few fields but you can leave some blankFor some fields there will be a default value,If you enter '.', the field will be left blank.-----Country Name (2 letter code) [XX]:CNState or Province Name (full name) []:beijingLocality Name (eg, city) [Default City]:beijingOrganization Name (eg, company) [Default Company Ltd]:mageOrganizational Unit Name (eg, section) []:testCommon Name (eg, your name or your server's hostname) []:zyyEmail Address []:2298@qq.com[root@cent8 /etc/pki/CA]$ tree.├── cacert.pem├── certs├── crl├── index.txt├── newcerts├── private│ └── caky.pem└── serial[root@cent8 /etc/pki/CA]$ sz /etc/pki/CA/cacert.pem(改为.crt后缀)
★用户生成私钥openssl genrsa -out app1/app1.key★用户生成证书申请文件[root@cent8 ~]$ openssl req -new -key app1/app1.key -out app1/app1.csrYou are about to be asked to enter information that will be incorporatedinto your certificate request.What you are about to enter is what is called a Distinguished Name or a DN.There are quite a few fields but you can leave some blankFor some fields there will be a default value,If you enter '.', the field will be left blank.-----Country Name (2 letter code) [XX]:CNState or Province Name (full name) []:beijingLocality Name (eg, city) [Default City]:beijingOrganization Name (eg, company) [Default Company Ltd]:mageOrganizational Unit Name (eg, section) []:learnCommon Name (eg, your name or your server's hostname) []:zyyEmail Address []:zhuyuanyuanPlease enter the following 'extra' attributesto be sent with your certificate requestA challenge password []:zhuyuanyAn optional company name []:magee★CA证书颁发openssl ca -in app1/app1.csr -out /etc/pki/CA/certs/app1.crt -days 365sz /etc/pki/CA/certs/app1.crt
ssh服务器配置
1.在ubuntu上启用root远程ssh登录
2.解决ssh登录缓慢的问题
服务器端的配置文件: /etc/ssh/sshd_config
Port
ListenAddress ip
LoginGraceTime 2m
PermitRootLogin yes #######默认ubuntu不允许root远程ssh登录
prohibit-password
StrictModes yes #检查.ssh/文件的所有者,权限等
MaxAuthTries 6 #
MaxSessions 10 #同一个连接最大会话
PubkeyAuthentication yes #基于key验证
PermitEmptyPasswords no #空密码连接
PasswordAuthentication yes #基于用户名和密码连接
GatewayPorts no
ClientAliveInterval 10 #单位:秒
ClientAliveCountMax 3 #默认3
UseDNS yes ##############提高速度可改为no
GSSAPIAuthentication yes ##############提高速度可改为no
MaxStartups #未认证连接最大值,默认值10
Banner /path/file
#以下可以限制可登录用户的办法:
AllowUsers user1 user2 user3
DenyUsers
AllowGroups
DenyGroups
PAM
模块文件目录 /lib64/security/
特定模块配置 /etc/security/module_name.conf

通用配置文件一般无 /etc/pam.conf
应用模块的专用配置 /etc/pam.d/app_name
时间同步服务
#私有服务端
[root@cent-8 ~]$ yum install chrony -y;systemctl enable --now chronyd
[root@cent-8 ~]$ vim /etc/chrony.conf
server time1.cloud.tencent.com iburst
server time2.cloud.tencent.com iburst
allow 10.0.0.0/24
[root@cent-8 ~]$ systemctl restart chronyd
[root@cent8 ~]$ chronyc accheck 10.0.0.18
208 Access allowed
#私有客户端
[root@cent-8 ~]$ yum install chrony -y;systemctl enable --now chronyd
[root@cent-8 ~]$ ss -untl
udp     UNCONN   0        0               127.0.0.1:323             0.0.0.0:*
udp     UNCONN   0        0                   [::1]:323                [::]:*

[root@cent-8 ~]$ date -s "2016-09-10 14:24:34"

[root@cent-8 ~]$ vim /etc/chrony.conf
server 10.0.0.8
[root@cent-8 ~]$ chronyc sources -v
210 Number of sources = 1

  .-- Source mode  '^' = server, '=' = peer, '#' = local clock.
 / .- Source state '*' = current synced, '+' = combined , '-' = not combined,
| /   '?' = unreachable, 'x' = time may be in error, '~' = time too variable.
||                                                 .- xxxx [ yyyy ] +/- zzzz
||      Reachability register (octal) -.           |  xxxx = adjusted offset,
||      Log2(Polling interval) --.      |          |  yyyy = measured offset,
||                                \     |          |  zzzz = estimated error.
||                                 |    |           \
MS Name/IP address         Stratum Poll Reach LastRx Last sample
===============================================================================
^* 10.0.0.8                      3   6    37    28  +1461ns[  +95us] +/-   30ms
[root@cent-8 ~]$ date
Wed Nov 17 01:11:31 CST 2021


