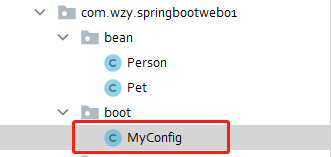
第一步:创建Bean类Person。
package com.wzy.springbootweb01.bean;@Data//提供Getter、Setter方法。public class Person {private String userName;private Integer age;}
第二步:在文件配置类中配置各种数据格式。
package com.wzy.springbootweb01.boot;@Configuration/*(proxyBeanMethods = false)*/public class MyConfig {@Beanpublic WebMvcConfigurer webMvcConfigurer(){//增强功能return new WebMvcConfigurer() {//自定义协商策略@Overridepublic void configureContentNegotiation(ContentNegotiationConfigurer configurer) {HashMap<String, MediaType> mediaTypes = new HashMap<>();//json格式数据适配mediaTypes.put("json",MediaType.APPLICATION_JSON);//XML格式数据适配mediaTypes.put("xml",MediaType.APPLICATION_XML);//gg格式数据适配mediaTypes.put("gg",MediaType.parseMediaType("application/x-guigu"));ParameterContentNegotiationStrategy parameterStrategy= new ParameterContentNegotiationStrategy(mediaTypes);configurer.strategies(Arrays.asList(parameterStrategy));}};}}
第四步:创建MyController处理器对象类。
package com.wzy.springbootweb01.controller;@Controller//创建处理器对象,并把处理器对象中,处理器方法处理的结果输出到浏览器。public class MyConyroller11Json {@ResponseBody@RequestMapping(value = "getJson",method = RequestMethod.GET)public Person getJson(){Person person = new Person();person.setUserName("张三");person.setAge(25);return person;}}
测试:json

