构建聚合工程
Maven 有三种打包方式:pom war jar
jar:默认的打包方式,通用工具类,可以被其他工程的 pom文件中引用
war:打包成 war,可以发布在服务器上
pom:用在聚合工程中,可以对 jar 包统一版本控制,被继承的对象
聚合工程可以分为 顶级工程与子工程,在 maven 里称为模块(module),
模块间平级,可以互相依赖
子模块可以使用顶级工程里的所有资源(依赖),子模块间如果要使用资源,必须构建依赖
新建 Maven 工程
在 pom 文件中指定 pom 打包方式
<!--打包方式--><packaging>pom</packaging>
创建子工程
common
右键 项目根目录,New 一个 Module mail-common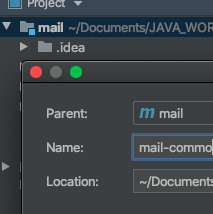
新建后会在顶级工程 pom 中自动增加 modules
<modules>
  <module>big-proj-common</module>
</modules>
pojo
创建一个新的子工程 mail-pojo
pojo 可以在 pom 文件中配置依赖 common,从而使用 pojo 中的工具类
<dependencies>
  <dependency>
    <groupId>com.ylq</groupId>
    <artifactId>mail-common</artifactId>
    <version>1.0-SNAPSHOT</version>
  </dependency>
</dependencies>
mapper
数据层使用 Mybatis 所以起名为 mapper
由于数据层常常要需要实体类 所以 mapper 需要依赖 pojo
<dependencies>
  <dependency>
    <groupId>com.ylq</groupId>
    <artifactId>mail-pojo</artifactId>
    <version>1.0-SNAPSHOT</version>
  </dependency>
</dependencies>
由于 pojo 依赖了 common,所以 mapper 也可以使用 common 中的类
service
同理 service 依赖 mapper
api
同理 api 依赖 service
安装
IDEA 中创建完子模块并编写依赖关系后并不能立即使用,还需要安装
打开侧边栏的 Maven 按钮,—> root —>Lifecycle —> 双击install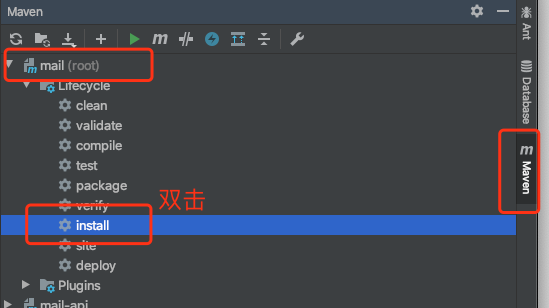
成功会提示
[INFO] BUILD SUCCESS
[INFO] ------------------------------------------------------------------------
[INFO] Total time:  4.563 s
整合 Spring Boot
引入依赖 parent
顶级项目添加 Spring Boot parent 依赖
Spring Boot 的所有工具版本都由这个父级依赖管理
<parent>
    <groupId>org.springframework.boot</groupId>
    <artifactId>spring-boot-starter-parent</artifactId>
    <version>2.1.5.RELEASE</version>
    <relativePath />
</parent>
设置资源属性
源码 和 output 的编码方式 与 jdk 版本
<properties>
    <project.build.sourceEncoding>UTF-8</project.build.sourceEncoding>
    <project.reporting.outputEncoding>UTF-8</project.reporting.outputEncoding>
    <java.version>1.8</java.version>
</properties>
其他依赖
<dependencies>
    <dependency>
        <groupId>org.springframework.boot</groupId>
        <artifactId>spring-boot-starter</artifactId>
        <exclusions>
            <exclusion>
                <groupId>org.springframework.boot</groupId>
                <artifactId>spring-boot-starter-logging</artifactId>
            </exclusion>
        </exclusions>
    </dependency>
    <dependency>
        <groupId>org.springframework.boot</groupId>
        <artifactId>spring-boot-starter-web</artifactId>
    </dependency>
    <dependency>
        <groupId>org.springframework.boot</groupId>
        <artifactId>spring-boot-configuration-processor</artifactId>
        <optional>true</optional>
    </dependency>
</dependencies>
由于后续会整合其他的日志,所以要排除 Spring Boot 自带的日志
starter-web: Spring 的 web 模块
configuration-processor:Spring Boot 默认解析 yml 文件,如果项目中使用了其他文件需要解析配置,就需要引入这个组件
由于是聚合工程需要再次 打开 侧边栏的 Maven 运行安装
创建启动类
在 api 模块 的 src/main/java/ 创建包和启动类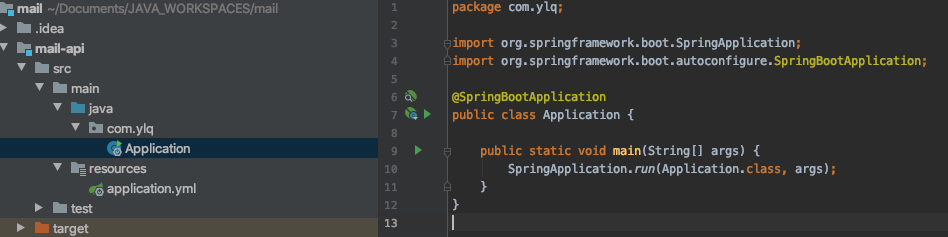
在 resources 下创建 yml 文件
创建 controller 包 和 HelloController
@RestController
public class HelloController {
    @GetMapping("/hello")
    public Object hello() {
        return "Hello World!";
    }
}
直接右键 Run Application 完成启动。

若有收获,就点个赞吧
0 人点赞
