- 为什么要学习Shell 编程
- Shell 是什么
- Shell 脚本的执行方式
- !/bin/bash
- 移除执行权限,直接sh+脚本执行
- 被注释内容
- !/bin/bash
- 案例 1:定义变量 A
- 输出变量需要加上$
- 案例 2:撤销变量 A
- 案例 3:声明静态的变量 B=2,不能 unset
- !/bin/bash
- 案例 1:定义变量 A
- 输出变量需要加上$
- 案例 2:撤销变量 A
- 案例 3:声明静态的变量 B=2,不能 unset
- !/bin/bash
- 案例 1:定义变量 A
- 输出变量需要加上$
- 案例 2:撤销变量 A
- 案例 3:声明静态的变量 B=2,不能 unset
- 定义一个环境变量
- /etc/profile
- System wide environment and startup programs, for login setup
- Functions and aliases go in /etc/bashrc
- It’s NOT a good idea to change this file unless you know what you
- are doing. It’s much better to create a custom.sh shell script in
- /etc/profile.d/ to make custom changes to your environment, as this
- will prevent the need for merging in future updates.
- Path manipulation
- By default, we want umask to get set. This sets it for login shell
- Current threshold for system reserved uid/gids is 200
- You could check uidgid reservation validity in
- /usr/share/doc/setup-*/uidgid file
- !/bin/bash
- !/bin/bash
- 以后台的方式执行一个脚本,并获取他的进程号
- !/bin/bash
- 案例 1:计算(2+3)X4 的值
- 使用第一种方式
- 使用第二种方式 推荐使用
- 使用第三种方式
- 案例 2:请求出命令行的两个参数[整数]的和 20 50
- !/bin/bash
- 案例 1:计算(2+3)X4 的值
- 使用第一种方式
- 使用第二种方式 推荐使用
- 使用第三种方式
- 案例 2:请求出命令行的两个参数[整数]的和 20 50
- 非空返回 true,可使用$?验证(0 为 true,>1 为 false)
- !/bin/bash
- 案例 1:”ok”是否等于”ok”
- 判断语句:使用 =
- !/bin/bash
- 案例 1:”ok”是否等于”ok”
- 判断语句:使用 =
- 案例 2:23 是否大于等于 22
- 判断语句:使用 -ge
- 流程控制
- read 读取控制台输入
- 函数
- Shell 编程综合案例
- 准备数据库
- 编写脚本
- !/bin/bash
- 备份目录
- 当前时间
- 数据库地址
- 数据库用户名
- 数据库密码
- 备份的数据库名
- 创建备份目录,如果不存在,就创建
- 备份数据库
- 将文件处理成 tar.gz
- 删除对应的备份目录
- 删除10天前的备份文件
- 设置定时任务
为什么要学习Shell 编程
Linux 运维工程师在进行服务器集群管理时,需要编写 Shell 程序来进行服务器管理。
对于 JavaEE 和 Python 程序员来说,工作的需要,你的老大会要求你编写一些 Shell 脚本进行程序或者是服务器的维护,比如编写一个定时备份数据库的脚本。
对于大数据程序员来说,需要编写 Shell 程序来管理集群
Shell 是什么
Shell 是一个命令行解释器,它为用户提供了一个向 Linux 内核发送请求以便运行程序的界面系统级程序,用户可以用 Shell 来启动、挂起、停止甚至是编写一些程序
Shell 脚本的执行方式
脚本格式要求
- 脚本以#!/bin/bash 开头
- 脚本需要有可执行权限
编写第一个Shell 脚本
需求说明:创建一个 Shell 脚本,输出 hello world! ``` [root@localhost shcode]# vim hello.sh [root@localhost shcode]# cat hello.sh!/bin/bash
echo “hello,world!” [root@localhost shcode]# ll 总用量 4 -rw-r—r—. 1 root root 32 1月 19 21:02 hello.sh [root@localhost shcode]# ./hello.sh -bash: ./hello.sh: 权限不够 [root@localhost shcode]# chmod u+x hello.sh [root@localhost shcode]# ll 总用量 4 -rwxr—r—. 1 root root 32 1月 19 21:02 hello.sh [root@localhost shcode]# ./hello.sh hello,world! [root@localhost shcode]# /root/shcode/hello.sh hello,world!
移除执行权限,直接sh+脚本执行
[root@localhost shcode]# chmod u-x hello.sh [root@localhost shcode]# ll 总用量 4 -rw-r—r—. 1 root root 32 1月 19 21:02 hello.sh [root@localhost shcode]# sh hello.sh hello,world!
<a name="q3trz"></a>## 脚本的常用执行方式方式 1(输入脚本的绝对路径或相对路径)<br />说明:首先要赋予 helloworld.sh 脚本的+x 权限, 再执行脚本<br />比如 ./hello.sh <br />或者使用绝对路径 /root/shcode/hello.sh<br />方式 2(sh+脚本)<br />说明:不用赋予脚本+x 权限,直接执行即可。<br />比如 sh hello.sh , 也可以使用绝对路径<a name="pCPSr"></a># Shell 的变量<a name="WcOSg"></a>## Shell 变量介绍Linux Shell 中的变量分为,系统变量和用户自定义变量。<br />系统变量:$HOME、$PWD、$SHELL、$USER 等等,比如: echo $HOME 等等..<br />显示当前 shell 中所有变量:set<a name="JAODt"></a>## shell 变量的定义<a name="eDAAy"></a>### 基本语法
定义变量:变量名=值 撤销变量:unset 变量 声明静态变量:readonly 变量,注意:不能 unset
单行注释
被注释内容
多行注释 :<<! 被注释内容 !
<a name="Ma4LM"></a>### 定义变量的规则- 变量名称可以由字母、数字和下划线组成,但是不能以数字开头。5A=200 (×)- 等号两侧不能有空格 A = 100 (x)- 变量名称一般习惯为大写, 这是一个规范,我们遵守即可- 将命令的返回值赋给变量- A=`date`反引号,运行里面的命令,并把结果返回给变量 A- A=$(date) 等价于反引号<a name="eJkvI"></a>### 快速入门> 案例 1:定义变量 A
[root@localhost shcode]# vim var.sh [root@localhost shcode]# cat var.sh
!/bin/bash
案例 1:定义变量 A
A=100
输出变量需要加上$
echo $A
案例 2:撤销变量 A
案例 3:声明静态的变量 B=2,不能 unset
[root@localhost shcode]# chmod u+x var.sh [root@localhost shcode]# ll 总用量 8 -rw-r—r—. 1 root root 32 1月 19 21:02 hello.sh -rwxr—r—. 1 root root 162 1月 19 21:17 var.sh [root@localhost shcode]# ./var.sh 100
> 案例 2:撤销变量 A
[root@localhost shcode]# vim var.sh [root@localhost shcode]# cat var.sh
!/bin/bash
案例 1:定义变量 A
A=100
输出变量需要加上$
echo A=$A echo “A=$A”
案例 2:撤销变量 A
unset A echo “A=$A”
案例 3:声明静态的变量 B=2,不能 unset
[root@localhost shcode]# ./var.sh A=100 A=100 A=
> 案例 3:声明静态的变量 B=2,不能 unset
[root@localhost shcode]# vim var.sh [root@localhost shcode]# cat var.sh
!/bin/bash
案例 1:定义变量 A
A=100
输出变量需要加上$
echo A=$A echo “A=$A”
案例 2:撤销变量 A
unset A echo “A=$A”
案例 3:声明静态的变量 B=2,不能 unset
readonly B=2 echo “B=$B” unset B [root@localhost shcode]# ./var.sh A=100 A=100 A= B=2 ./var.sh: 第 13 行:unset: B: 无法反设定: 只读 variable
> 案例 4:可把变量提升为全局环境变量,可供其他 shell 程序使用<a name="j7uQf"></a># 设置环境变量<a name="njiTb"></a>## 基本语法
export 变量名=变量值 (功能描述:将shell 变量输出为环境变量/全局变量) source 配置文件 (功能描述:让修改后的配置信息立即生效) echo $变量名 (功能描述:查询环境变量的值)
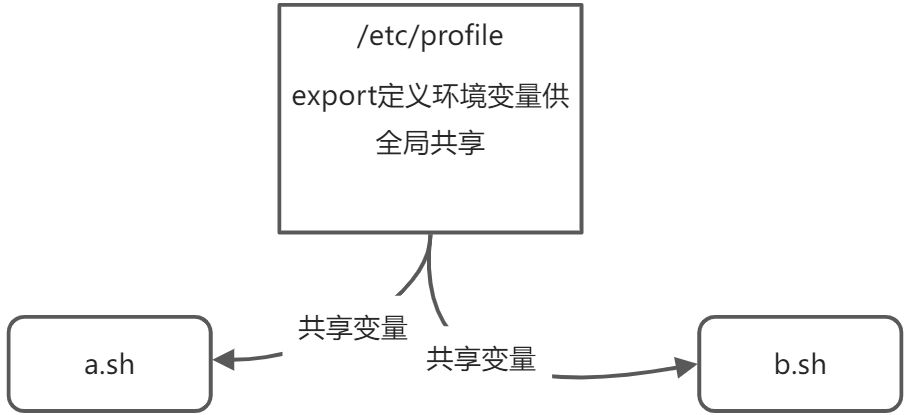<a name="o6FW1"></a>## 快速入门- 在/etc/profile 文件中定义 TOMCAT_HOME 环境变量- 查看环境变量 TOMCAT_HOME 的值- 在另外一个 shell 程序中使用 TOMCAT_HOME- 注意:在输出 TOMCAT_HOME 环境变量前,需要让其生效source /etc/profile
[root@localhost opt]# vim /etc/profile [root@localhost opt]# cat /etc/profile export JAVA_HOME=/usr/local/java/jdk1.8.0_261 export PATH=$JAVA_HOME/bin:$PATH
定义一个环境变量
export TOMCAT_HOME=/opt/tomcat
/etc/profile
System wide environment and startup programs, for login setup
Functions and aliases go in /etc/bashrc
It’s NOT a good idea to change this file unless you know what you
are doing. It’s much better to create a custom.sh shell script in
/etc/profile.d/ to make custom changes to your environment, as this
will prevent the need for merging in future updates.
pathmunge () { case “:${PATH}:” in :”$1”:) ;; *) if [ “$2” = “after” ] ; then PATH=$PATH:$1 else PATH=$1:$PATH fi esac }
if [ -x /usr/bin/id ]; then if [ -z “$EUID” ]; then
# ksh workaroundEUID=`/usr/bin/id -u`UID=`/usr/bin/id -ru`fiUSER="`/usr/bin/id -un`"LOGNAME=$USERMAIL="/var/spool/mail/$USER"
fi
Path manipulation
if [ “$EUID” = “0” ]; then pathmunge /usr/sbin pathmunge /usr/local/sbin else pathmunge /usr/local/sbin after pathmunge /usr/sbin after fi
HOSTNAME=/usr/bin/hostname 2>/dev/null
HISTSIZE=1000
if [ “$HISTCONTROL” = “ignorespace” ] ; then
export HISTCONTROL=ignoreboth
else
export HISTCONTROL=ignoredups
fi
export PATH USER LOGNAME MAIL HOSTNAME HISTSIZE HISTCONTROL
By default, we want umask to get set. This sets it for login shell
Current threshold for system reserved uid/gids is 200
You could check uidgid reservation validity in
/usr/share/doc/setup-*/uidgid file
if [ $UID -gt 199 ] && [ “/usr/bin/id -gn“ = “/usr/bin/id -un“ ]; then
umask 002
else
umask 022
fi
for i in /etc/profile.d/.sh /etc/profile.d/sh.local ; do if [ -r “$i” ]; then if [ “${-#i}” != “$-“ ]; then . “$i” else . “$i” >/dev/null fi fi done
unset i unset -f pathmunge [root@localhost opt]# echo $TOMCAT_HOME
[root@localhost opt]# source /etc/profile [root@localhost opt]# echo $TOMCAT_HOME /opt/tomcat
<a name="eeoTo"></a># 位置参数变量<a name="QaH1w"></a>## 介绍当我们执行一个 shell 脚本时,如果希望获取到命令行的参数信息,就可以使用到位置参数变量<br />比如 : ./myshell.sh 100 200 , 这个就是一个执行 shell 的命令行,可以在 myshell 脚本中获取到参数信息<a name="xrBmt"></a>## 基本语法
$n (功能描述:n 为数字,$0 代表命令本身,$1-$9 代表第一到第九个参数,十以上的参数,十以上的参数需要用大括号包含,如${10}) $ (功能描述:这个变量代表命令行中所有的参数,$把所有的参数看成一个整体) $@ (功能描述:这个变量也代表命令行中所有的参数,不过$@把每个参数区分对待) $# (功能描述:这个变量代表命令行中所有参数的个数)
<a name="UTWcG"></a>## 案例> 编写一个 shell 脚本 position.sh , 在脚本中获取到命令行的各个参数信息。
[root@localhost shcode]# vim position.sh [root@localhost shcode]# cat position.sh
!/bin/bash
echo “0=$0 1=$1 2=$2” echo “所有的参数=$*” echo “$@” echo “参数的个数=$#” [root@localhost shcode]# chmod u+x position.sh [root@localhost shcode]# ./position.sh 0=./position.sh 1= 2= 所有的参数=
参数的个数=0 [root@localhost shcode]# ./position.sh 100 200 300 0=./position.sh 1=100 2=200 所有的参数=100 200 300 100 200 300 参数的个数=3
<a name="MsVGN"></a># 预定义变量<a name="aWUj0"></a>## 介绍就是 shell 设计者事先已经定义好的变量,可以直接在 shell 脚本中使用<a name="zMXHn"></a>## 基本语法
$$ (功能描述:当前进程的进程号(PID)) $! (功能描述:后台运行的最后一个进程的进程号(PID)) $?(功能描述:最后一次执行的命令的返回状态。如果这个变量的值为 0,证明上一个命令正确执行;如果这个变量的值为非 0(具体是哪个数,由命令自己来决定),则证明上一个命令执行不正确了。)
<a name="yNDGs"></a>## 应用实例> 在一个 shell 脚本中简单使用一下预定义变量 preVar.sh
[root@localhost shcode]# vim preVar.sh [root@localhost shcode]# cat preVar.sh
!/bin/bash
echo “当前执行的进程ID=$$”
以后台的方式执行一个脚本,并获取他的进程号
/root/shcode/position.sh & echo “最后一个后台方式运行的进程ID=$!” echo “执行的结果是=$?” [root@localhost shcode]# chmod u+x preVar.sh [root@localhost shcode]# ./preVar.sh 当前执行的进程ID=69365 最后一个后台方式运行的进程ID=69366 执行的结果是=0 [root@localhost shcode]# 0=/root/shcode/position.sh 1= 2= 所有的参数=
参数的个数=0 ^C
<a name="V7olr"></a># 运算符<a name="KP9b8"></a>## 基本介绍学习如何在 shell 中进行各种运算操作<a name="yZePl"></a>## 基本语法
“$((运算式))”或”$[运算式]”或者 expr m + n //expression 表达式 注意 expr 运算符间要有空格 如果希望将 expr 的结果赋给某个变量,使用 `` expr m - n expr *, /, % 乘,除,取余
<a name="oLChE"></a>## 应用实例> 案例 1:计算(2+3)X4 的值
[root@localhost shcode]# vim oper.sh [root@localhost shcode]# cat oper.sh
!/bin/bash
案例 1:计算(2+3)X4 的值
使用第一种方式
RES1=$(((2+3)*4)) echo “res1=$RES1”
使用第二种方式 推荐使用
RES2=$[(2+3)*4] echo “res2=$RES2”
使用第三种方式
TEMP=expr 2 + 3
RES4=expr $TEMP \* 4
echo “temp=$TEMP”
echo “res4=$RES4”
案例 2:请求出命令行的两个参数[整数]的和 20 50
[root@localhost shcode]# chmod u+x oper.sh [root@localhost shcode]# ./oper.sh res1=20 res2=20 temp=5 res4=20
> 案例 2:请求出命令行的两个参数[整数]的和 20 50
[root@localhost shcode]# vim oper.sh [root@localhost shcode]# cat oper.sh
!/bin/bash
案例 1:计算(2+3)X4 的值
使用第一种方式
RES1=$(((2+3)*4)) echo “res1=$RES1”
使用第二种方式 推荐使用
RES2=$[(2+3)*4] echo “res2=$RES2”
使用第三种方式
TEMP=expr 2 + 3
RES4=expr $TEMP \* 4
echo “temp=$TEMP”
echo “res4=$RES4”
案例 2:请求出命令行的两个参数[整数]的和 20 50
SUM=$[$1+$2] echo “sum=$SUM” [root@localhost shcode]# ./oper.sh 1 2 res1=20 res2=20 temp=5 res4=20 sum=3
<a name="Q0yYE"></a># 条件判断<a name="gbKzx"></a>## 基本语法
[ condition ](注意 condition 前后要有空格)
非空返回 true,可使用$?验证(0 为 true,>1 为 false)
<a name="d8F5A"></a>## 应用实例[ hspEdu ] 返回 true <br />[ ] 返回 false<br />[ condition ] && echo OK || echo notok 条件满足,执行后面的语句<a name="POf8r"></a>## 判断语句
常用判断条件 1) = 字符串比较
2)两个整数的比较 -lt 小 于 little -le 小于等于 little equal -eq 等 于 equal -gt 大 于 greater -ge 大于等于 greater equal -ne 不等于 not equal
3)按照文件权限进行判断 -r 有读的权限 -w 有写的权限 -x 有执行的权限
4)按照文件类型进行判断 -f 文件存在并且是一个常规的文件 -e 文件存在 -d 文件存在并是一个目录
<a name="fTqta"></a>## 应用实例> 案例 1:"ok"是否等于"ok"判断语句:使用 =
[root@localhost shcode]# cat ifdemo.sh
!/bin/bash
案例 1:”ok”是否等于”ok”
判断语句:使用 =
if [ “ok” = “ok” ] then echo “equal” fi
[root@localhost shcode]# ./ifdemo.sh equal
> 案例 2:23 是否大于等于 22判断语句:使用 -ge
[root@localhost shcode]# cat ifdemo.sh
!/bin/bash
案例 1:”ok”是否等于”ok”
判断语句:使用 =
if [ “ok” = “ok” ] then echo “equal” fi
案例 2:23 是否大于等于 22
判断语句:使用 -ge
if [ 23 -ge 22 ] then echo “大于” fi
[root@localhost shcode]# ./ifdemo.sh equal 大于
> 案例 3:/root/shcode/aaa.txt 目录中的文件是否存在判断语句: 使用 -f```shell[root@localhost shcode]# cat ifdemo.sh#!/bin/bash#案例 1:"ok"是否等于"ok"#判断语句:使用 =if [ "ok" = "ok" ]thenecho "equal"fi#案例 2:23 是否大于等于 22#判断语句:使用 -geif [ 23 -ge 22 ]thenecho "大于"fi#案例 3:/root/shcode/aaa.txt 目录中的文件是否存在#判断语句: 使用 -fif [ -f /root/shcode/aaa.txt ]thenecho "存在"fi#看几个案例if [ hspedu ]thenecho "hello,hspedu"fi[root@localhost shcode]# ./ifdemo.shequal大于存在hello,hspedu
流程控制
if 判断
基本语法
if [ 条件判断式 ]then代码fi或者多分支if [ 条件判断式 ]then代码elif [ 条件判断式 ]then代码fi注意事项:[ 条件判断式 ],中括号和条件判断式之间必须有空格
应用实例
请编写一个 shell 程序,如果输入的参数,大于等于 60,则输出 “及格了”,如果小于 60,则输出 “不及格”
[root@localhost shcode]# vim ifCase.sh[root@localhost shcode]# cat ifCase.sh#!/bin/bash#案例:请编写一个 shell 程序,如果输入的参数,大于等于 60,则输出 "及格了",如果小于 60,则输出 "不及格"if [ $1 -ge 60 ]thenecho "及格了"elif [ $1 -lt 60 ]thenecho "不及格"fi[root@localhost shcode]# chmod u+x ifCase.sh[root@localhost shcode]# ./ifCase.sh./ifCase.sh: 第 3 行:[: -ge: 期待一元表达式./ifCase.sh: 第 6 行:[: -lt: 期待一元表达式[root@localhost shcode]# ./ifCase.sh 10不及格[root@localhost shcode]# ./ifCase.sh 100及格了
case 语句
基本语法
case $变量名 in"值1")如果变量的值等于值1,则执行程序1;;"值2")如果变量的值等于值2,则执行程序2;;…省略其他分支…*)如果变量的值都不是以上的值,则执行此程序;;esac
应用实例
当命令行参数是 1 时,输出 “周一”, 是 2 时,就输出”周二”, 其它情况输出 “other”
[root@localhost shcode]# vim testCase.sh[root@localhost shcode]# cat testCase.sh#!/bin/bash#当命令行参数是 1 时,输出 "周一", 是 2 时,就输出"周二", 其它情况输出 "other"case $1 in"1")echo "周一";;"2")echo "周二";;*)echo "other...";;esac[root@localhost shcode]# sh testCase.shother...[root@localhost shcode]# sh testCase.sh 1周一[root@localhost shcode]# sh testCase.sh 2周二[root@localhost shcode]# sh testCase.sh 3other...
for 循环
基本语法
for 变量 in 值1 值2 值3…do程序/代码done或者for (( 初始值;循环控制条件;变量变化 ))do程序/代码done
应用实例
案例 1 :打印命令行输入的参数 [这里可以看出$* 和 $@ 的区别]
[root@localhost shcode]# vim testFor1.sh[root@localhost shcode]# cat testFor1.sh#!/bin/bash#打印命令行输入的参数 [这里可以看出$* 和 $@ 的区别]#注意 $* 是把输入参数当作一个整体,所以只会输出一句for i in "$*"doecho "num is $i"done#使用 $@ 来获取输入的参数,注意,这时是分别对待,所以有几个参数,就会输出几行echo "======================================="for j in "$@"doecho "num is $j"done[root@localhost shcode]# sh testFor1.sh 1 2 3num is 1 2 3=======================================num is 1num is 2num is 3
案例 2 :从 1 加到 100 的值输出显示
[root@localhost shcode]# vim testFor2.sh[root@localhost shcode]# cat testFor2.sh#!/bin/bash#从 1 加到 100 的值输出显示,如何把100做成一个变量 $1SUM=0for(( i=1; i<=$1; i++))do#写上业务代码SUM=$[$SUM+$i]doneecho "总和sum=$SUM"[root@localhost shcode]# sh testFor2.sh 100总和sum=5050
while 循环
基本语法
while [ 条件判断式 ]do程序/代码done注意:while 和 [ 有空格,条件判断式和 [ 也有空格
应用实例
从命令行输入一个数 n,统计从 1+..+ n 的值是多少?
[root@localhost shcode]# vim testWhile.sh[root@localhost shcode]# cat testWhile.sh#!/bin/bash#从命令行输入一个数 n,统计从 1+..+ n 的值是多少?SUM=0i=0while [ $i -le $1 ]doSUM=$[$SUM+$i]#i自增i=$[$i+1]doneecho "执行结果=$SUM"[root@localhost shcode]# sh testWhile.sh 10执行结果=55[root@localhost shcode]# sh testWhile.sh 100执行结果=5050
read 读取控制台输入
基本语法
read(选项)(参数)选项:-p:指定读取值时的提示符;-t:指定读取值时等待的时间(秒),如果没有在指定的时间内输入,就不再等待了。。参数变量:指定读取值的变量名
应用实例
案例 1:读取控制台输入一个 NUM1 值
[root@localhost shcode]# vim testRead.sh[root@localhost shcode]# cat testRead.sh#!/bin/bash#案例 1:读取控制台输入一个 NUM1 值read -p "请输入一个数NUM1=" NUM1echo "你输入的NUM1=$NUM1"[root@localhost shcode]# sh testRead.sh请输入一个数NUM1=10你输入的NUM1=10
案例 2:读取控制台输入一个 NUM2 值,在 10 秒内输入。
[root@localhost shcode]# vim testRead.sh[root@localhost shcode]# cat testRead.sh#!/bin/bash#案例 1:读取控制台输入一个 NUM1 值read -p "请输入一个数NUM1=" NUM1echo "你输入的NUM1=$NUM1"#案例 2:读取控制台输入一个 NUM2 值,在 10 秒内输入。read -t 10 -p "请输入一个数NUM2=" NUM2echo "你输入的NUM2=$NUM2"[root@localhost shcode]# sh testRead.sh请输入一个数NUM1=10你输入的NUM1=10请输入一个数NUM2=100你输入的NUM2=100[root@localhost shcode]# sh testRead.sh请输入一个数NUM1=10你输入的NUM1=10请输入一个数NUM2=你输入的NUM2=
函数
函数介绍
shell 编程和其它编程语言一样,有系统函数,也可以自定义函数。系统函数中,我们这里就介绍两个。
系统函数
basename 基本语法
功能:返回完整路径最后 / 的部分,常用于获取文件名basename [pathname] [suffix]basename [string] [suffix] (功能描述:basename 命令会删掉所有的前缀包括最后一个(‘/’)字符,然后将字符串显示出来。选项:suffix 为后缀,如果 suffix 被指定了,basename 会将 pathname 或 string 中的 suffix 去掉。
basename 应用实例
请返回 /root/shcode/aaa.txt 的 “aaa.txt” 部分
[root@localhost shcode]# basename /root/shcode/aaa.txtaaa.txt
dirname 基本语法
功能:返回完整路径最后 / 的前面的部分,常用于返回路径部分dirname 文件绝对路径 (功能描述:从给定的包含绝对路径的文件名中去除文件名(非目录的部分),然后返回剩下的路径(目录的部分))
dirname 应用实例
请返回 /root/shcode/aaa.txt 的/root/shcode
[root@localhost shcode]# dirname /root/shcode/aaa.txt/root/shcode
自定义函数
基本语法
[ function ] funname[()]{Action;[return int;]}调用直接写函数名:funname [值]
应用实例
计算输入两个参数的和(动态的获取), getSum
[root@localhost shcode]# vim testFun.sh[root@localhost shcode]# cat testFun.sh#!/bin/bash#计算输入两个参数的和(动态的获取), getSum#定义函数 getSumfunction getSum(){SUM=$[$n1+$n2]echo "和是=$SUM"}#输入两个值read -p "请输入一个数 n1=" n1read -p "请输入一个数 n2=" n2#调用自定义函数getSum $n1 $n2[root@localhost shcode]# sh testFun.sh请输入一个数 n1=1请输入一个数 n2=2和是=3
Shell 编程综合案例
需求分析
- 每天凌晨 2:30 备份 数据库 hspedu 到 /data/backup/db
- 备份开始和备份结束能够给出相应的提示信息
- 备份后的文件要求以备份时间为文件名,并打包成 .tar.gz 的形式,比如:2021-03-12_230201.tar.gz
- 在备份的同时,检查是否有 10 天前备份的数据库文件,如果有就将其删除。
代码实操 /usr/sbin/mysql_db.backup.sh
```shell准备数据库
[root@localhost mysql]# mysql -u root -p Enter password: Welcome to the MySQL monitor. Commands end with ; or \g. Your MySQL connection id is 4 Server version: 5.7.26 MySQL Community Server (GPL)
Copyright (c) 2000, 2019, Oracle and/or its affiliates. All rights reserved.
Oracle is a registered trademark of Oracle Corporation and/or its affiliates. Other names may be trademarks of their respective owners.
Type ‘help;’ or ‘\h’ for help. Type ‘\c’ to clear the current input statement.
mysql> show databases; +——————————+ | Database | +——————————+ | information_schema | | mysql | | performance_schema | | sys | +——————————+ 4 rows in set (0.02 sec)
mysql> create datebase hspedu; ERROR 1064 (42000): You have an error in your SQL syntax; check the manual that corresponds to your MySQL server version for the right syntax to use near ‘datebase hspedu’ at line 1 mysql> create DATABASE hspedu; Query OK, 1 row affected (0.00 sec)
mysql> show databases; +——————————+ | Database | +——————————+ | information_schema | | hspedu | | mysql | | performance_schema | | sys | +——————————+ 5 rows in set (0.00 sec)
mysql> use hspedu; Database changed mysql> CREATE TABLE myorder( -> id INT NOT NULL AUTO_INCREMENT, -> name VARCHAR(100) NOT NULL, -> PRIMARY KEY ( id ) -> )ENGINE=InnoDB DEFAULT CHARSET=utf8; Query OK, 0 rows affected (0.02 sec)
mysql> show tables; +—————————+ | Tables_in_hspedu | +—————————+ | myorder | +—————————+ 1 row in set (0.00 sec)
mysql> select * from myorder; Empty set (0.01 sec)
mysql> INSERT INTO myorder ( id,name) VALUES (100,’dog’); Query OK, 1 row affected (0.01 sec)
mysql> select * from myorder; +——-+———+ | id | name | +——-+———+ | 100 | dog | +——-+———+ 1 row in set (0.00 sec)
mysql> exit Bye
编写脚本
[root@localhost db]# vim /usr/sbin/mysql_db.backup.sh [root@localhost db]# cat /usr/sbin/mysql_db.backup.sh
!/bin/bash
备份目录
BACKUP=/data/backup/db
当前时间
DATETIME=$(date +%Y-%m-%d_%H%M%S) echo $DATETIME
数据库地址
HOST=localhost
数据库用户名
DB_USER=root
数据库密码
DB_PW=123456
备份的数据库名
DATABASE=hspedu
创建备份目录,如果不存在,就创建
[ ! -d “${BACKUP}/$DATETIME” ] && mkdir -p “${BACKUP}/$DATETIME”
备份数据库
mysqldump -u${DB_USER} -p${DB_PW} —host=${HOST} -q -R —databases ${DATABASE} | gzip > ${BACKUP}/${DATETIME}/$DATETIME.sql.gz
将文件处理成 tar.gz
cd ${BACKUP} tar -zcvf $DATETIME.tar.gz ${DATETIME}
删除对应的备份目录
rm -rf ${BACKUP}/${DATETIME}
删除10天前的备份文件
find ${BACKUP} -atime +10 -name “*.tar.gz” -exec rm -rf {} \;
echo “备份数据库${DATABASE} 成功~”
设置定时任务
[root@localhost db]# crontab -e crontab: installing new crontab [root@localhost db]# crontab -l 30 2 * /usr/sbin/mysql_db.backup.sh ```

若有收获,就点个赞吧
0 人点赞
