前置工作
安装docker
安装minikube
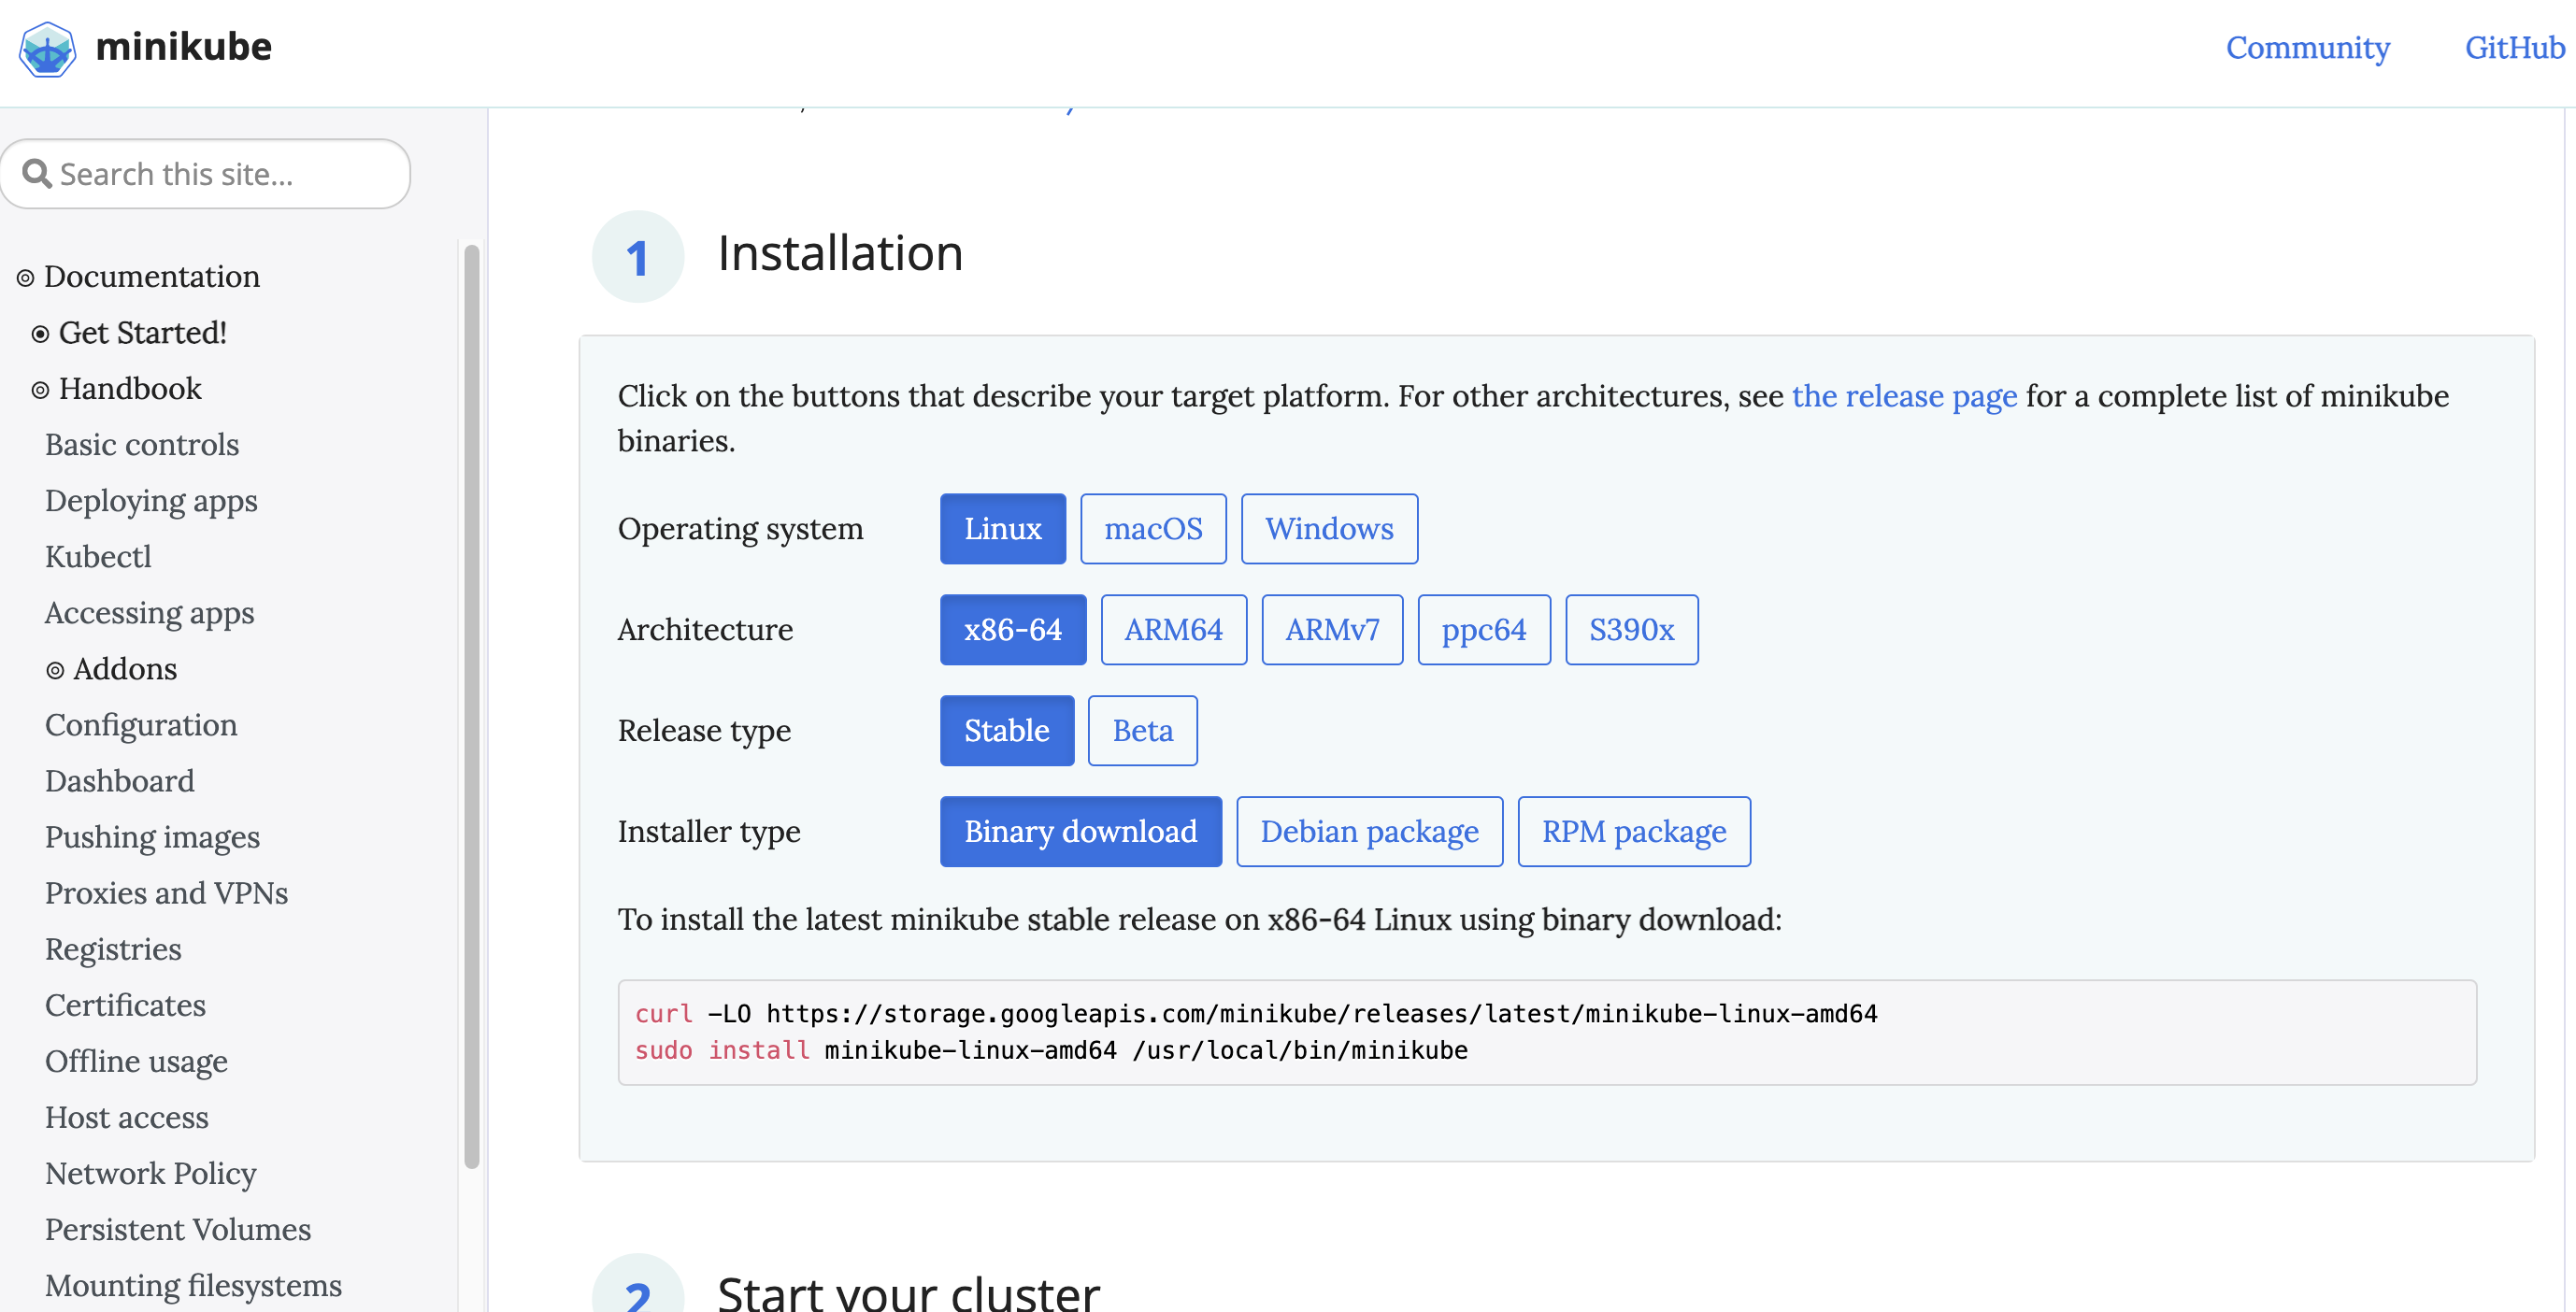
下载及安装
curl -LO https://storage.googleapis.com/minikube/releases/latest/minikube-linux-amd64sudo install minikube-linux-amd64 /usr/local/bin/minikube
配置当前会话支持 kubectl 命令
alias kubectl="minikube kubectl --"
安装helm
参考文章:https://blog.51cto.com/u_12099683/4538065 官网:https://helm.sh/docs/intro/install/
下载及安装
wget https://get.helm.sh/helm-v3.5.4-linux-amd64.tar.gztar -zxvf helm-v3.5.4-linux-amd64.tar.gzcd linux-amd64/cp helm /usr/bin/helm
查看版本
helm version
添加仓库
helm repo add stable http://mirror.azure.cn/kubernetes/chartshelm repo add aliyun https://kubernetes.oss-cn-hangzhou.aliyuncs.com/chartshelm repo add flink-operator-repo https://archive.apache.org/dist/flink/flink-kubernetes-operator-0.1.0/helm repo update
查看仓库
helm repo list

指定k8s集群位置
export KUBECONFIG=/root/.kube/config
简单测试
#生成chart文件helm create one#打包helm package one#安装helm install one one-0.1.0.tgz
安装seatunnel
参考官网:https://seatunnel.apache.org/docs/2.1.1/start/kubernetes
seatunnel版本:2.1.1
启动minikube
指定k8s版本为1.23.3
minikube start --kubernetes-version=v1.23.3 --force
下载镜像
编辑Dockerfile
vi Dockerfile
FROM flink:1.13ENV SEATUNNEL_VERSION="2.1.0"RUN wget https://archive.apache.org/dist/incubator/seatunnel/${SEATUNNEL_VERSION}/apache-seatunnel-incubating-${SEATUNNEL_VERSION}-bin.tar.gzRUN tar -xzvf apache-seatunnel-incubating-${SEATUNNEL_VERSION}-bin.tar.gzRUN mkdir -p $FLINK_HOME/usrlibRUN cp apache-seatunnel-incubating-${SEATUNNEL_VERSION}/lib/seatunnel-core-flink.jar $FLINK_HOME/usrlib/seatunnel-core-flink.jarRUN rm -fr apache-seatunnel-incubating-${SEATUNNEL_VERSION}*
构建
docker build -t seatunnel:2.1.0-flink-1.13 -f Dockerfile .
加载镜像到minikube
minikube image load seatunnel:2.1.0-flink-1.13
k8s安装cert文件
#下载wget https://github.com/jetstack/cert-manager/releases/download/v1.7.1/cert-manager.yaml#部署kubectl create -f cert-manager.yaml
helm安装Flink Kubernetes Operator
helm repo add flink-operator-repo https://downloads.apache.org/flink/flink-kubernetes-operator-0.1.0/helm install flink-kubernetes-operator flink-operator-repo/flink-kubernetes-operator
验证
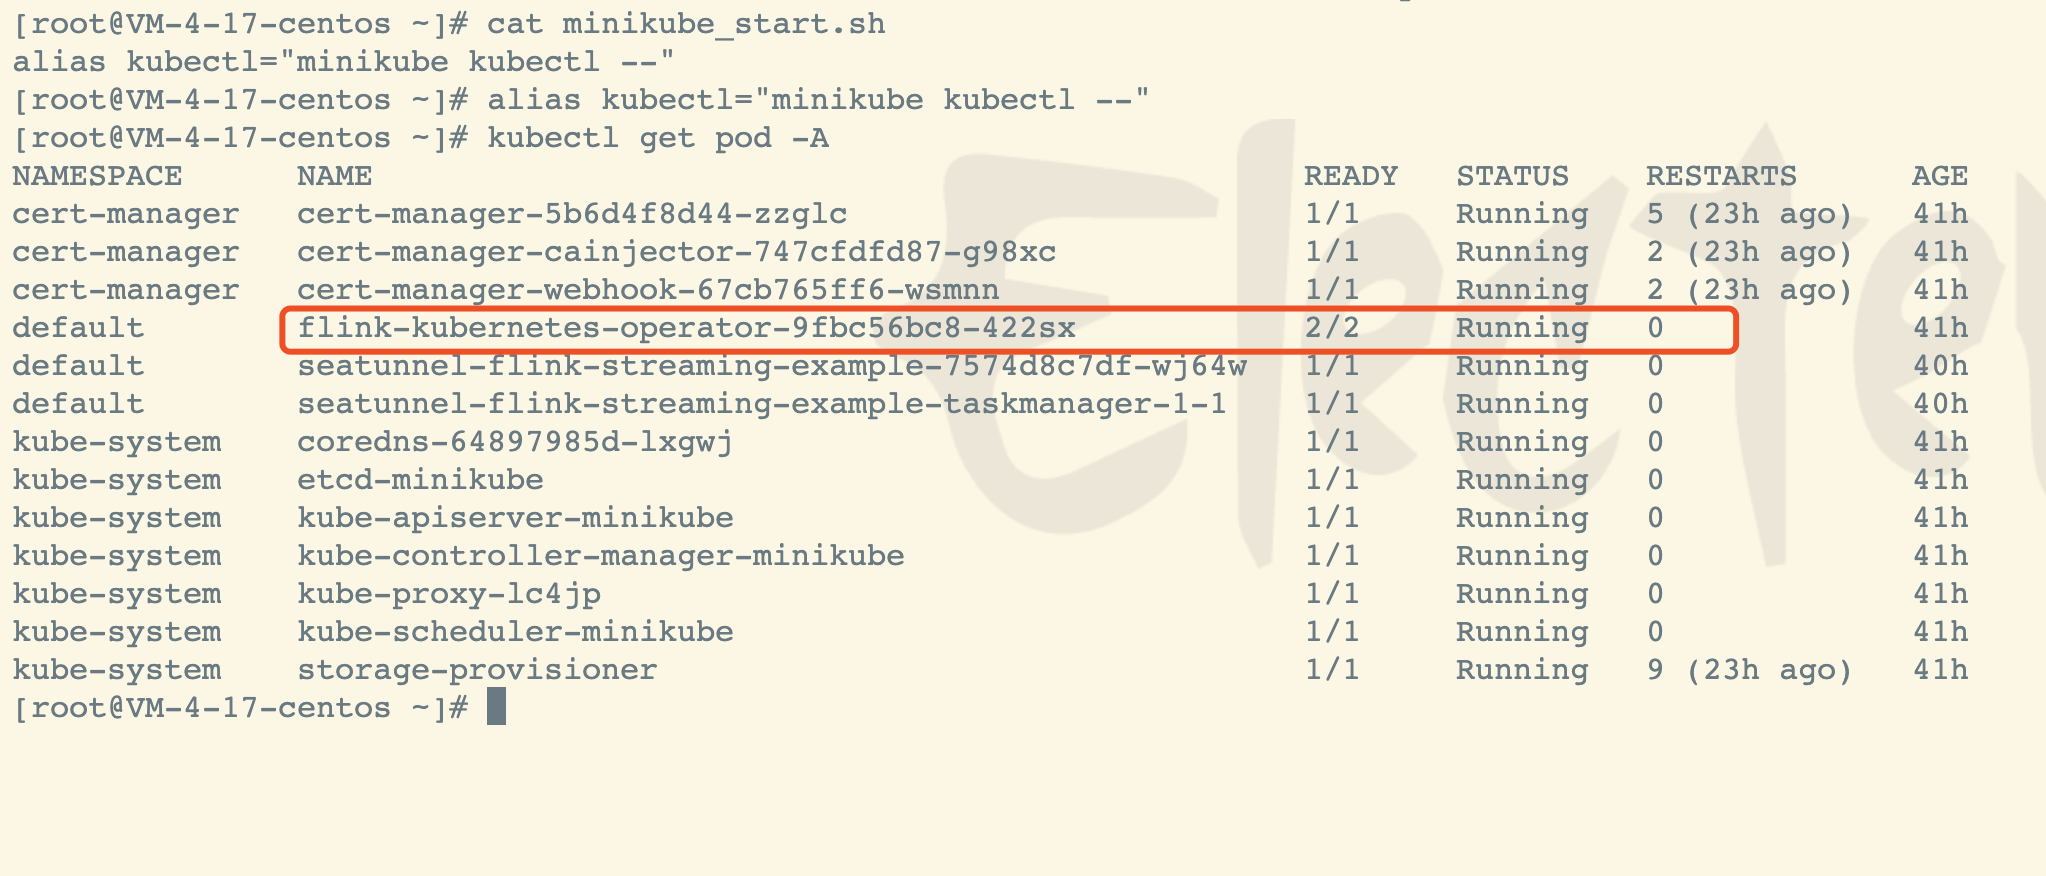
验证pod进程
#alias kubectl="minikube kubectl --"kubectl get pod -A
验证seatunnel应用
构造虚拟数据流
vi flink.streaming.conf#新增如下内容env {execution.parallelism = 1}source {FakeSourceStream {result_table_name = "fake"field_name = "name,age"}}transform {sql {sql = "select name,age from fake"}}sink {ConsoleSink {}}
挂载配置文件到pod中
pod中创建目录
minikube sshsudo mkdir /mnt/data
拷贝文件
minikube cp flink.streaming.conf /mnt/data/flink.streaming.conf
编写seatunnel的yaml部署文件
vi seatunnel-flink.yaml
新增如下内容
apiVersion: flink.apache.org/v1alpha1kind: FlinkDeploymentmetadata:namespace: defaultname: seatunnel-flink-streaming-examplespec:image: seatunnel:2.1.0-flink-1.13#image: ren:8088/keyboardone/seatunnel:2.1.0-flink-1.13flinkVersion: v1_14flinkConfiguration:taskmanager.numberOfTaskSlots: "2"serviceAccount: flinkjobManager:replicas: 1resource:memory: "2048m"cpu: 1taskManager:resource:memory: "2048m"cpu: 2podTemplate:spec:containers:- name: flink-main-containervolumeMounts:- mountPath: /dataname: config-volumevolumes:- name: config-volumehostPath:path: "/mnt/data"type: Directoryjob:jarURI: local:///opt/flink/usrlib/seatunnel-core-flink.jarentryClass: org.apache.seatunnel.SeatunnelFlinkargs: ["--config", "/data/flink.streaming.conf"]parallelism: 2upgradeMode: stateless
执行部署
kubectl apply -f seatunnel-flink.yaml
验证
验证服务
kubectl get svc

查看日志
kubectl logs -f deploy/seatunnel-flink-streaming-example
暴露端口
kubectl port-forward svc/seatunnel-flink-streaming-example-rest 8081
Now the Flink Dashboard is accessible at localhost:8081.
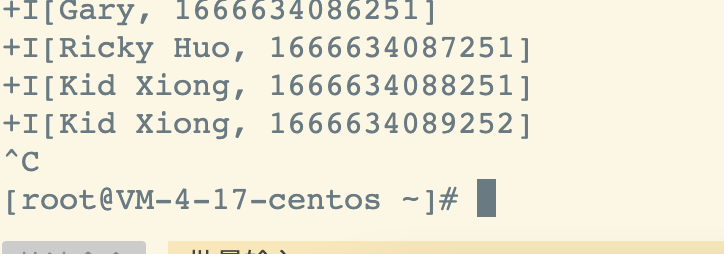
打印日志
kubectl logs \-l 'app in (seatunnel-flink-streaming-example), component in (taskmanager)' \--tail=-1 \-f
删除部署
kubectl delete -f seatunnel-flink.yaml
删除minikube集群
minikube stopminikube delete --all

若有收获,就点个赞吧
0 人点赞
