虽然只剩一个月就2021年了,但仍然有很多人使用着非常原始的工具书写LaTeX(包括一个星期前的我在内),那么我就不废话直奔主题,请使用现代化的工具——VS Code。
起源
就在前不久,由于意外获得了一块1T的固态硬盘,这使得我有足够的空间在笔记本上装了个Ubuntu双系统,然后在折腾各种工具之余,我也开始测试在Ubuntu上使用什么编辑器写起LaTeX来最舒服。
最先安装的自然是TeXstudio,这家伙比在win10上看起来舒服了不少,随后我顺便测试了一下VS Code,然后我流泪了,我深刻地理解了什么叫做 a modern approach.
配置
如何安装LaTeX就不废话了,但要注意两点:
- 下载 TeXlive 而不是 CTeX
- 下载
texlive-full
如何在VS Code中配置 LaTeX呢?
分为以下几部分:
安装 LaTeX Workshop
在插件商店中搜索 LaTeX Workshop,安装即可。
打开插件设置
这里有两种方法,一个是在 设置-拓展-LaTeX 中,瞪大眼睛一个个查看选项并勾选。
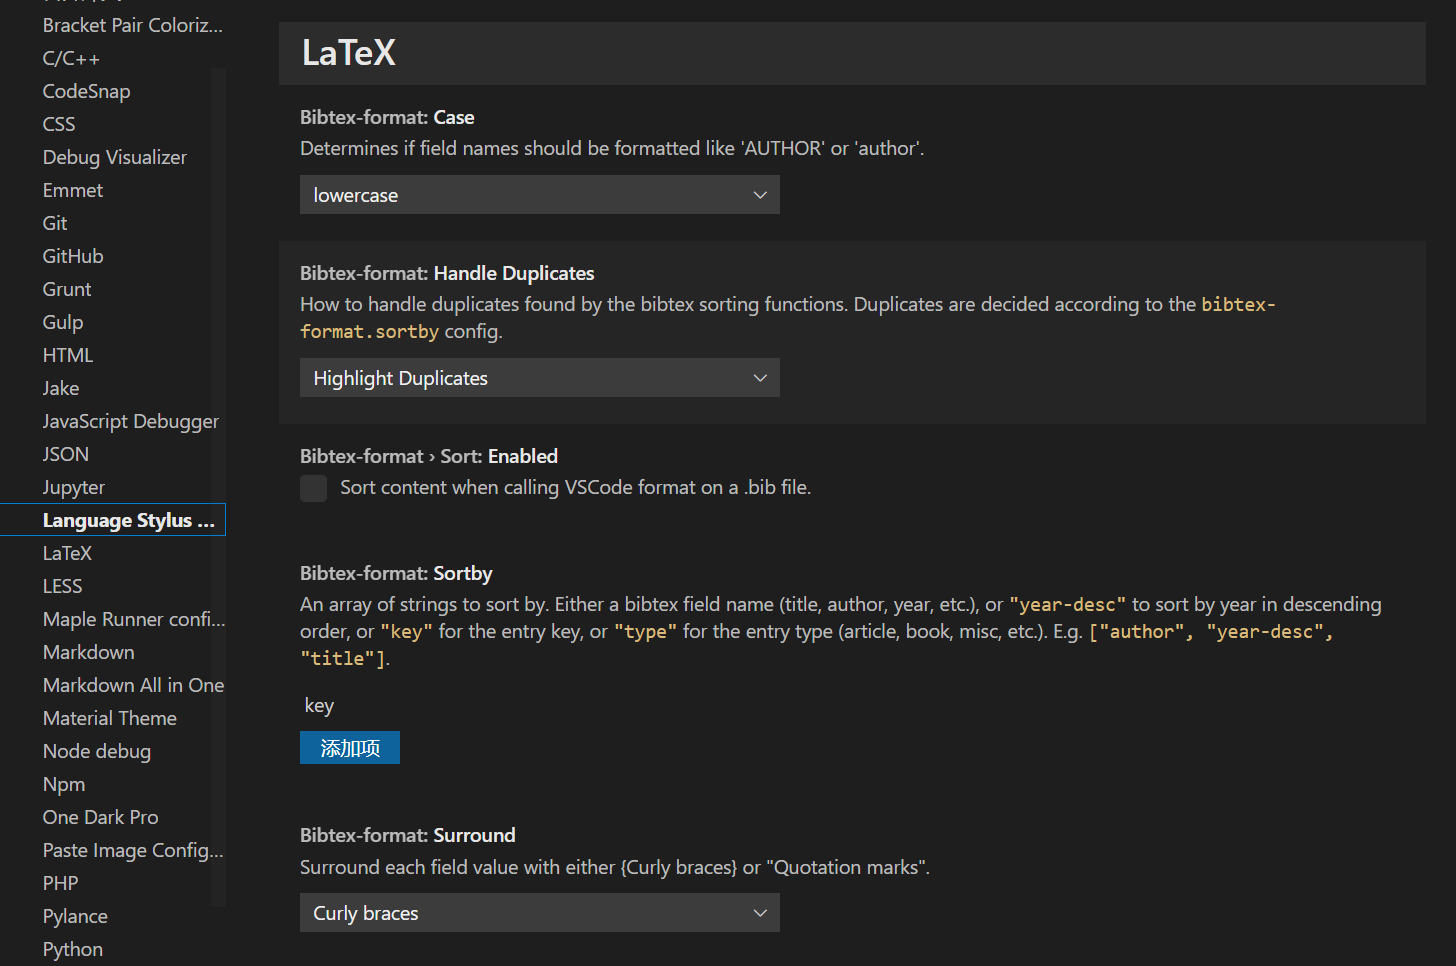
另一种是在 settings.json 中设置,只需 Ctrl+Shift+P 打开命令面板,然后输入 Open Settings(json),如果你的VScode不巧抽风了,Ctrl+P+输入> ,之后再输入 Open Settings(json)也一样。
复制配置代码
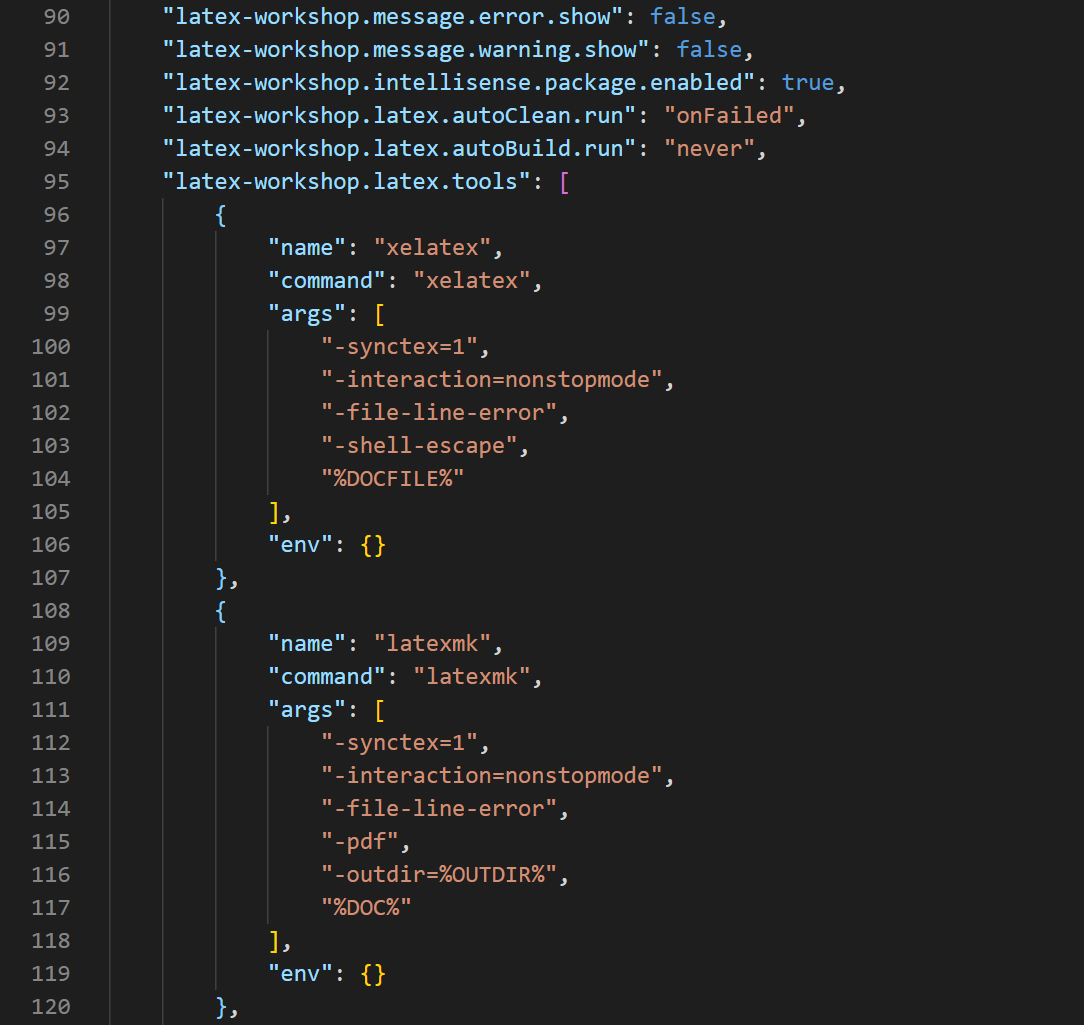
"latex-workshop.latex.recipes": [{"name": "XeLaTeX","tools": ["xelatex"]},{"name": "PDFLaTeX","tools": ["pdflatex"]},{"name": "xelatex -> bibtex -> xelatex*2","tools": ["xelatex","bibtex","xelatex","xelatex"]},// {// "name": "latexmk 🔃",// "tools": [// "latexmk"// ]// },// {// "name": "latexmk (latexmkrc)",// "tools": [// "latexmk_rconly"// ]// },// {// "name": "latexmk (lualatex)",// "tools": [// "lualatexmk"// ]// },{"name": "pdflatex ➞ bibtex ➞ pdflatex * 2","tools": ["pdflatex","bibtex","pdflatex","pdflatex"]}// {// "name": "Compile Rnw files",// "tools": [// "rnw2tex",// "latexmk"// ]// },// {// "name": "Compile Jnw files",// "tools": [// "jnw2tex",// "latexmk"// ]// },// {// "name": "tectonic",// "tools": [// "tectonic"// ]// }],"latex-workshop.latex.tools": [{"name": "xelatex","command": "xelatex","args": ["-synctex=1","-interaction=nonstopmode","-file-line-error","-shell-escape","%DOCFILE%"],"env": {}},{"name": "latexmk","command": "latexmk","args": ["-synctex=1","-interaction=nonstopmode","-file-line-error","-pdf","-outdir=%OUTDIR%","%DOC%"],"env": {}},{"name": "lualatexmk","command": "latexmk","args": ["-synctex=1","-interaction=nonstopmode","-file-line-error","-lualatex","-outdir=%OUTDIR%","%DOC%"],"env": {}},{"name": "latexmk_rconly","command": "latexmk","args": ["%DOC%"],"env": {}},{"name": "pdflatex","command": "pdflatex","args": ["-synctex=1","-interaction=nonstopmode","-file-line-error","%DOC%"],"env": {}},{"name": "bibtex","command": "bibtex","args": ["%DOCFILE%"],"env": {}},{"name": "rnw2tex","command": "Rscript","args": ["-e","knitr::opts_knit$set(concordance = TRUE); knitr::knit('%DOCFILE_EXT%')"],"env": {}},{"name": "jnw2tex","command": "julia","args": ["-e","using Weave; weave(\"%DOC_EXT%\", doctype=\"tex\")"],"env": {}},{"name": "jnw2texmintex","command": "julia","args": ["-e","using Weave; weave(\"%DOC_EXT%\", doctype=\"texminted\")"],"env": {}},{"name": "tectonic","command": "tectonic","args": ["--synctex","--keep-logs","%DOC%.tex"],"env": {}}],
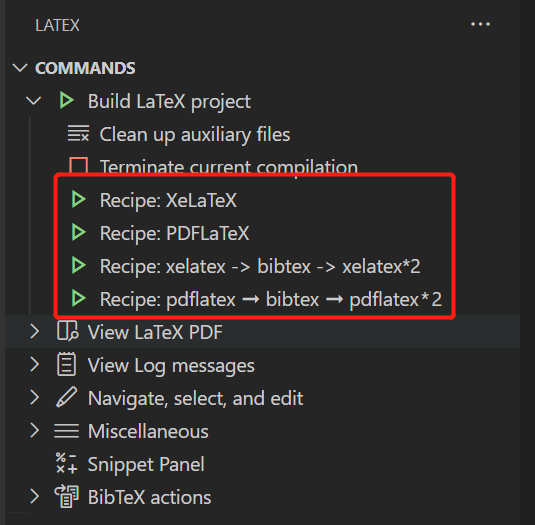
这是对应你的编译流程,一般来说只需通过第一个 XeLaTeX 就够了,但如果你插入了参考文献,就得使用第三个流程 xelatex -> bibtex -> xelatex*2,这对于老手来说应该不陌生了。
"latex-workshop.message.error.show": false,"latex-workshop.message.warning.show": false,"latex-workshop.intellisense.package.enabled": true,"latex-workshop.latex.autoClean.run": "onFailed","latex-workshop.latex.recipe.default": "lastUsed","latex-workshop.showContextMenu": true,
前两个是关闭错误和警告消息提示,不然会一直在右下角弹窗,非常烦人,一般都是自己从状态栏看报错信息。
双向同步
接下来是稍微复杂一点的配置——双向同步,也就是你能从当前代码跳转到PDF对应行,也能从PDF所在行跳转到对应代码处。
"latex-workshop.view.pdf.viewer": "external","latex-workshop.view.pdf.external.synctex.command": "C:\\Program Files\\SumatraPDF\\SumatraPDF.exe","latex-workshop.view.pdf.external.viewer.command": "C:\\Program Files\\SumatraPDF\\SumatraPDF.exe","latex-workshop.view.pdf.invert": 1,"latex-workshop.view.pdf.external.synctex.args": ["-forward-search","%TEX%","%LINE%","-reuse-instance","-inverse-search","\"C:\\Users\\Theigrams\\AppData\\Local\\Programs\\Microsoft VS Code\\code.exe\" \"C:\\Users\\Theigrams\\AppData\\Local\\Programs\\Microsoft VS Code\\resources\\app\\out\\cli.js\" -r -g \"%f:%l\"","%PDF%"],
第一行是设置使用外置PDF浏览器,VSCode内置的会比较卡。
第二三行是 SumatraPDF.exe 所在的路径。
第5-13行自己对照着修改VScode和SumatraPDF的路径即可。
然后记得打开SumatraPDF-设置-高级选项,找到 InverseSearchCmdLine 那一行修改,记得换成自己的路径。
InverseSearchCmdLine = "C:\Users\Theigrams\AppData\Local\Programs\Microsoft VS Code\code.exe" "C:\Users\Theigrams\AppData\Local\Programs\Microsoft VS Code\resources\app\out\cli.js" -r -g "%f:%l"
A modern approach
至此,你已经可以开始用VScode编写LaTeX文档了,但如果你看过这篇文章1700页数学笔记火了!全程敲代码,速度飞快易搜索,硬核小哥教你上手LaTeX+Vim - 知乎 (zhihu.com),大概你就能明白快速使用LaTeX的核心就是Snippets。
使用Snippets
请点进 Snippets · James-Yu/LaTeX-Workshop Wiki (github.com),详细观看里面有哪些Snippets,
核心Snippets有如下:
| Prefix | Environment name |
|---|---|
BEQ |
equation |
BAL |
align |
BIT |
itemize |
BEN |
enumerate |
| Prefix | Sectioning level |
|---|---|
| SCH | chapter |
| SSE | section |
| SSS | subsection |
| SS2 | subsubsection |
| Prefix | Shortcut | Command |
|---|---|---|
MRM |
ctrl+m, ctrl+r | \mathrm{${1}} |
MBF |
ctrl+m, ctrl+s | \mathsf{${1}} |
MBF |
ctrl+m, ctrl+b | \mathbf{${1}} |
MBB |
ctrl+m, ctrl+shift+b | \mathbb{${1}} |
MCA |
ctrl+m, ctrl+c | \mathcal{${1}} |
MIT |
ctrl+m, ctrl+i | \mathit{${1}} |
MTT |
ctrl+m, ctrl+t | \mathtt{${1}} |
注意使用snippet时,如果有多个空,在填写完第一个之后按Tab 就能自动跳到第二个空。
自制Snippets
workshop自带的这些Snippets是远远不够的,而且众口难调,不如自己配置Snippets来得爽快。
打开设置-用户代码片段-latex.json,然后你就可以模仿样例输入完成自己的Snippets.
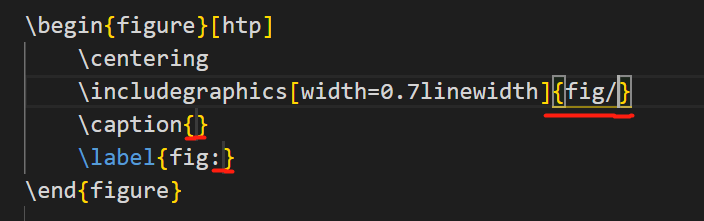
例如,我们可以自制一个插入图片的Snippet:
"Input a figure": {"prefix": "fig","body": ["\\begin{figure}[htp]","\t\\centering","\t\\includegraphics[width=0.7linewidth]{fig/$1}","\t\\caption{$2}","\t\\label{fig:$3}","\\end{figure}","$0"],"description": "Input a figure"},
直接输入 fig 就能看到Snippet提示:
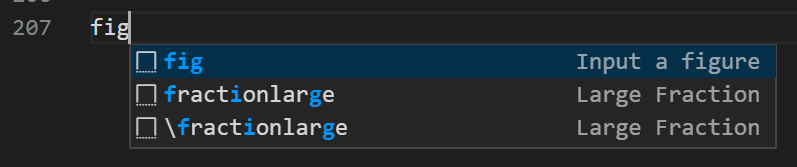
注意生成的代码中有三个细微的竖线,也就是上面代码中 $1,$2,$3 的地方,我们可以填完内容后用 Tab 跳到下一个。
我们可以继续制作一个三线表的snippet:
"three horizontal lines": {"prefix": "3linetable","body": ["\\begin{table}[htbp]","\t\\centering\n\t\\caption{$1}","\t\\label{tab:$2}","\t\\begin{tabular}{ccc}","\t\t\\toprule","\t\t姓名 & 学号 & 性别 \\\\\\\\ \\midrule","\t\tSteve Jobs & 001 & Male \\\\\\\\","\t\tBill Gates & 002 & Female \\\\\\\\ \\bottomrule","\t\\end{tabular}","\\end{table}\n"],}
注意,由于 \ 的转移符非常特殊,要生成换行符号 \\,我们得使用 \\\\\\\\ 来完成。
插入图片
虽然我们在上面设置了插入图片的snippet,但还是得自己把图片放到文件夹下,一点也不智能。
所以我们得使用modern一点的方法:
首先进入拓展商店,安装插件 Paste Image,它的作用就是自动帮你把剪切板中的图片放到设定目录中,并生成特定代码。
然后是配置,还是打开 settings.json,将以下代码复制进去:
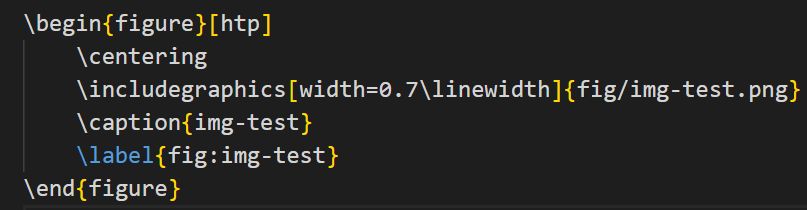
"pasteImage.defaultName": "f-H-m-s","pasteImage.path": "${currentFileDir}/fig","pasteImage.filePathConfirmInputBoxMode": "onlyName","pasteImage.showFilePathConfirmInputBox": true,"pasteImage.insertPattern": "\\begin{figure}[htp]\n\t\\centering\n\t\\includegraphics[width=0.7\\linewidth]{fig/${imageFileName}}\n\t\\caption{${imageFileNameWithoutExt}}\n\t\\label{fig:${imageFileNameWithoutExt}}\n\\end{figure}\n",
第2行是设置图片保存路径,我设置的是存在当前目录下的 fig 文件夹中,
第4行是指保存之前弹出一个框,让你修改文件名
第5行是插入后生成代码
流程大致如下:
- 截图,或将图片复制到剪切板
Ctrl+Alt+V(如果没反应,大概率是快捷键冲突了,可以自行把其他屏蔽)- 在弹出的box中修改名称

- 自动插入代码
设置快捷键
对于一些非常高频的操作,snippet也显得不够便捷,这时我们就需要自定义快捷键。
例如对于行内数学公式环境,一般使用 Ctrl+M 就能自动生成 $ $ ,并且光标还在中间。
这时我们打开 设置-键盘快捷方式,打开keybindings.json
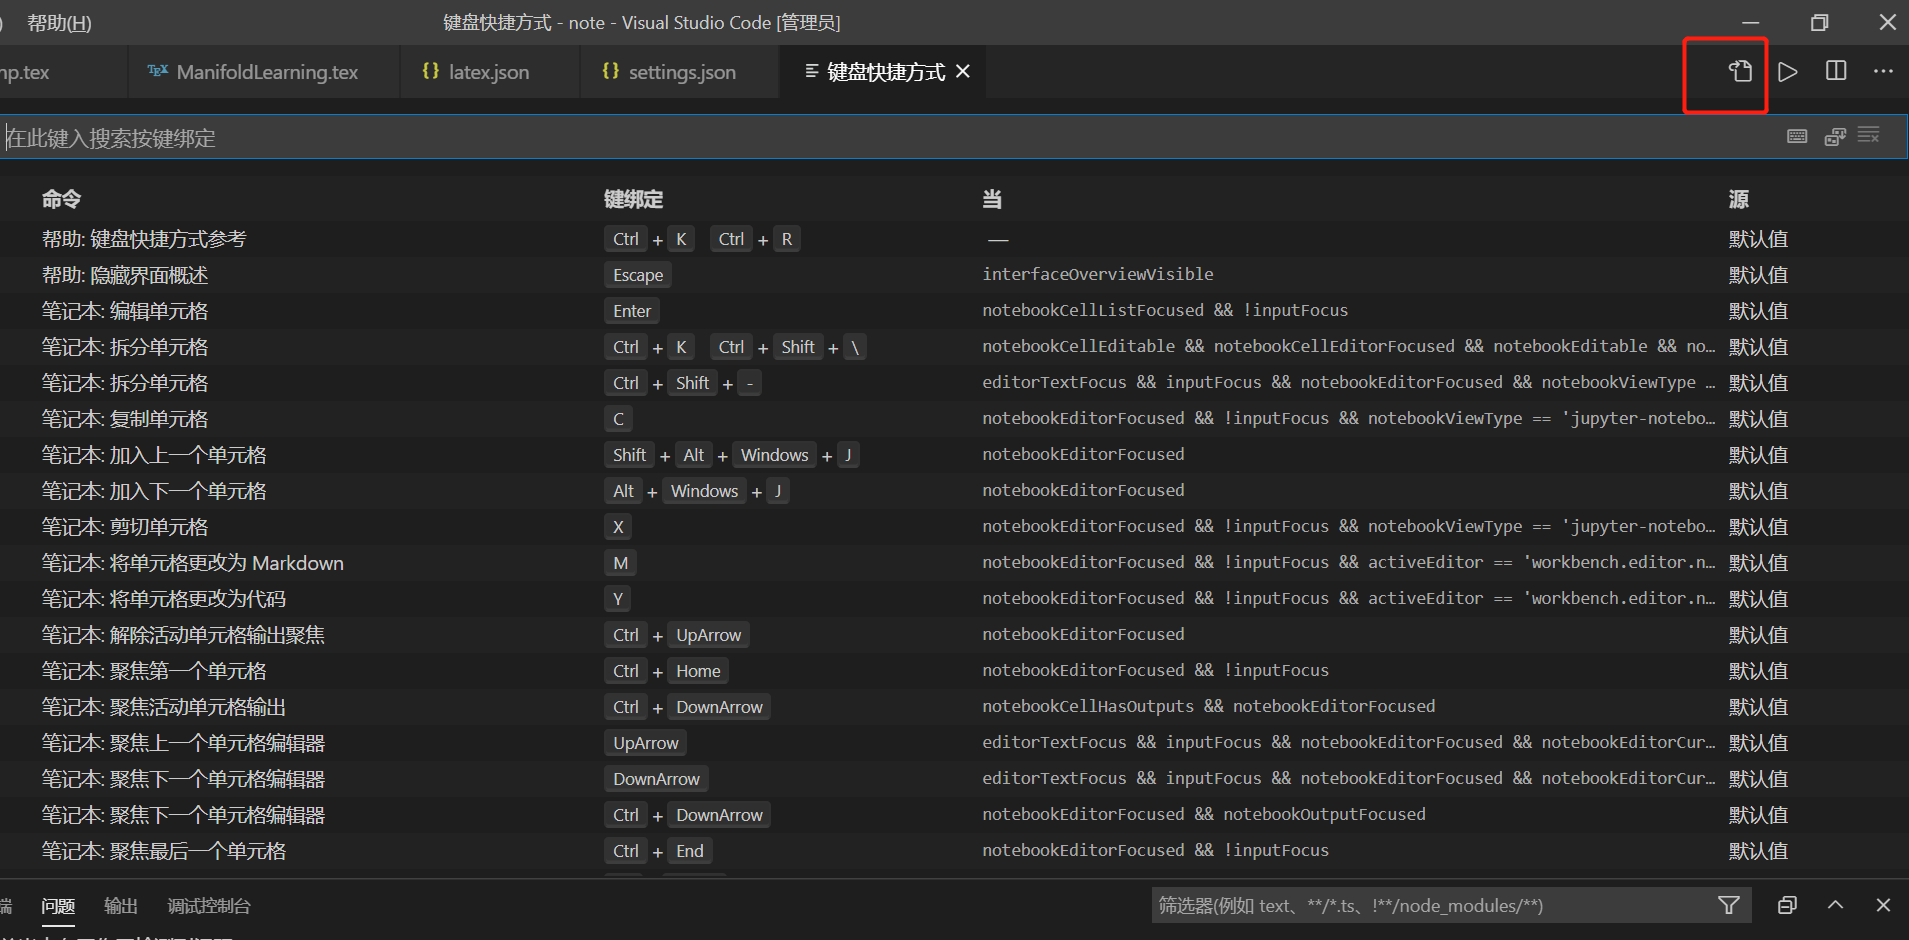
复制如下代码即可:
{"key": "ctrl+m","command": "editor.action.insertSnippet","when": "editorTextFocus","args": {"snippet": "$ $1 $ $0"}},
第6行中,第1,3个 $ 是用于产生数学公式环境,$1 是指待会儿光标移到此处,待输入文件,$0 是指输完后按 Tap 可以调到公式环境外面去。
但是,有的时候我们还有这种需求:选中一段文本,按 Ctrl+M 希望能在其两端插入 $ 符号,这时只需稍微修改一点即可满足需求:
{"key": "ctrl+m","command": "editor.action.insertSnippet","when": "editorTextFocus","args": {"snippet": "$ ${TM_SELECTED_TEXT}$1 $ $0"}},
自用模板
最后贴一个自用模板,定理样式来源于 HaoyunQin 的 LaTeX Snippets
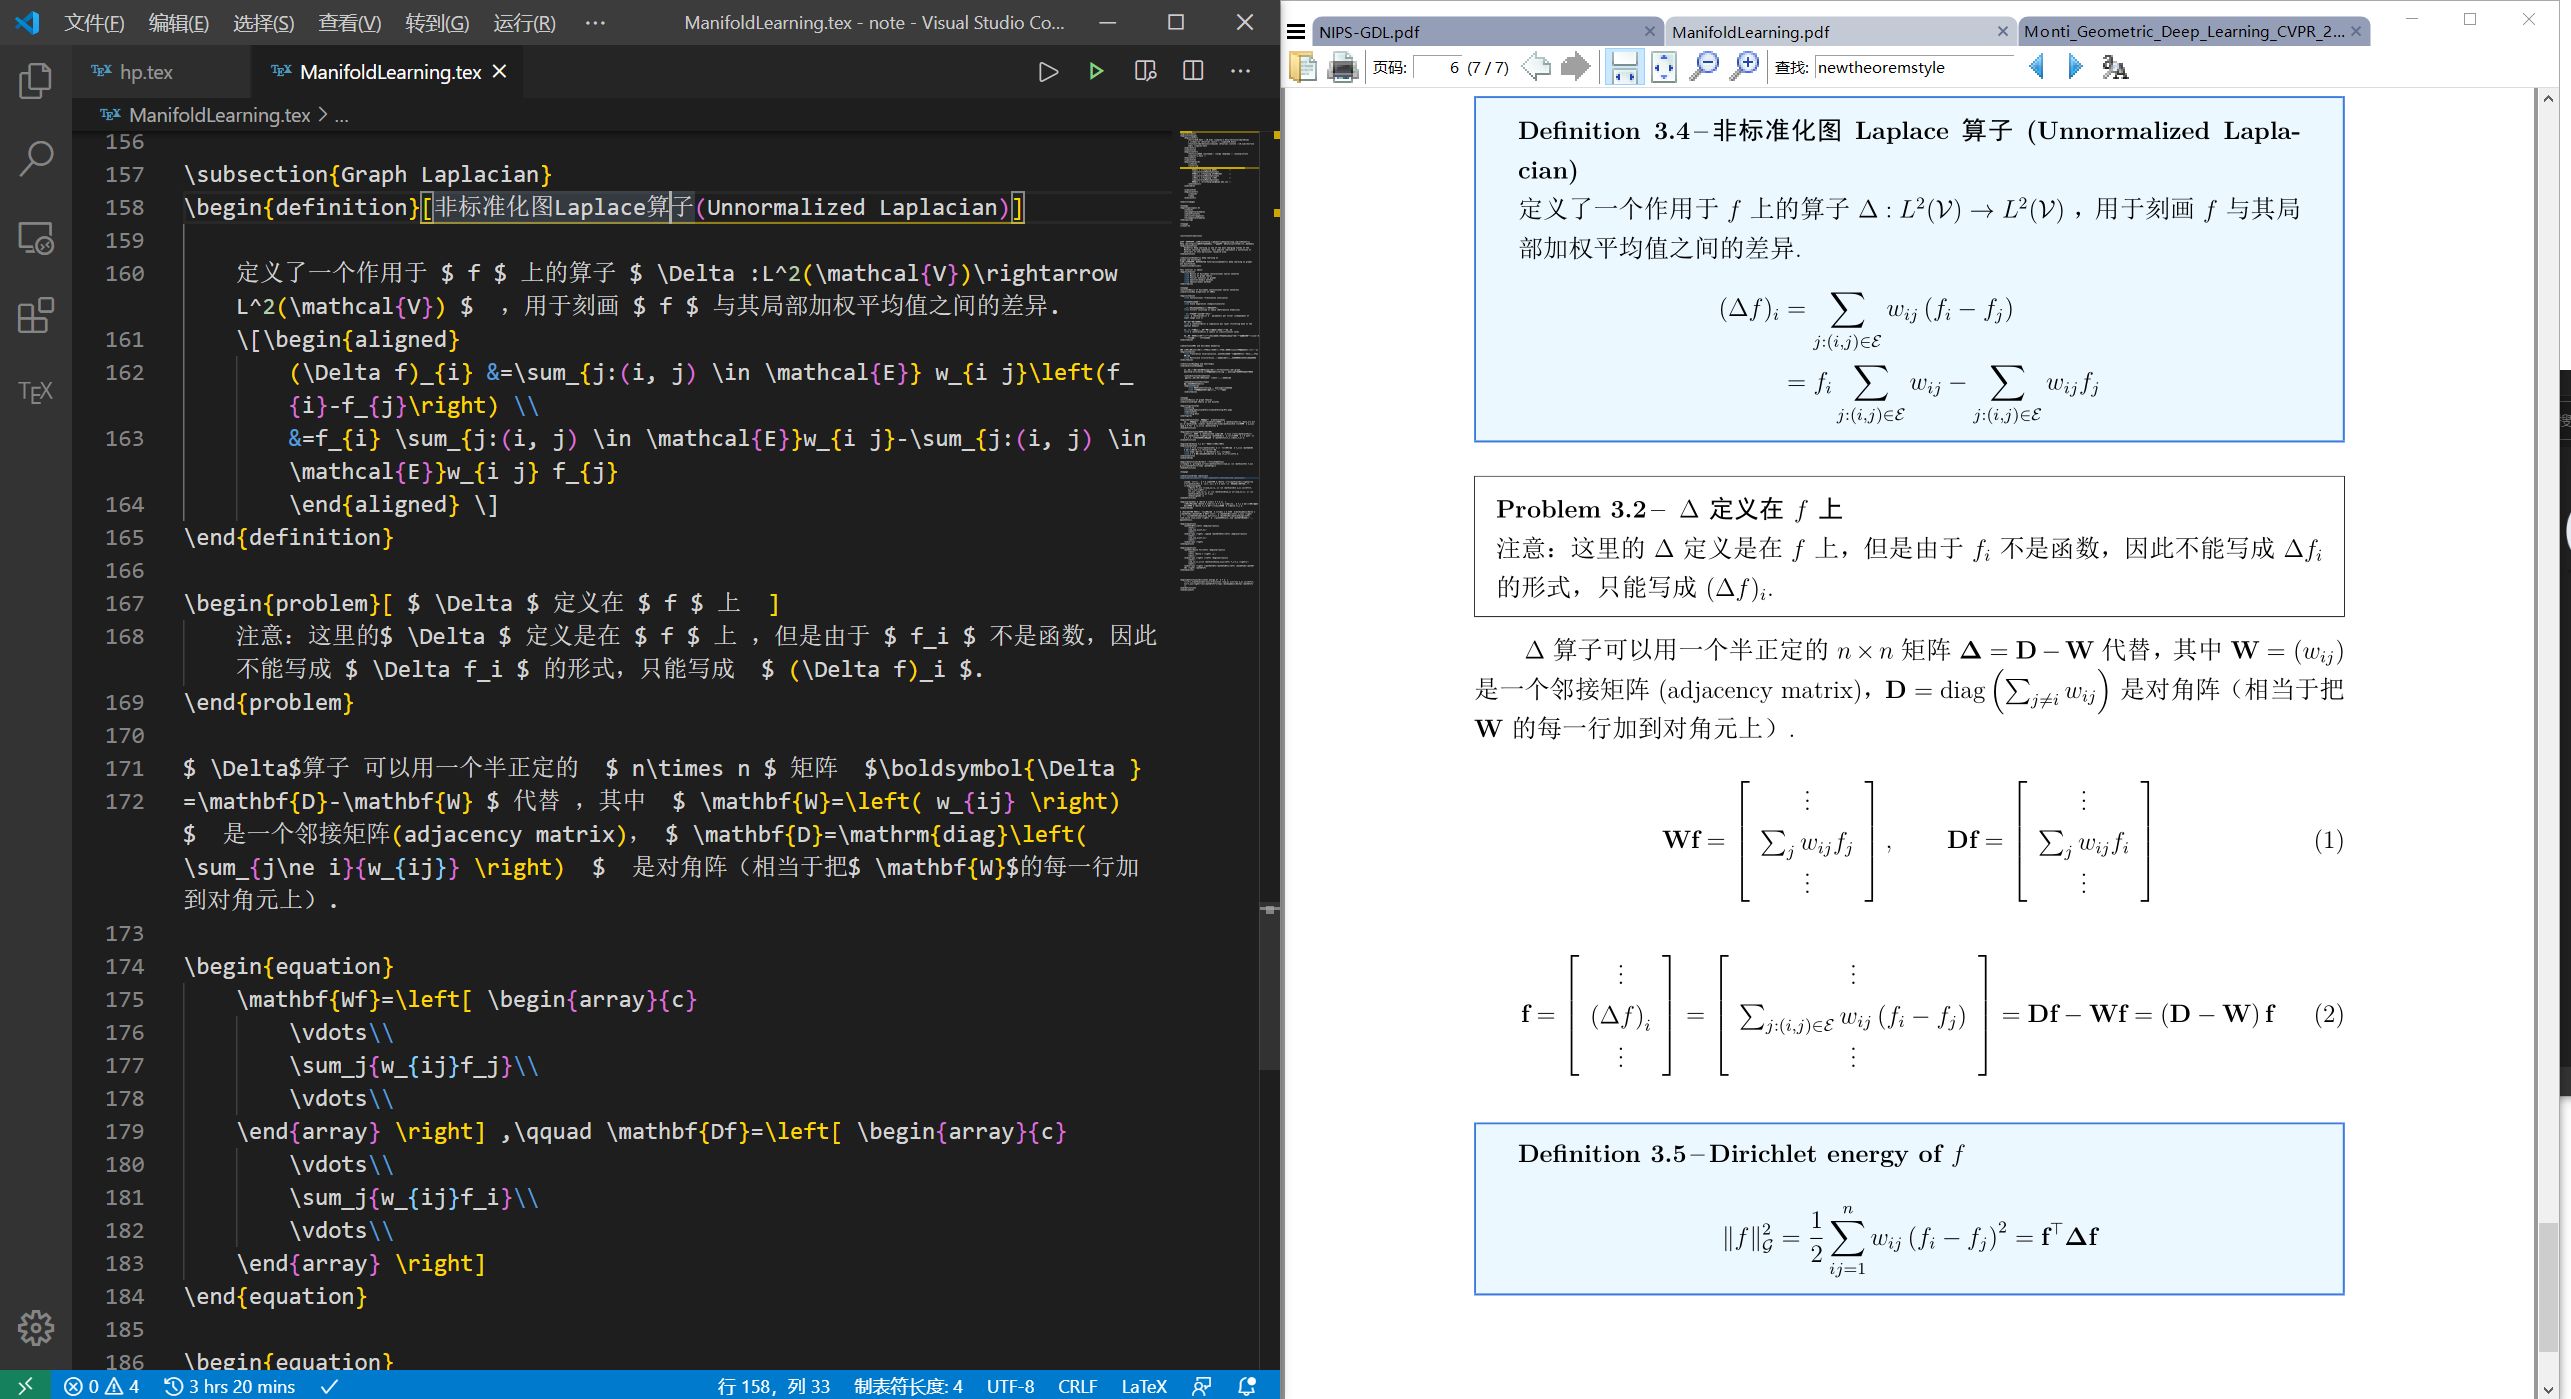
\documentclass[a4paper]{article} \usepackage[UTF8]{ctex} %中文 \usepackage{amsmath,amsfonts,amssymb,amsthm,mathrsfs,bm} \usepackage{setspace} %行间距 \usepackage{geometry} %页边距 \geometry{left=3.18cm,right=3.18cm,top=2.54cm,bottom=2.54cm} %\usepackage{pifont} %带圈数字 \ding{172} \usepackage{graphicx} %插图 \includegraphics[width=1cm]{picture.jpg} \usepackage{subfigure} \usepackage{mdframed} %\usepackage{wrapfig} \usepackage[ colorlinks=true, citecolor=blue, linkcolor=red, anchorcolor=green, urlcolor=blue, bookmarksopen=true,bookmarksnumbered=true]{hyperref} \usepackage{enumitem} \usepackage[square,numbers,sort&compress]{natbib} \usepackage{tcolorbox} \tcbuselibrary{most} \newenvironment{myitemize}{\begin{itemize}}{\end{itemize}} \tcolorboxenvironment{myitemize} {blanker, before skip = 6pt, after skip = 6pt, borderline west = {3mm}{0pt}{red}} \usepackage{array} \usepackage{float} \usepackage{booktabs} %\toprule \midrule \bottomrule \usepackage{multicol} \usepackage{minted} \usepackage{tabularx} %%%%%%%%%%%%%%%%%%%%%%%%%% Define some useful colors %%%%%%%%%%%%%%%%%%%%%%%%%% \definecolor{ocre}{RGB}{243,102,25} \definecolor{mygray}{RGB}{243,243,244} \definecolor{deepGreen}{RGB}{26,111,0} \definecolor{shallowGreen}{RGB}{235,255,255} \definecolor{deepBlue}{RGB}{61,124,222} \definecolor{shallowBlue}{RGB}{235,249,255} %%%%%%%%%%%%%%%%%%%%%%%%%%%%%%%%%%%%%%%%%%%%%%%%%%%%%%%%%%%%%%%%%%%%%%%%%%%%%%% %%%%%%%%%%%%%%%%%%%%%%%%%%%%% \newtheoremstyle{mytheoremstyle}{3pt}{3pt}{\normalfont}{0cm}{\rmfamily\bfseries}{}{\newline}{{\color{black}\thmname{#1}~\thmnumber{#2}}\thmnote{\,--\,#3}} \newtheoremstyle{myproblemstyle}{3pt}{3pt}{\normalfont}{0cm}{\rmfamily\bfseries}{}{\newline}{{\color{black}\thmname{#1}~\thmnumber{#2}}\thmnote{\,--\,#3}} \theoremstyle{mytheoremstyle} \newmdtheoremenv[linewidth=1pt,backgroundcolor=shallowGreen,linecolor=deepGreen,leftmargin=0pt,innerleftmargin=20pt, innerrightmargin=20pt,]{theorem}{Theorem}[section] \theoremstyle{mytheoremstyle} \newmdtheoremenv[linewidth=1pt,backgroundcolor=shallowBlue,linecolor=deepBlue,leftmargin=0pt,innerleftmargin=20pt, innerrightmargin=20pt,]{definition}{Definition}[section] \theoremstyle{myproblemstyle} \newmdtheoremenv[linecolor=black,leftmargin=0pt,innerleftmargin=10pt,innerrightmargin=10pt,]{problem}{Problem}[section] %%%%%%%%%%%%%%%%%%%%%%%%%%%%%%%%%%%%%%%%%%%%%%%%%%%%%%%%%%%%%%%%%%%%%%%%%%%%%%% % \usepackage{listings} \usepackage{fontspec} \usepackage{xcolor} \newcommand{\univname}{\href{https://www.buaa.edu.cn}{Beihang Universite}} \newcommand{\depname}{\href{http://math.buaa.edu.cn}{School of Mathematical Sciences}} \newcommand{\faculty}{\href{http://lmib.buaa.edu.cn}{MOE Key Laboratory of Mathematics Informatics and Behavioral Semantics(LMIB)}} \newcommand{\horrule}[1]{\rule{\linewidth}{#1}} \newcommand{\entit}{Geometric Deep Learning} \newcommand{\cntit}{基于图和流形上的深度学习} \renewcommand{\theFancyVerbLine}{\sffamily \textcolor[rgb]{0.5,0.5,1.0}{\scriptsize \oldstylenums{\arabic{FancyVerbLine}}}} \newminted{ruby}{mathescape,linenos,breaklines,breakanywhere,style=xcode,frame=single} \newminted{python}{texcl=true,mathescape,linenos,breaklines,breakanywhere,style=colorful,frame=single} \definecolor{darkblue}{rgb}{0.0,0.0,0.3} \newtcbox{\mybox}[1][red] {on line, arc = 3pt, colback = #1!10!white, colframe = #1!50!black, boxsep = 0pt, left = 1pt, right = 1pt, top =2.5pt, bottom = 1pt, boxrule = 0.8pt, bottomrule = 0.8pt, toprule = 0.8pt} \def\cdg#1{\mybox[green]{\mintinline{ruby}{#1}}} % text style \def\cdr#1{\mybox[red]{\mintinline{ruby}{#1}}} %\def\cdr#1{\mintinline{ruby}{#1}} %%%%%%%%%%%%%%%%%%%%%%%%%% main text %%%%%%%%%%%%%%%%%%%%%%%%%%%%%%%%%%%%%%%%%%%%%%%%%%%%% \begin{document} \begin{titlepage} \begin{center} \horrule{0.5pt} \\[0.4cm] \vspace{-1.5ex}\textcolor{darkblue} { \zihao{-1} \bfseries \entit \\ \vspace{0.4cm}} \textcolor{darkblue}{\zihao{3} \bfseries \cntit} \\[0.1cm]\horrule{2pt} \vspace{-2ex} \end{center} \vspace{1cm} \begin{center} \textsc{\LARGE \univname\\ \large \depname \\ \unskip\strut} \vspace{-1.5ex} \\ \end{center} \vspace{3cm} \begin{table}[h] \zihao{4} \centering \begin{tabular}{p{3cm}<{\raggedleft} p{6cm}<{\centering}} 姓名: & {\fangsong 某某} \\ \specialrule{0em}{2pt}{2pt} 学号: & {\fangsong 123456} \\ \specialrule{0em}{2pt}{2pt} 导师: & {\fangsong 某某} \\ \specialrule{0em}{2pt}{2pt} 邮箱: & \url{theigrams@buaa.edu.cn} \\ \end{tabular} \end{table} \vspace{3cm} \begin{center} \zihao{4} \today \end{center} \end{titlepage} \newpage \begin{spacing}{1.5} \zihao{4} \thispagestyle{empty} \tableofcontents \setcounter{page}{1} \thispagestyle{empty} \end{spacing} \newpage \zihao{-4} \section{Basics of graph theory} \subsection{Graph Laplacian} \begin{definition}[非标准化图Laplace算子(Unnormalized Laplacian)] 定义了一个作用于 $ f $ 上的算子 $ \Delta :L^2(\mathcal{V})\rightarrow L^2(\mathcal{V}) $ ,用于刻画 $ f $ 与其局部加权平均值之间的差异. \[\begin{aligned} (\Delta f)_{i} & =\sum_{j:(i, j) \in \mathcal{E}} w_{i j}\left(f_{i}-f_{j}\right) \\ & =f_{i} \sum_{j:(i, j) \in \mathcal{E}}w_{i j}-\sum_{j:(i, j) \in \mathcal{E}}w_{i j} f_{j} \end{aligned} \] \end{definition} \begin{problem}[ $ \Delta $ 定义在 $ f $ 上 ] 注意:这里的$ \Delta $ 定义是在 $ f $ 上 ,但是由于 $ f_i $ 不是函数,因此不能写成 $ \Delta f_i $ 的形式,只能写成 $ (\Delta f)_i $. \end{problem} $ \Delta$算子 可以用一个半正定的 $ n\times n $ 矩阵 $\boldsymbol{\Delta } =\mathbf{D}-\mathbf{W} $ 代替 ,其中 $ \mathbf{W}=\left( w_{ij} \right) $ 是一个邻接矩阵(adjacency matrix), $ \mathbf{D}=\mathrm{diag}\left( \sum_{j\ne i}{w_{ij}} \right) $ 是对角阵(相当于把$ \mathbf{W}$的每一行加到对角元上). \begin{equation} \mathbf{Wf}=\left[ \begin{array}{c} \vdots \\ \sum_j{w_{ij}f_j} \\ \vdots \\ \end{array} \right] ,\qquad \mathbf{Df}=\left[ \begin{array}{c} \vdots \\ \sum_j{w_{ij}f_i} \\ \vdots \\ \end{array} \right] \end{equation} \begin{equation} \mathbf{\Delta f}=\left[ \begin{array}{c} \vdots \\ \left( \Delta f \right) _i \\ \vdots \\ \end{array} \right] =\left[ \begin{array}{c} \vdots \\ \sum_{j:(i,j)\in \mathcal{E}}{w_{ij}\left( f_i-f_j \right)} \\ \vdots \\ \end{array} \right] =\mathbf{Df}-\mathbf{Wf}=\left( \mathbf{D}-\mathbf{W} \right) \mathbf{f} \end{equation} \begin{definition}[Dirichlet energy of $ f $ ] \[\|f\|_{\mathcal{G}}^{2}=\frac{1}{2} \sum_{i j=1}^{n} w_{i j}\left(f_{i}-f_{j}\right)^{2}=\mathbf{f}^{\top} \boldsymbol{\Delta} \mathbf{f}\] \end{definition} \begin{pythoncode} import torch as tf a=1 \end{pythoncode} \cdr{redbox test} and \cdg{greenbox test} \end{document}

若有收获,就点个赞吧
0 人点赞
