在 TeX 的使用上,不可避免的是要使用到 PDF 格式文件:现在几乎所有的 TeX 都是直接支持 PDF 输出;插图也大多是 PDF 格式的。
社区里,几乎所有能找到的工具大多是基于下面几个开源项目的:
- Ghostscript,PDF 及 PS 的解释器
- MuPDF,PDF 解释器 / 预览器
- Poppler/Xpdf,PDF 解析 / 显示库
本文介绍的一些小技巧跟这几个开源项目的工具有关。
1. EPS 文件到 PDF 的转换
就算到了 2020 年,我依然能够发现某些学生或者某些期刊还在使用或者要求使用 EPS 格式文件来插图。就我的了解而言,似乎没有哪一家的排版流程完全是基于 PostScript 的。所以 EPS 这东西没必要用,就算你用了 EPS 文件,最后还是要转换成 PDF 文件的。所以,我建议使用某些工具软件(matlab 之类)导出图像的,直接导出 PDF 就好。
万一不幸,需要处理,其实也比较简单,直接用 ps2pdf 工具即可(TeX Live 中自带):
Usage: ps2pdf [options] <inputfile> <outputfile><inputfile> can be either a PS, EPS, or PDF file.A single hyphen (-) denotes stdin.<outputfile> is required if <inputfile> is a PDF fileor input is read from stdin.
2. PDF 文件裁边
某些 PDF 文件需要裁边,具体场景比如:把 PDF 扔到 Kindle 里面去读;插图的时候避免多余的空白。这时候可以使用 pdfcrop 工具(TeX Live 中自带)。简单的用法就是敲个命令:
但是这个工具的参数实在是太多了,在使用的时候,建议对照着 help 调整一下,多试几次:
PDFCROP 1.40, 2020/06/06 - Copyright (c) 2002-2020 by Heiko Oberdiek, Oberdiek Package Support Group.Syntax: pdfcrop [options] <input[.pdf]> [output file]Function: Margins are calculated and removed for each page in the file.Options: (defaults:)--help print usage--version print version number--(no)verbose verbose printing (false)--(no)debug debug informations (false)--gscmd <name> call of ghostscript (gswin32c)--pdftex | --xetex | --luatexuse pdfTeX | use XeTeX | use LuaTeX (pdftex)--pdftexcmd <name> call of pdfTeX (pdftex)--xetexcmd <name> call of XeTeX (xetex)--luatexcmd <name> call of LuaTeX (luatex)--margins "<left> <top> <right> <bottom>" (0 0 0 0)add extra margins, unit is bp. If only one number isgiven, then it is used for all margins, in the caseof two numbers they are also used for right and bottom.--(no)clip clipping support, if margins are set (false)(not available for --xetex)--(no)hires using `%%HiResBoundingBox' (false)instead of `%%BoundingBox'--(no)ini use iniTeX variant of the TeX compiler (false)Expert options:--restricted turn on restricted mode (false)--papersize <foo> parameter for gs's -sPAPERSIZE=<foo>,use only with older gs versions <7.32 ()--resolution <xres>x<yres> ()--resolution <res> pass argument to ghostscript's option -rExample: --resolution 72--bbox "<left> <bottom> <right> <top>" ()override bounding box found by ghostscriptwith origin at the lower left corner--bbox-odd Same as --bbox, but for odd pages only ()--bbox-even Same as --bbox, but for even pages only ()--pdfversion <x.y> | auto | noneSet the PDF version to x.y, x= 1 or 2, y=0-9.If `auto' is given as value, then thePDF version is taken from the headerof the input PDF file.An empty value or `none' uses thedefault of the TeX engine. (auto)--uncompress creates an uncompressed pdf,useful for debugging (false)Input file: If the name is `-', then the standard input is used andthe output file name must be explicitly given.Examples:pdfcrop --margins 10 input.pdf output.pdfpdfcrop --margins '5 10 5 20' --clip input.pdf output.pdfIn case of errors:Try option --verbose first to get more information.In case of bugs:Please, use option --debug for bug reports.
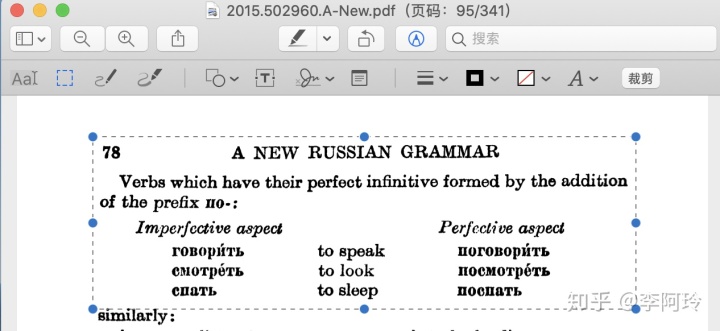
如果你使用的是 Mac 系统,有时候截图可能更省事一点,因为 Preview 自带截图工具,大致如下:

3. PDF 文件转为图像(位图)
这个我用的比较多,比如写公众号文章或者知乎文章的时候,就需要把某些输出的结果转换成图。(现在都偷懒到直接用 PC 版微信的截图功能了)
转换成图像就有两个方法。
MuPDF 工具(速度略快一点的):
mutool draw -r 300 -o i.png i.pdf
这里面 - r 是 dpi 大小(默认是 72,想要图片清晰,就增大数值),-o 是输出文件名,如果是多页,可以写成格式化字符串样式,比如:
mutool draw -r 300 -o i-%d.png i.pdf
Ghostscript(速度略慢一点的):
gs -sDEVICE=pngalpha -o file-%03d.png -r300 i.pdf
如果是在 Windows 下的 TeX Live 中,可以这样使用:
rungs -sDEVICE=pngalpha -o file-%03d.png -r300 i.pdf
4. PDF 文件转为图像(矢量)
这里面,所谓的矢量图像,其实 PDF 就是一个,比如我们可以通过下面的命令实现其他软件中的 “转曲” 功能:
gs -o o.pdf -dNoOutputFonts -sDEVICE=pdfwrite -dNOPAUSE -dBATCH -dSAFER i.pdf
但有时候我们需要输出到 SVG 或者 EPS(现实如此),那么可以使用 poppler 的 pdftocairo 工具:
pdftocairo -svg i.pdfpdftocairo -eps i.pdf
MuPDF 的工具也支持:
mutool convert -F svg i.pdf
5. 查看 / 抽取文档内的字体和图像
这个可能算一点逆向。有时候分析某些 PDF 的排版,就需要查看字体。而某些文章,比如想要取出原图,也是可以操作的。
查看字体可以使用 poppler 的 pdffonts:
取出 PDF 文件中的字体和图像可以使用:
6. 抽取 PDF 页面
偶尔需要抽出一定范围的页面或者单独的几个页面的时候(比如第 1 页,第 2 页,第 3 页,第 6-7 页),可以这样:
mutool merge -o o.pdf i.pdf 1,2,3,6-7
虽然我们看到了 merge 字眼,而且 MuPDF 的这个工具确实是也是做合并的。但我要说的是,抽取单个 PDF 中的页面确实是某种特殊的合并操作。merge 的全部操作如下:
usage: mutool merge [-o output.pdf] [-O options] input.pdf [pages] [input2.pdf] [pages2] ...-o - name of PDF file to create-O - comma separated list of output optionsinput.pdf name of input file from which to copy pagespages comma separated list of page numbers and rangesPDF output options:decompress: decompress all streams (except compress-fonts/images)compress: compress all streamscompress-fonts: compress embedded fontscompress-images: compress imagesascii: ASCII hex encode binary streamspretty: pretty-print objects with indentationlinearize: optimize for web browsersclean: pretty-print graphics commands in content streamssanitize: sanitize graphics commands in content streamsgarbage: garbage collect unused objectsincremental: write changes as incremental updatecontinue-on-error: continue saving the document even if there is an erroror garbage=compact: ... and compact cross reference tableor garbage=deduplicate: ... and remove duplicate objectsdecrypt: write unencrypted documentencrypt=rc4-40|rc4-128|aes-128|aes-256: write encrypted documentpermissions=NUMBER: document permissions to grant when encryptinguser-password=PASSWORD: password required to read documentowner-password=PASSWORD: password required to edit document
小技巧就先介绍这些,有其他的问题的,欢迎留言。
本文首发于公众号 “学术与 TeX”,欢迎搜索关注本公众号。
https://zhuanlan.zhihu.com/p/197919733

