常用命令
linux命令大全:https://man.linuxde.net/
1、软件安装命令
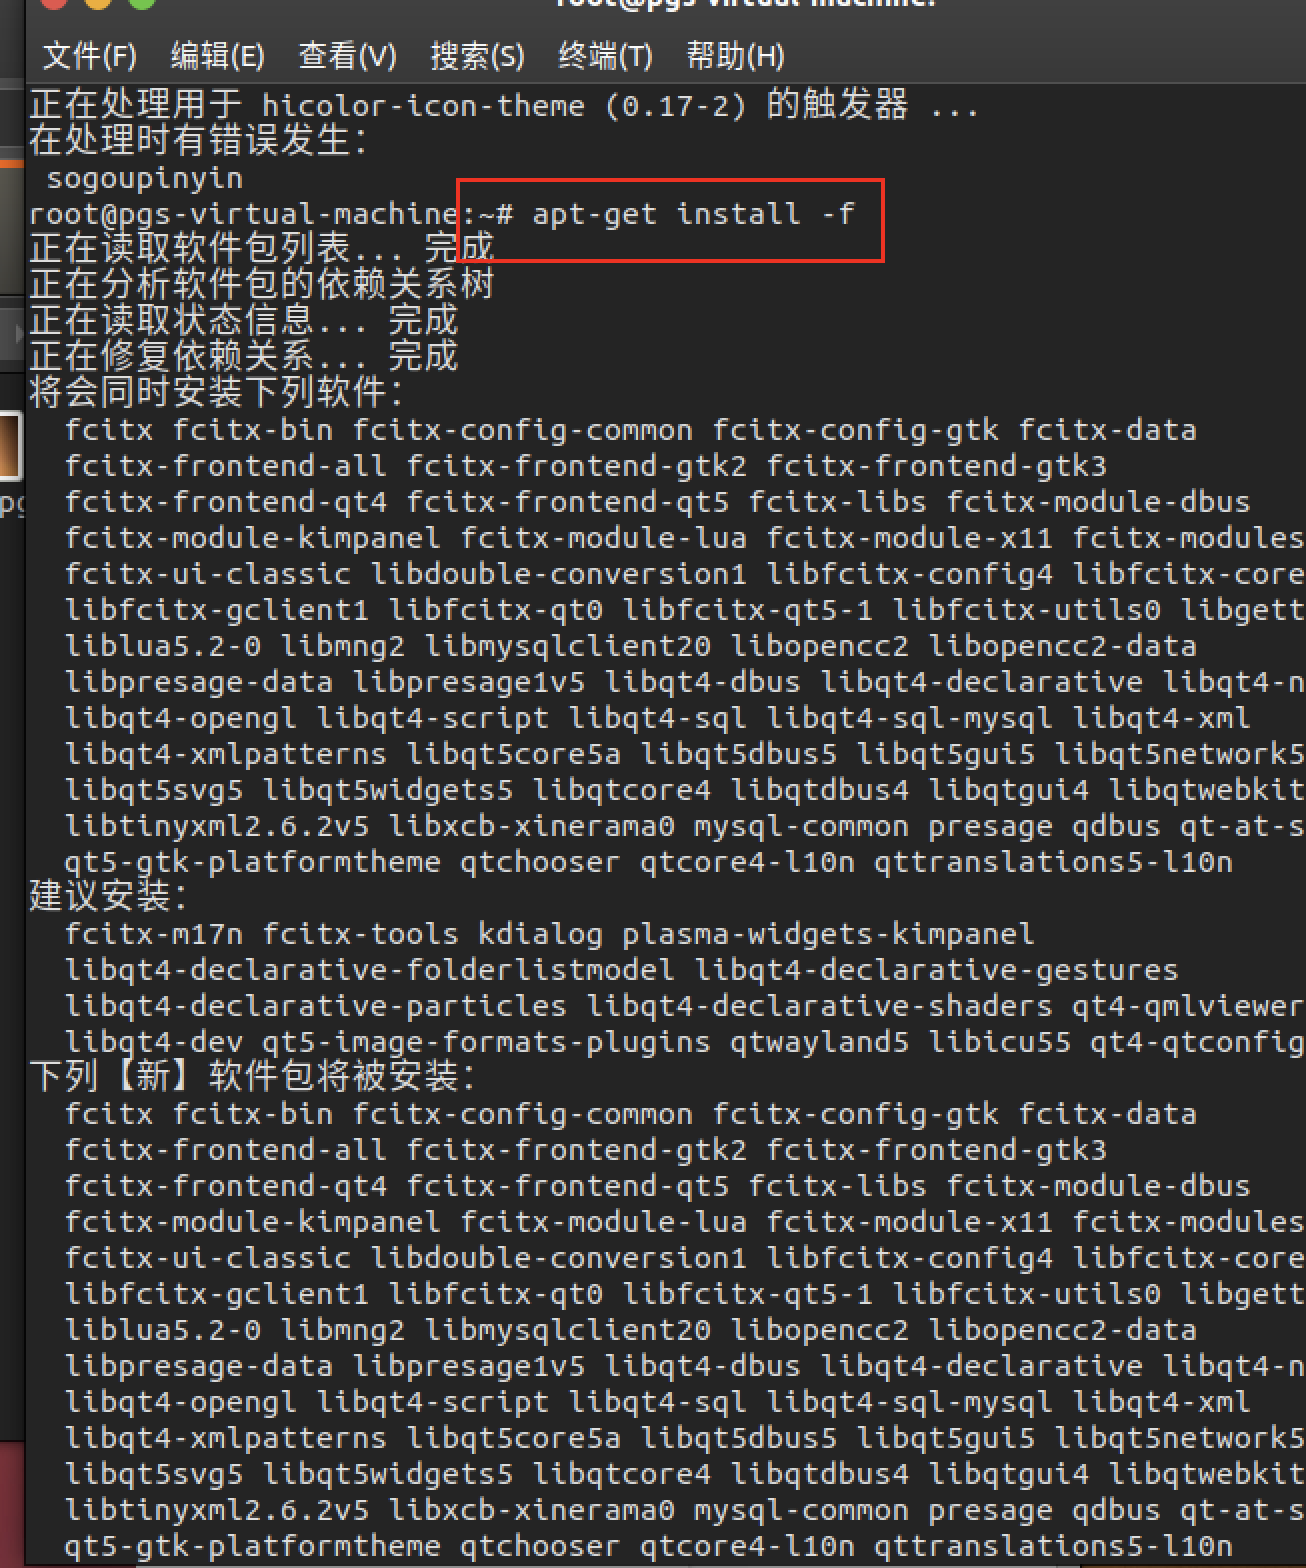
- apt-get | 实例 | 说明 | | —- | —- | | apt-get install vim | 安装vim应用 | | apt-get update | 更新源 | | apt-get remove vim | 删除一个已安装的包 | | apt-get-purge remove vim | 删除一个已安装的包同时删除配置文件 | | apt-get upgrade | 更新所有已安装的软件包 | | apt-get clean | 清除缓存,(下载的软件包包括正在使用的,但不影响程序) | | apt-get autoclen | 清除缓存(已卸载的软件) | | apt-get install -f | 安装依赖软件 |
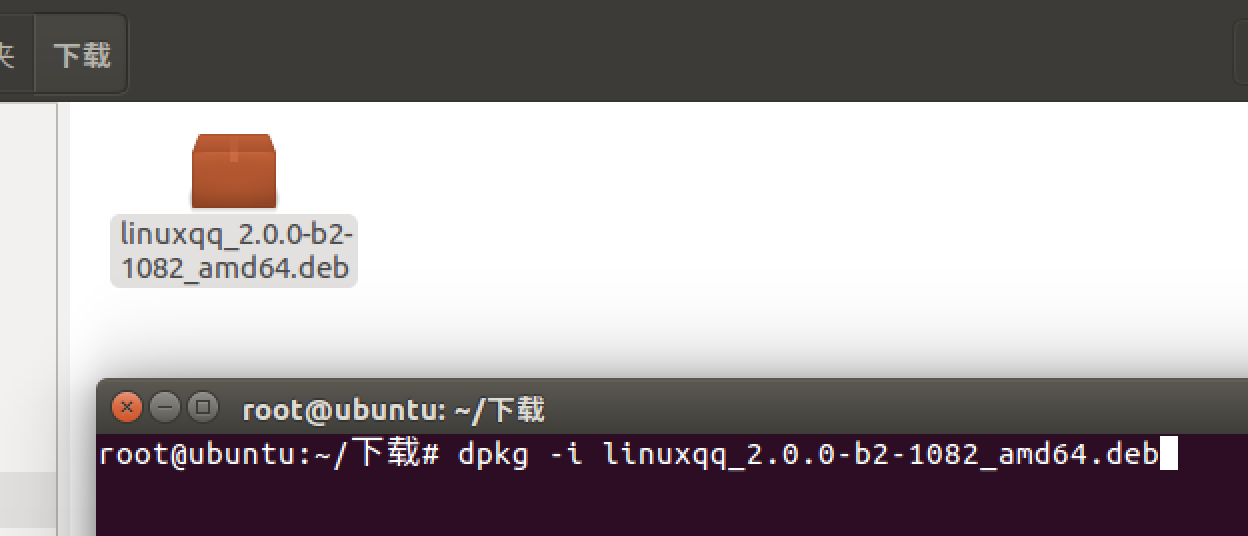
- dpkg:Debian Linux系统用来安装,创建和管理软件包的实用工具(ubuntu也用)
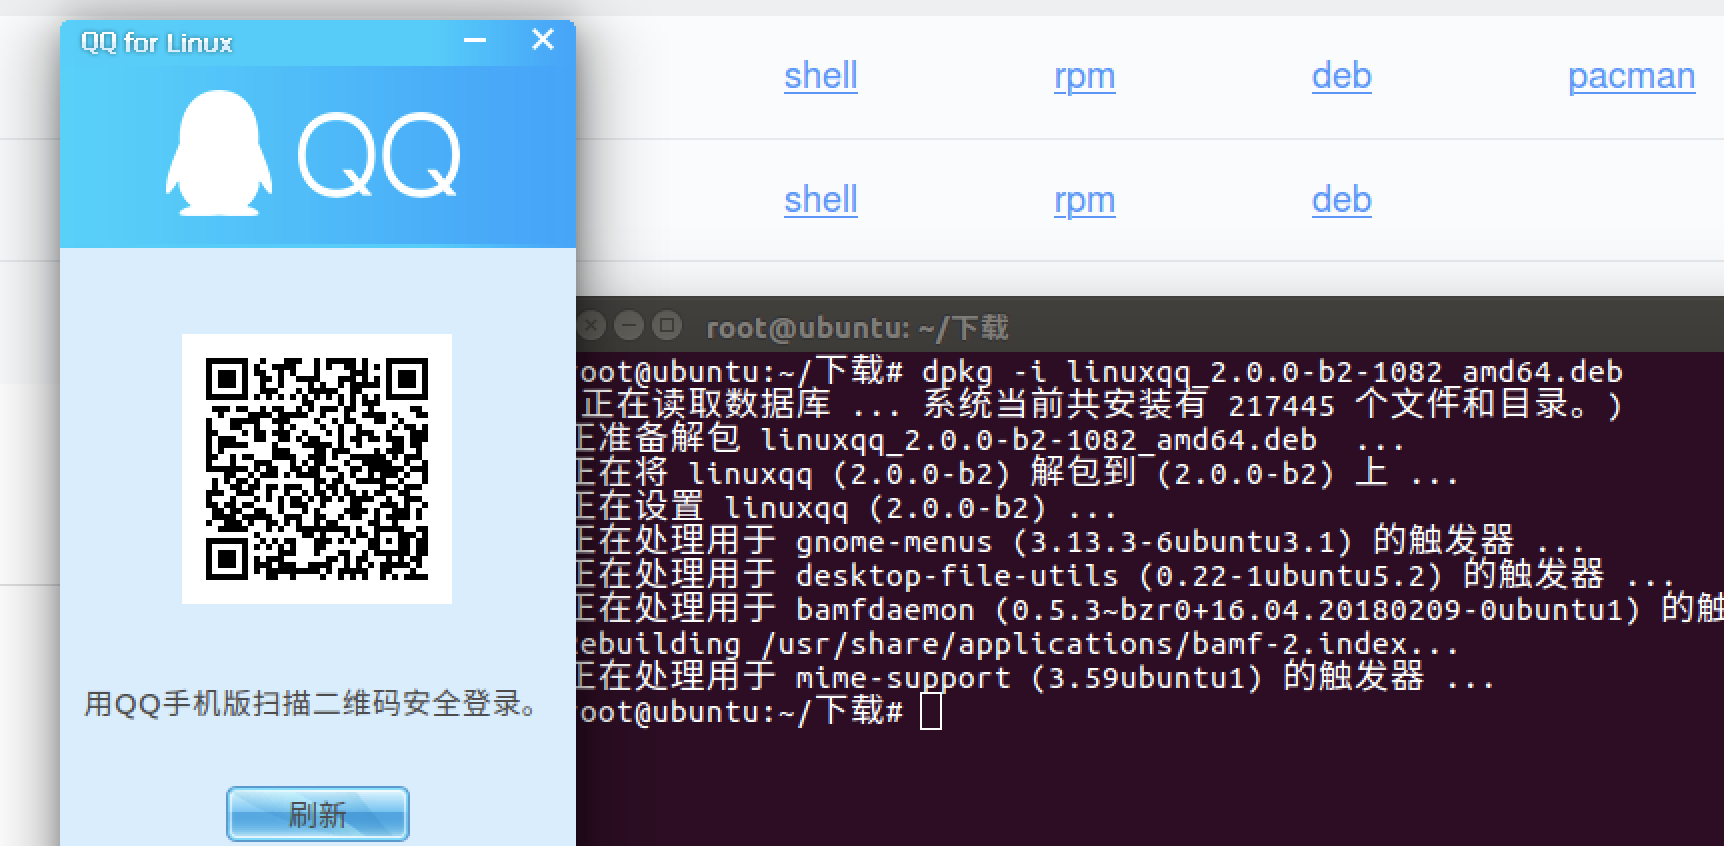
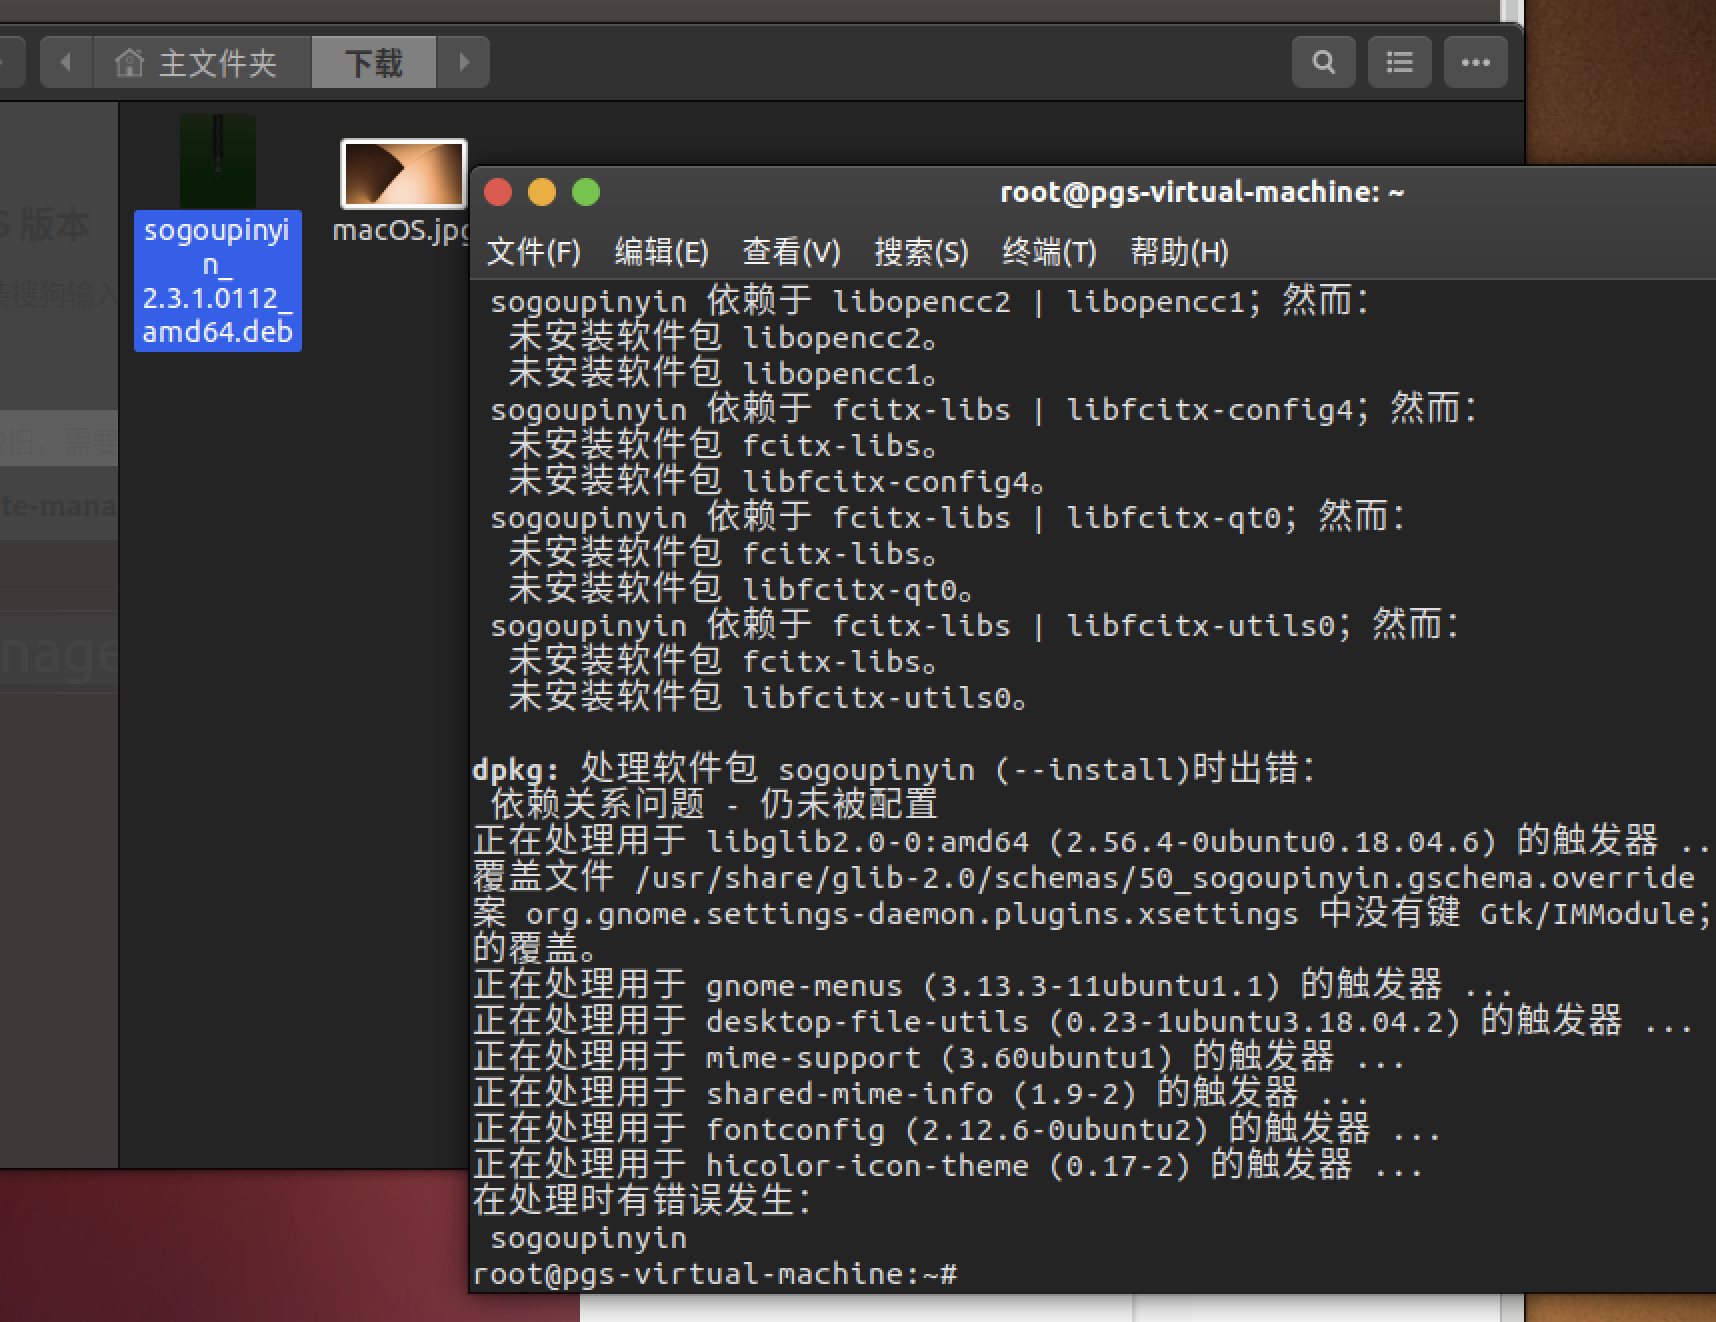
安装qq https://im.qq.com/linuxqq/download.html(软件被占用apt-get install -f)
| 实例 | 说明 |
|---|---|
| dkpg -i xxxx.deb | 安装.deb软件包 |
| dpkg -r xxxx | 删除软件 |
| dkpg -P xxxx | 删除软件同时删除配置 |
| dkpg -L xxxx | 列出与该包关联的文件 |
| dkpg -l | 列出当前已安装的包 |
| dpkg -c xxxx.deb | 列出deb包的内容 |

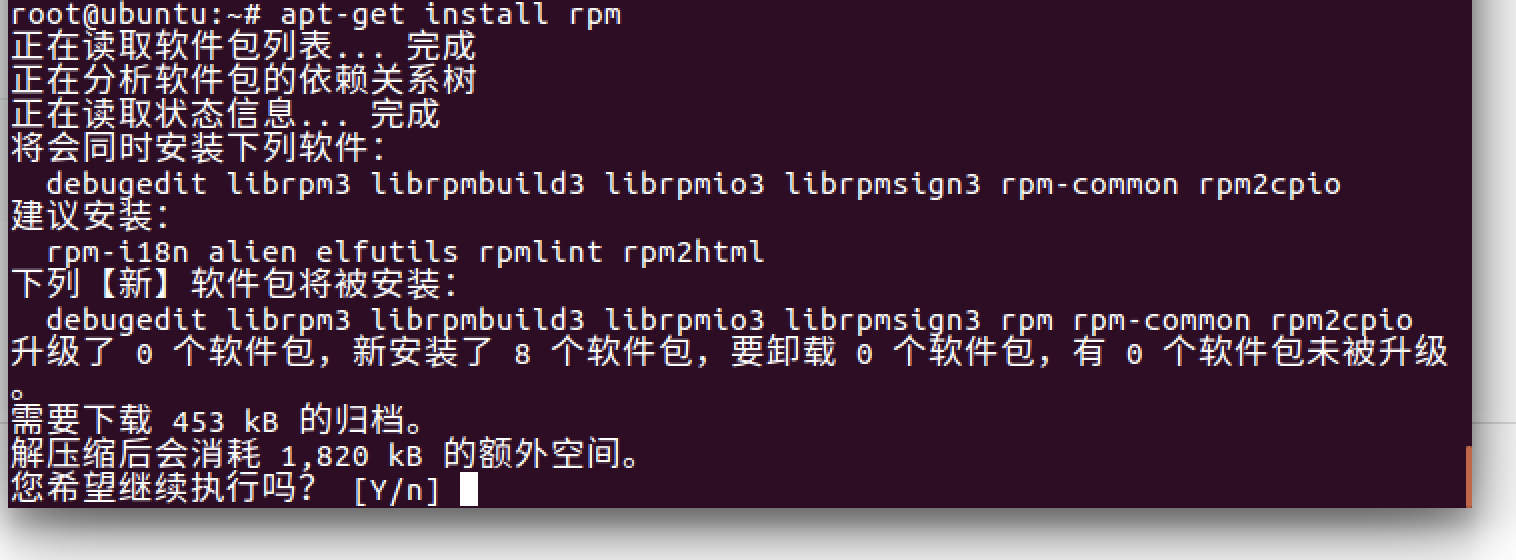
- rpm是Red Hat Linux发行版专门用来管理Linux各项套件的程序(默认ubuntu没有安装) | 实例 | 说明 | | —- | —- | | rpm -ivh package.rpm | 安装rpm包,显示执行过程 | | rpm -qi package.rpm | 显示软件安装信息 | | rpm -e package.rpm | 卸载rpm包 |
2、文件目录目录
cd | 实例 | 说明 | | —- | —- | | cd | 进入用户主目录 | | cd ~ | 进入用户主目录 | | cd .. | 返回上级目录 | | cd - | 返回进入此目录之前所在的目录 | | cd ./ubuntu | 进入当前目录下ubuntu目录 |
ls:先讲解用户、组、权限 | 实例 | 说明 | | —- | —- | | ls | 显示当前目录下非隐藏文件与目录 | | ls -a | 显示当前目录下包括隐藏文件在内的所有文件列表 | | ls -l | 以列表方式输出长 | | ls -i | 显示文件的inode信息 | | ls -al | 将-a和-l两个命令组合使用 | | ls -k | 以kb(千字节)为单位显示文件大小 | | ls -h | 自动显示字节,根据大小换算成KB、MB、GB |
cp:将原文件(目录)拷贝到目的文件(目录) | 实例 | 说明 | | —- | —- | | cp 1.txt /home/user/2.txt | 将当前文件拷贝到/home/user/2.txt | | cp -R hello /home | 将当前hello目录拷贝到/home目录下 | | cp /user/.txt /home | 将/user/目录下后缀为txt的文件拷贝到home目录下 | | cp ./ /home | 将当前目录下所有文件拷贝到home目录下 | | cp -r -a /user/* /home | 将user目录下所有到/home,没有提示 |
mv:将源文件移动到目标文件(更名) | 实例 | 说明 | | —- | —- | | mv -f /user/*.txt /home | 移动到目标文件,如果存在直接覆盖 | | mv hello.txt 2.txt | 将文件hello.txt更名为2.txt |
rmdir:删除空目录 | 实例 | 说明 | | —- | —- | | rmdir hello project | 删除当前目录中hello和project目录,必须是空目录 | | rmdir -r project | 递归删除当前project空目录 |
mkdir | 实例 | 说明 | | —- | —- | | mkdir hello | 当前目录下创建hello目录 | | mkdir -m 770 hello | 当前目录下创建hello目录,同时指明权限其他用户不能访问 | | mkdir -p hello/15pb | 联级创建目录,如果没有hello目录就创建,再创建15pb目录 |
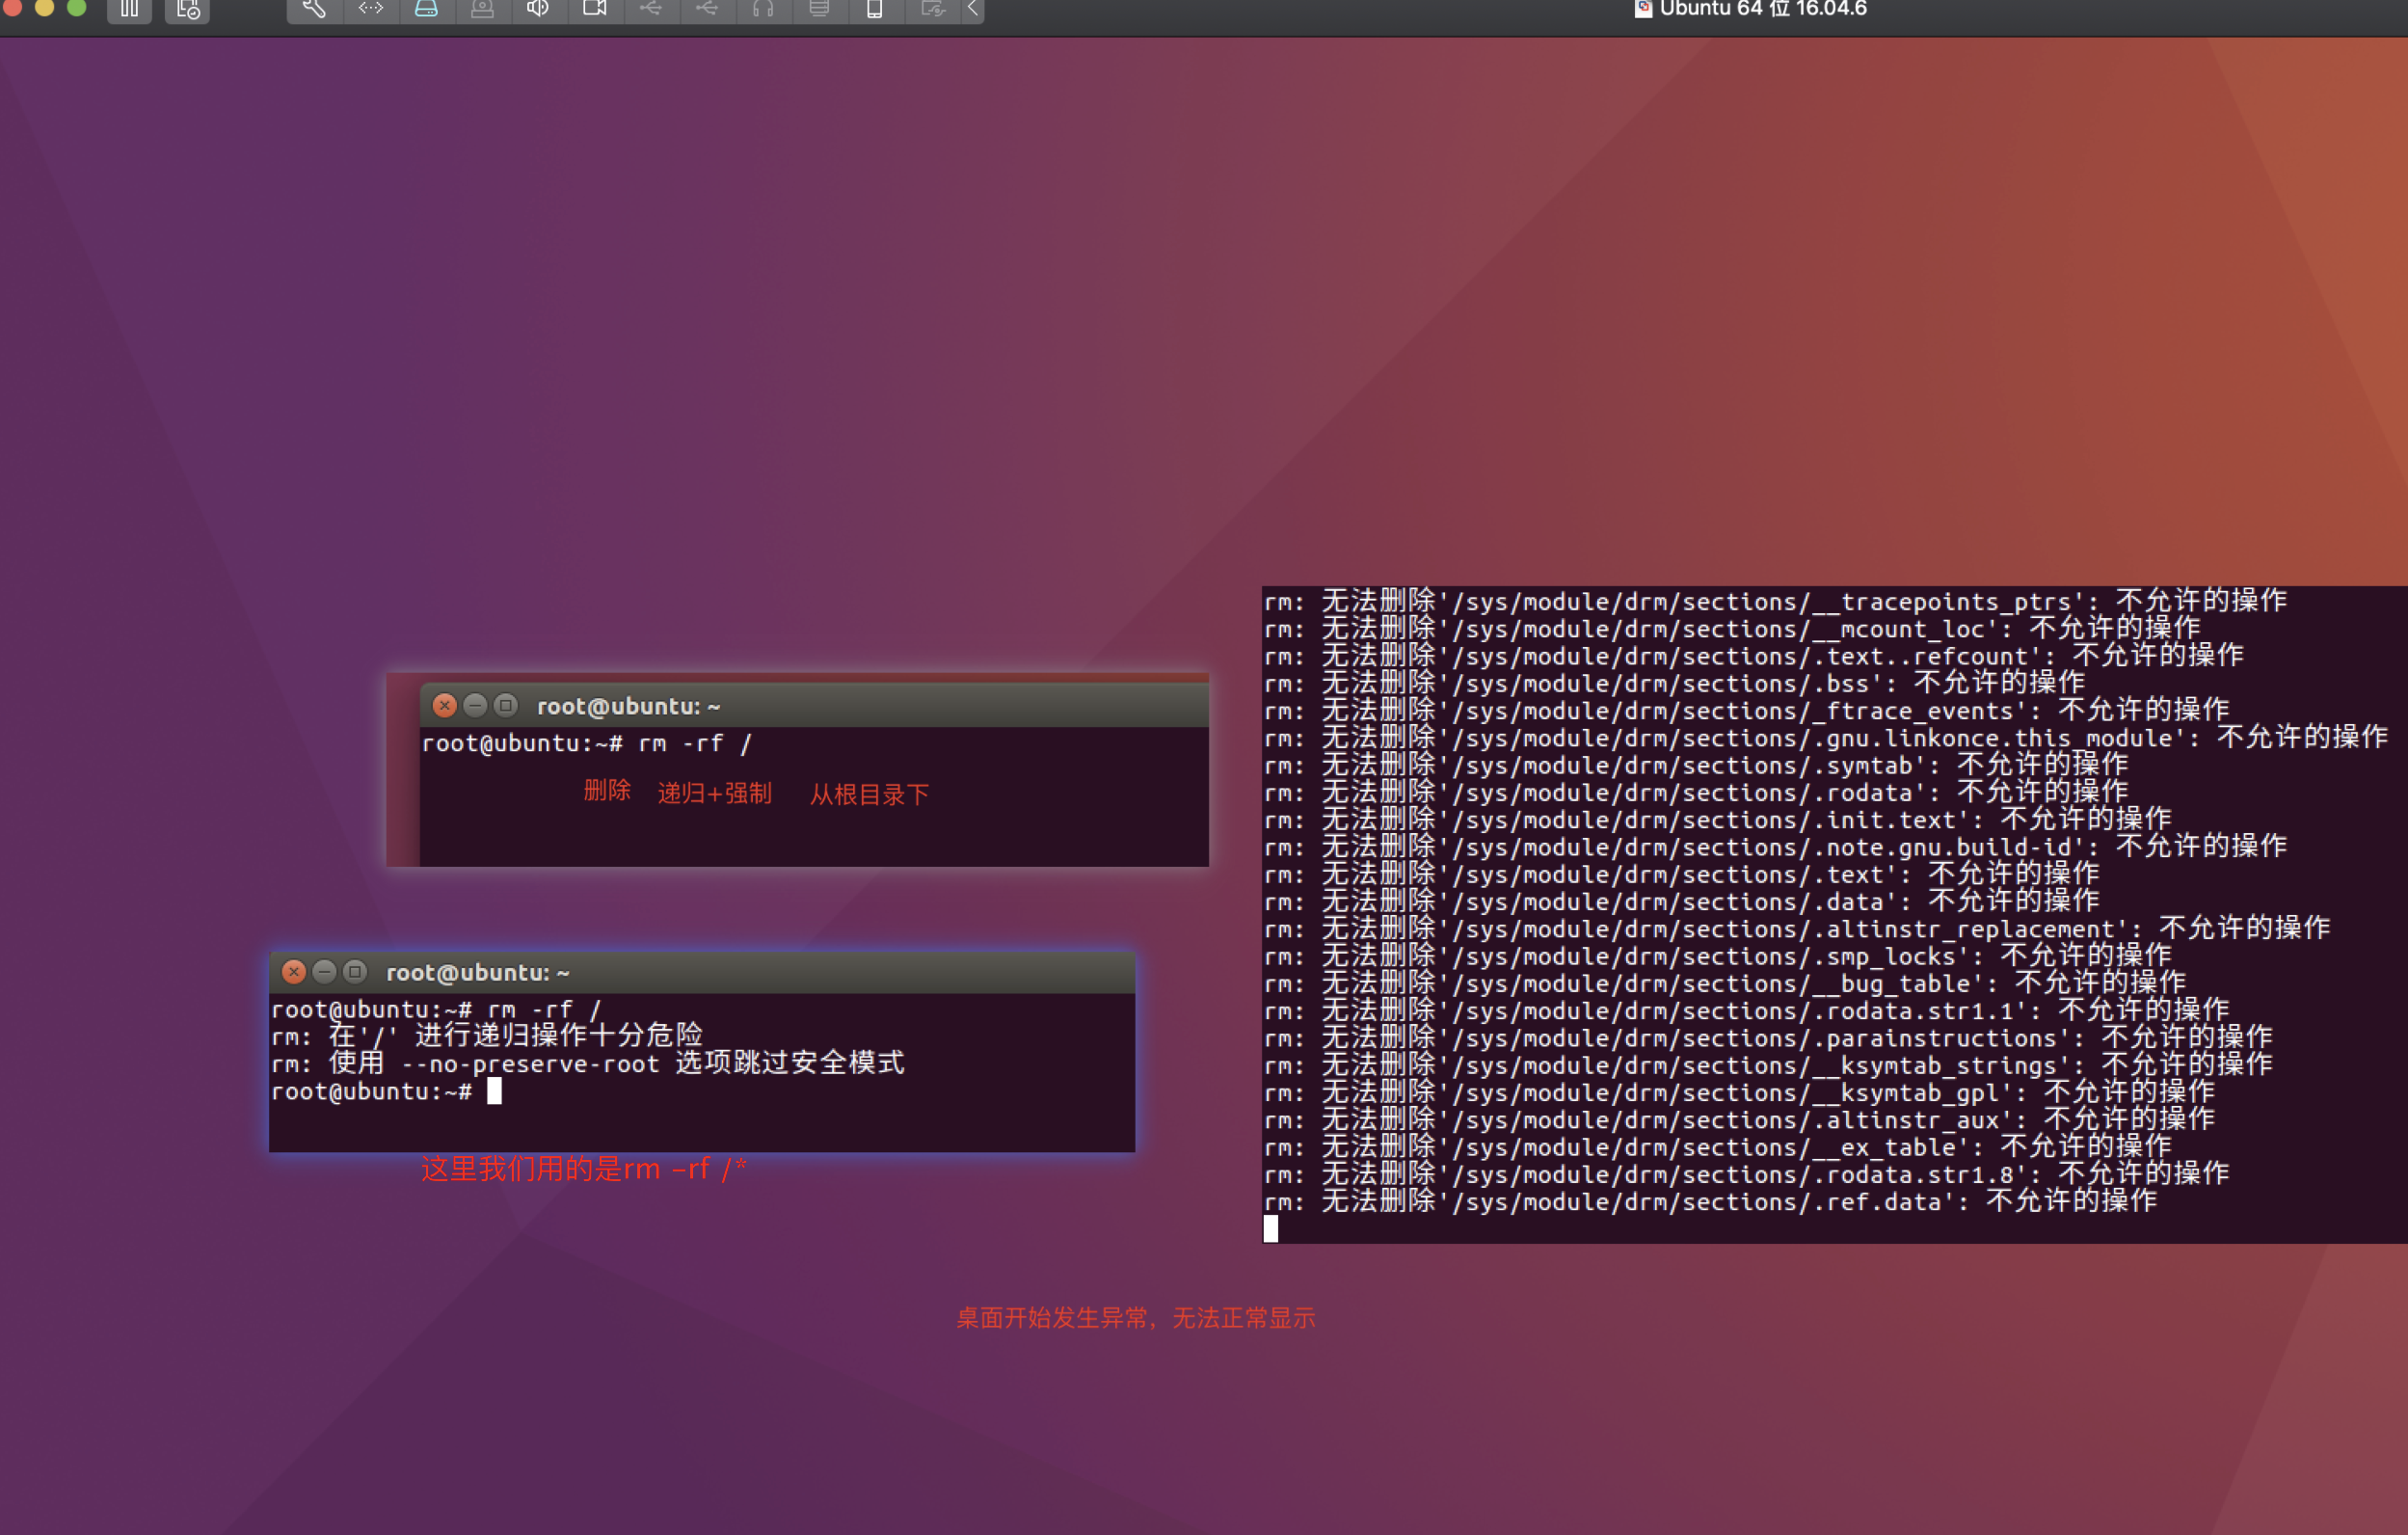
rm:删除文件,目录 | 实例 | 说明 | | —- | —- | | rm 1.txt | 删除1.txt(默认无法删除目录) | | rm -r hello | 递归删除hello目录 | | rm -f .txt | 强制删除当前目录下所有.txt文件 |
pwd:以绝对路径的方式显示用户当前工作目录 | 实例 | 说明 | | —- | —- | | pwd | 显示当前的绝对路径 |
touch | 实例 | 说明 | | —- | —- | | touch 2.txt | 创建文件 |
file用来探测给定文件的类型 | 实例 | 说明 | | —- | —- | | file 1.txt | 显示这个文件信息(编码,类型) | | file -i 1.txt | 显示这个文件信息(MIME) |
grep全面搜索正则表达式并把行打印出来 | 实例 | 说明 | | —- | —- | | grep “hello” 1.txt | 从1.txt中搜索hello文本,并打印出来 | | grep “hello” 1.txt 2.txt | 从1.txt和2.txt中搜索hello文本,并打印出来 | | grep -c “hello” 1.txt | 从1.txt匹配到hello文本几次 | | grep -n “hello” 1.txt | 找到匹配的文本后,打印对应的行数 | | grep “hello” -r | 从当前目录下搜索所有文件带有hello文本 |
find查找文件 | 实例 | 说明 | | —- | —- | | find /home -name “.txt” | 在/home目录下查找以txt结尾的文件名 | | find /home -iname “.txt” | 同上,但忽略大小写 | | | | | find . -type 类型参数 | 类型参数可以是:f普通文件 |符号连接 d目录 c字符设备 b块设备 s套接字 | | find . -type f -name “1.*” | 查找当前目录下1打头普通文件 |
whereis/locate查找二进制程序,源代码文件 | 实例 | 说明 | | —- | —- | | whereis vim | 查找vim程序相关位置 | | whereis -b vim | 只进行二进制程序查找 | | whereis -s vim | 只进行源码查找 | | locate vim | 查找vim程序相关位置 |
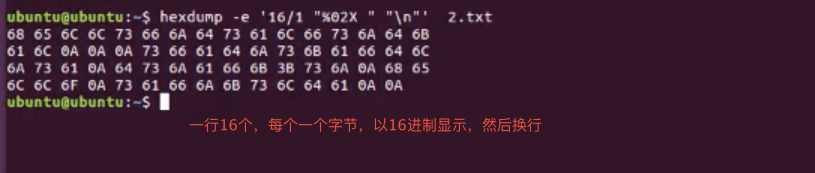
hexdump | 实例 | 说明 | | —- | —- | | hexdump -e ‘16/1 “%02X” “\n”‘ 2.txt | | | hexdump -n 10 -C 2.txt | 显示前10个以十六进制方式,-C是asc码 | | hexdump -n 10 -C -s 20 2.txt | 从20偏移位置开始显示 |
more/less/cat/head/tail | 实例 | 说明 | | —- | —- | | more 2.txt | 多屏显示文本,只能后翻 | | less 2.txt | 多屏显示文本,可以前后翻 | | head -n 4 2.txt | 查看4行文本内容(默认显示10行) | | tail 2.txt | 查看文件最后10行内容 |
ln创建一个连接文件 | 实例 | 说明 | | —- | —- | | ln /user/1.txt /desktop/1.txt | 创建一个硬连接 | | ln -s/user/1.txt /desktop/1.txt | 创建软连接 |
Windows 中快連方式,实际上快連方式和它指向的文件是独立的两个文件,两个都占硬盘空间只不过用户访快捷方式时,其效果等于访指向的文件
软连接:源文件删除后打开失败
硬连接:源文件删除后打开正常
3、用户权限
- su
在/etc/sudoers.d里边存着root权限文件
| 实例 | 说明 |
|---|---|
| su ubuntu64 | 切换ubuntu64用户 |
| su | 切换root用户 |
sudo用来以其他身份来执行命令,预设的身份为root | 实例 | 说明 | | —- | —- | | sudo apt-get install vim | 临时切换root用户执行程序 |
useradd | 实例 | 说明 | | —- | —- | | useradd -m pgs | 创建pgs用户同时创建home目录 |
passwd | 实例 | 说明 | | —- | —- | | passwd pgs | 修改指定用户密码 | | passwd | 修改root用户密码 |
userdel | 实例 | 说明 | | —- | —- | | userdel -r pgs | 删除用户,同时删除home目录 |
usermod | 实例 | 说明 | | —- | —- | | usermod -G sudo pgs | 修改用户pgs加入附加组 | | usermod -g sudo pgs | 修改用户pgs当前组 | | usermod -i alibaba pgs | 修改pgs的用户名为alibaba |
chmod | 实例 | 说明 | | —- | —- | | chmod 777 1.txt | 更改当前1.txt所有用户都可以读写执行 |
chgrp | 实例 | 说明 | | —- | —- | | chgrp pgs 1.txt | 更改当前1.txt文件的属组是pgs |
chown | 实例 | 说明 | | —- | —- | | chown pgs 1.txt | 更改当前1.txt文件的属主是pgs |
groupadd | 实例 | 说明 | | —- | —- | | groupadd pgs | 添加pgs组 |
groupdel | 实例 | 说明 | | —- | —- | | groupdel pgs | 删除pgs组 |
4、进程
ps/top | 实例 | 说明 | | —- | —- | | ps -aux | 显示所有终端机下的 | | top | 可视化显示进程信息 |
pstree | 实例 | 说明 | | —- | —- | | pstree | 可树状显示进程 |
kill/killall | 实例 | 说明 | | —- | —- | | kill 1234 | 结束一个pid为1234的进程 | | kill -9 1234 | 强制结束一个pid为1234的进程 | | killall ps | 通过 |
free显示当前系统未使用的已使用的内存数目 | 实例 | 说明 | | —- | —- | | free -m | 当前内存使用情况,以MB为单位 | | free -h | 自动显示内存单位 |
5、磁盘相关
df | 实例 | 说明 | | —- | —- | | df -h | 显示磁盘空间,以刻度方式 | | df -a | 查看全部文件系统 |
du | 实例 | 说明 | | —- | —- | | du -b 1.txt | 查看文件占用空间,以字节为单位 | | du hello | 查看目录占用空间,kb为单位 | | du 1.txt 2.txt | 查看多个文件占用内存空间 |
6、网络命令
ping | 实例 | 说明 | | —- | —- | | ping -c 4 192.168.1.1 | 测试为了4次 | | ping www.baidu.com | |
netstat | 实例 | 说明 | | —- | —- | | netstat -ano | 显示网络连接情况 | | netstat -l | 显示监听的端口 | | netstat -i | 显示网络设备接口 |
ifconfig | 实例 | 说明 | | —- | —- | | ifconfig | 显示当前网络配置情况 |
wget:用来从指定的URL下载文件 | 实例 | 说明 | | —- | —- | | wget https://mirrors.aliyun.com/ubuntu-releases/16.04/ubuntu-16.04.7-desktop-amd64.iso | 下载ubuntu镜像到当前目录下 | | wget https://www.baidu.com/ -O 2.html | 下载后指定文件名 | | wget -b https://mirrors.aliyun.com/ubuntu-releases/16.04/ubuntu-16.04.7-desktop-amd64.iso | 后台下载 |
7、解压备份
zip | 实例 | 说明 | | —- | —- | | zip -q -r test.zip /hello/ | 不显示信息,打包这个hello目录下所有文件到tets.zip | | zip -q -r test.zip *.txt | 打包当前目录下所有txt文件到test.zip | | zip -q -r test.zip 1.txt 2.txt | 打包当前目录下1.txt 2.txt文件到test.zip |
unzip | 实例 | 说明 | | —- | —- | | unzip test.zip | 解压zip文件到当前目录下 | | unzip -n test.zip d /tmp | 解压tets.zip文件到当前目录/tmp/文件夹下 | | unzip -v test.zip | 查看tets.zip文件内容,但不解压 |
tar | 实例 | 说明 | | —- | —- | | tar -zcvf log.tar.gz log2012.log | 打包后,以 gzip 压缩 | | tar -zxvf /opt/soft/test/log.tar.gz | 解包 |
8、其他命令
uname | 实例 | 说明 | | —- | —- | | uname -a | 显示当前系统全部信息 | | uname -r | 显示内核版本 |
clear | 实例 | 说明 | | —- | —- | | clear | 清屏 |
*source将一个文件当成shell执行
| 实例 | 说明 |
|---|---|
| source bash_profile | 更新环境变量 |
- man | 实例 | 说明 | | —- | —- | | man 1 ls | 1表示查询的是linux命令 | | man 2 xxx | 2表示查询的是linux api | | man 3 xxx | 3表示查询的是C库函数 |
9、计划任务
crontab:用于创建定时任务
crond:任务计划的服务进程,开机默认启动
默认情况开机时会启动cron服务
| 服务操作 | 命令 |
|---|---|
| 启动服务 | service cron start |
| 服务状态 | service cron status |
| 停止服务 | service cron stop |
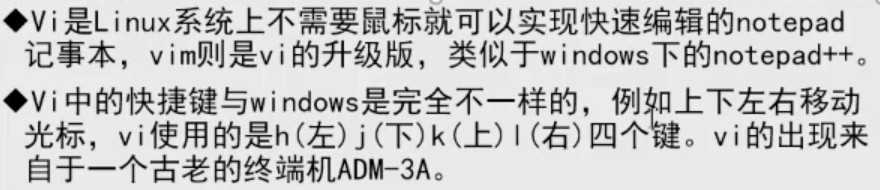
vim(编译器之神)使用
vim简介

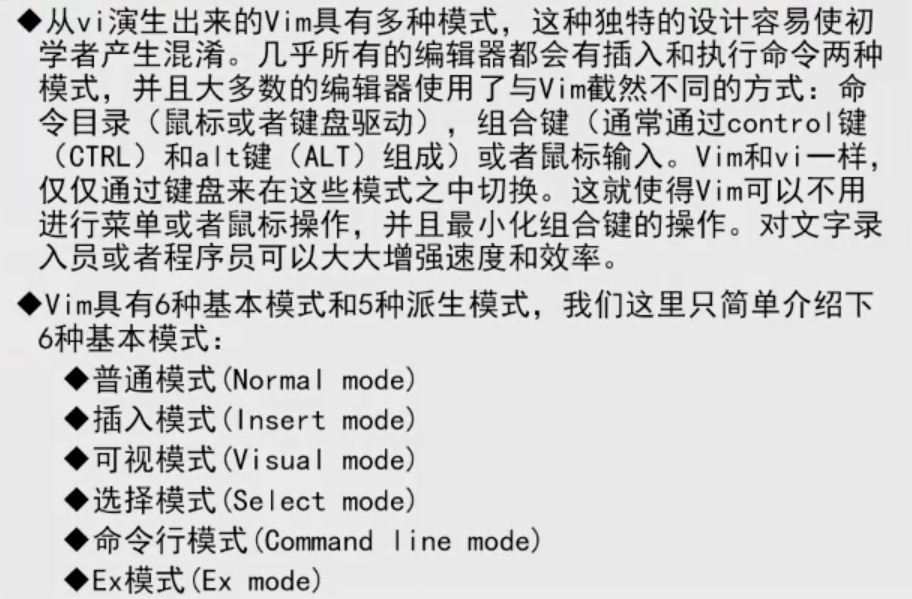
使用

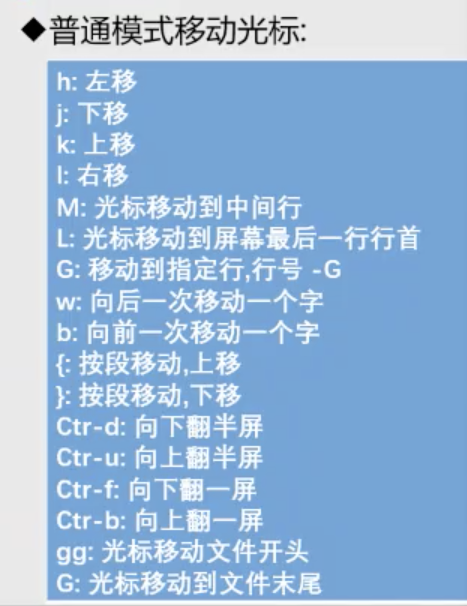
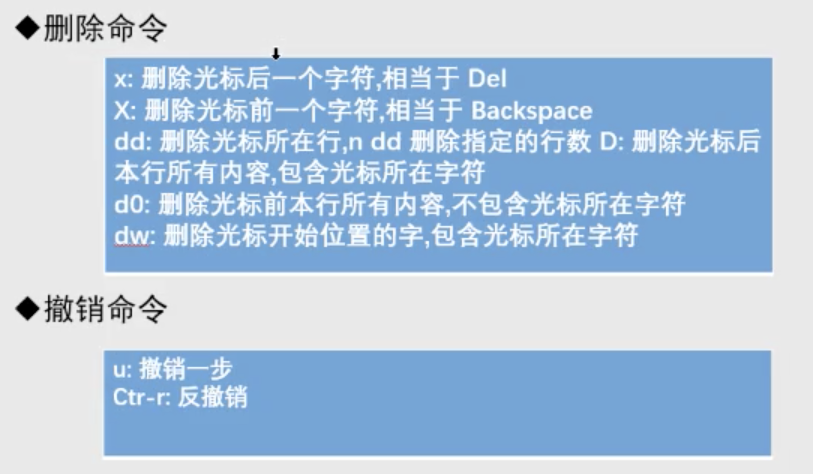
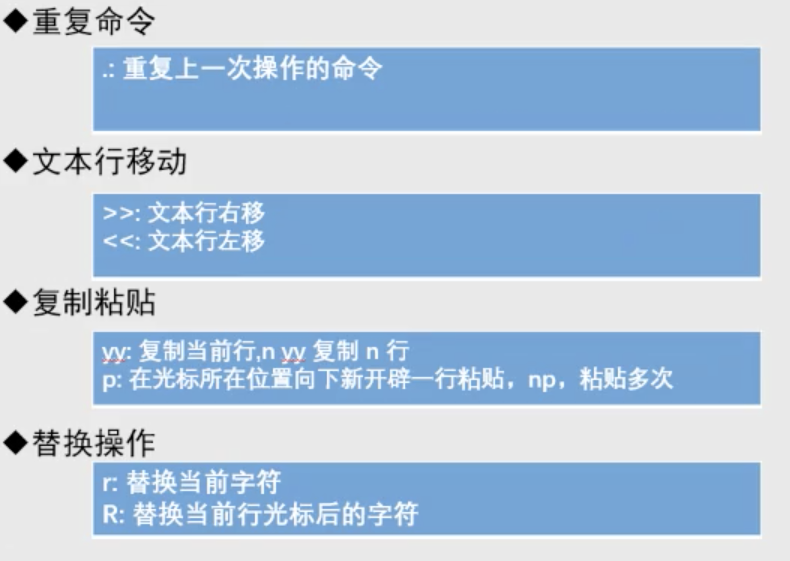
普通模式下
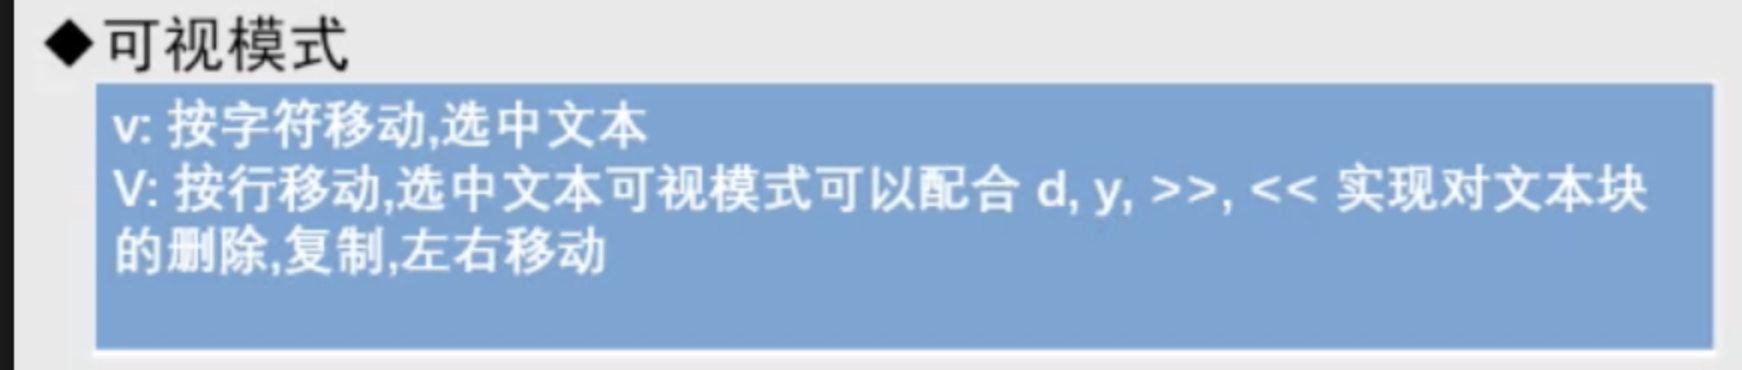
可视模式(普通模式按v)
命令模式(普通模式按:)
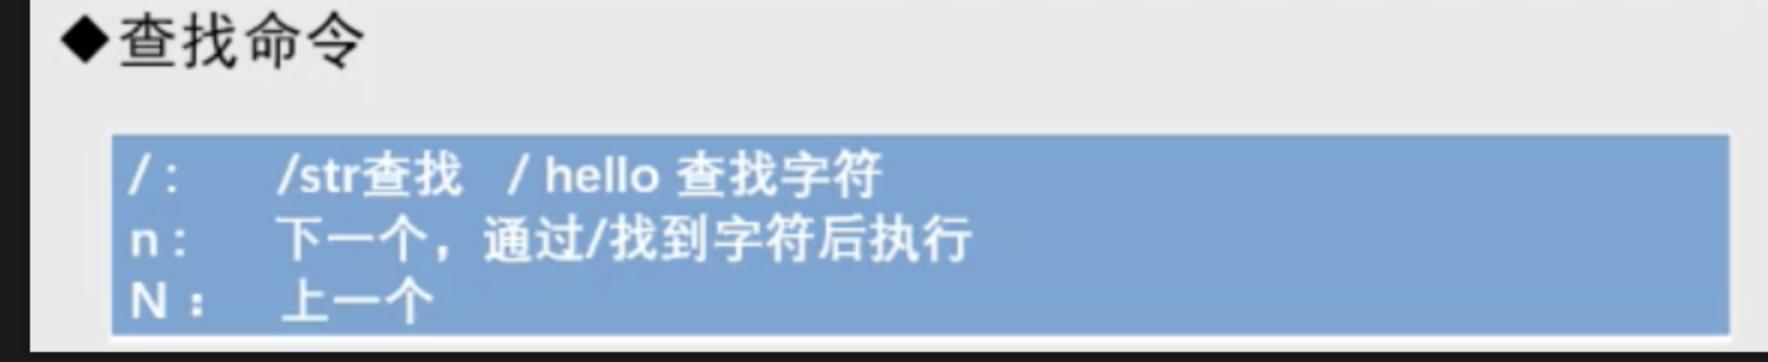
查找模式(普通模式按/)
系统常用设置
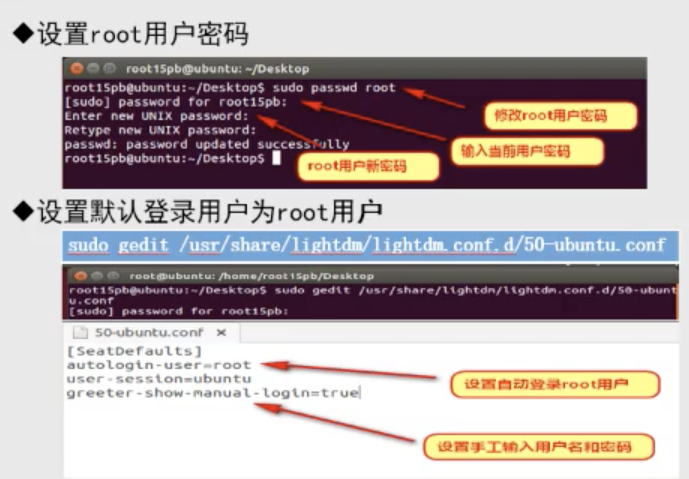
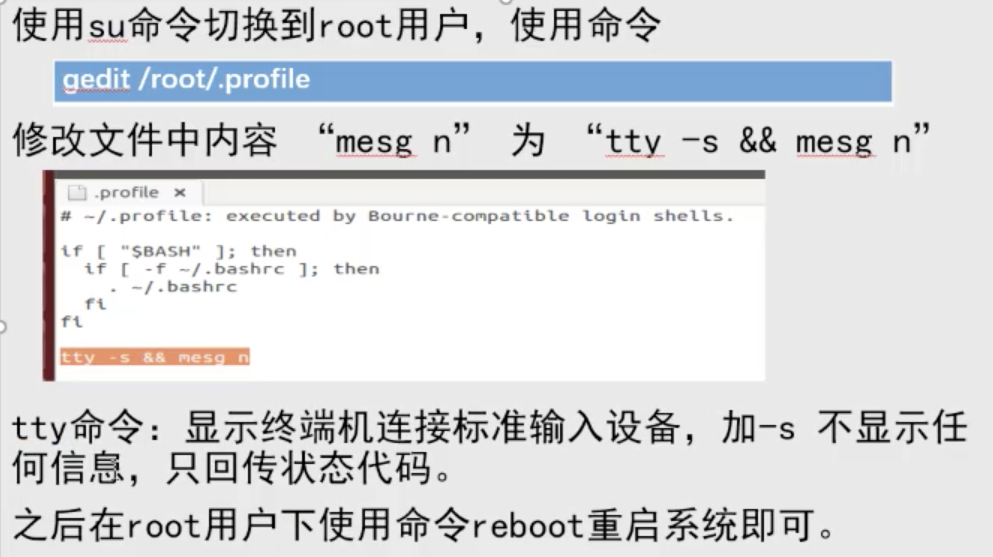
root登录
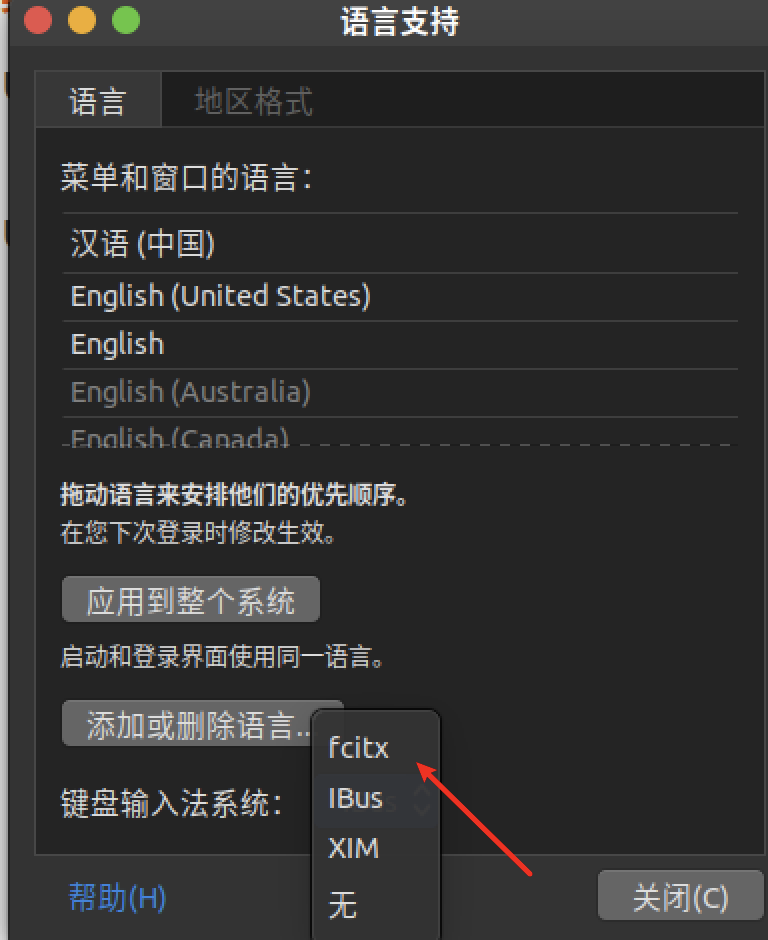
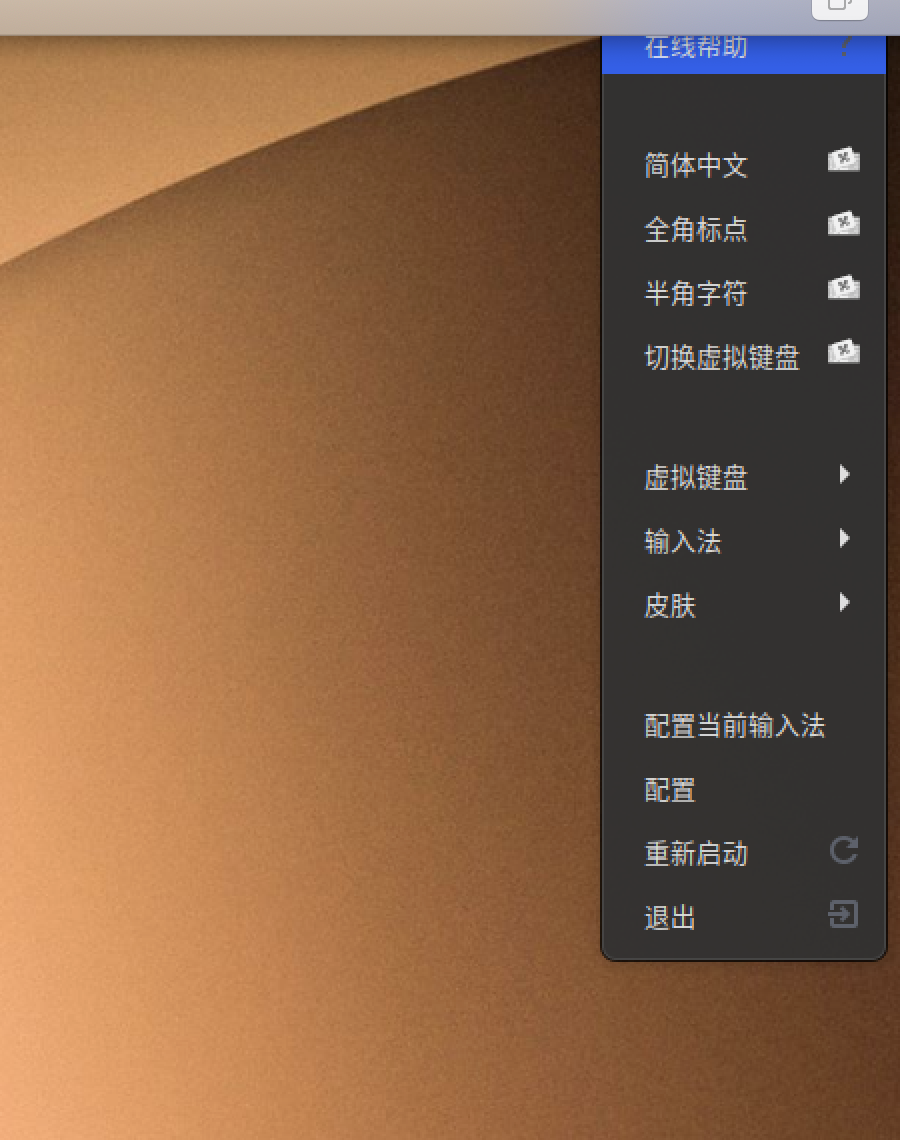
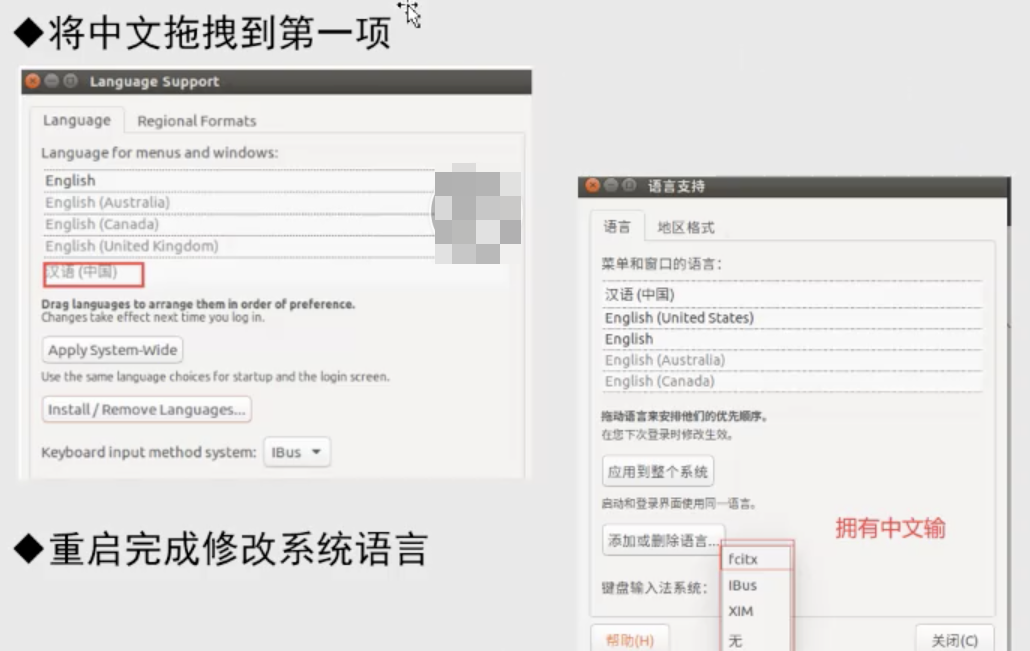
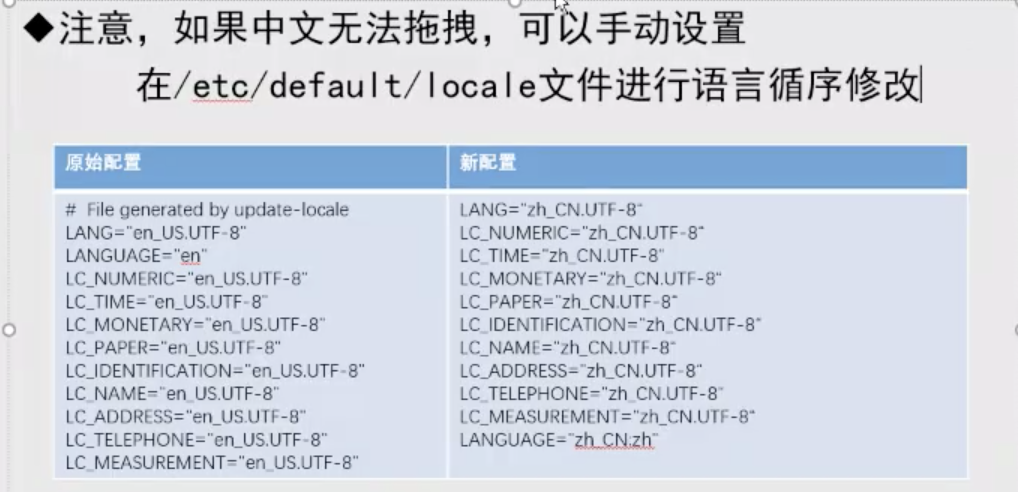
安装搜狗输入法、改中文显示
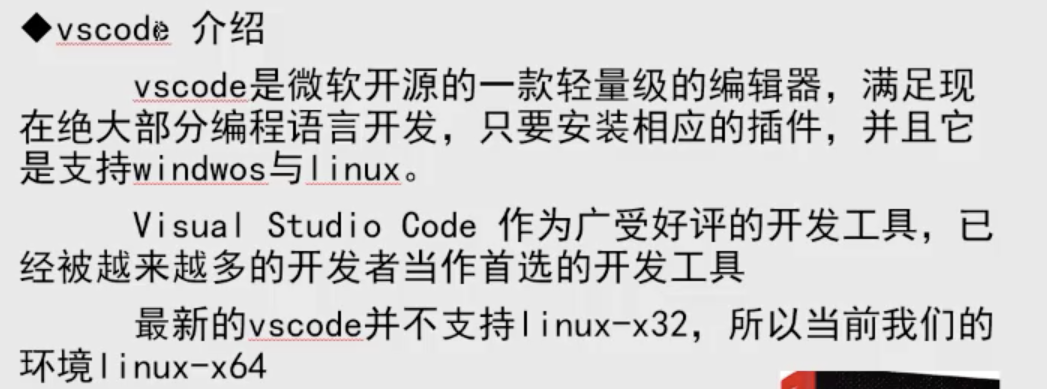
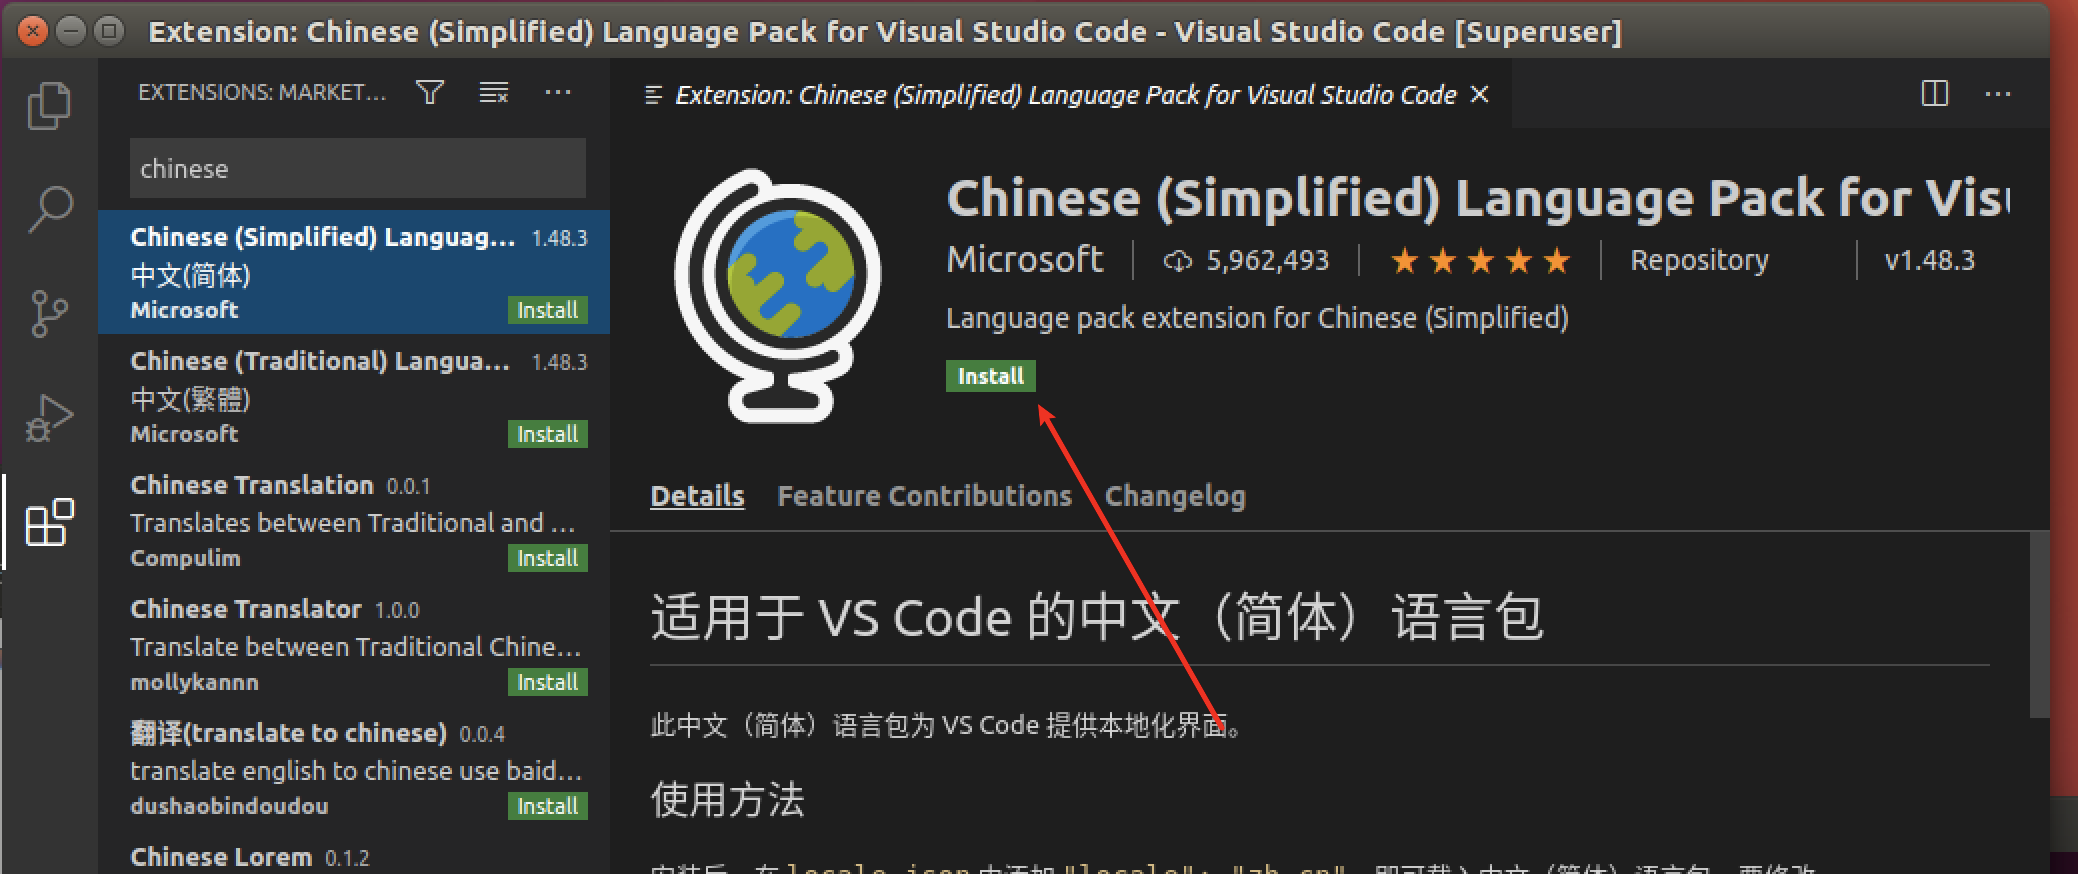
vscode配置
简介
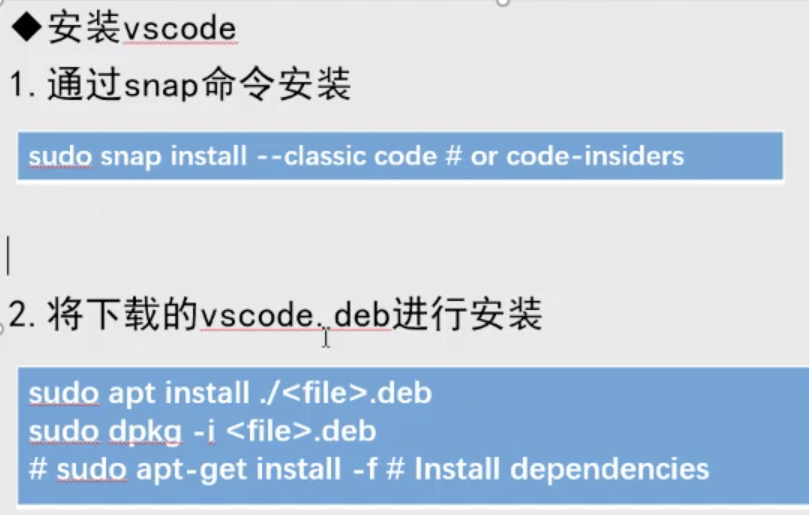
通过dpkg安装
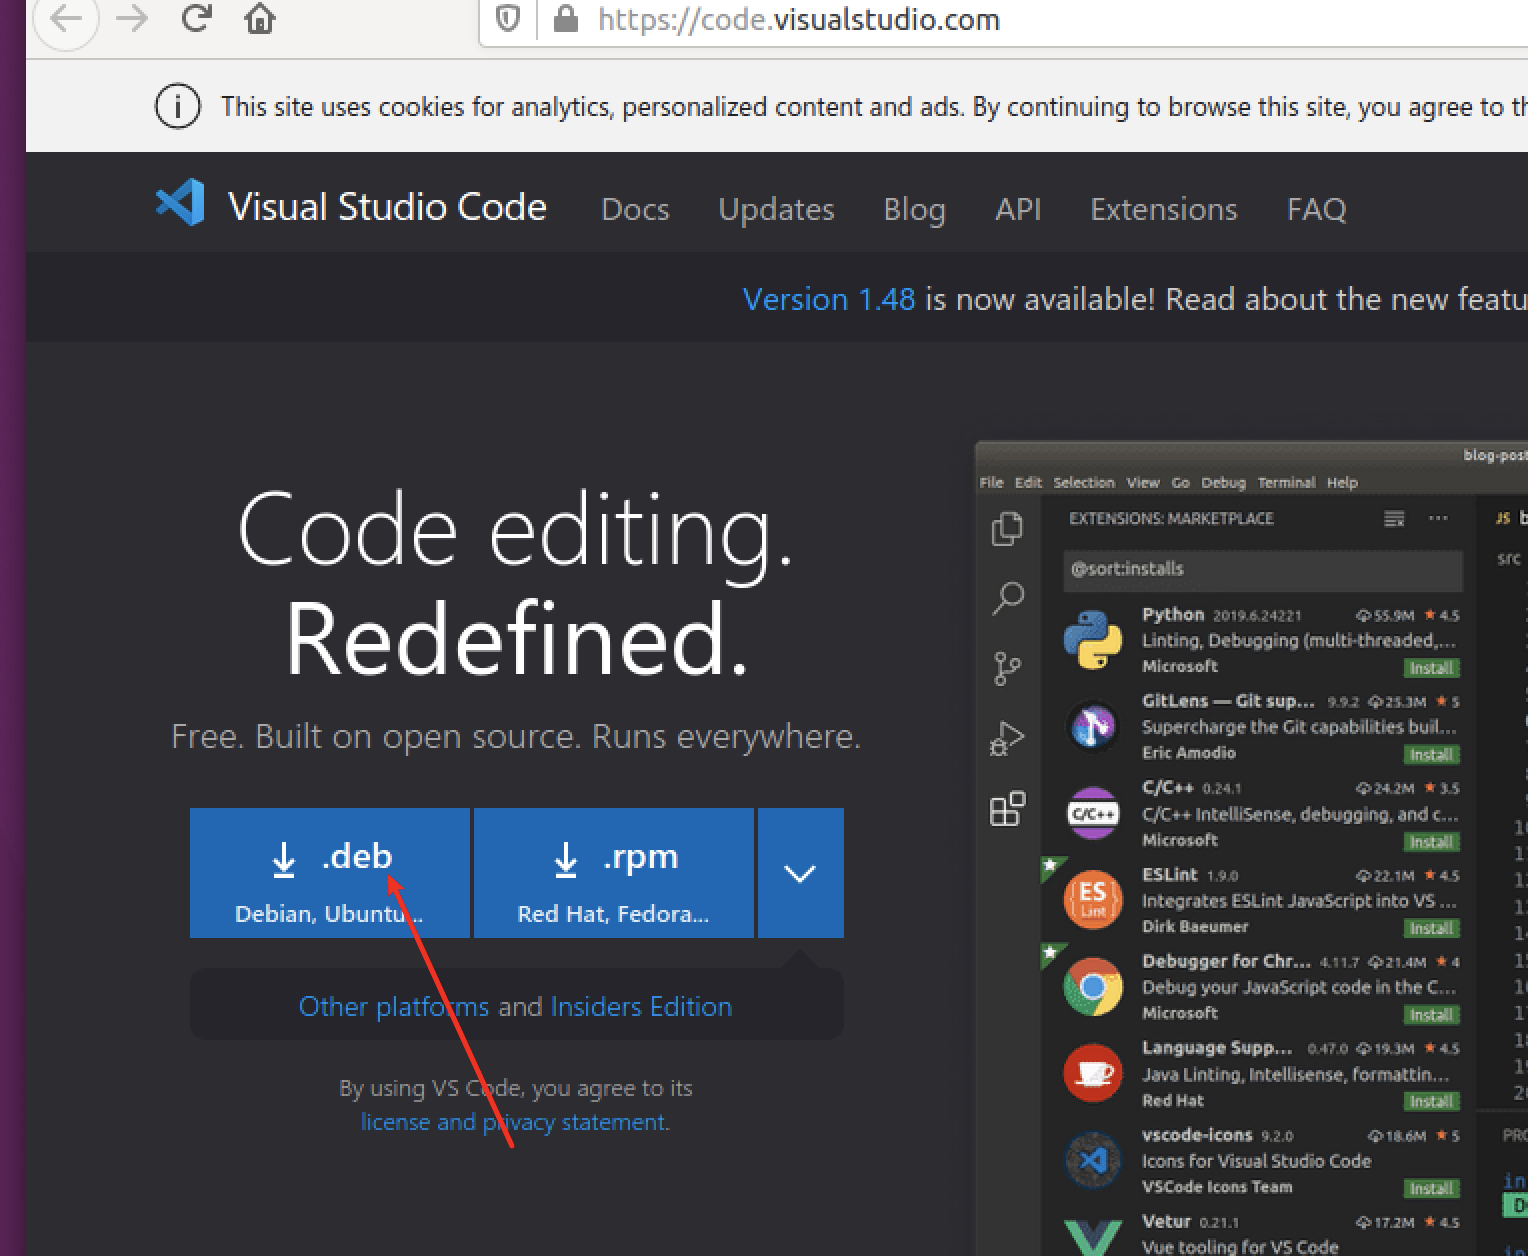
通过微软推荐方法安装
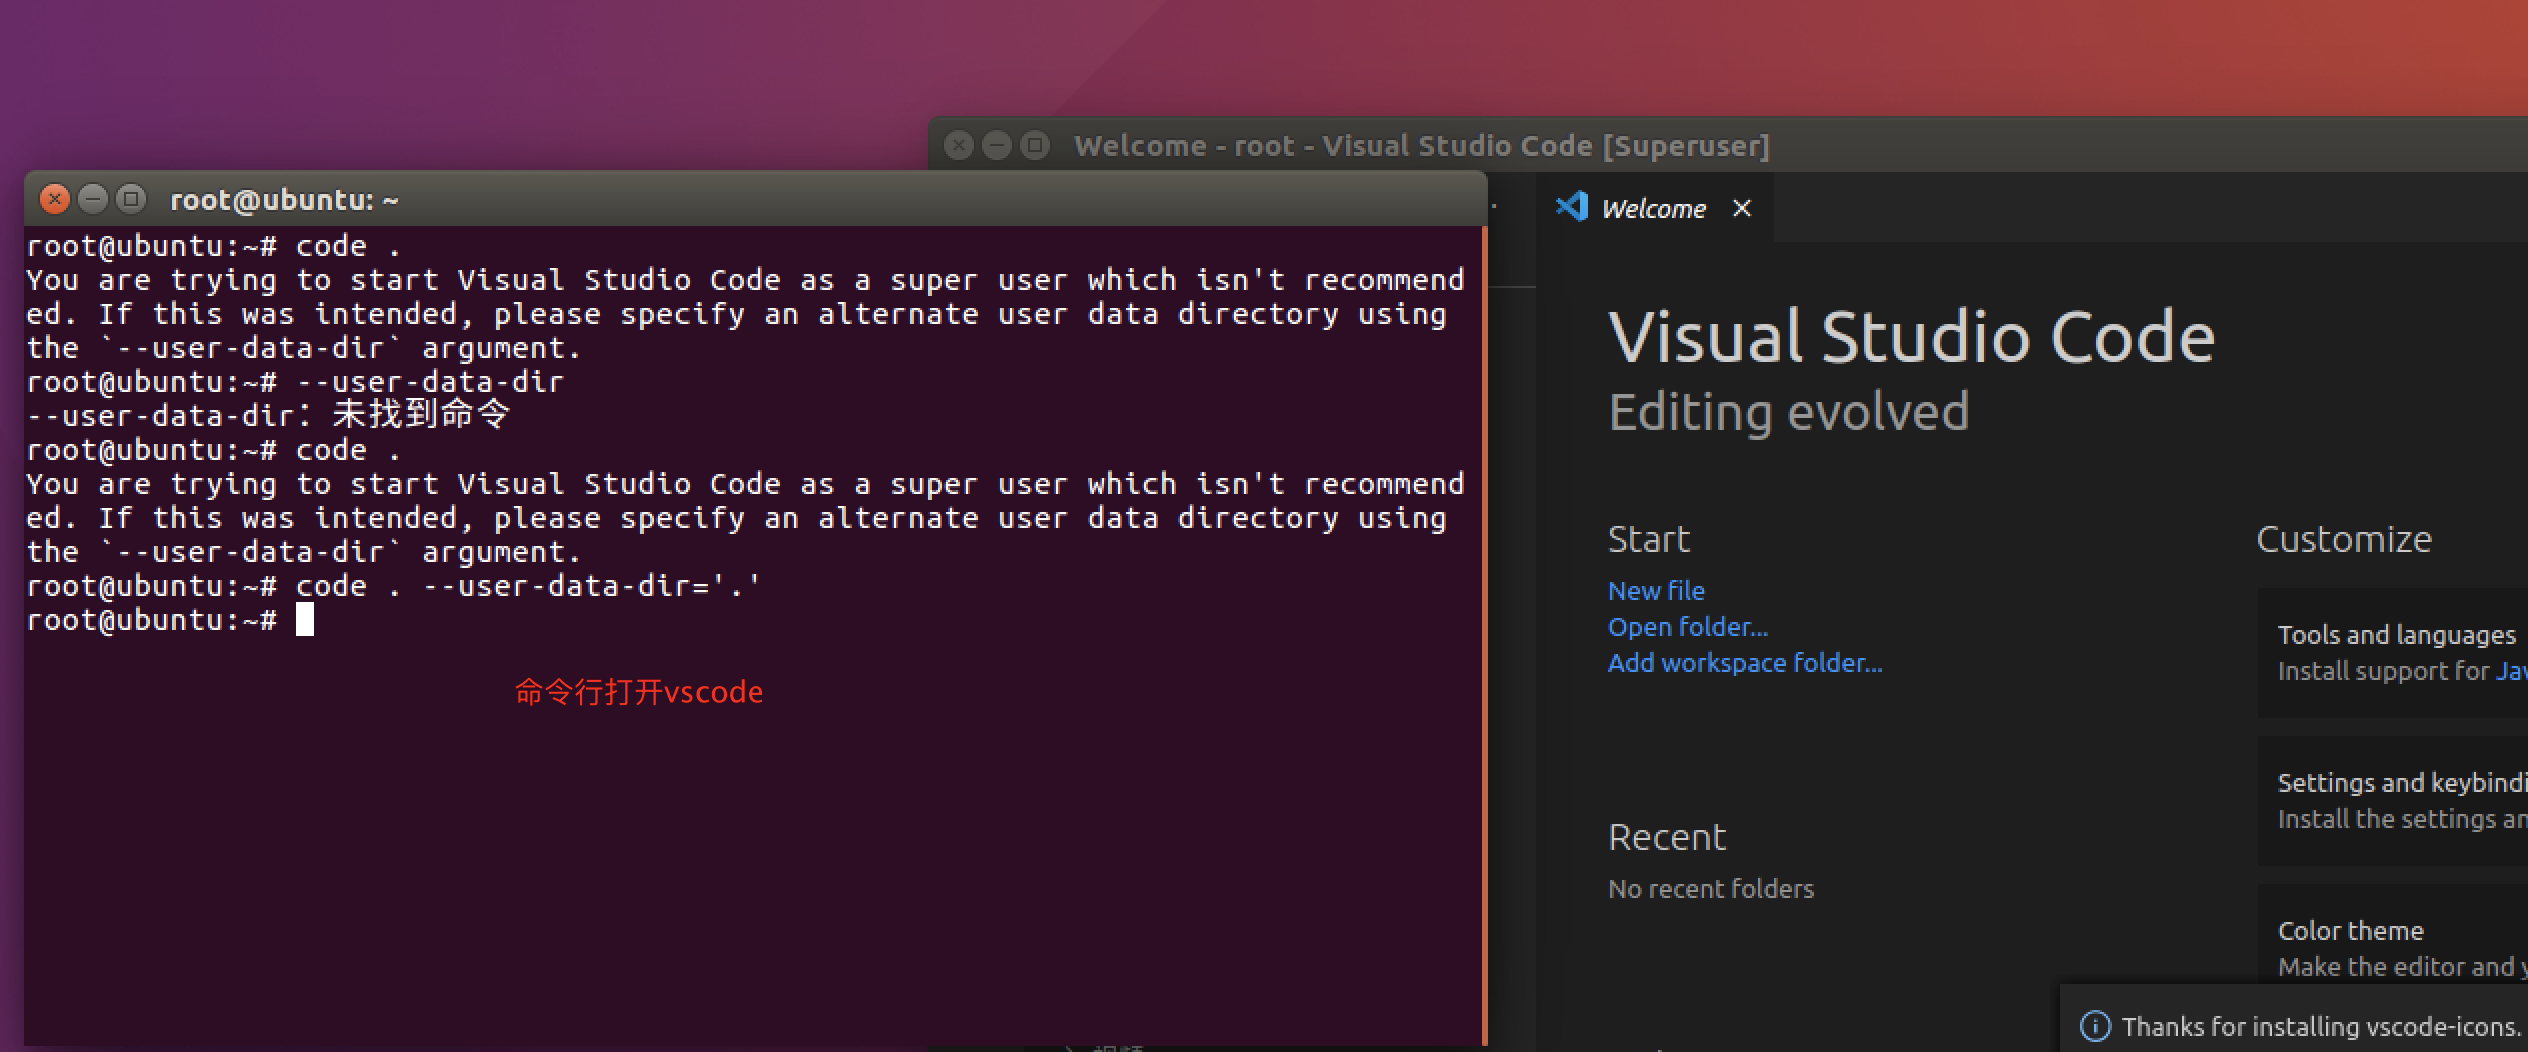
命令行打开vscode

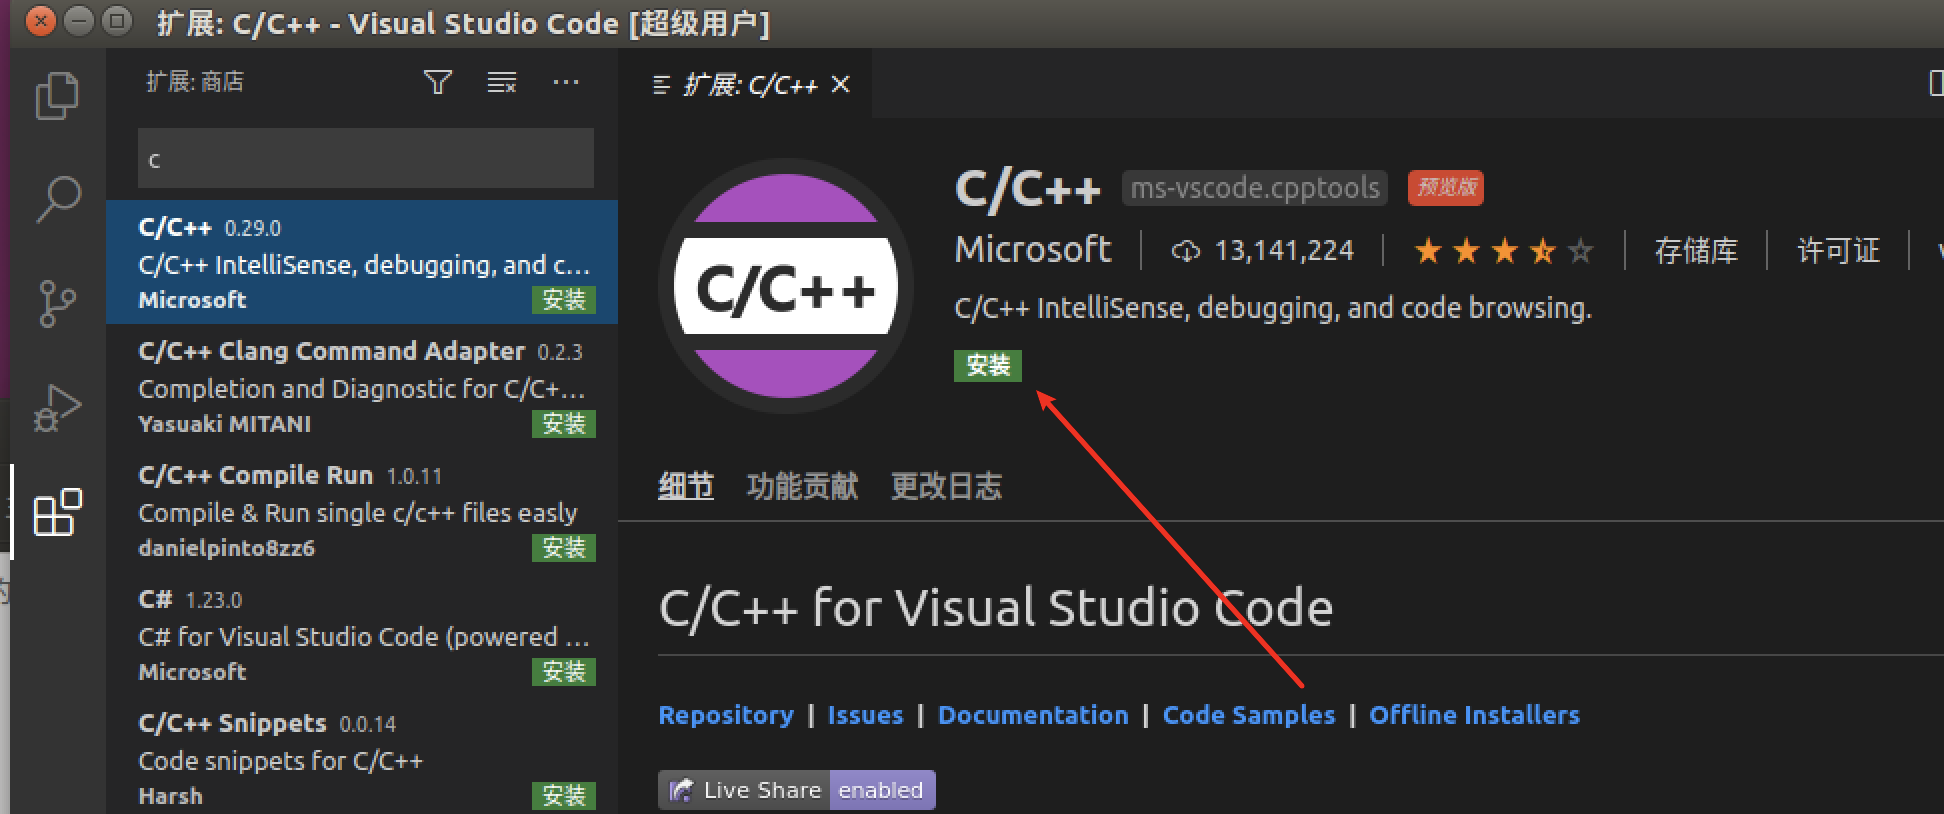
vscode插件

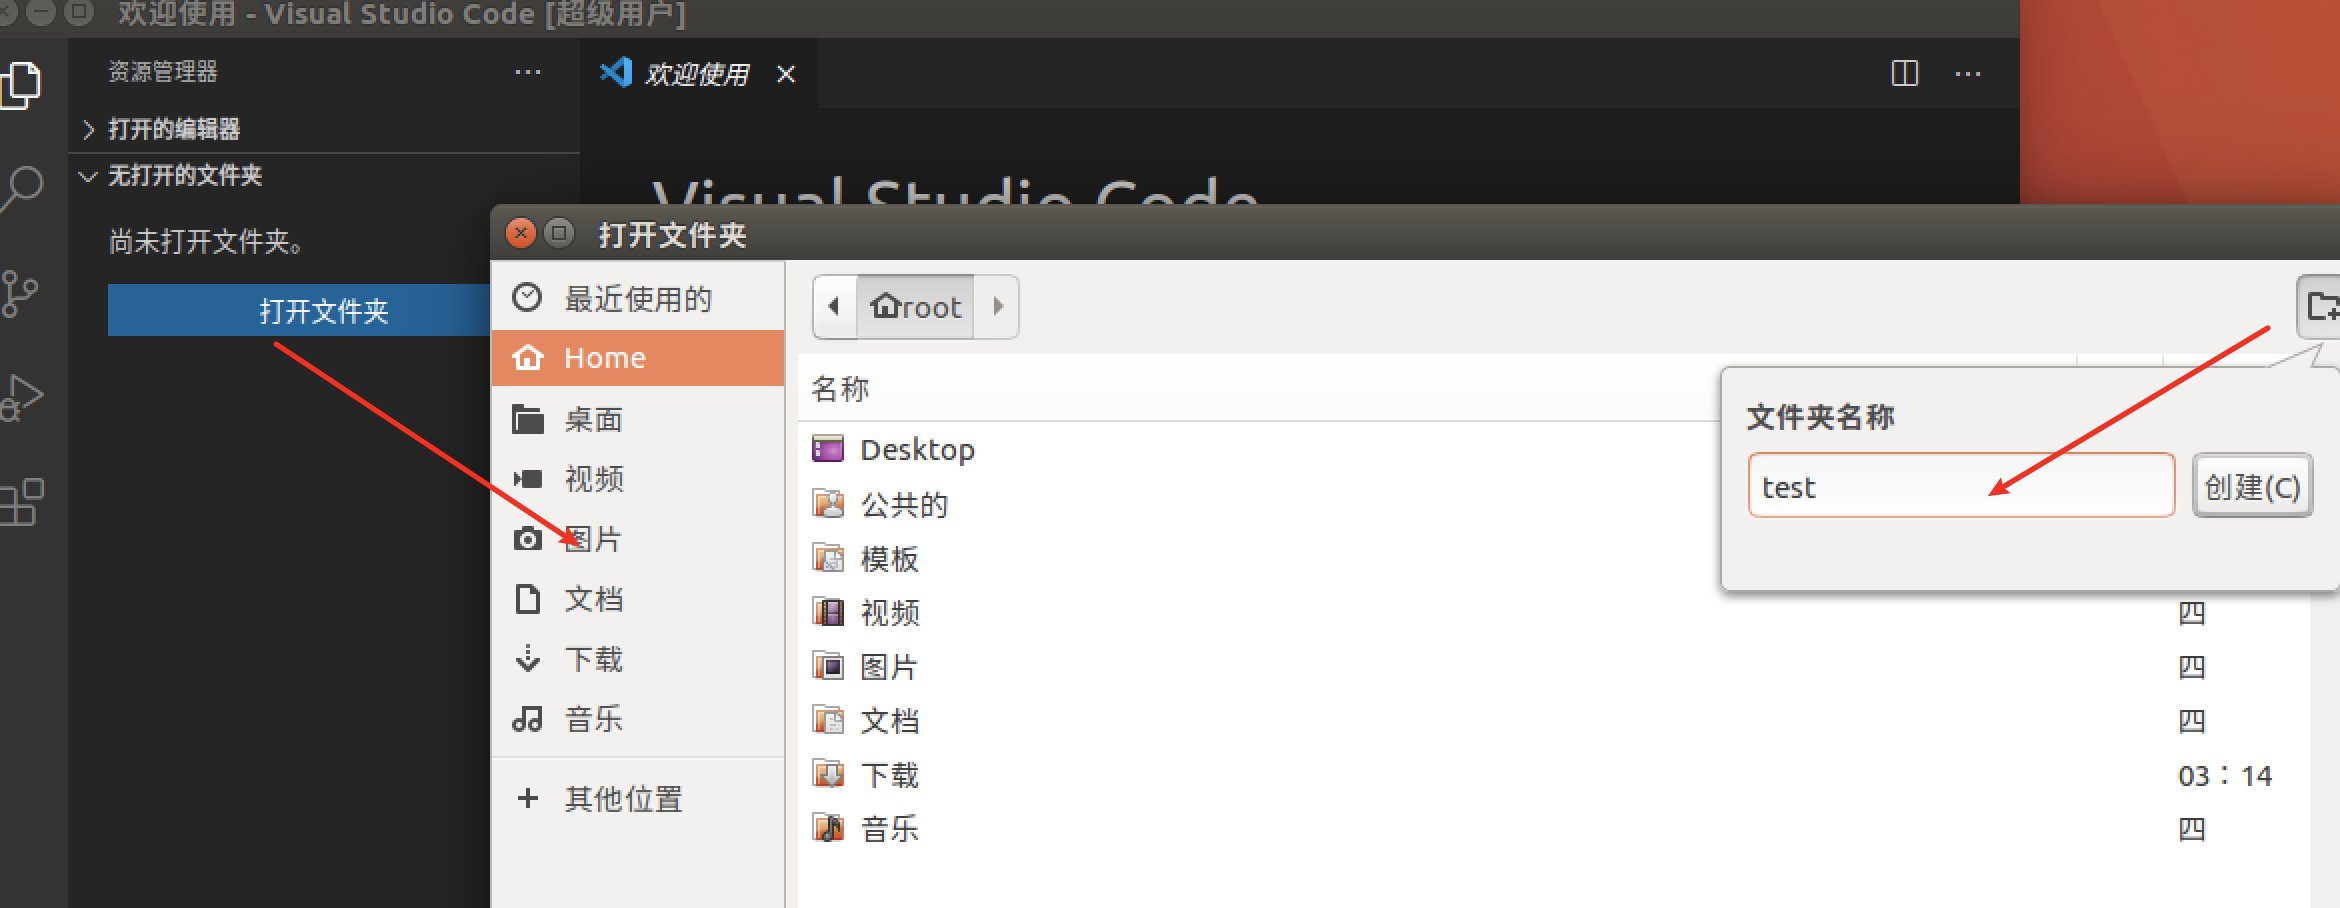
编写一个c语音程序
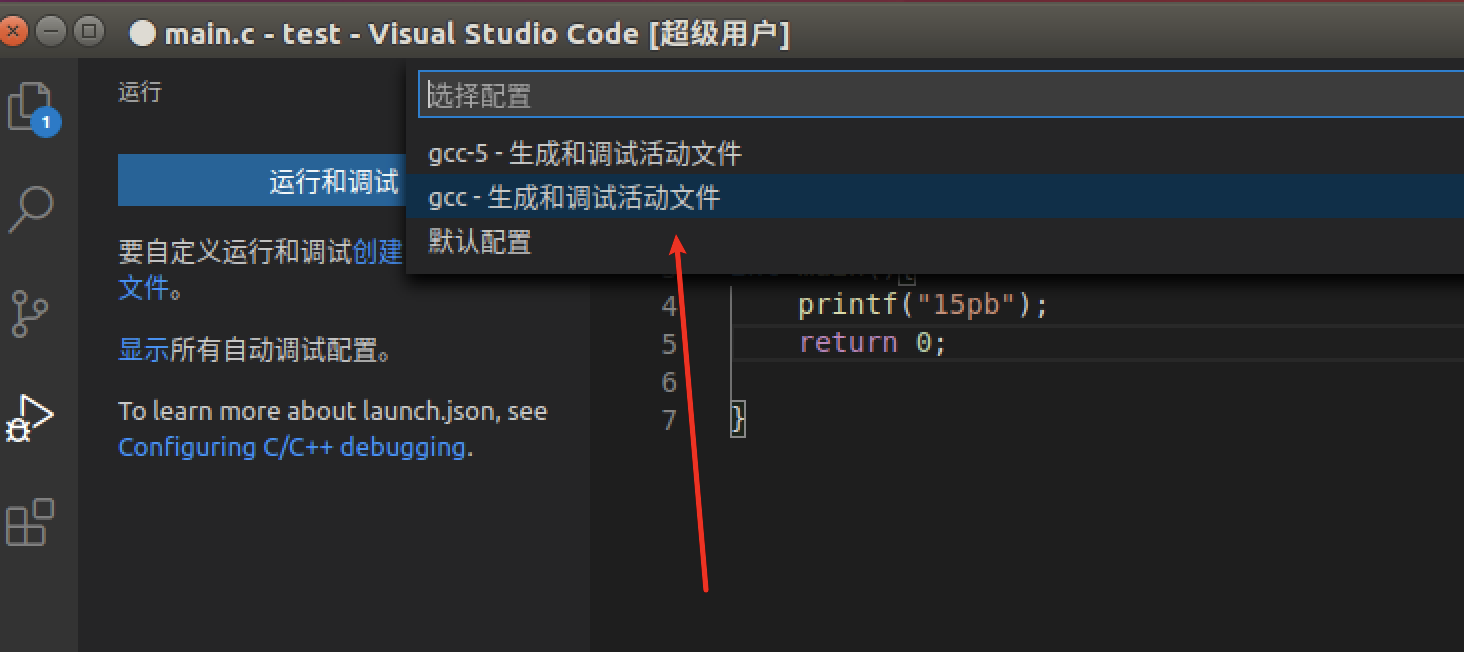
编译c代码

C配置
配置根据官方文档即可:https://code.visualstudio.com/docs/cpp/config-linux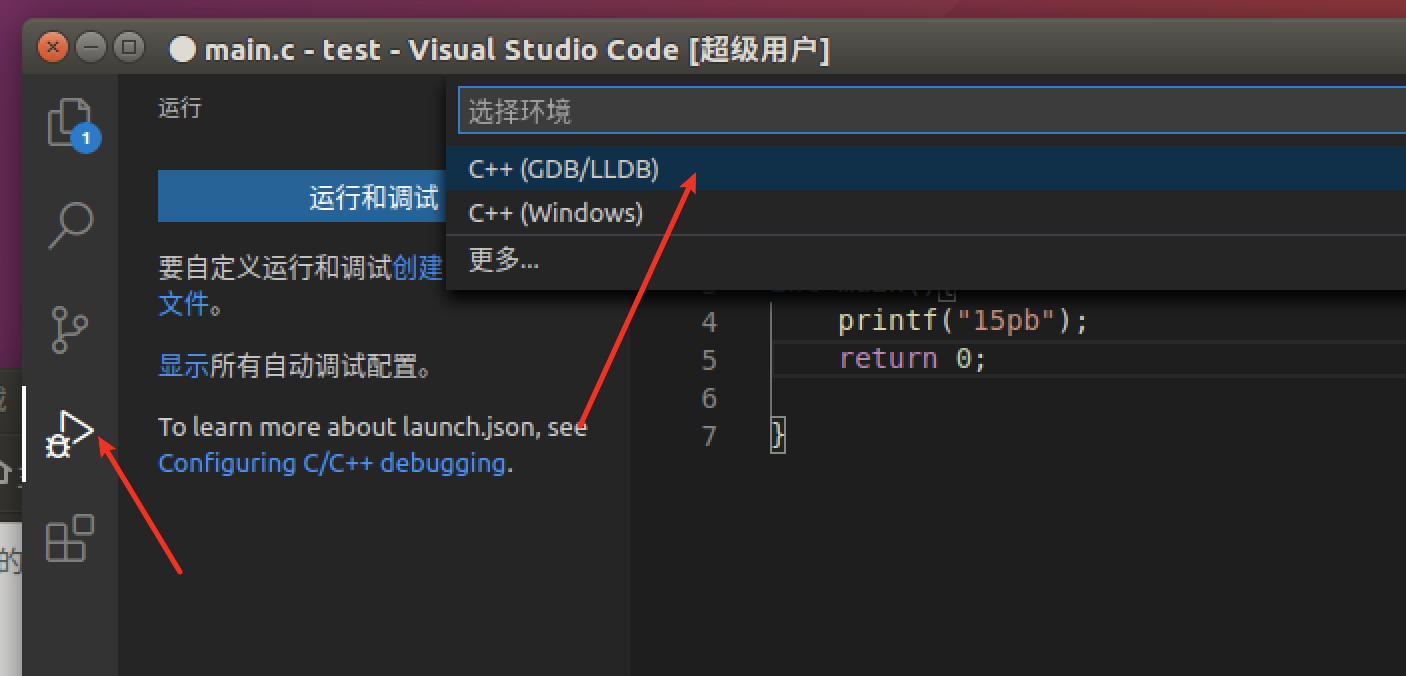
launch.json
{"version": "0.2.0","configurations": [{"name": "g++ build and debug active file",//配置名称,将会在启动配置的下拉菜单中显示"type": "cppdbg",//配置类型,这里只能为cppdbg"request": "launch",//请求配置类型,可以为launch(启动)或attach(附加)"program": "${fileDirname}/${fileBasenameNoExtension}",//将要进行调试的程序的路径"args": [],//程序调试时传递给程序的命令行参数,一般设置为空即可"stopAtEntry": false,//设为true时程序将暂停在程序入口处,我一般设置为true"cwd": "${workspaceFolder}",//调试程序时的工作目录"environment": [],//(环境变量)"externalConsole": false,//调试时是否显示控制台窗口,一般设置为true显示控制台"MIMode": "gdb",//指定连接的调试器,可以为gdb或lldb。但目前lldb在Windows下没有预编译好的版本"setupCommands": [{"description": "Enable pretty-printing for gdb","text": "-enable-pretty-printing","ignoreFailures": true}],"preLaunchTask": "g++ build active file",//调试会话开始执行前的任务,一般为编译程序。注意这个名字和task.json中的label要一样"miDebuggerPath": "/usr/bin/gdb"//调试器路径,Windows下后缀不能省略,Linux下则去掉}]}
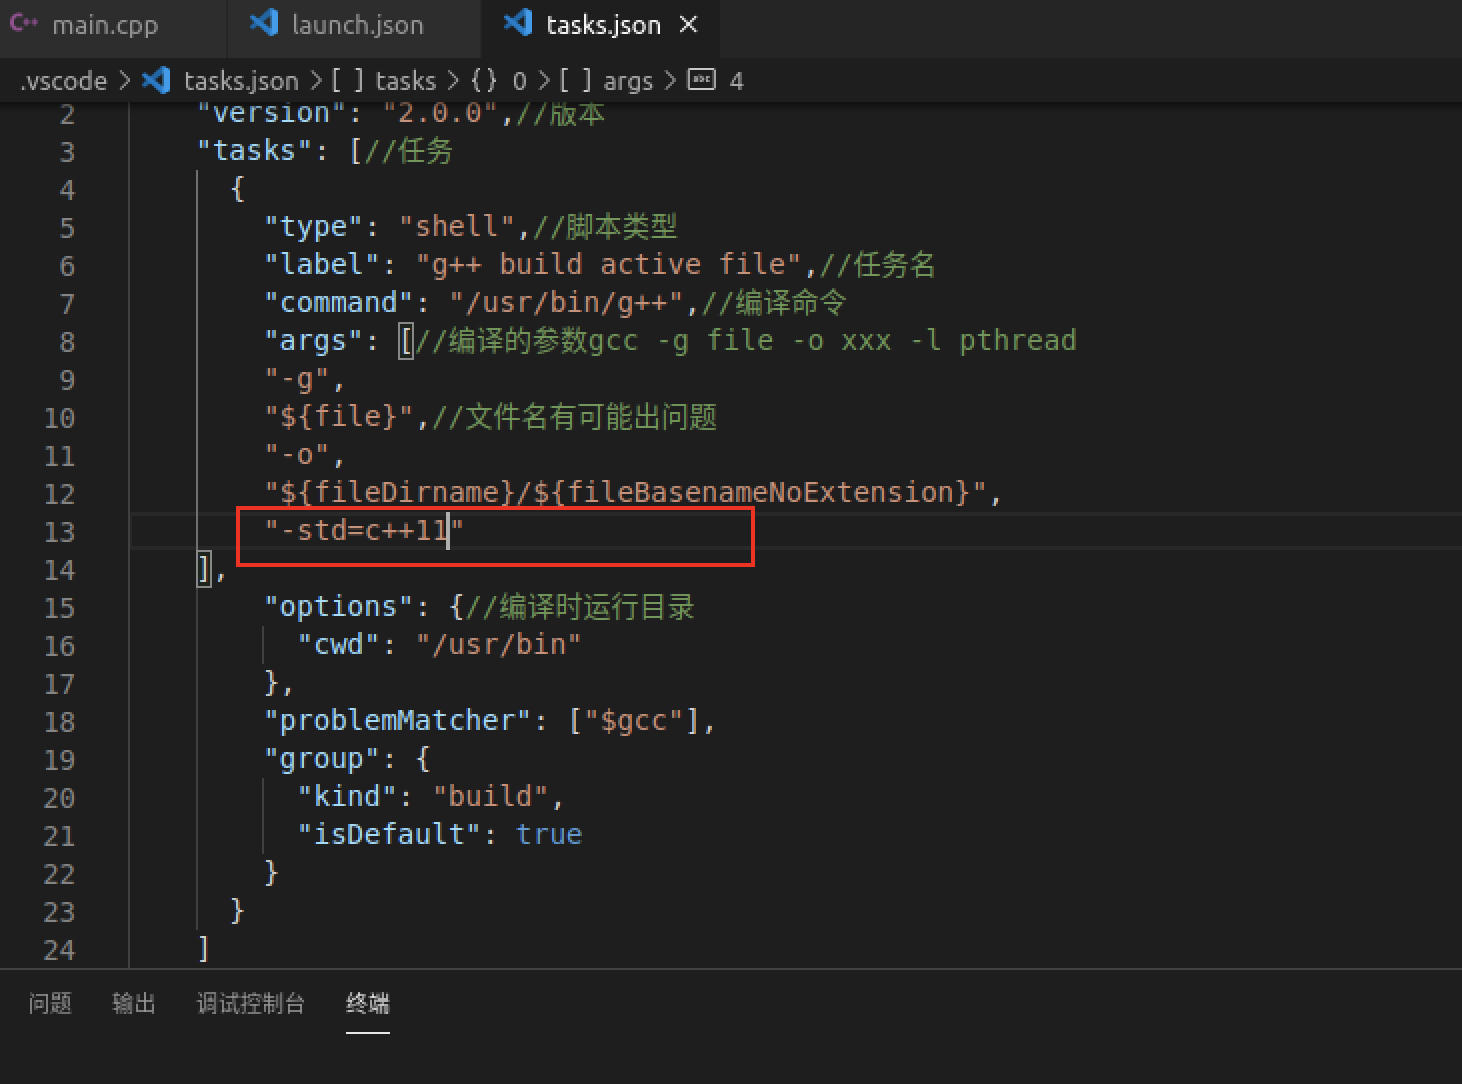
task.json

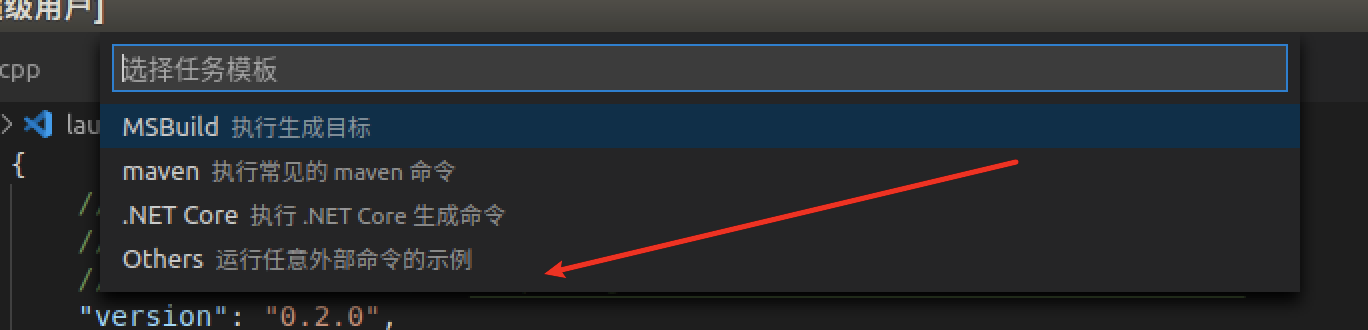
{"version": "2.0.0",//版本"tasks": [//任务{"type": "shell",//脚本类型"label": "g++ build active file",//任务名"command": "/usr/bin/g++",//编译命令"args": [//编译的参数gcc -g file -o xxx -l pthread"-g","${file}",//文件名有可能出问题"-o","${fileDirname}/${fileBasenameNoExtension}"],"options": {//编译时运行目录"cwd": "/usr/bin"},"problemMatcher": ["$gcc"],"group": {"kind": "build","isDefault": true}}]}
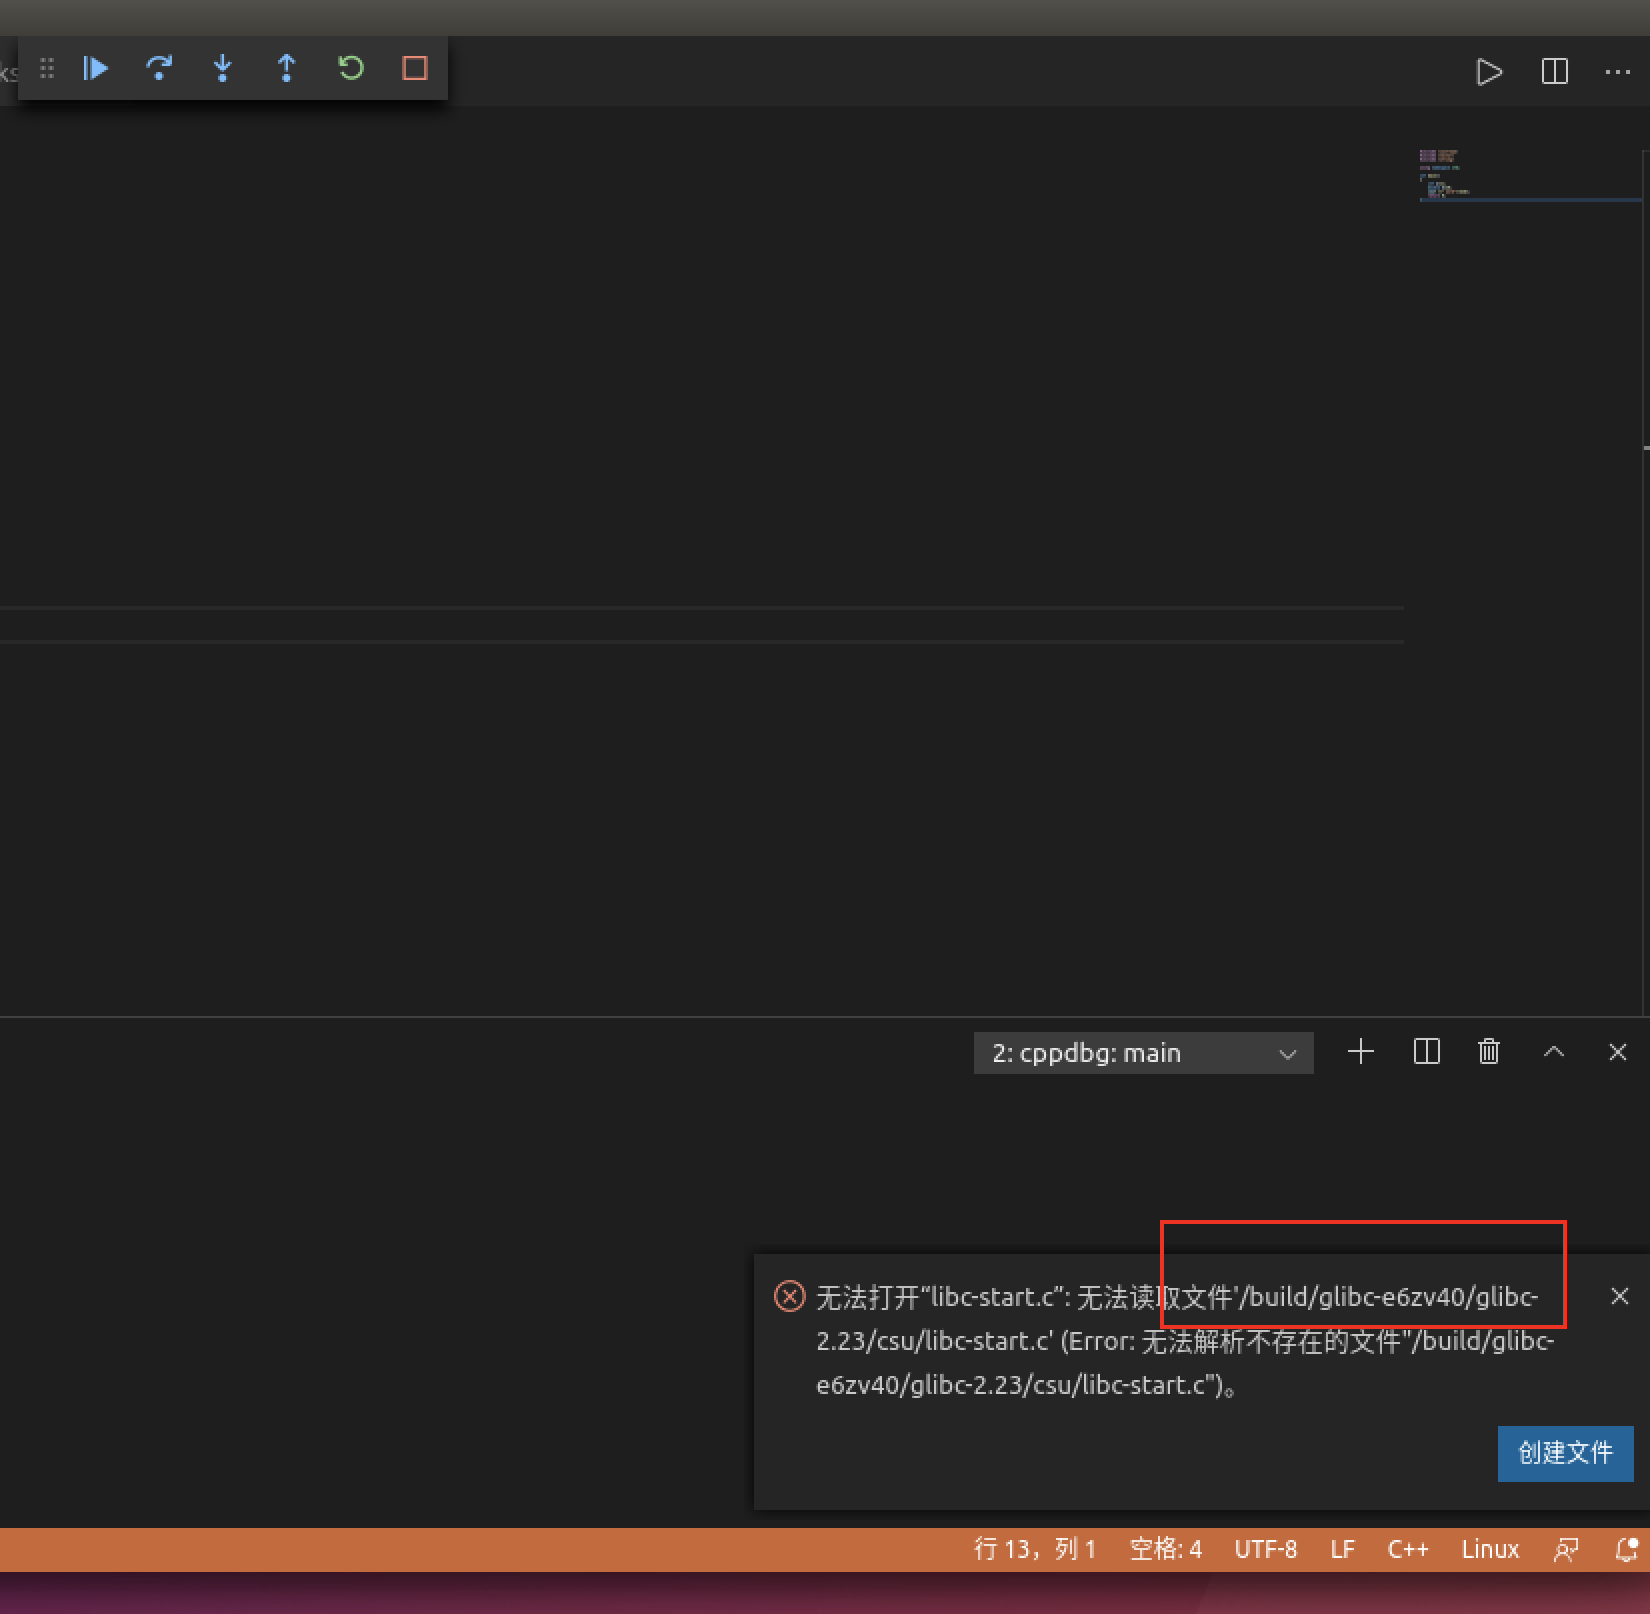
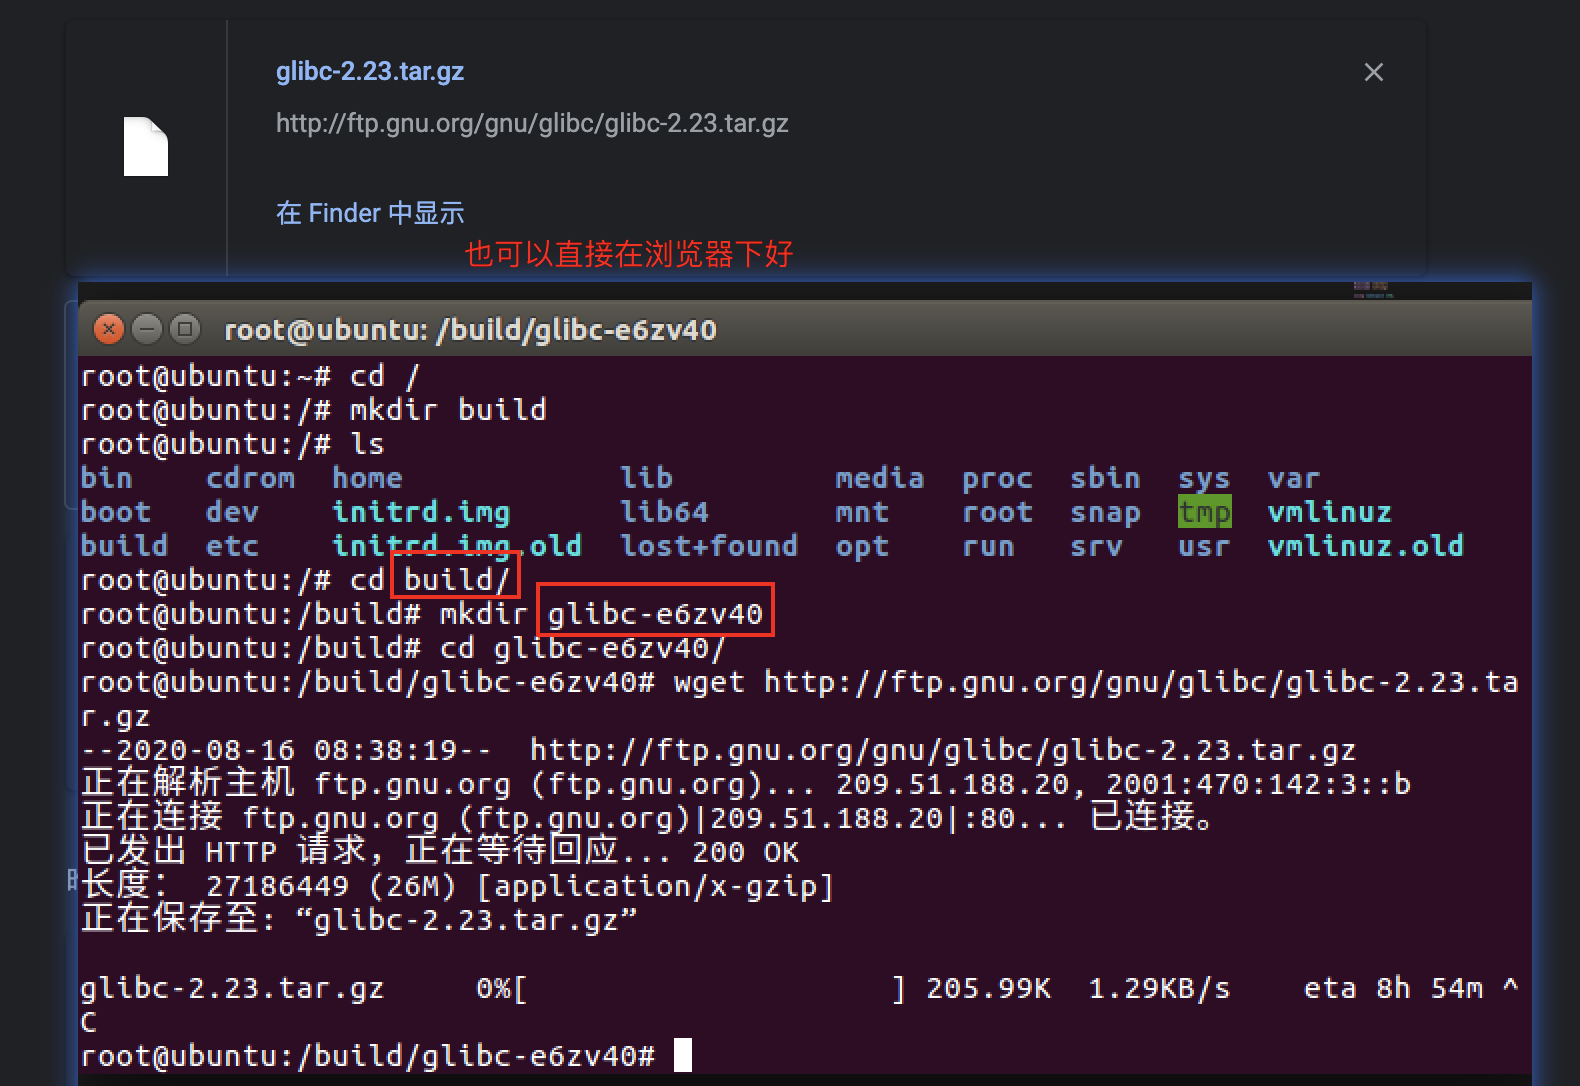
注意

运行完出现问题

C++配置
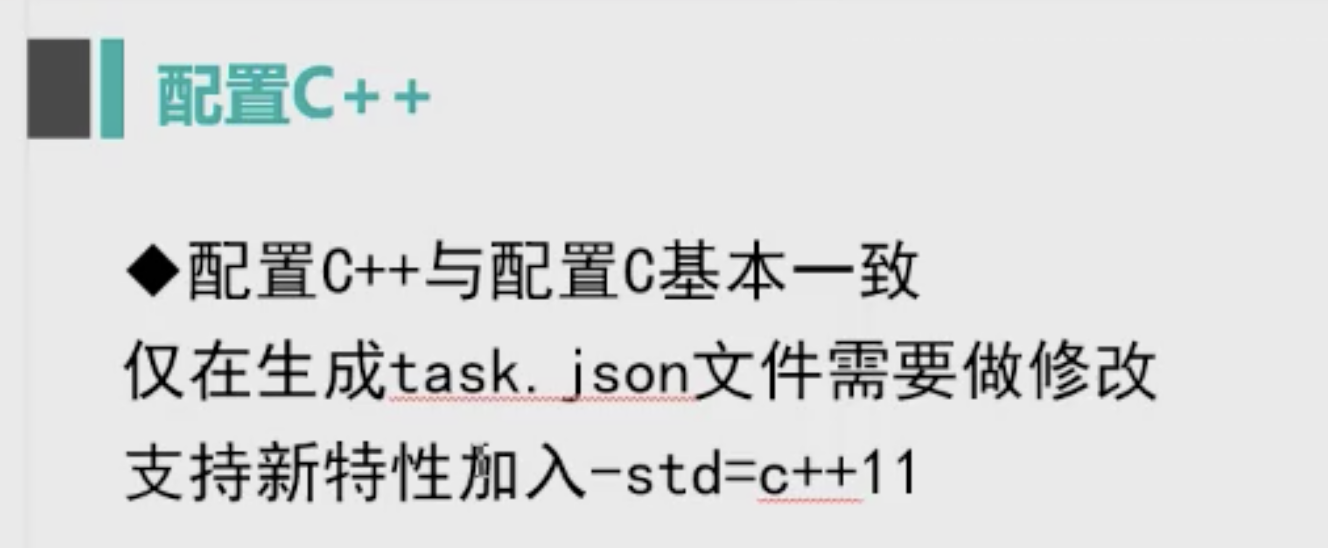
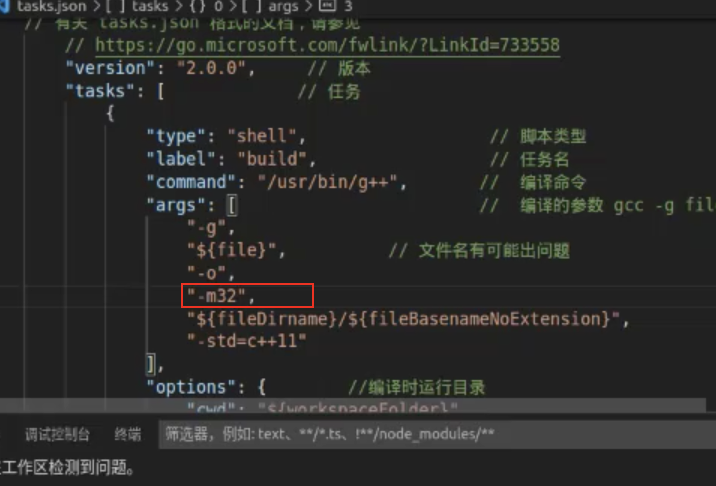
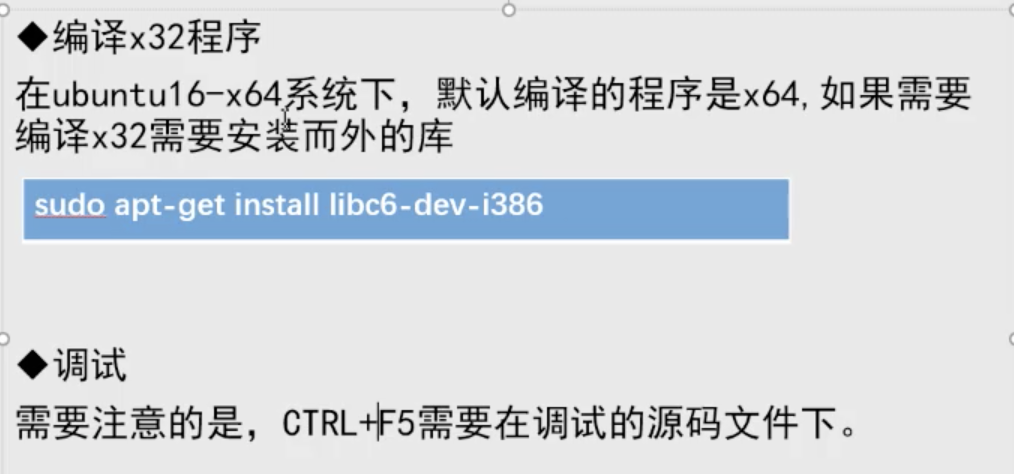
vscode默认64位,怎么编译32位

若有收获,就点个赞吧
0 人点赞
