1. 简介
JDBC(Java Data Base Connectivity,java数据库连接)是一种用于执行SQL语句的Java API,可以为多种关系数据库提供统一访问,它由一组用Java语言编写的类和接口组成。JDBC提供了一种基准,据此可以构建更高级的工具和接口,使数据库开发人员能够编写数据库应用程序。因此,JDBC本质上是一套操作所有关系型数据库的规则,即接口。各个数据库厂商去实现这套接口,并提供数据库驱动jar包。我们可以使用这套接口编程,真正执行代码的是jar包中的实现类。
使用Java开发任何数据库应用程序的都需要4个主要接口:Driver、Connection、Statement、ResultSet:
- JDBC程序需要利用
Driver接口加载一个合适的数据库驱动程序 - 使用
Connection接口连接到数据库 - 使用
Statement接口创建和执行SQL语句 - 如果最后返回结果的话,使用
ResultSet接口处理结果
JDBC API支持两层和三层处理模型进行数据库访问,但在一般的JDBC体系结构由两层组成:
- JDBC API: 提供了应用程序对JDBC的管理连接
- JDBC Driver API: 支持JDBC管理到驱动器连接
JDBC API的使用驱动程序管理器和数据库特定的驱动程序提供透明的连接到异构数据库。
JDBC驱动程序管理器可确保正确的驱动程序来访问每个数据源。该驱动程序管理器能够支持连接到多个异构数据库的多个并发的驱动程序。
2. IDEA载入IDBC驱动的方法
如果数据库连接的jar包没有导入到Java项目的路径下,运行程序就会报如下异常
java.lang.ClassNotFoundException:com.mysql.jdbc.Driver
将JDBC驱动导入项目路径分入以下几步:
- 下载所使用数据库对应的jar包,这里以MySQL的
mysql-connector-java-8.0.20.jar为例。首先到Connector/J 8.0.20下载,如果你是windows系统,需在Select Operating System下拉框中选择Platform Independent,然后下载Platform Independent (Architecture Independent), ZIP即可(其他操作系统选择对应的即可) - 解压下载好的压缩包,在解压文件目录中会看到
mysql-connector-java-8.0.20.jar存在
使用IDEA打开所使用的Java工程,然后点击菜单栏File -> Project Structure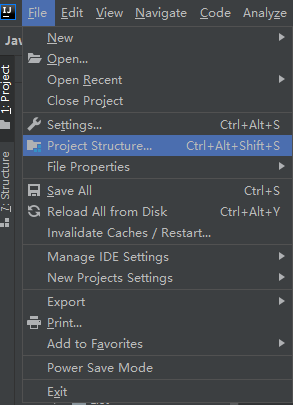
- 点击进入,选择Modules -> Dependencies,点击右侧的➕,选择1. JAR or Drectories,找到你
mysql-connector-java-8.0.20.jar所在的目录, 选择后点击🆗->🆗即可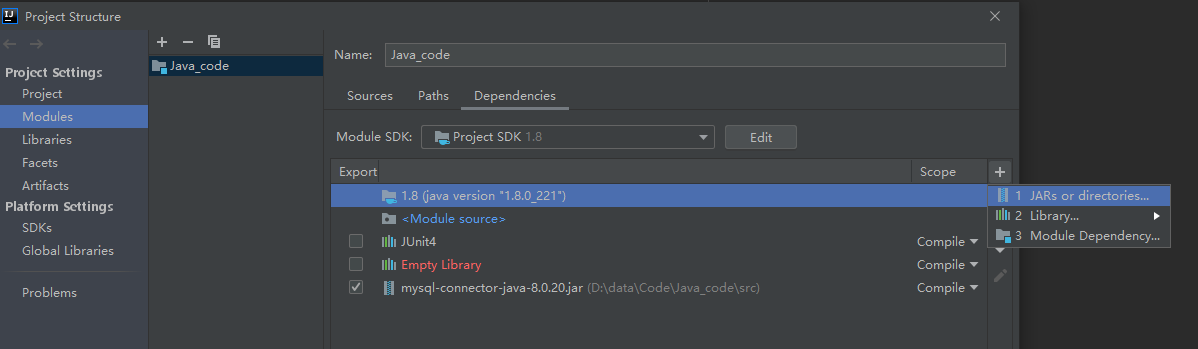
3. JDBC数据库的连接
- 硬写入: ```java import java.sql.*; import java.util.Collection;
public class Main { public static void main(String[] args) throws SQLException { Class.forName(“com.mysql.cj.jdbc.Driver”); Connection connection = DriverManager.getConnection(“jdbc:mysql://localhost:3306/xxxx?useUnicode=true&characterEncoding=utf-8&useSSL=false&serverTimezone = GMT”, “root”, “xxxx”); // 其他逻辑 } }
- 通过配置文件建立连接- 编写配置文件`DBConfig.properties````javadriver=com.mysql.cj.jdbc.Driverurl=jdbc:mysql://localhost:3306/xxxx?useUnicode=true&characterEncoding=utf-8&useSSL=false&serverTimezone = GMTusername=rootpassword=xxxx
读取配置文件中信息,建立连接
public class Main {
public static void main(String[] args) throws SQLException {
   Connection connection = getConnection();
   // 其他逻辑
}

public static Connection getConnection(){
   try {
       Properties prop = new Properties();
       Class<Main> cls = Main.class;
       InputStream is = cls.getClassLoader().getResourceAsStream("DBConfig.properties")
       prop.load(is);

       String driver = prop.getProperty("driver");
       String url = prop.getProperty("url");
       String username = prop.getProperty("username");
       String password = prop.getProperty("password");

       Class.forName(driver);
       return DriverManager.getConnection(url, username, password);
   } catch (Exception e) {
       e.printStackTrace();
   }
   return null;
}
}
通过注解的方式建立连接,首先定义注解 ```java import java.lang.annotation.*;
@Target({ElementType.METHOD,ElementType.TYPE}) @Retention(RetentionPolicy.RUNTIME) public @interface jdbc { String driver(); String url(); String username(); String password(); }
<br />然后使用注解建立连接:
```java
import java.sql.*;
import java.util.Collection;

@jdbc(driver = "com.mysql.cj.jdbc.Driver",
        url = "jdbc:mysql://localhost:3306/xxxx?useUnicode=true&characterEncoding=utf-8&useSSL=false&serverTimezone = GMT",
        username = "root", password = "xxxx")
public class Main {
    public static void main(String[] args) throws SQLException {
        Connection connection = getConnection();
        // 其他逻辑
    }

    public static Connection getConnection(){
        try {
            Class<Main> cls = Main.class;
            jdbc annotation = cls.getAnnotation(jdbc.class);
            String driver = annotation.driver();
            String url = annotation.url();
            String username = annotation.username();
            String password = annotation.password();

            Class.forName(driver);
            return DriverManager.getConnection(url, username, password);
        } catch (Exception e) {
            e.printStackTrace();
        }
        return null;
    }
}
处理Exception in thread “main” java.sql.SQLNonTransientConnectionException异常的办法: 之前Java中使用mysql-connecter-java连接数据库的语句为:
Class.forName("com.mysql.jdbc.Driver");
String url = "jdbc:mysql://localhost:3306/db_name";
String username = "root";
String password = "xxxxx";
Connection connection = DriverManager.getConnection(url, username, password);
如果使用新版本的jar包链接数据库就会出现异常,这是因为连接方式发生了改变:
Class.forName("com.mysql.cj.jdbc.Driver");
String url = "jdbc:mysql://localhost:3306/db_name?useUnicode=true&characterEncoding=utf-8&useSSL=false&serverTimezone = GMT";
String username = "root";
String password = "xxxxx";
Connection connection = DriverManager.getConnection(url, username, password);
url中
?serverTimezone = GMT的加入可以解决Exception in thread "main" java.sql.SQLException: The server time zone value '?й???????' is unrecognized or represents more than one time zone.异常的出现。
4. JDBC的使用
在上面介绍了通过不同的方法来获取到JDBC的连接,当获取到连接后,执行以下操作使用连接:
- 定义SQL语句
- 获取执行SQL语句的Statement对象
- 接收执行后返回的结果
- 处理结果
- 释放资源
4.1 throws处理异常
由于JDBC使用的过程中会抛出异常,最简单的方式就是直接通过throws关键字进行声明,将其交给JVM进行处理。
import java.sql.*;

@jdbc(driver = "com.mysql.cj.jdbc.Driver",
        url = "jdbc:mysql://localhost:3306/sql_store?useUnicode=true&characterEncoding=utf-8&useSSL=false&serverTimezone = GMT",
        username = "root", password = "120809")
public class Main {
    public static void main(String[] args) throws SQLException {
        Connection connection = getConnection();
        System.out.println(connection);
        // 定义SQL语句
        String sql = "SELECT * FROM customers WHERE customer_id = 1";

        // 获取执行SQL的Statement对象
        Statement statement = connection.createStatement();

        // 执行SQL语句,获取结果
        ResultSet resultSet = statement.executeQuery(sql);
        System.out.println(resultSet);

        // 关闭链接,释放资源
        statement.close();
        connection.close();
    }

    public static Connection getConnection(){
        try {
            Class<Main> cls = Main.class;
            jdbc annotation = cls.getAnnotation(jdbc.class);
            String driver = annotation.driver();
            String url = annotation.url();
            String username = annotation.username();
            String password = annotation.password();

            Class.forName(driver);
            return DriverManager.getConnection(url, username, password);
        } catch (Exception e) {
            e.printStackTrace();
        }
        return null;
    }
}
4.2 try-catch-finally捕获异常
另一种方法方式是通过try-catch语句自己捕获异常进行处理,最后使用finally语句释放资源。
import java.sql.*;

@jdbc(driver = "com.mysql.cj.jdbc.Driver",
        url = "jdbc:mysql://localhost:3306/sql_store?useUnicode=true&characterEncoding=utf-8&useSSL=false&serverTimezone = GMT",
        username = "root", password = "xxxx")
public class Main {
    public static void main(String[] args){
        executeSQL();
    }

    private static void executeSQL(){
        Connection connection = null;
        Statement statement = null;
        try {
            connection = getConnection();
            String sql = "SELECT * FROM customers WHERE customer_id = 1";
            statement = connection.createStatement();
            ResultSet resultSet = statement.executeQuery(sql);
        } catch (SQLException e) {
            e.printStackTrace();
        } finally {
            if (statement != null){
                try {
                    statement.close();
                } catch (SQLException throwables) {
                    throwables.printStackTrace();
                }
            }
            if (connection != null){
                try {
                    connection.close();
                } catch (SQLException throwables) {
                    throwables.printStackTrace();
                }
            }
        }
    }
    public static Connection getConnection(){
        try {
            Class<Main> cls = Main.class;
            jdbc annotation = cls.getAnnotation(jdbc.class);
            String driver = annotation.driver();
            String url = annotation.url();
            String username = annotation.username();
            String password = annotation.password();

            Class.forName(driver);
            return DriverManager.getConnection(url, username, password);
        } catch (Exception e) {
            e.printStackTrace();
        }
        return null;
    }
}
4.3 try-catch-resource语句处理异常
上面使用try-catch-finally捕获异常的方式,虽然可以自己定义处理异常的逻辑,但代码看起来十分的多。一种更好的方式是使用try-catch-resource语句处理异常,这也是后面代码实践中使用的方式。
import java.sql.*;

@jdbc(driver = "com.mysql.cj.jdbc.Driver",
        url = "jdbc:mysql://localhost:3306/sql_store?useUnicode=true&characterEncoding=utf-8&useSSL=false&serverTimezone = GMT",
        username = "root", password = "xxxx")
public class Main {
    public static void main(String[] args){
        executeSQL();
    }

    private static void executeSQL(){
        try (Connection connection = getConnection();
                Statement statement = connection.createStatement()) {
            String sql = "SELECT * FROM customers WHERE customer_id = 1";
            int count = statement.executeUpdate(sql);
            System.out.println(count);
        } catch (SQLException e) {
            e.printStackTrace();
        }
    }

    public static Connection getConnection(){
        try {
            Class<Main> cls = Main.class;
            jdbc annotation = cls.getAnnotation(jdbc.class);
            String driver = annotation.driver();
            String url = annotation.url();
            String username = annotation.username();
            String password = annotation.password();

            Class.forName(driver);
            return DriverManager.getConnection(url, username, password);
        } catch (Exception e) {
            e.printStackTrace();
        }
        return null;
    }
}
5. JDBC中的对象
JDBC中一共有如下的5个对象:
- DriverManager:驱动管理对象
- Connection:数据库连接对象
- Statement:执行sql的对象
- ResultSet:结果集对象
- PreparedStatement:执行sql的对象,但比Statement更加强大
5.1 DriverManager
java.sql.DriverManager主要有如下两个功能:
注册驱动:它的执行依赖于类中的
static void registerDriver(Driver driver)这个方法。虽然在前面驱动注册的代码中写的是Class.forName("com.mysql.cj.jdbc.Driver");,它通过反射机制获取Class类对象来完成注册。我们继续看一下括号中指定类的源码实现,源码位于mysql-connector-java-8.0.20\src\main\user-impl\java\com\mysql\cj\jdbc:public class Driver extends NonRegisteringDriver implements java.sql.Driver { static { try { java.sql.DriverManager.registerDriver(new Driver()); } catch (SQLException E) { throw new RuntimeException("Can't register driver!"); } } public Driver() throws SQLException { // Required for Class.forName().newInstance() } }
发现在类中的静态代码块中使用registerDriver()完成了驱动的注册。
获取数据库连接
static Connection getConnection(String url, String user, String password)- url:指定连接的路径
- user:用户名
- password:密码
5.2 Connection
java.sql.Connection主要有两个功能:
获取执行sql的对象
Statement createStatement(String sql)
PreparedStatement prepareStatement(String sql)
管理事务:主要涉及的事务管理操作有开启事务、提交事务和回滚事务
// 调用该方法并设置参数为false,即开启事务
void setAutoCommit(boolean autoCommit)
// 提交事务
void commit()
// 回滚事务
void rollback()
5.3 Statement
java.sql.Statement主要有如下功能:
- 执行SQL:
boolean execute(String sql):可以执行任意的SQL语句int executeUpdate(String sql):执行DML语句(insert、update、delete)、DDL语句(create、alter、drop),返回值表示影响的行数,可以通过它判断SQL语句是否执行成功ResultSet executeQuery(String sql):执行DQL语句(select)
下面我们通过代码实践一下Statement的相关内容。假设当前所用的表是customers,表的定义以及已有的记录如下所示:
mysql> SELECT * FROM customers;
+-------------+------------+------------+------------+--------------+------------------------+------------------+-------+--------+
| customer_id | first_name | last_name  | birth_date | phone        | address                | city             | state | points |
+-------------+------------+------------+------------+--------------+------------------------+------------------+-------+--------+
|           1 | Babara     | MacCaffrey | 1986-03-28 | 781-932-9754 | 0 Sage Terrace         | Waltham          | MA    |   2273 |
|           2 | Ines       | Brushfield | 1986-04-13 | 804-427-9456 | 14187 Commercial Trail | Hampton          | VA    |    947 |
|           3 | Freddi     | Boagey     | 1985-02-07 | 719-724-7869 | 251 Springs Junction   | Colorado Springs | CO    |   2967 |
|           4 | Ambur      | Roseburgh  | 1974-04-14 | 407-231-8017 | 30 Arapahoe Terrace    | Orlando          | FL    |    457 |
|           5 | Clemmie    | Betchley   | 1973-11-07 | NULL         | 5 Spohn Circle         | Arlington        | TX    |   3675 |
|           6 | Elka       | Twiddell   | 1991-09-04 | 312-480-8498 | 7 Manley Drive         | Chicago          | IL    |   3073 |
|           7 | Ilene      | Dowson     | 1964-08-30 | 615-641-4759 | 50 Lillian Crossing    | Nashville        | TN    |   1672 |
|           8 | Thacher    | Naseby     | 1993-07-17 | 941-527-3977 | 538 Mosinee Center     | Sarasota         | FL    |    205 |
|           9 | Romola     | Rumgay     | 1992-05-23 | 559-181-3744 | 3520 Ohio Trail        | Visalia          | CA    |   1486 |
|          10 | Levy       | Mynett     | 1969-10-13 | 404-246-3370 | 68 Lawn Avenue         | Atlanta          | GA    |    796 |
+-------------+------------+------------+------------+--------------+------------------------+------------------+-------+--------+
10 rows in set (0.00 sec)
下面函数中主函数和获取数据库连接的代码统一为如下形式: ```java import java.sql.*;
@jdbc(driver = “com.mysql.cj.jdbc.Driver”, url = “jdbc:mysql://localhost:3306/sql_store” + “?useUnicode=true&characterEncoding=utf-8&useSSL=false&serverTimezone = GMT”, username = “root”, password = “xxxx”) public class Main { public static void main(String[] args){ // 执行方法名 }
public static Connection getConnection(){
    try {
        Class<Main> cls = Main.class;
        jdbc annotation = cls.getAnnotation(jdbc.class);
        String driver = annotation.driver();
        String url = annotation.url();
        String username = annotation.username();
        String password = annotation.password();

        Class.forName(driver);
        return DriverManager.getConnection(url, username, password);
    } catch (Exception e) {
        e.printStackTrace();
    }
    return null;
}
}
**执行INSERT语句:**

执行代码为

```java
private static void executeInsert(){
    String sql = "INSERT INTO customers (first_name, last_name, birth_date, phone, address, city, state, points) VALUES ('Forlogen', 'Liang', '1990-08-24', 888-888-2424, 'Lakers', 'LA', 'C', 81)";

    try (Connection connection = getConnection();
         Statement statement = connection.createStatement()) {
        int count = statement.executeUpdate(sql);
        System.out.println(count);
    } catch (SQLException e) {
        e.printStackTrace();
    }
}
然后我们用SELECT语句看一下是否插入成功。从表中可以看出,一条记录成功的插入到了表中。
mysql> SELECT * FROM customers;
+-------------+------------+------------+------------+--------------+------------------------+------------------+-------+--------+
| customer_id | first_name | last_name  | birth_date | phone        | address                | city             | state | points |
+-------------+------------+------------+------------+--------------+------------------------+------------------+-------+--------+
|           1 | Babara     | MacCaffrey | 1986-03-28 | 781-932-9754 | 0 Sage Terrace         | Waltham          | MA    |   2273 |
|           2 | Ines       | Brushfield | 1986-04-13 | 804-427-9456 | 14187 Commercial Trail | Hampton          | VA    |    947 |
|           3 | Freddi     | Boagey     | 1985-02-07 | 719-724-7869 | 251 Springs Junction   | Colorado Springs | CO    |   2967 |
|           4 | Ambur      | Roseburgh  | 1974-04-14 | 407-231-8017 | 30 Arapahoe Terrace    | Orlando          | FL    |    457 |
|           5 | Clemmie    | Betchley   | 1973-11-07 | NULL         | 5 Spohn Circle         | Arlington        | TX    |   3675 |
|           6 | Elka       | Twiddell   | 1991-09-04 | 312-480-8498 | 7 Manley Drive         | Chicago          | IL    |   3073 |
|           7 | Ilene      | Dowson     | 1964-08-30 | 615-641-4759 | 50 Lillian Crossing    | Nashville        | TN    |   1672 |
|           8 | Thacher    | Naseby     | 1993-07-17 | 941-527-3977 | 538 Mosinee Center     | Sarasota         | FL    |    205 |
|           9 | Romola     | Rumgay     | 1992-05-23 | 559-181-3744 | 3520 Ohio Trail        | Visalia          | CA    |   1486 |
|          10 | Levy       | Mynett     | 1969-10-13 | 404-246-3370 | 68 Lawn Avenue         | Atlanta          | GA    |    796 |
|          14 | Forlogen   | Liang      | 1990-08-24 | -2424        | Lakers                 | LA               | C     |     81 |
+-------------+------------+------------+------------+--------------+------------------------+------------------+-------+--------+
11 rows in set (0.00 sec)
执行UPDATE语句
执行代码如下,这里我们修改的是first_name为Forlgoen对应的phone:
private static void executeUpdate(){
    String sql = "UPDATE customers SET phone = '888-888-8888' WHERE first_name = 'Forlogen'";

    try (Connection connection = getConnection();
         Statement statement = connection.createStatement()) {
        int count = statement.executeUpdate(sql);
        System.out.println(count);
    } catch (SQLException e) {
        e.printStackTrace();
    }
}
再去看一下表中最新的记录,发现更新语句也成功执行。
mysql> SELECT * FROM customers;
+-------------+------------+------------+------------+--------------+------------------------+------------------+-------+--------+
| customer_id | first_name | last_name  | birth_date | phone        | address                | city             | state | points |
+-------------+------------+------------+------------+--------------+------------------------+------------------+-------+--------+
|           1 | Babara     | MacCaffrey | 1986-03-28 | 781-932-9754 | 0 Sage Terrace         | Waltham          | MA    |   2273 |
|           2 | Ines       | Brushfield | 1986-04-13 | 804-427-9456 | 14187 Commercial Trail | Hampton          | VA    |    947 |
|           3 | Freddi     | Boagey     | 1985-02-07 | 719-724-7869 | 251 Springs Junction   | Colorado Springs | CO    |   2967 |
|           4 | Ambur      | Roseburgh  | 1974-04-14 | 407-231-8017 | 30 Arapahoe Terrace    | Orlando          | FL    |    457 |
|           5 | Clemmie    | Betchley   | 1973-11-07 | NULL         | 5 Spohn Circle         | Arlington        | TX    |   3675 |
|           6 | Elka       | Twiddell   | 1991-09-04 | 312-480-8498 | 7 Manley Drive         | Chicago          | IL    |   3073 |
|           7 | Ilene      | Dowson     | 1964-08-30 | 615-641-4759 | 50 Lillian Crossing    | Nashville        | TN    |   1672 |
|           8 | Thacher    | Naseby     | 1993-07-17 | 941-527-3977 | 538 Mosinee Center     | Sarasota         | FL    |    205 |
|           9 | Romola     | Rumgay     | 1992-05-23 | 559-181-3744 | 3520 Ohio Trail        | Visalia          | CA    |   1486 |
|          10 | Levy       | Mynett     | 1969-10-13 | 404-246-3370 | 68 Lawn Avenue         | Atlanta          | GA    |    796 |
|          14 | Forlogen   | Liang      | 1990-08-24 | 888-888-8888 | Lakers                 | LA               | C     |     81 |
+-------------+------------+------------+------------+--------------+------------------------+------------------+-------+--------+
11 rows in set (0.00 sec)
执行DELETE语句
下面我们删除刚插入的那条记录:
private static void executeDelete(){
    String sql = "DELETE FROM customers WHERE first_name = 'Forlogen'";

    try (Connection connection = getConnection();
         Statement statement = connection.createStatement()) {
        int count = statement.executeUpdate(sql);
        System.out.println(count);
    } catch (SQLException e) {
        e.printStackTrace();
    }
}
然后再去看一下表,发现此时表中已不存在刚插入的那条记录了。
mysql> SELECT * FROM customers;
+-------------+------------+------------+------------+--------------+------------------------+------------------+-------+--------+
| customer_id | first_name | last_name  | birth_date | phone        | address                | city             | state | points |
+-------------+------------+------------+------------+--------------+------------------------+------------------+-------+--------+
|           1 | Babara     | MacCaffrey | 1986-03-28 | 781-932-9754 | 0 Sage Terrace         | Waltham          | MA    |   2273 |
|           2 | Ines       | Brushfield | 1986-04-13 | 804-427-9456 | 14187 Commercial Trail | Hampton          | VA    |    947 |
|           3 | Freddi     | Boagey     | 1985-02-07 | 719-724-7869 | 251 Springs Junction   | Colorado Springs | CO    |   2967 |
|           4 | Ambur      | Roseburgh  | 1974-04-14 | 407-231-8017 | 30 Arapahoe Terrace    | Orlando          | FL    |    457 |
|           5 | Clemmie    | Betchley   | 1973-11-07 | NULL         | 5 Spohn Circle         | Arlington        | TX    |   3675 |
|           6 | Elka       | Twiddell   | 1991-09-04 | 312-480-8498 | 7 Manley Drive         | Chicago          | IL    |   3073 |
|           7 | Ilene      | Dowson     | 1964-08-30 | 615-641-4759 | 50 Lillian Crossing    | Nashville        | TN    |   1672 |
|           8 | Thacher    | Naseby     | 1993-07-17 | 941-527-3977 | 538 Mosinee Center     | Sarasota         | FL    |    205 |
|           9 | Romola     | Rumgay     | 1992-05-23 | 559-181-3744 | 3520 Ohio Trail        | Visalia          | CA    |   1486 |
|          10 | Levy       | Mynett     | 1969-10-13 | 404-246-3370 | 68 Lawn Avenue         | Atlanta          | GA    |    796 |
+-------------+------------+------------+------------+--------------+------------------------+------------------+-------+--------+
10 rows in set (0.00 sec)
5.4 ResultSet
java.sql.ResultSet用于封装查询的结果,执行SELECT语句得到的就是一个ResultSet对象。如果想要查看对象中保存的数据,我们需要使用如下的方法:
boolean next():游标(cursor)向下移动一行,判断当前行是否是最后一行末尾(是否有数据),如果是,则返回false,否则返回truegetxxx(参数):它根据传入的参数不同定义了一系列重载的方法,用于获取表中的记录。其中xxx表示想要获取的数据的类型,参数的定义如下:- int:代表列的标号
- String:代表列名称
下面我们依然使用上面的customers表,然后执行SELECT * FROM customers来获取表中的记录,并查看其中一些数据。
private static void executeSelect() {
    String sql = "SELECT * FROM customers";

    try (Connection connection = getConnection();
         Statement statement = connection.createStatement();
         ResultSet resultSet = statement.executeQuery(sql)) {
        while (resultSet.next()){
            int id = resultSet.getInt(1);
            String first_name = resultSet.getString(2);
            String last_name = resultSet.getString("last_name");
            System.out.println(id + " -- " + first_name + " -- " + last_name);
        }
    } catch (SQLException throwables) {
        throwables.printStackTrace();
    }
}
输出结果如下,可以看到SELECT语句执行成功,并且我们也可以从ResultSet对象中查看数据:
1 -- Babara -- MacCaffrey
2 -- Ines -- Brushfield
3 -- Freddi -- Boagey
4 -- Ambur -- Roseburgh
5 -- Clemmie -- Betchley
6 -- Elka -- Twiddell
7 -- Ilene -- Dowson
8 -- Thacher -- Naseby
9 -- Romola -- Rumgay
10 -- Levy -- Mynett
5.5. 结果装载
数据库中的表的每一条记录我们可以将其看作是一个对象。因此,可以创建和表对应的类,然后将表中的结果表示为类的对象,从而实现表中记录的装载。
为了演示的简便,我们使用products表。表中的记录如下所示:
+------------+------------------------------+-------------------+------------+
| product_id | name                         | quantity_in_stock | unit_price |
+------------+------------------------------+-------------------+------------+
|          1 | Foam Dinner Plate            |                70 |       1.21 |
|          2 | Pork - Bacon,back Peameal    |                49 |       4.65 |
|          3 | Lettuce - Romaine, Heart     |                38 |       3.35 |
|          4 | Brocolinni - Gaylan, Chinese |                90 |       4.53 |
|          5 | Sauce - Ranch Dressing       |                94 |       1.63 |
|          6 | Petit Baguette               |                14 |       2.39 |
|          7 | Sweet Pea Sprouts            |                98 |       3.29 |
|          8 | Island Oasis - Raspberry     |                26 |       0.74 |
|          9 | Longan                       |                67 |       2.26 |
|         10 | Broom - Push                 |                 6 |       1.09 |
+------------+------------------------------+-------------------+------------+
然后创建对应于表的Products类:
package JDBC;

public class Products {
    private int id;
    private String name;
    private int quantity_in_stock;
    private  int unit_price;

    public int getId() {
        return id;
    }

    public void setId(int id) {
        this.id = id;
    }

    public String getName() {
        return name;
    }

    public void setName(String name) {
        this.name = name;
    }

    public int getUnit_price() {
        return unit_price;
    }

    public void setUnit_price(int unit_price) {
        this.unit_price = unit_price;
    }

    public int getQuantity_in_stock() {
        return quantity_in_stock;
    }

    public void setQuantity_in_stock(int quantity_in_stock) {
        this.quantity_in_stock = quantity_in_stock;
    }

    public Products(int id, String name, int quantity_in_stock, int unit_price) {
        this.id = id;
        this.name = name;
        this.quantity_in_stock = quantity_in_stock;
        this.unit_price = unit_price;
    }

    @Override
    public String toString() {
        return "Products{" +
                "id=" + id +
                ", name='" + name + '\'' +
                ", quantity_in_stock=" + quantity_in_stock +
                ", unit_price=" + unit_price +
                '}';
    }
}
最后实现记录的装载和结果的遍历。
import java.sql.*;
import java.util.ArrayList;
import java.util.List;

public class Main {
    public static void main(String[] args){
        ArrayList<Products> all = findAll();
        for (Products products : all) {
            System.out.println(products);
        }
    }

    private static ArrayList<Products> findAll() {
        String sql = "SELECT * FROM products";
        List<Products> list = new ArrayList<>();
        try (Connection connection = getConnection();
             Statement statement = connection.createStatement();
             ResultSet resultSet = statement.executeQuery(sql)) {
            while (resultSet.next()){
                int id = resultSet.getInt(1);
                String name = resultSet.getString(2);
                int quantity_in_stock = resultSet.getInt(3);
                int unit_price = resultSet.getInt(4);
                list.add(new Products(id, name, quantity_in_stock, unit_price));
            }

        } catch (SQLException throwables) {
            throwables.printStackTrace();
        }

        return (ArrayList<Products>) list;
    }
}
遍历结果输出为:
Products{id=1, name='Foam Dinner Plate', quantity_in_stock=70, unit_price=1}
Products{id=2, name='Pork - Bacon,back Peameal', quantity_in_stock=49, unit_price=4}
Products{id=3, name='Lettuce - Romaine, Heart', quantity_in_stock=38, unit_price=3}
Products{id=4, name='Brocolinni - Gaylan, Chinese', quantity_in_stock=90, unit_price=4}
Products{id=5, name='Sauce - Ranch Dressing', quantity_in_stock=94, unit_price=1}
Products{id=6, name='Petit Baguette', quantity_in_stock=14, unit_price=2}
Products{id=7, name='Sweet Pea Sprouts', quantity_in_stock=98, unit_price=3}
Products{id=8, name='Island Oasis - Raspberry', quantity_in_stock=26, unit_price=0}
Products{id=9, name='Longan', quantity_in_stock=67, unit_price=2}
Products{id=10, name='Broom - Push', quantity_in_stock=6, unit_price=1}
5.6 SQL注入问题
前面已经说了JDBC中的DriverManager、Connection、Statement和ResultSet四个重要的对象,只剩下PreparedStatement没有说,但提到一句PreparedStatement相比于Statement更加的强大。那么在学习PreparedStatement相关内容前,我们首先通过已经学习的知识编写一个登录(Login)的例子,即判断输入的用户名和密码在数据库表中是否存在。既然需要查询表,我们首先在数据库中新建表account,由于只是演示所用,它只有两个字段username和password。
CREATE TABLE account(
    username varchar(20),
    password varchar(20)
);
然后往表中插入几条记录
mysql> SELECT * FROM account;
+----------+----------+
| username | password |
+----------+----------+
| Forlogen | 100      |
| Kobe     | 101      |
+----------+----------+
2 rows in set (0.00 sec)
最后我们需要编写一个实现登录判断的类,代码如下,由于逻辑很简单,这里就不多做解释了:
package JDBC;

import java.sql.Connection;
import java.sql.DriverManager;
import java.sql.ResultSet;
import java.sql.Statement;
import java.util.Scanner;

public class LoginDemo {
    public static void main(String[] args) {
        Scanner sc = new Scanner(System.in);
        System.out.println("please input your username...");
        String username = sc.nextLine();
        System.out.println("please input your password...");
        String password = sc.nextLine();
        boolean b = login(username, password);
        String message = b == true ? "welcome..." : "please input correct username and password!";
        System.out.println(message);
    }

    private static boolean login(String username, String password) {
        if (username == null || password == null){
            return false;
        }

        String sql = "SELECT * FROM account WHERE username = '"+ username + "' and password = '"+ password+"' ";
        try(Connection conn = getConnection();
            Statement stmt = conn.createStatement();
            ResultSet rs = stmt.executeQuery(sql);
        ){
            return rs.next();
        } catch(Exception e){
            e.printStackTrace();
        }
        return false;
    }

    @jdbc(driver = "com.mysql.cj.jdbc.Driver",
            url = "jdbc:mysql://localhost:3306/sql_test" +
                    "?useUnicode=true&characterEncoding=utf-8&useSSL=false&serverTimezone = GMT",
            username = "root", password = "xxxx")
    public static Connection getConnection(){
        try {
            Class<Main> cls = Main.class;
            jdbc annotation = cls.getAnnotation(jdbc.class);
            String driver = annotation.driver();
            String url = annotation.url();
            String username = annotation.username();
            String password = annotation.password();

            Class.forName(driver);
            return DriverManager.getConnection(url, username, password);
        } catch (Exception e) {
            e.printStackTrace();
        }
        return null;
    }
}
我们看一下编写的类能否实现想要的功能。首先输入Forlogen和100,控制台显示: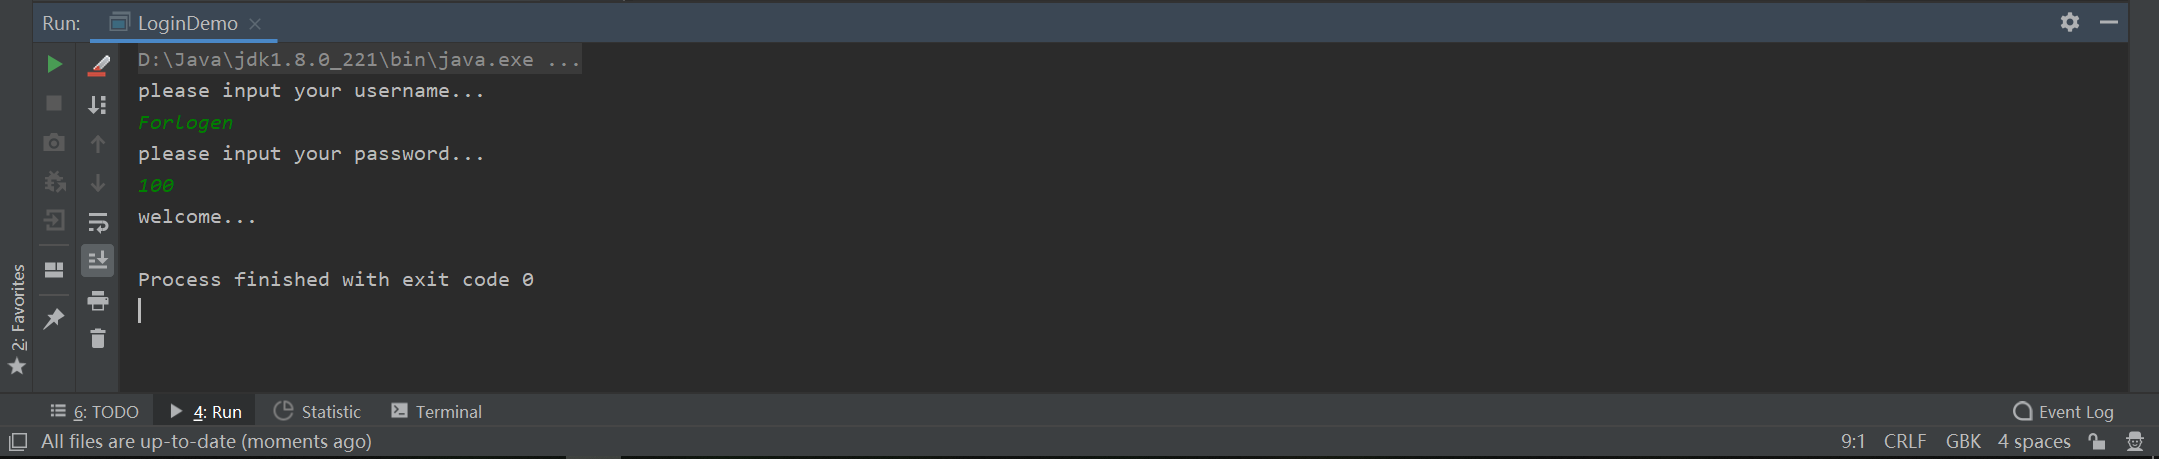
然后再随便写个密码试一下: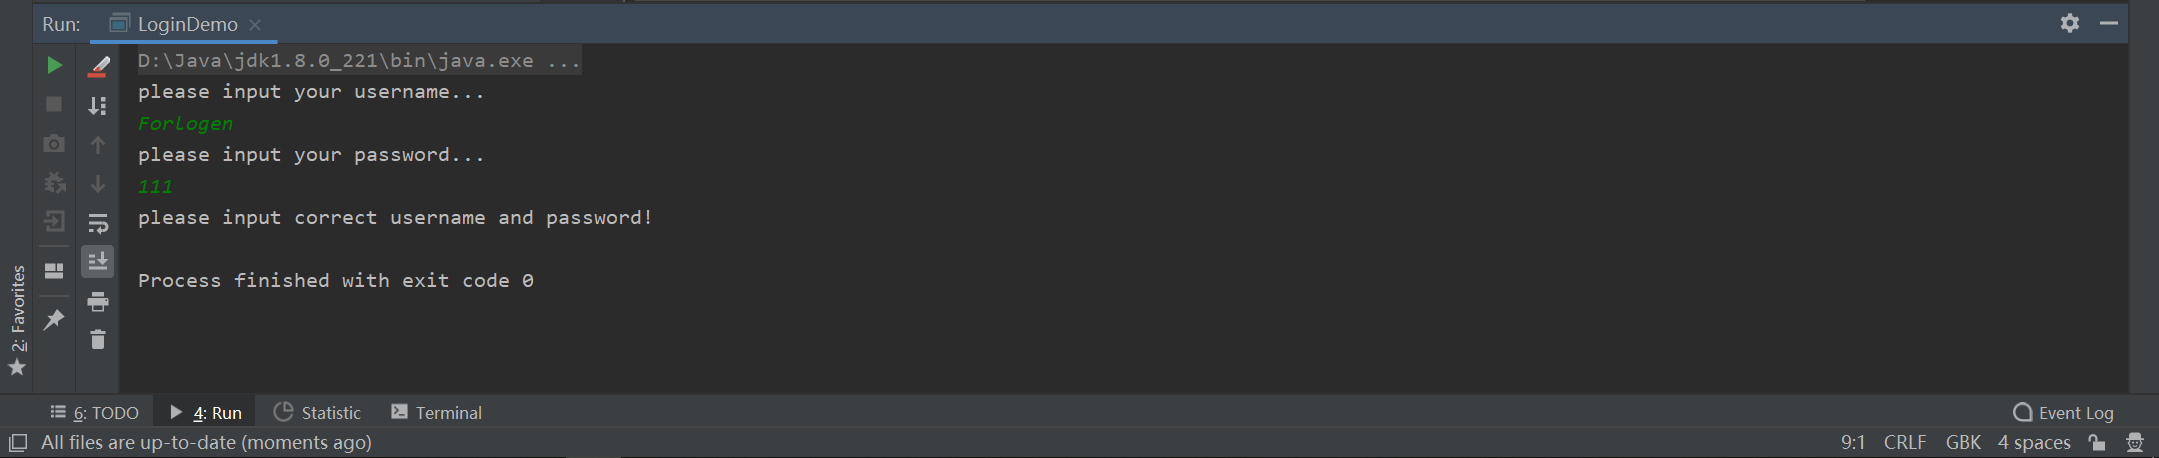
或是输入一个不存在的用户:
从上面的的试验结果中可以看到,我们编写的类确实可以识别输入的用户名和密码是否存在于表中,哇~可是别高兴太早,下面我们输入Forlogen和a' or 'a' = 'a,然后看一下输出: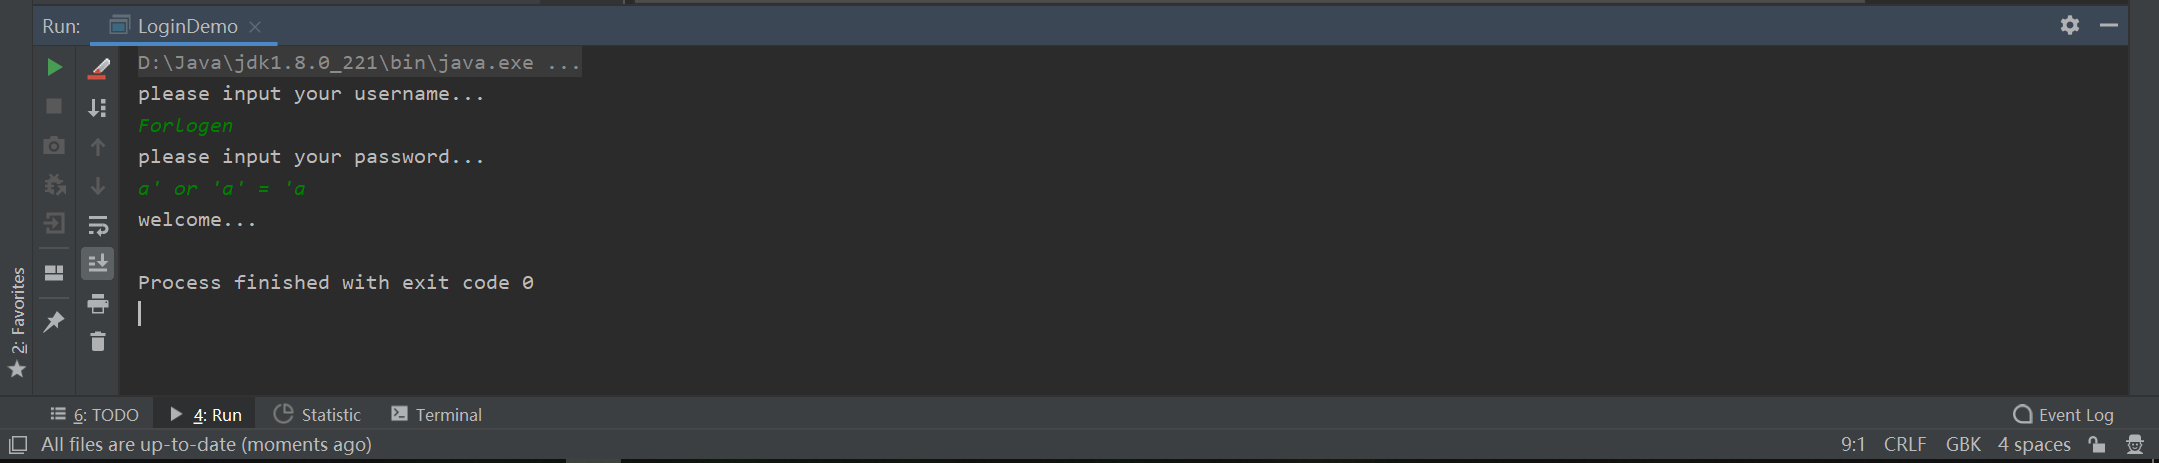
发现它居然通过了验证!这么神奇吗?其实这个案例就显示了Statement的一个问题 - - SQL 注入问题,这也是为什么更推荐使用PreparedStatement的原因。
SQL注入问题是指在拼接SQL语句时,有一些SQL的特殊关键字参与了字符串的拼接,从而导致安全性问题的发生。例如上面拼接好的SQL语句为:
SELECT * FROM account WHERE username = 'Forlogen' and password = 'a' or 'a' = 'a'
虽然password输入时错误的,但是'a' = 'a'这个逻辑表达式的存在,使得WHERE语句的结果为true,从而被判断输入是合法的,但这显然是不合理的。
5.7 PreparedStatement
因此,PreparedStatement通过占位符?来标识数据的位置,然后再逐一的填入数据,最后执行SQL语句。而使用了占位符的SQL语句又被称为预编译SQL语句。使用占位符后,填充数据需使用各种重载的setxxx(),方法中第一个参数为填充的位置,第二个是准备填入的数据。
void setDouble(int parameterIndex, double x)void setFloat(int parameterIndex, float x)void setInt(int parameterIndex, int x)- …
然后同样需要获取PreparedStatement对象,最后使用executexxx()执行SQL语句,获取结果。
executeQuery():执行查询类语句使用,返回一个结果集executeUpdate():执行更新类语句(insert、update、delete等),返回一个表示受影响行数的int型整数
那么,下面我们更新一下上面的Login程序。
private static boolean safeLogin(String username, String password) throws SQLException {
    if (username == null || password == null){
        return false;
    }

    ResultSet res = null;
    String sql = "SELECT * FROM account WHERE username = ? AND password = ?";
    try(Connection conn = getConnection();
        PreparedStatement pstmt = conn.prepareStatement(sql);
       ){
        pstmt.setString(1, username);
        pstmt.setString(2, password);
        res = pstmt.executeQuery();
        return res.next();

    } catch (Exception e){
        e.printStackTrace();
    } finally {
        res.close();
    }
    return false;
}
然后同样输入Forlogen和a' or 'a' = 'a,发现此时程序已经修改了之前的问问题。
6. JDBC事务管理
6.1 事务
6.2 示例
下面通过一个账户转账的例子来开一下JDBC中的事务管理,首先新建表account,它包含id、name和balance三个字段,并在表中插入两条记录:
mysql> SELECT * FROM account;
+----+----------+---------+
| id | name     | balance |
+----+----------+---------+
|  1 | Forlogen |    1000 |
|  2 | Kobe     |    1000 |
+----+----------+---------+
2 rows in set (0.00 sec)
然后编写实现转账功能的类,代码如下:
package JDBC;

import java.sql.Connection;
import java.sql.DriverManager;
import java.sql.PreparedStatement;

@jdbc(driver = "com.mysql.cj.jdbc.Driver",
        url = "jdbc:mysql://localhost:3306/sql_store" +
                "?useUnicode=true&characterEncoding=utf-8&useSSL=false&serverTimezone = GMT",
        username = "root", password = "xxxx")
public class TransactionDemo {
    public static void main(String[] args) {
        bank();
    }

    public static void bank() {
        String sql1 = "update account set balance = balance - ? where id = ?";
        String sql2 = "update account set balance = balance + ? where id = ?";

        try(Connection conn = getConnection();
            PreparedStatement pstmt1 = conn.prepareStatement(sql1);
            PreparedStatement pstmt2 = conn.prepareStatement(sql2);){

            pstmt1.setDouble(1,100);
            pstmt1.setInt(2,1);

            pstmt2.setDouble(1,100);
            pstmt2.setInt(2,2);

            int c = pstmt1.executeUpdate();
            int r = 3 / 0;
            pstmt2.executeUpdate();
            System.out.println(c);
        } catch (Exception e){
            e.printStackTrace();
        }
    }

    public static Connection getConnection(){
        try {
            Class<Main> cls = Main.class;
            jdbc annotation = cls.getAnnotation(jdbc.class);
            String driver = annotation.driver();
            String url = annotation.url();
            String username = annotation.username();
            String password = annotation.password();

            Class.forName(driver);
            System.out.println(DriverManager.getConnection(url, username, password));
            return DriverManager.getConnection(url, username, password);
        } catch (Exception e) {
            e.printStackTrace();
        }
        return null;
    }
}
我们执行一次代码,然后查看数据库中的表,表更新为:
mysql> select * from account;
+----+----------+---------+
| id | name     | balance |
+----+----------+---------+
|  1 | Forlogen |     900 |
|  2 | Kobe     |    1100 |
+----+----------+---------+
2 rows in set (0.00 sec)
发现执行成功!
但如果在执行完sql1后程序发生了异常,那么表是如何变化的呢?下面我们在代码中插入一个简单的数学异常:
public static void bank() {
    String sql1 = "update account set balance = balance - ? where id = ?";
    String sql2 = "update account set balance = balance + ? where id = ?";

    try(Connection conn = getConnection();
        PreparedStatement pstmt1 = conn.prepareStatement(sql1);
        PreparedStatement pstmt2 = conn.prepareStatement(sql2);){

        pstmt1.setDouble(1,100);
        pstmt1.setInt(2,1);

        pstmt2.setDouble(1,100);
        pstmt2.setInt(2,2);

        int c = pstmt1.executeUpdate();
        // 徒手造异常
        int r = 3 / 0;

        pstmt2.executeUpdate();
        System.out.println(c);
    } catch (Exception e){
        e.printStackTrace();
    }
}
然后再去看一下表中的记录,发现Forlgen的前扣掉了,但是Kobe的余额并没有增加,这显然是不正常的。为了解决这种问题,就需要使用事务来进行操作。
mysql> select * from account;
+----+----------+---------+
| id | name     | balance |
+----+----------+---------+
|  1 | Forlogen |     800 |
|  2 | Kobe     |    1100 |
+----+----------+---------+
2 rows in set (0.00 sec)
6.3事务操作
JDBC中涉及到事务操作的主要有:
连接对象.setAutoCommit(boolean autoCommit):当参数为true时表示自动提交,即不使用事务;如果为false,启用事务,SQL操作会在commit之后统一提交连接对象.commit():提交事务连接对象.rollback():事务回滚
我们在前面的例子中开启事务,执行转账操作来看一下是否有作用
public static void bank() throws SQLException {
    String sql1 = "update account set balance = balance - ? where id = ?";
    String sql2 = "update account set balance = balance + ? where id = ?";
    Connection conn = null;
    PreparedStatement pstmt1 = null;
    PreparedStatement pstmt2 = null;

    try{
        conn = getConnection();
        pstmt1 = conn.prepareStatement(sql1);
        pstmt2 = conn.prepareStatement(sql2);
        conn.setAutoCommit(false);

        pstmt1.setDouble(1,100);
        pstmt1.setInt(2,1);

        pstmt2.setDouble(1,100);
        pstmt2.setInt(2,2);

        int c = pstmt1.executeUpdate();
        int r = 3 / 0;
        pstmt2.executeUpdate();
        System.out.println(c);

        conn.commit();
    } catch (Exception e){
        conn.rollback();
        e.printStackTrace();
    } finally {
        close(null, pstmt1, conn);
        close(null, pstmt2, null);
    }
}
执行代码后,表中记录为
mysql> select * from account;
+----+----------+---------+
| id | name     | balance |
+----+----------+---------+
|  1 | Forlogen |     800 |
|  2 | Kobe     |    1100 |
+----+----------+---------+
2 rows in set (0.00 sec)
从结果中可以看出,由于开启了事务,当发生异常时,事务会自动回滚,这样就不会发生一方减钱了,另一方却没有收到钱的尴尬。

若有收获,就点个赞吧
0 人点赞
