一、提高性能方法总结:
1.1 优化构建速度
1.1.1 生产环境(development)
方法一:babel开启编译缓存:::info
**babel **编译 开启**cacheDirectory **缓存,编译之后,从缓存中获取js文件 :::module.exports = {module: {rules: [{test: '\.js$',use: {// 将 es6 代码 -- 通过es5一下的代码实现loader: 'babel-loader',options: {// 开启babel编译缓存cacheDirectory: true,}},// 按需打包.js文件include: 'xx',exclude: 'xxx'}]}}
方法二:按需打包 .js 文件打包速度块、产出代码小 :::info
**include、exclude**表示哪些 js 文件需要进行编译打包,哪些不需要 ::: :::infowebpack.IgnorePlugins()
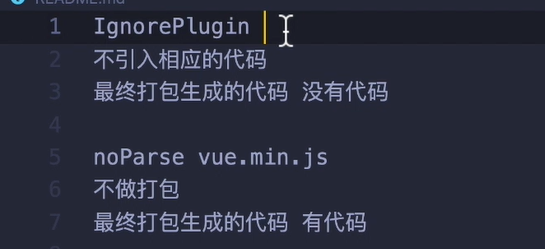
避免引入不必要的模块….
noParse: []:::(1)
IgnorePlugins: 在import 'xxx'时,忽略node_module插件包里,哪些文件不需要进行编译打包 生成打包后的文件中,忽略的文件代码,不会出现在产出代码中;如需引用忽略包中的代码,需要手动进行引入( 2 )
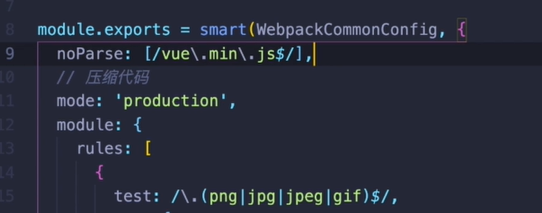
noParse: [/vue\.min\.js/]: 在打包时,不需要对 已经打包后的库 再次进行打包 的配置; 产出的代码中—包含打包后的文件
方法三:多进程打包:::info happyPack / ParallelUglifyPlugin 多进程打包 ::: 方法四:热模块(HMR)更新—-优化开发打包:::info
- 开启HMR 热更新之后,样式变化不会进行重新打包
- 通过
hot.module.accept(path, cb)对模块变化的代码做改变 - 提高打包速度
:::
方法五:DllPlugin打包——提高打包构建速度:::info 开发环境配置,提高开发环境下的打包速度 :::module.exports = {mode: 'development',entry: {main: 'index.js'},resolve: {alias: {'@': resolve(__dirname, 'xxxx'),},extensions: ['.js', '.jsx', '.vue']},devServer: {hot: true,},plugins: [new HotModuleReplacementPlugin(),]}
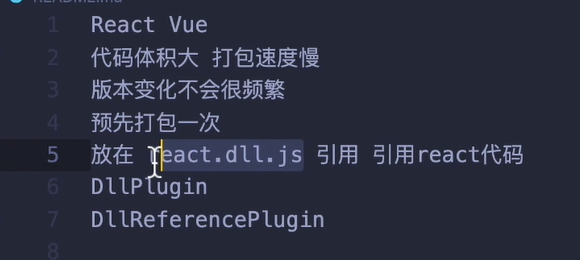
版本变化不会变化很大的文件,预先进行打包一次;之后再使用
import 'xx'时就不需要再次进行打包,直接引入即可
// 针对 ddl 的配置const { distPath } = require('./paths')// 引入webpack 内置 dll 库const DllPlugin = require('webpack/lib/DllPlugin')const { resolve } = require('path')module.exports = {mode: 'development',entry: {// 将 import 'react' 和 'react-dom'// 都打包到 生成的 boundle 文件中react: ['react', 'react-dom'],},output: {// 打包 bundle 的名字 react.dll.jsfilename: '[name].dll.js',path: distPath,// 全局变量 _dll_reactlibrary: '_dll_[name]',},plugins: [new DllPlugin({// name 和 输出的 全局变量名一致name: '_dll_[name]',// 生成的 react.manifest.jsonpath: resolve(distPath, '[name].manifest.json'),}),],};
1.1.2 可以使用生产环境:
:::info
- babel 开启编译缓存(
**cacheDirectory **) - 按需打包 .js 文件 (
webpack.IgnorePlugins(),noParse:[],**include、exclude**) - 多进程打包 (
happyPack、ParallelUglifyPlugin插件) :::1.1.3 在生产环境下不使用
- 热更新(HMR) 不需要开启 (
webpack.HotModuleReplacementPlugin) DllPlugin插件:对 react、vue 版本变化不大的库,预先进行打包

- 热更新(HMR) 不需要开启 (
二、 优化打包构建速度
2.1 babel 编译配置
设置缓存cacheDirectory + exclude/include
babel -> core-js + regenerator -> es6 -> es5:::info- 在babel 编译打包一次之后,后续不需要再次编译,提高性能优化;es6代码通过es5重写改变,再次编译,不改变从缓存中获取
- 拿缓存中编译好的代码就可以
options.cacheDirectory通过缓存 :::
include:
包含那个文件夹下的.js文件进行编译exclude: path.resolve(__dirname, 'node_modules')
排除那个文件夹下的.js文件进行编译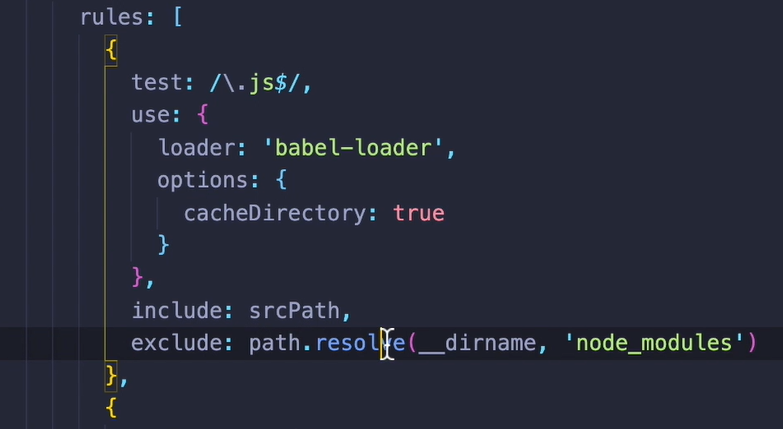
2.2 按需打包js文件代码
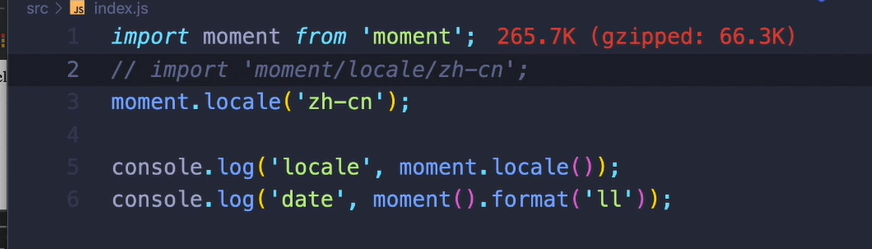
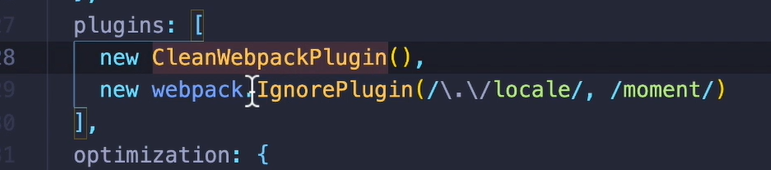
webpack.IgnorePlugins() + noParse: []
webpack.IgnorePlugin()a. 打包时:忽略
moment包下面moment/locale文件夹下的js文件代码 b. 此时需要文件下的代码时,需要手动引入,自己需要的文件 c. 不引入相应的代码,最终打包之后没有忽略的代码
noParse: [/vue\.min\.js$/]a.
vue.min.js是打包过后的文件 ;
b. 表示不需要对哪些文件在编译时,再次进行打包; c. 之后产出的文件中直接将源代码打包好的文件放入其中…
2.3 多进程打包和压缩
2.3.1 概念:
js单线程nodeJS基于 js 单线程webpack基于nodeJS单线程 —> 开启多线程打包
2.3.2 开启多进程打包工具:
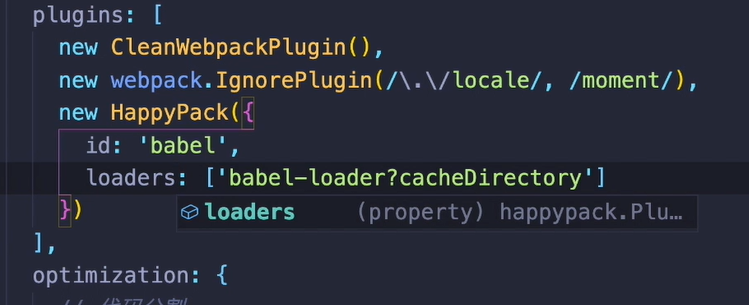
`npm i happypack -D` `plugins: [new HappyPack( id: 'xx', loaders: 'xxx' )]`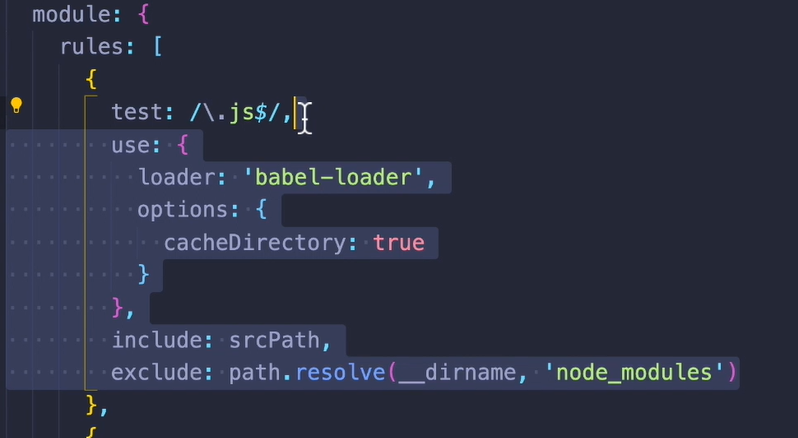<br />(1)使用如下`happyPack`工具进行 .js 文件 打包<br />`const happyPack = require('happypack')`
use: ['happypack/loader?id=babel']表示:将对 .js 文件的处理,交给id为babel的happypack的实例进行处理
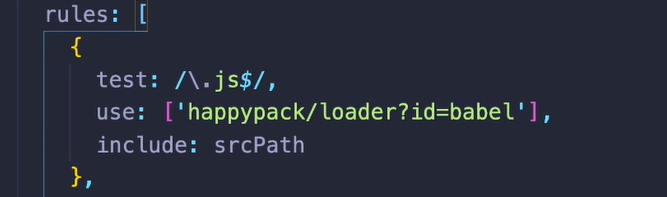
(2)创建一个 id 为 babel 的happyPack的实例
loader: ['babel-loader?cacheDirectory']?后面表示的是配置项:开启文件缓存 使用babel-loader这个loader插件
1.2.3 开启多进程js代码压缩
项目比较小:不需要开启多进程
js代码压缩
`npm i webpack-parallel-uglify-plugin -D` <br />开启多进程---压缩`js`代码
const ParallelUglifyPlugin = require('webpack-parallel-uglify-plugin')
 new ParalleUglifyPlugin({
   uglifyJS: {
     output: {
       beautify: false,  // 代码风格
       comments: false,  // 注释
     }
   }
 })
2.4 提高打包构建速度—热跟新
2.4.1 不使用webpack-dev-server实现源码变化,重新打包,刷新页面
:::info
watch: true开启代码监听watchOptions: { }监听配置:object 对象形式watchOptions.ignored忽略,不监听那个文件watchOptions.aggregateTimeout文件变化多长时间,去重新打包,编译watchOptions.poll每隔多长时间去访问一下文件系统,文件有没有变化(ms) :::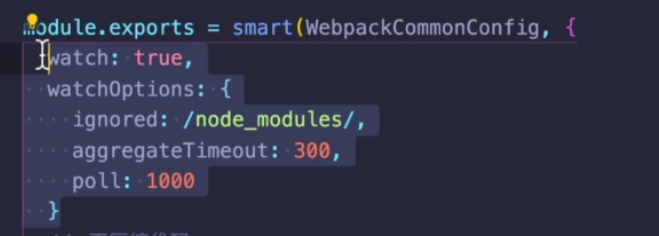
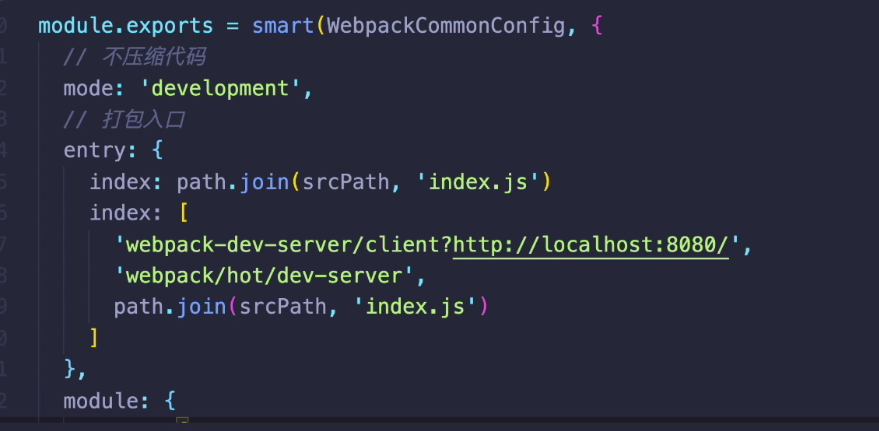
2.4.2 热更新(HMR)
开发环境下:新的代码会生效, 网页不会刷新
开启热模块更新:
2.5 DllPlugin
2.5.1 介绍
开发环境配置,提高开发环境下的打包速度
版本变化不会变化很大的文件,预先进行打包一次;之后再使用
import 'xx'时就不需要再次进行打包,直接引入即可
:::info
通过 先打包 的方式 将模块中 需要使用的库或变量,先进行一次打包,生成 bundle 文件,
后续使用这个文件,直接通过 **.json**文件进行获取打包后的 dll 文件
在开发环境 webpack.dev.js 配置中 进行配置,通过索引方式
:::
2.5.2 基本配置
DllPlugin为webpack内置的库
:::info
entry: { main: ['xx', 'xx'] }
数组形式写法:将 import 导入的模块放入生成的 boundle 文件
library: '_dll_[name]'
全局变量名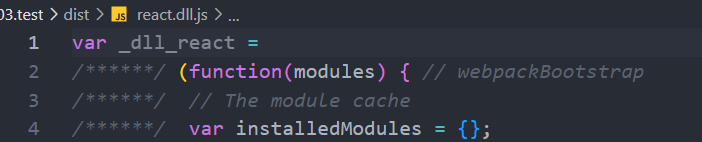
DllPlugin({name: library})
name 需和全局变量保持一致 :::
// 针对 ddl 的配置
const { distPath } = require('./paths')

// 引入webpack 内置 dll 库
const DllPlugin = require('webpack/lib/DllPlugin')
const { resolve } = require('path')

module.exports = {
  mode: 'development',
  entry: {
    // 将 import 'react' 和 'react-dom'
    // 都打包到 生成的 boundle 文件中 代码块中文件
    // nodule_module....
    react: ['react', 'react-dom'],
  },
  output: {
    // 打包 bundle 的名字 react.dll.js
    filename: '[name].dll.js',
    path: distPath,
    // 全局变量 _dll_react
    library: '_dll_[name]',
  },
  plugins: [
    new DllPlugin({
      // name 和 输出的 全局变量名一致
      name: '_dll_[name]',
      // 生成的 react.manifest.json
      path: resolve(distPath, '[name].manifest.json'),
    }),
  ],
};

2.5.3 使用生成的dll文件
const { resolve } = require('path');
const HtmlWebpackPlugin = require('html-webpack-plugin');
const { CleanWebpackPlugin } = require('clean-webpack-plugin');
const DllRefercncePlugin = require('webpack/lib/DllReferencePlugin');
module.exports = {
mode: 'development',
entry: {
main: resolve(__dirname, '../src/main.js'),
},
output: {
filename: 'bundle.js',
path: resolve(__dirname, '../dist/'),
},
devtool: 'eval-source-map',
module: {
rules: [],
},
plugins: [
new HtmlWebpackPlugin({
template: resolve(__dirname, '../src/index.html'),
filename: 'test.html',
}),
// 使用dllPlugin打包生成的文件
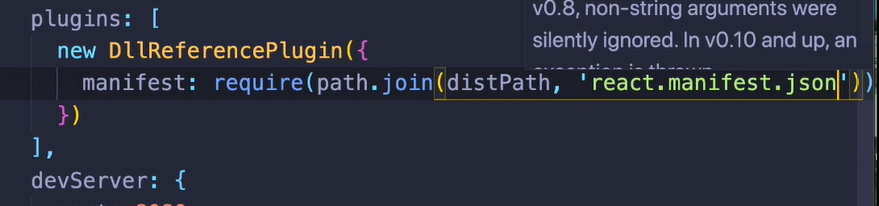
new DllRefercncePlugin({
manifest: resolve(__dirname, '../dist/noChange.manifest.json')
}),
],
};
开发环境下: webpack.dev.conf.js 文件的配置项
:::info
使用wenpack 内置的
DllReferencePlugin::: :::info
plugins:[]配置插件进行使用
manifest: 对应生成的.json文件的路径,
作用:
通过自己模块中使用的import 'react'; import 'react-dom',查找.json文件下对应打包后的 dll文件中的内容
:::
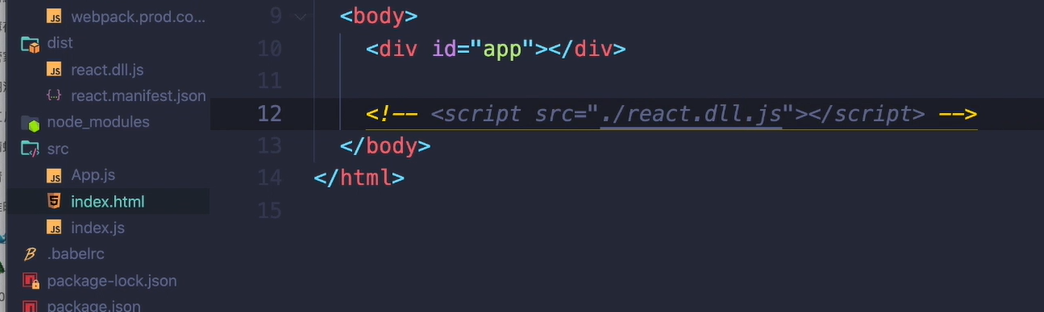
 :::info
在 html 模板中引入 dll 文件
:::
:::info
在 html 模板中引入 dll 文件
:::

若有收获,就点个赞吧
0 人点赞
