安装windows terminal
进入microsoft store 安装windows terminal
beautify
# 美化要点:1. 改主题 (Oh-My-Posh)2. 改颜色主题3. 换字体
install scoop
# 保证允许本地脚本的执行set-executionpolicy remotesigned -scope currentuser# install scoopiex (new-object net.webclient).downloadstring('https://get.scoop.sh')
install font
# 搜索 nerd fonts,这里选择是的FantasqueSansMono这个字体scoop search FantasqueSansMono-NF# 添加 nerd fonts 源scoop bucket add 'nerd-fonts'# 安装 nerd fontsscoop install FantasqueSansMono-NF
install oh-my-posh (similar with oh-my-zsh)
# 1. 安装 chocoSet-ExecutionPolicy Bypass -Scope Process -Force; iex ((New-Object System.Net.WebClient).DownloadString('https://chocolatey.org/install.ps1'))# 2. 安装ConEmuchoco install ConEmu# 3. 安装 posh-git 和 oh-my-poshInstall-Module posh-git -Scope CurrentUserInstall-Module oh-my-posh -Scope CurrentUser# 4. 设置 Powershell 的 profileif (!(Test-Path -Path $PROFILE )) { New-Item -Type File -Path $PROFILE -Force }notepad $PROFILE# 5. 粘贴以下内容进 profile 文件Import-Module posh-gitImport-Module oh-my-poshSet-Theme Paradox
optimize ls
# 1. 直接在powershell里运行(如果运行失败请检查是否安装 PowerShellGet):Install-Module Get-ChildItemColor# 或者# git 安装(上面成功了,就不需要再用 git 安装)git clone https://github.com/joonro/Get-ChildItemColor.git# 2. 激活Import-Module Get-ChildItemColor
sample profile config
Import-Module Get-ChildItemColor$env:PYTHONIOENCODING="utf-8"# Remove curl aliasIf (Test-Path Alias:curl) {Remove-Item Alias:curl}If (Test-Path Alias:curl) {Remove-Item Alias:curl}# Remove-Item alias:ls -forceSet-Alias l Get-ChildItemColor -option AllScopeSet-Alias ls Get-ChildItemColorFormatWide -option AllScopefunction GitLogPretty {git log --graph --pretty='%Cred%h%Creset -%C(auto)%d%Creset %s %Cgreen(%cr) %C(bold blue)<%an>%Creset' --all}function PrettyLS {colorls --light -A}function GitStat {git status}function GoBack {Set-Location ..}function GetMyIp {curl -L tool.lu/ip}function UpdateScoop {scoop update; scoop update *}function UpdateChoco {choco upgrade chocolatey}Import-Module posh-gitImport-Module oh-my-posh# $DefaultUser = 'spenc'# Setup other aliasSet-Alias open Invoke-ItemSet-Alias .. GoBackSet-Alias glola GitLogPrettySet-Alias gst GitStatSet-Alias myip GetMyIpSet-Alias pls PrettyLS# Set themeSet-Theme robbyrussellSet-PSReadlineKeyHandler -Key Tab -Function MenuComplete
安装 oh-my-posh
我们需要先以管理员权限启动 PowerShell,以便执行安装操作。(具体是在开始按钮上点击右键,选择“Windows PowerShell (管理员)”。
然后,运行命令以安装 posh-git,这是 oh-my-posh 的依赖。
Install-Module posh-git -Scope CurrentUser
如果此前没有安装 NuGet 提供程序,则此时会提示安装 NuGet;如果此前没有开启执行任意脚本,此处也会提示执行脚本。如果没有权限执行脚本,可能需要先执行 Set-ExecutionPolicy Bypass。
接下来,运行命令以安装 oh-my-posh 本身。
Install-Module oh-my-posh -Scope CurrentUser
自此,oh-my-posh 安装完毕。
启用模组并设置主题
接下来,我们需要启用安装的模组。启用模组的命令是:
Import-Module oh-my-posh
但是运行Import-Module oh-my-posh时多数情况下会提示系统禁止运行脚本。
解决办法如下:
详细说明
Restricted 执行策略不允许任何脚本运行。
AllSigned 和 RemoteSigned 执行策略可防止 Windows PowerShell 运行没有数字签名的脚本。
本主题说明如何运行所选未签名脚本(即使在执行策略为 RemoteSigned 的情况下),还说明如何对
脚本进行签名以便您自己使用。
下面我们允许运行签名脚本
———————————————-
首次在计算机上启动 Windows PowerShell 时,现用执行策略很可能是 Restricted(默认设置)。Restricted 策略不允许任何脚本运行。
若要了解计算机上的现用执行策略,请键入:
get-executionpolicy
若要在本地计算机上运行您编写的未签名脚本和来自其他用户的签名脚本,请使用以下命令将计算机上的
执行策略更改为 RemoteSigned:
set-executionpolicy remotesigned
执行“set-ExecutionPolicy RemoteSigned ”:
执行策略更改
执行策略可以防止您执行不信任的脚本。更改执行策略可能会使您面临 about_Execution_Policies
帮助主题中所述的安全风险。是否要更改执行策略?
[Y] 是(Y) [N] 否(N) [S] 挂起(S) [?] 帮助 (默认值为“Y”): y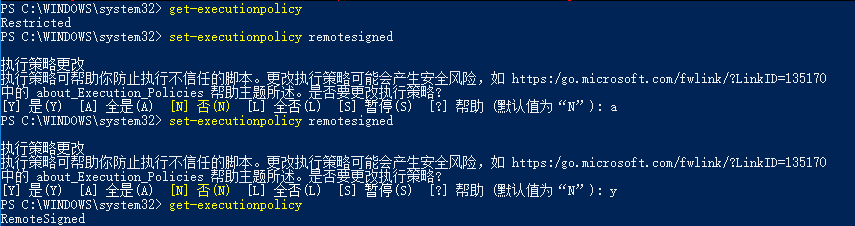
上图可以看出已成功更换为Remotesigned,这样就可以愉快的玩起来了
输入Import-Module oh-my-posh
成功。~~~
但是,我们期望的是每次打开 PowerShell 都能够启用这个模组,所以我们需要设置 profile 文件让它自动启用。
输入: $profile 可以让 PowerShell 告诉我们这个文件的路径是什么。当然下图是我的路径,读者的默认在文档路径里的 PowerShell 文件夹下。
我们需要编辑这个文件上图路径:c:\Users.…….(如果没有,手动创建一个),然后在里面写下:Import-Module oh-my-posh
接下来,新打开 PowerShell(不需要管理员权限)时就会提示加载了这个文件: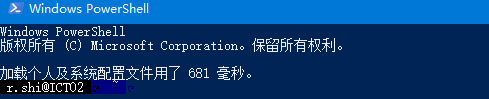
测试效果:输入set-theme设置主题,这里不要按加车, 按tap 可以自动匹配主题名了。
set-theme robbyrussell

若有收获,就点个赞吧
0 人点赞
