Nacos Confg 支持标准 Spring Cloud @RefreshScope特性,即应用订阅某个 Nacos 配置后,当配置内容变化时,Refresh Scope Beans 中的绑定配置的属性将有条件的更新。所谓的条件是指 Bean 必须:
- 必须条件:Bean 的声明类必须标注 @RefreshScope
- 二选一条件:
- 属性(非 static 字段)标注 @Value
- @ConfigurationPropertiesBean
除此之外,Nacos Confg 也引入了 Nacos Client 底层数据变化监听接口,即 com.alibaba.nacos.api.config.listener.Listener。下面的内容将分别讨论这三种不同的使用场景。
- 使用 Nacos Config 实现 Bean @Value属性动态刷新
- 使用 Nacos Config 实现 @ConfigurationPropertiesBean 属性动态刷新
- 使用 Nacos Config 监听实现 Bean 属性动态刷新
@Value属性动态刷新
基于应用 nacos-config-sample 修改,将引导类 NacosConfigDemo标注@RefreshScope和 @RestController,使得该类变为 Spring MVC REST 控制器,同时具备动态刷新能力,具体代码如下
package com.alibaba.cloud.nacosconfigsample;import javax.annotation.PostConstruct;import org.springframework.beans.factory.annotation.Autowired;import org.springframework.beans.factory.annotation.Value;import org.springframework.cloud.context.config.annotation.RefreshScope;import org.springframework.web.bind.annotation.RequestMapping;import org.springframework.web.bind.annotation.RestController;@RestController@RefreshScopepublic class NacosConfigDemo {@Value("${user.name}")private String userName;@Value("${user.age}")private int userAge;@PostConstructpublic void init() {System.out.printf("[init] user name : %s , age : %d%n", userName, userAge);}@RequestMapping("/user")public String user() {return String.format("[HTTP] user name : %s , age : %d", userName, userAge);}}
重新编译并启动应用:
mvn clean package && java -jar target/nacos-config-sample-0.0.1-SNAPSHOT.jar
应用启动中,会看到如下输出,说明启动过程中可以读取到服务端的配置:
[init] user name : nacos-config-sample , age : 90
打开新 tab ()并通过命令行访问 REST 资源 /user:
curl http://127.0.0.1:60000/user
你会看到下面的输入:
[HTTP] user name : nacos-config-sample , age : 90
本次请求结果中的 user name 和 age 数据与应用启动时的一致,因为此时 Nacos Server 中的配置数据没变化。
通过nacos控制台调整 nacos-config-sample.properties 配置,将 user.age 从 90 变更为 99: 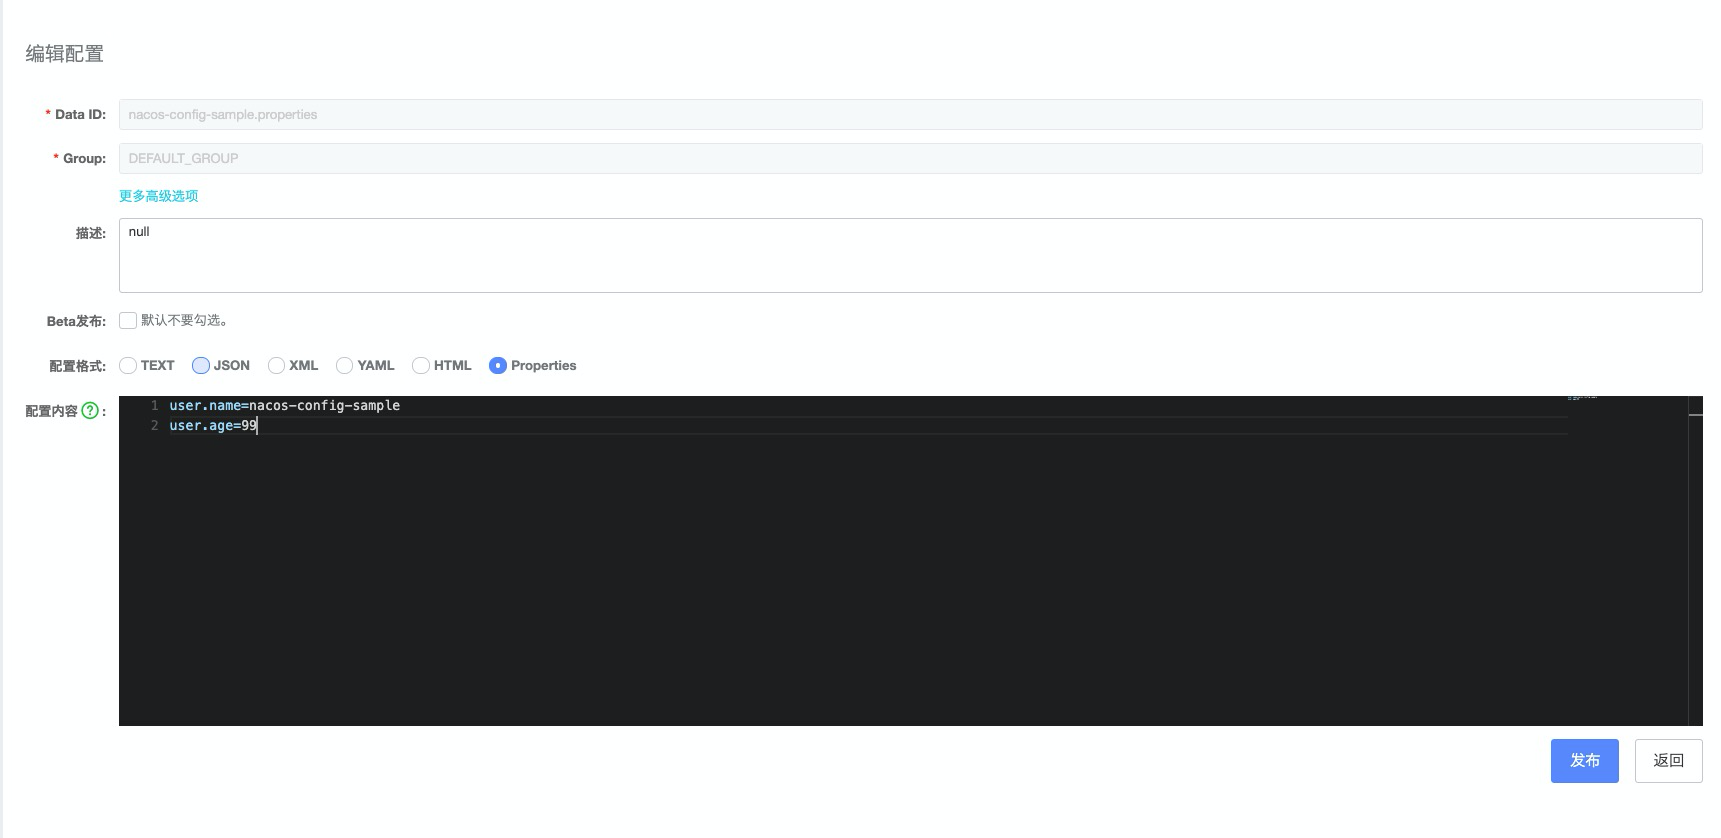
点击“发布”按钮,观察应用日志变化(部分内容被省略):
c.a.n.client.config.impl.ClientWorker : [fixed-127.0.0.1_8848] [data-received] dataId=nacos-config-sample.properties, group=DEFAULT_GROUP, tenant=null, md5=4a8cb29154adb9a0e897e071e1ec8d3c, content=user.name=nacos-config-sampleuser.age=99, type=propertieso.s.boot.SpringApplication : Started application in 0.208 seconds (JVM running for 290.765)o.s.c.e.event.RefreshEventListener : Refresh keys changed: [user.age]
- 第 1 和 2 行代码是由 Nacos Client 输出,通知开发者具体的内容变化,不难发现,这里没有输出完整的配置内容,仅为变更部分,即配置 user.age。
- 第 3 行日志似乎让 SpringApplication 重启了,不过消耗时间较短,这里暂不解释,后文将会具体讨论,只要知道这与 Bootstrap 应用上下文相关即可。
- 最后一行日志是由 Spring Cloud 框架输出,提示开发人员具体变更的 Spring 配置 Property,可能会有多个,不过本例仅修改一处,所以显示单个。
重新访问 REST 资源 /user:
curl http://127.0.0.1:8080/user
会看到如下输出:
[HTTP] user name : nacos-config-sample , age : 99
终端日志显示了这次配置变更同步到了 @Value(“${user.age}”) 属性 userAge 的内容。除此之外,应用控制台也输出了以下内容:
[init] user name : nacos-config-sample , age : 99
而该日志是由 init()方法输出,那么是否说明该方法被框架调用了呢?答案是肯定的。既然 @PostConstruct方法执行了,那么 @PreDestroy方法会不会被调用呢?不妨增加 Spring Bean 销毁回调方法
package com.alibaba.cloud.nacosconfigsample;import javax.annotation.PostConstruct;import javax.annotation.PreDestroy;import org.springframework.beans.factory.annotation.Autowired;import org.springframework.beans.factory.annotation.Value;import org.springframework.cloud.context.config.annotation.RefreshScope;import org.springframework.web.bind.annotation.RequestMapping;import org.springframework.web.bind.annotation.RestController;@RestController@RefreshScopepublic class NacosConfigDemo {@Value("${user.name}")private String userName;@Value("${user.age}")private int userAge;@PostConstructpublic void init() {System.out.printf("[init] user name : %s , age : %d%n", userName, userAge);}@RequestMapping("/user")public String user() {return String.format("[HTTP] user name : %s , age : %d", userName, userAge);}@PreDestroypublic void destroy() {System.out.printf("[destroy] user name : %s , age : %d%n", userName, userAge);}}
重新编译并启动应用:
mvn clean package && java -jar target/nacos-config-sample-0.0.1-SNAPSHOT.jar
启动过程会看到下面的日志
[init] user name : nacos-config-sample , age : 99
将配置 user.age 内容从 99 调整为 18,观察控制台日志变化:
c.a.n.client.config.impl.ClientWorker : [fixed-127.0.0.18848] [data-received] dataId=nacos-config-sample.properties, group=DEFAULTGROUP, tenant=null, md5=e25e486af432c403a16d5fc8a5aa4ab2, content=user.name=nacos-config-sample user.age=18, type=propertieso.s.boot.SpringApplication : Started application in 0.208 seconds (JVM running for 144.467)[destroy] user name : nacos-config-sample , age : 99o.s.c.e.event.RefreshEventListener : Refresh keys changed: [user.age]
相较于前一个版本,日志插入了 destroy()方法输出内容,并且Bean 属性 userAge 仍旧是变更前的数据 99。随后,再次访问 REST 资源 /user,其中终端日志:
curl http://127.0.0.1:8080/user
[HTTP] user name : nacos-config-sample , age : 18
应用控制台日志:
[init] user name : nacos-config-sample , age : 18
两者与前一版本并无差异,不过新版本给出了一个现象,即当 Nacos Config 接收到服务端配置变更时,对应的 @RefreshScopeBean 生命周期回调方法会被调用,并且是先销毁,然后由重新初始化。本例如此设计,无非想提醒读者,要意识到 Nacos Config 配置变更对 @RefreshScopeBean 生命周期回调方法的影响,避免出现重复初始化等操作。
注: Nacos Config 配置变更调用了 Spring Cloud API ContextRefresher,该 API 会执行以上行为。同理,执行 Spring Cloud Acutator Endpoint refresh也会使用 ContextRefresher。
@ConfigurationPropertiesBean 属性动态刷新
在应用 nacos-config-sample 新增 User类,并标注 @RefreshScope和 @ConfigurationProperties,代码如下
package com.alibaba.cloud.nacosconfigsample;import org.springframework.boot.context.properties.ConfigurationProperties;import org.springframework.cloud.context.config.annotation.RefreshScope;@RefreshScope@ConfigurationProperties(prefix = "user")public class User {private String name;private int age;public String getName() {return name;}public void setName(String name) {this.name = name;}public int getAge() {return age;}public void setAge(int age) {this.age = age;}@Overridepublic String toString() {return "User{" +"name='" + name + '\'' +", age=" + age +'}';}}
根据 @ConfigurationProperties的定义, User类的属性绑定到了配置属性前缀 user。下一步,调整引导类,代码如下
package com.alibaba.cloud.nacosconfigsample;import javax.annotation.PostConstruct;import javax.annotation.PreDestroy;import org.springframework.beans.factory.annotation.Autowired;import org.springframework.beans.factory.annotation.Value;import org.springframework.cloud.context.config.annotation.RefreshScope;import org.springframework.web.bind.annotation.RequestMapping;import org.springframework.web.bind.annotation.RestController;@RestController@RefreshScope@EnableConfigurationProperties(User.class)public class NacosConfigDemo {@Value("${user.name}")private String userName;@Value("${user.age}")private int userAge;@Autowiredprivate User user;@PostConstructpublic void init() {System.out.printf("[init] user name : %s , age : %d%n", userName, userAge);}@RequestMapping("/user")public String user() {return String.format("[HTTP] user name : %s , age : %d", userName, userAge);}@PreDestroypublic void destroy() {System.out.printf("[destroy] user name : %s , age : %d%n", userName, userAge);}@RequestMapping("/userObject")public String userObject() {return "[HTTP] " + user;}}
较前一个版本 NacosConfigSampleApplication实现,主要改动点:
- 激活 @ConfigurationPropertiesBean @EnableConfigurationProperties(User.class)
- 通过 @Autowired依赖注入 UserBean
- 使用 user Bean( toString() 方法替换 user()中的实现
重启应用后,再将 user.age 配置从 18 调整为 99,控制台日志输出符合期望:
[init] user name : nacos-config-sample , age : 18
[init] user name : nacos-config-sample , age : 18……[fixed-127.0.0.18848] [data-received] dataId=nacos-config-sample.properties, group=DEFAULTGROUP, tenant=null, md5=b0f42fac52934faf69757c2b6770d39c, content=user.name=nacos-config-sampleuser.age=90, type=properties……[destroy] user name : nacos-config-sample , age : 18o.s.c.e.event.RefreshEventListener : Refresh keys changed: [user.age]
接下来,访问 REST 资源 /userObject,观察终端日志输出:
curl http://127.0.0.1:8080/user
[HTTP] User{name='nacos-config-sample', age=90}
User Bean 属性成功地变更为 90,达到实战效果。上小节提到 Nacos Config 配置变更会影响 @RefreshScopeBean 的生命周期方法回调。同理,如果为 User增加初始化和销毁方法的话,也会出现行文,不过本次将 User实现 Spring 标准的生命周期接口 InitializingBean和 DisposableBean
package com.alibaba.cloud.nacosconfigsample;import org.springframework.beans.factory.DisposableBean;import org.springframework.beans.factory.InitializingBean;import org.springframework.boot.context.properties.ConfigurationProperties;import org.springframework.cloud.context.config.annotation.RefreshScope;@RefreshScope@ConfigurationProperties(prefix = "user")public class User implements InitializingBean, DisposableBean {private String name;private int age;public String getName() {return name;}public void setName(String name) {this.name = name;}public int getAge() {return age;}public void setAge(int age) {this.age = age;}@Overridepublic String toString() {return "User{" +"name='" + name + '\'' +", age=" + age +'}';}@Overridepublic void afterPropertiesSet() throws Exception {System.out.println("[afterPropertiesSet()] " + toString());}@Overridepublic void destroy() throws Exception {System.out.println("[destroy()] " + toString());}}
代码调整后,重启应用,并修改配置(90 -> 19),观察控制台日志输出:
[init] user name : nacos-config-sample , age : 90 c.a.n.client.config.impl.ClientWorker : [fixed-127.0.0.18848] [data-received] dataId=nacos-config-sample.properties, group=DEFAULTGROUP, tenant=null, md5=30d26411b8c1ffc1d16b3f9186db498a, content=user.name=nacos-config-sample user.age=19, type=properties……[destroy()] User{name='nacos-config-sample', age=90}[afterPropertiesSet()] User{name='nacos-config-sample', age=19}[destroy] user name : nacos-config-sample , age : 90……o.s.c.e.event.RefreshEventListener : Refresh keys changed: [user.age]
不难发现, UserBean 的生命周期方法不仅被调用,并且仍旧是先销毁,再初始化。那么,这个现象和之前看到的 SpringApplication重启是否有关系呢?答案也是肯定的,不过还是后文再讨论。
下一小节将继续讨论怎么利用底层 Nacos 配置监听实现 Bean 属性动态刷新
监听实现 Bean 属性动态刷新
前文曾提及 com.alibaba.nacos.api.config.listener.Listener是 Nacos Client API 标准的配置监听器接口,由于仅监听配置内容,并不能直接与 Spring 体系打通,因此,需要借助于 Spring Cloud Alibaba Nacos Config API NacosConfigManager,代码调整如下
package com.alibaba.cloud.nacosconfigsample;import javax.annotation.PostConstruct;import javax.annotation.PreDestroy;import org.springframework.beans.factory.annotation.Autowired;import org.springframework.beans.factory.annotation.Value;import org.springframework.cloud.context.config.annotation.RefreshScope;import org.springframework.web.bind.annotation.RequestMapping;import org.springframework.web.bind.annotation.RestController;import com.alibaba.cloud.nacos.NacosConfigManager;import com.alibaba.nacos.api.config.listener.AbstractListener;@RestController@RefreshScope@EnableConfigurationProperties(User.class)public class NacosConfigDemo {@Value("${user.name}")private String userName;@Value("${user.age}")private int userAge;@Autowiredprivate User user;@Autowiredprivate NacosConfigManager nacosConfigManager;@Beanpublic ApplicationRunner runner() {return args -> {String dataId = "nacos-config-sample.properties";String group = "DEFAULT_GROUP";nacosConfigManager.getConfigService().addListener(dataId, group, new AbstractListener() {@Overridepublic void receiveConfigInfo(String configInfo) {System.out.println("[Listener] " + configInfo);}});};}@PostConstructpublic void init() {System.out.printf("[init] user name : %s , age : %d%n", userName, userAge);}@RequestMapping("/user")public String user() {return String.format("[HTTP] user name : %s , age : %d", userName, userAge);}@PreDestroypublic void destroy() {System.out.printf("[destroy] user name : %s , age : %d%n", userName, userAge);}@RequestMapping("/user")public String user() {return "[HTTP] " + user;}}
代码主要变化:
- @Autowired依赖注入 NacosConfigManager
- 新增 runner()方法,通过 NacosConfigManagerBean 获取 ConfigService,并增加了 AbstractListener( Listener抽象类)实现,监听 dataId = “nacos-config-sample.properties” 和 group = “DEFAULT_GROUP” 的配置内容
重启应用,并将配置 user.age 从 19 调整到 90,观察日志变化:
c.a.n.client.config.impl.ClientWorker : [fixed-127.0.0.18848] [data-received] dataId=nacos-config-sample.properties, group=DEFAULTGROUP, tenant=null, md5=b0f42fac52934faf69757c2b6770d39c, content=user.name=nacos-config-sampleuser.age=90, type=properties[Listener] user.name=nacos-config-sampleuser.age=90……
在第 1 行日志下方,新增了监听实现代码的输出内容,不过这段内容是完整的配置,而非变化的内容。读者请务必注意其中的差异。下一步要解决的是将配置映射到 Bean 属性,此处给出一个简单的解决方案,实现步骤有两个:
- 将 String 内容转化为 Properties 对象
- 将 Properties 属性值设置到对应的 Bean 属性
重启应用,并将配置 user.age 从 90 调整到 19,观察日志变化:
[Listener] user.name=nacos-config-sample
user.age= 19
[Before User] User{name=’nacos-config-sample’, age=90}
[After User] User{name=’nacos-config-sample’, age=19}
上述三个例子均围绕着 Nacos Config 实现 Bean 属性动态更新,不过它们是 Spring Cloud 使用场景。如果读者的应用仅使用 Spring 或者 Spring Boot,可以考虑 Nacos Spring 工程, Github 地址:https://github.com/nacos-group/nacos-spring-project,其中 @NacosValue支持属性粒度的更新。

若有收获,就点个赞吧
0 人点赞
