引子
fastdfs安装好以后是无法通过http访问的,这个时候就需要借助nginx了,所以需要安装fastdfs的第三方模块到nginx中,就能使用了。
注:nginx需要和storage在同一个节点。
安装nginx插件
- 解压nginx的fastdfs压缩包 ```shell tar -zxvf fastdfs-nginx-module-1.22.tar.gz
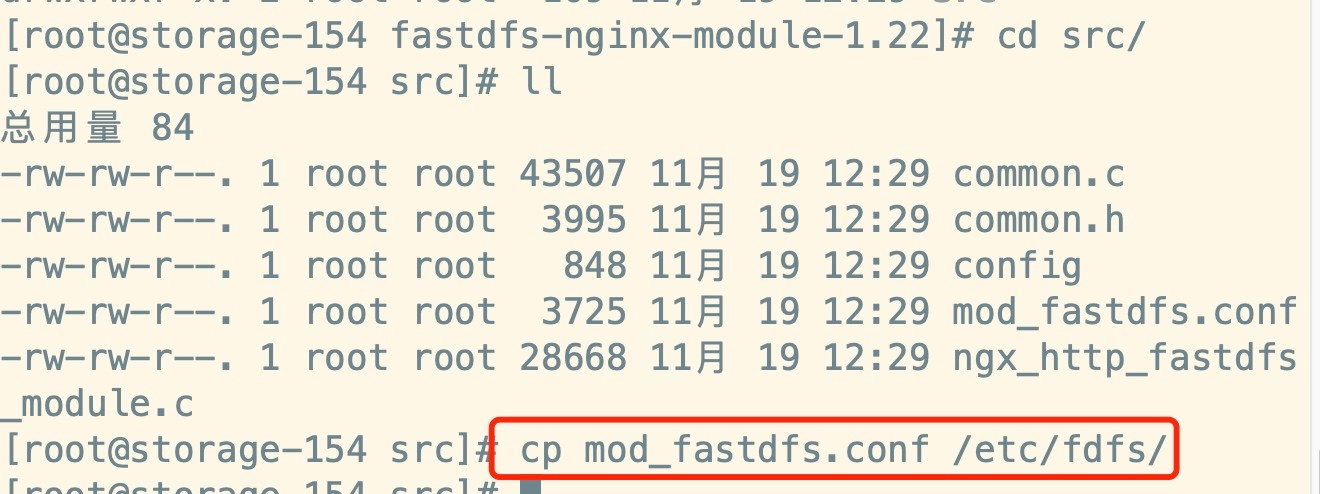
- 复制配置文件如下:```shellcp mod_fastdfs.conf /etc/fdfs
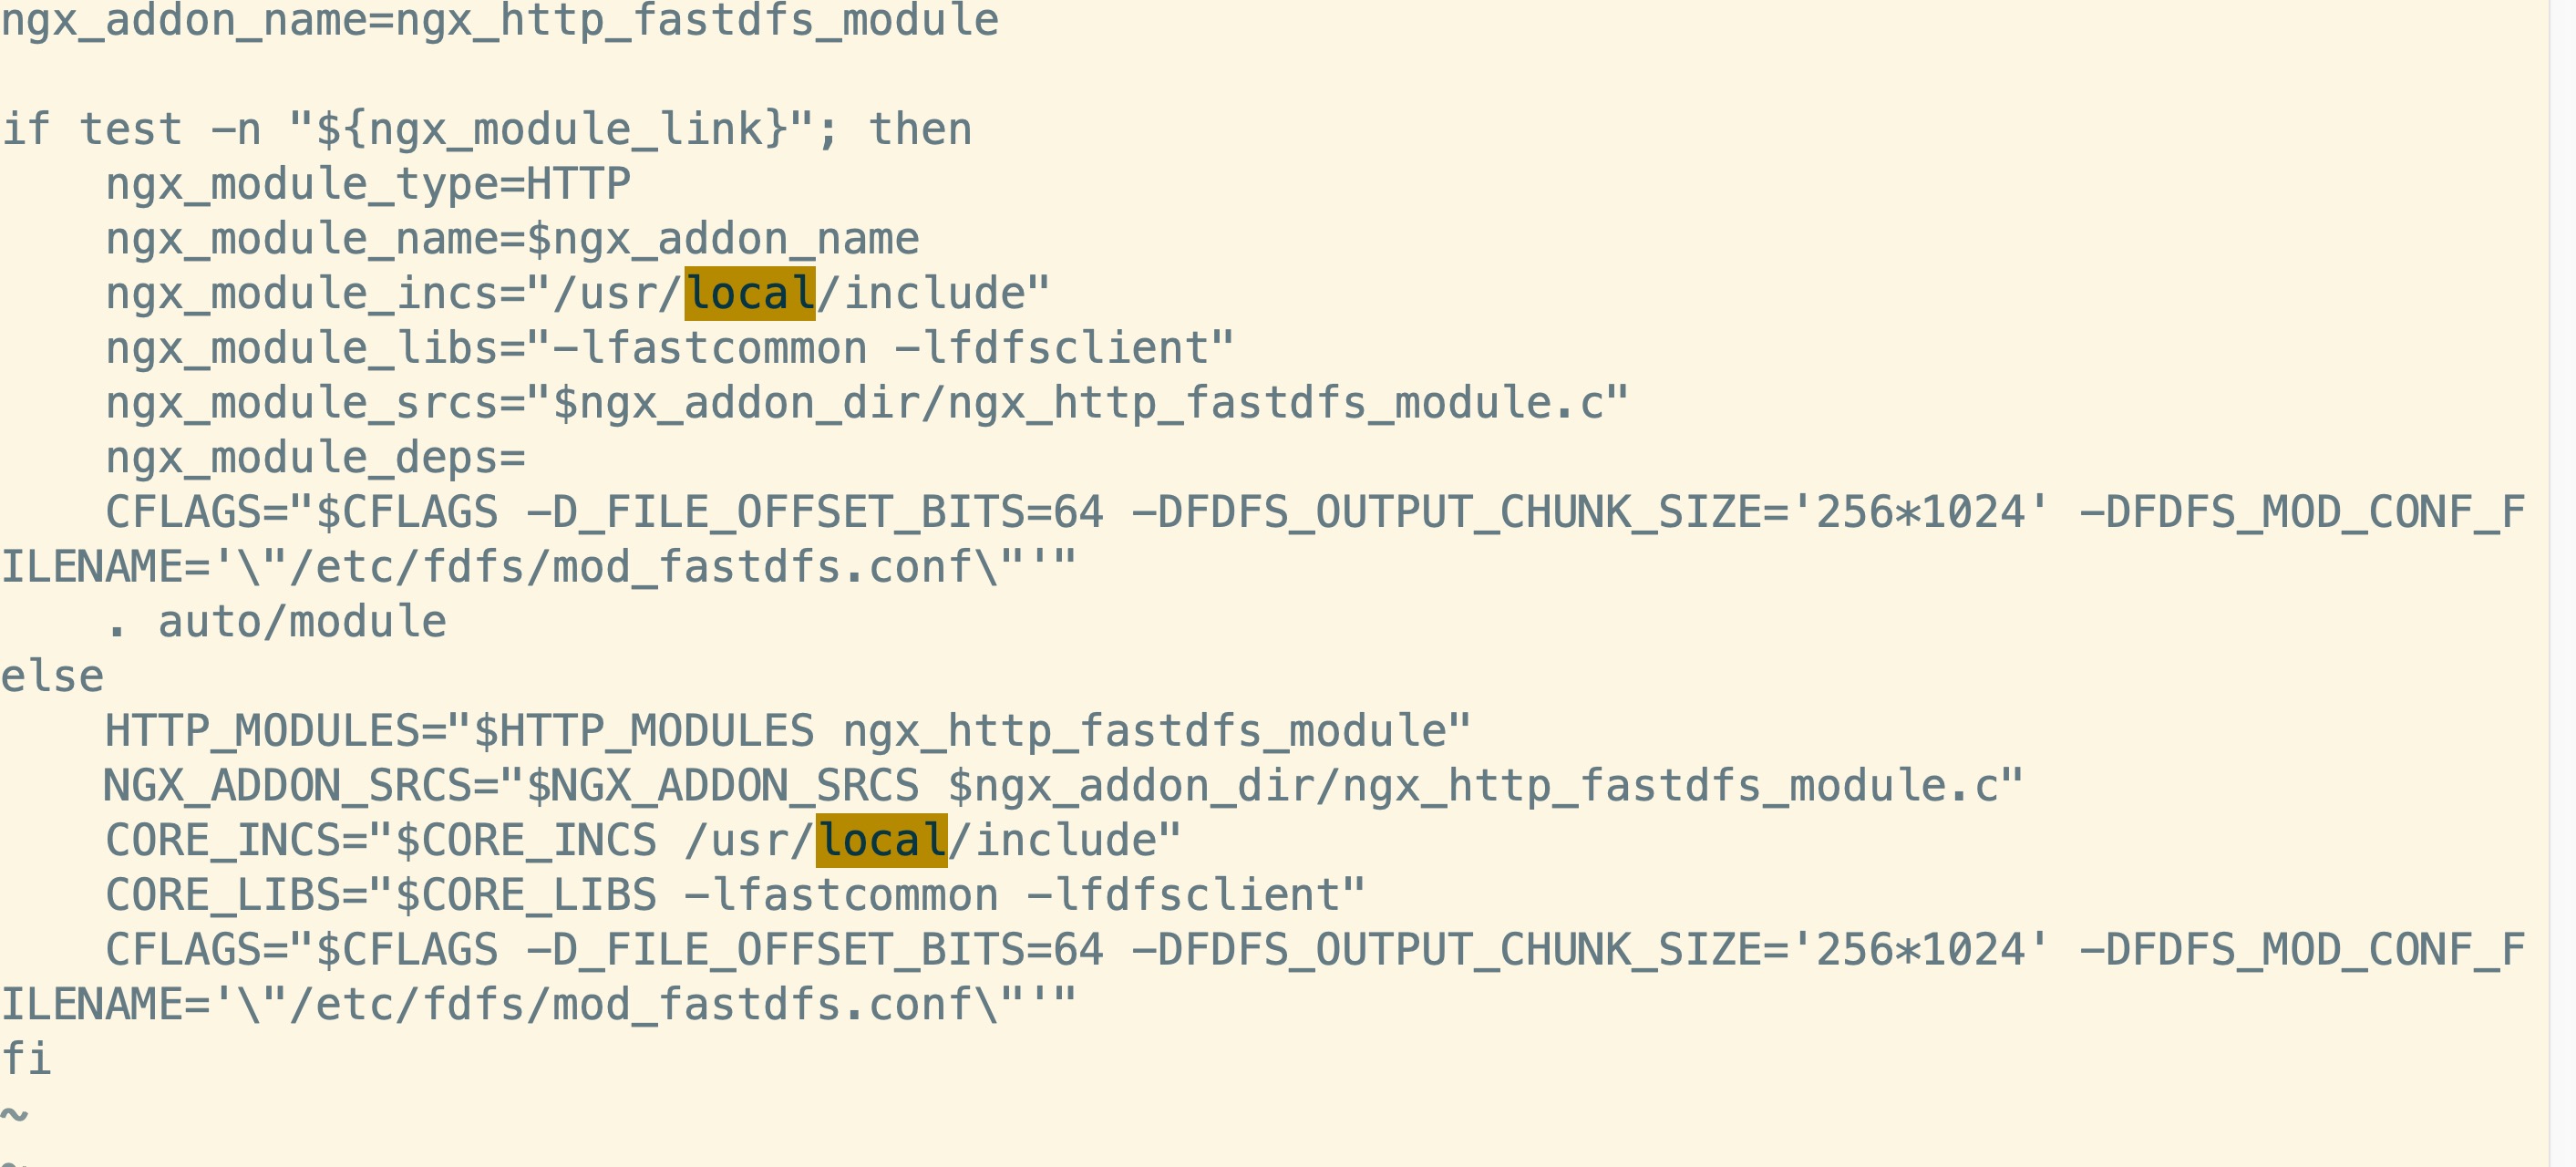
- 修改/fastdfs-nginx-module/src/config文件,主要是修改路径,把local删除,因为fastdfs安装的时候我们没有修改路径,原路径是/usr:
安装nginx(略)
其中配置如下: ```shell ./configure \n—prefix=/usr/local/nginx \n—pid-path=/var/run/nginx/nginx.pid \n—lock-path=/var/lock/nginx.lock \n—error-log-path=/var/log/nginx/error.log \n—http-log-path=/var/log/nginx/access.log \n—with-http_gzip_static_module \n—http-client-body-temp-path=/var/temp/nginx/client \n—http-proxy-temp-path=/var/temp/nginx/proxy \n—http-fastcgi-temp-path=/var/temp/nginx/fastcgi \n—http-uwsgi-temp-path=/var/temp/nginx/uwsgi \n—http-scgi-temp-path=/var/temp/nginx/scgi \n—add-module=/home/software/fdfs/fastdfs-nginx-module-1.22/src
主要新增一个第三方模块<br />修改 mod_fastdfs.conf 配置文件:```shellbase_path=/usr/local/fastdfs/tmptracker_server=192.168.1.153:22122group_name=imoocurl_have_group_name = truestore_path0=/usr/local/fastdfs/storage
mkdir /usr/local/fastdfs/tmp
修改nginx.conf,添加如下虚拟主机:
server {listen 8888;server_name localhost;location /imooc/M00 {ngx_fastdfs_module;}}
测试图片

若有收获,就点个赞吧
0 人点赞
