创建工程,引入依赖
<dependency><groupId>org.springframework.boot</groupId><artifactId>spring-boot-starter-data-elasticsearch</artifactId><!--<version>2.1.5.RELEASE</version>--><version>2.2.2.RELEASE</version></dependency><dependency><groupId>org.springframework.boot</groupId><artifactId>spring-boot-starter-test</artifactId><scope>test</scope></dependency>
配置yml
spring:data:elasticsearch:cluster-name: es6cluster-nodes: 192.168.1.187:9300
版本协调
目前springboot-data-elasticsearch中的es版本贴合为es-6.4.3,如此一来版本需要统一,把es进行降级。等springboot升级es版本后可以在对接最新版的7.4。
Netty issue fix
@Configurationpublic class ESConfig {/*** 解决netty引起的issue*/@PostConstructvoid init() {System.setProperty("es.set.netty.runtime.available.processors", "false");}}
附 elasticsearch6.4.3配置文件
elasticsearch.yml
cluster.name: es6node.name: node0path.data: /usr/local/elasticsearch-6.4.3/datapath.logs: /usr/local/elasticsearch-6.4.3/logsnetwork.host: 0.0.0.0
./elasticsearch
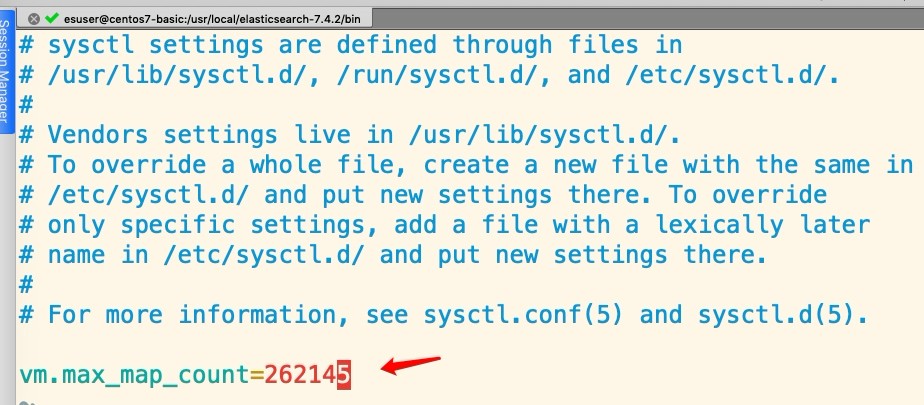
如果出现如下错误:
那么需要切换到root用户下去修改配置如下:
vim /etc/security/limits.conf
* soft nofile 65536* hard nofile 131072* soft nproc 2048* hard nproc 4096

Don’t forget!
中文分词器也需要去配置一下噢别忘记!:)
中文分词器的版本要记得使用6,而不是之前的7,版本一定要贴合噢~
比如目前的所有版本都是统一为es-6.4.3,那么下载地址为:
https://github.com/medcl/elasticsearch-analysis-ik/releases/tag/v6.4.3

若有收获,就点个赞吧
0 人点赞
