今年的一个项目要用到lin-cms-vue框架,长话短说,就是在lin-cms-vue的基础上封装了路由、接口请求、axios的拦截、一些处理函数、一些公共的框架(如lin-table)。当然,已经有成熟轮子的用户完全用不到。我也是抱着试一下的心态看看。之间也接触过一些好的框架,包括一些大公司牛人自己封装一些框架。
还是啰嗦了,其实lin-cms-vue就是对vue进行了二开,方便后续的开发。
官网地址:https://doc.cms.talelin.com/client/
项目clone下来后运行。
因为后端项目lin-cms-koa调用了插件’@koa/cors’,所以不用配置代理,直接和后端联调就可以了。
现在进入正题说一下lin-cms-vue的开发心得:
一、组件封装
1、table
对于一个管理后台类目框架,最重要的莫过于对el-table的封装,然而,lin-table封装的不够好,并不尽如人意。
槽点一:
首先吐槽操作栏operate,这种方式需要将operate中定义的方法在重新定义一次,否则会找不到这个方法,弃用了(但是代码中保留了operate方法),最后直接render的。
render方法如下:
<el-table-columnv-if="operate && operate.length"label="操作"fixed="right"class="action-btn-wrap":width="actionWidth"><template slot-scope="scope"><template v-for="(item, index) in operate"><el-buttonv-if="item.key ? testBtn(scope.row, item.key, item.value) : true":type="item.type"plain:key="index"size="mini"v-permission="{ permission: item.permission ? item.permission : '', type: 'disabled' }"@click.native.prevent.stop="buttonMethods(item.func, scope.$index, scope.row)">{{ item.name }}</el-button></template></template></el-table-column>// 就直接render吧<el-table-columnv-else-if="useActionRender"label="操作"fixed="right"class="action-btn-wrap":width="actionWidth"><template slot-scope="scope"><table-column:index="scope.$index":row="scope.row":col="scope.column":render="actionRender" /></template></el-table-column>
然后组件中需要渲染的地址直接jsx语法:
<!-- 表格 --><lin-tabletitle="工单列表":tableColumn="tableColumn":tableData="tableData":useActionRender="true":action-render="actionRender":showSelectCol="true":index="true":actionWidth="150":pagination="pagination":currentChange="currentChange":sizeChange="sizeChange"v-loading="loading"></lin-table>// 方法写在了methods中:actionRender(h, { index, row, col }) {const authority = this.user.role === 0 || this.user.role === 1 ? true : falsereturn (<div class="action-wrap">{/*客服登录才有编辑按钮*/}<el-button v-permission={['客服']} size="mini" plain type="primary" onClick={() => this.handleEdit(index, row, col)}>编辑</el-button><el-button size="mini" plain type="primary" onClick={() => this.goToGroupEditPage(index, row, col)}>详情</el-button></div>)}
槽点二:
对于table来说,最重要的就是搜索栏了。但是很遗憾没有配套的,只煎蛋的lin-search之类的。不知道这样的封装意义何在?
看一下框架自带的代码: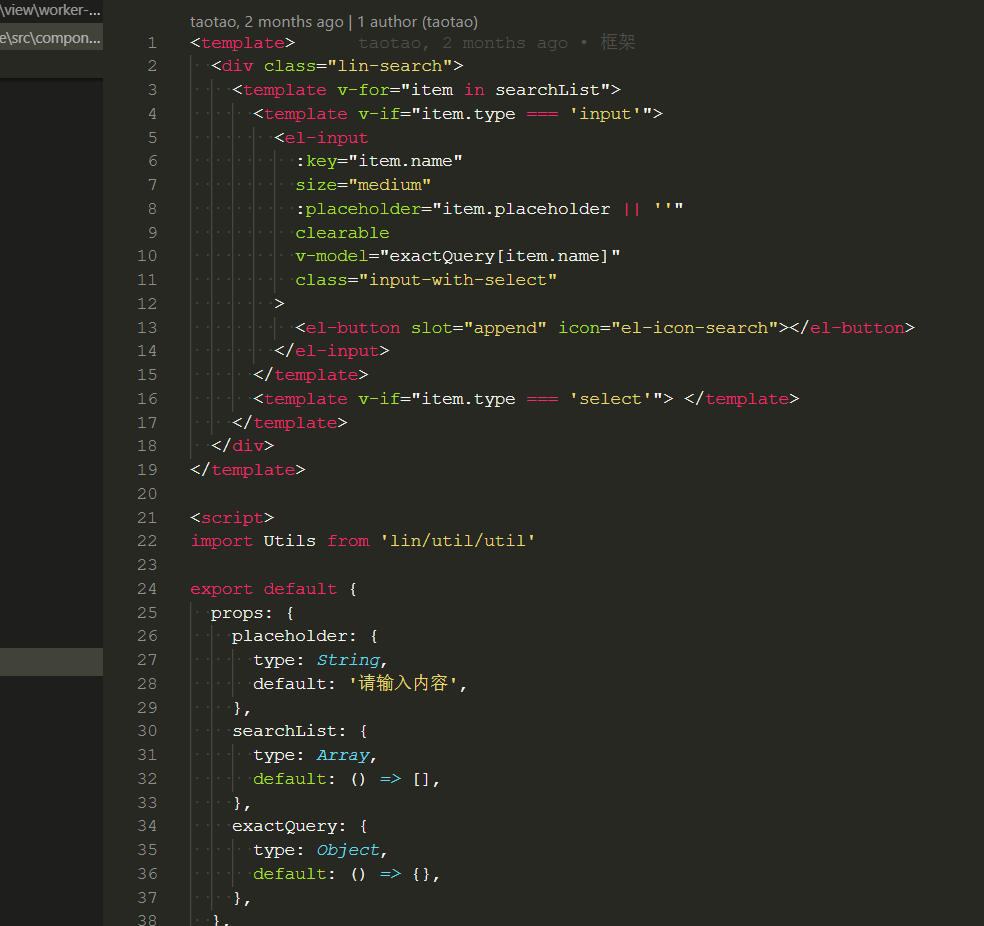
无用的很。
自己做了seach的封装。可以用mixin方法将search、reset都封装为公共的,这样就不用每个table页面都单独search。最后因为实际项目的原因,只将reset方法封装在了mixin中。
<template><div class="basic-search"><div class="basic-search__hd" v-show="showHd"><span class="basic-search__hd-line"></span><span class="basic-search__hd-title">筛选条件</span></div><el-row class="basic-search__bd"><el-col class="basic-search__col-l" :span="leftSpan"><el-formref="form":model="query":label-position="labelPosition":label-width="labelWidth + 'px'"@submit.native.prevent:size="size"><slot> </slot></el-form></el-col><el-col class="basic-search__col-r" :span="24 - leftSpan"><template v-if="mode === 2"><el-row><el-col :span="24"><el-button type="primary" icon="el-icon-search" @click="handleSearch(query)">查询</el-button></el-col></el-row><el-row><el-col :span="24"><el-button icon="el-icon-refresh" @click="handleReset" v-if="showReset">重置</el-button></el-col></el-row></template><template v-else><el-button type="primary" icon="el-icon-search" @click="handleSearch(query)">查询</el-button><span style="margin:0 2px;"> </span><el-button icon="el-icon-refresh" @click="handleReset" v-if="showReset">重置</el-button></template><atitle="展开更多"class="toggle-more-btn":class="[closed ? 'open' : 'close']"@click="toggleMore"v-if="showMore"></a></el-col></el-row></div></template><script>export default {props: {showHd: {type: Boolean,default: true},labelPosition: {type: String,default: 'right',},labelWidth: {type: Number,default: 80,},// 模式(1: 单行, 2: 多行)mode: {type: Number,default: 2,},showMore: {type: Boolean,default: false,},showReset: {type: Boolean,default: true,},closed: {type: Boolean,default: true,},query: {type: Object,default() {return {}},},toggleMore: {type: Function,default: () => {},},handleSearch: {type: Function,default: () => {},},handleReset: {type: Function,default: () => {},},size: {type: String,default: 'small',},},computed: {leftSpan() {if (this.showReset) {return this.mode === 2 ? 21 : 18}return 21},},}</script><style lang="scss" scoped>/deep/.el-select {width: 100%;}.basic-search {border-bottom: 1px solid #e2e2e5;padding: 20px 30px;}.basic-search__hd {margin-bottom: 24px;}.basic-search__hd-line {display: inline-block;margin-right: 10px;width: 4px;height: 16px;border-radius: 4px;vertical-align: middle;background: #4186f6;}.basic-search__hd-title {color: #3f4656;font-size: 14px;}.basic-search__bd {padding: 0 20px 0 15px;}.basic-search__col-l {padding-right: 16px;-webkit-user-select: none;-moz-user-select: none;-ms-user-select: none;user-select: none;}.basic-search__col-r {position: relative;/deep/ .el-row:first-child {margin-bottom: 22px;}.toggle-more-btn {position: absolute;top: 50%;right: -18px;width: 14px;height: 14px;margin-top: -8px;background: no-repeat center center;background-size: contain;&.open {background-image: url('~@/assets/image/icon-open.png');}&.close {background-image: url('~@/assets/image/icon-close.png');}}}/deep/.el-form-item__label {text-align: left;}</style>
然后mix中处理:
import Utils from 'lin/util/util'import BasicSearch from '@/component/base/basic-search'/*** 列表页查询表单公共方法混入*/export default {components: {BasicSearch,},props: {updateState: Function,handleSearch: Function,},data() {return {query: this.getDefaultQuery(),closed: true,}},methods: {toggleMore() {this.closed = !this.closed},handleReset() {this.query = this.getDefaultQuery()this.handleSearch(this.query)},getDefaultQuery() {const { fields } = thisconst query = {}for (let i = 0; i < fields.length; i++) {if (Utils.isObject(fields[i])) {query[fields[i].key] = fields[i].default} else {query[fields[i]] = undefined}}return query},},}
最后在每个模块中单独一个search文件:
<template><basic-search:label-width="90":query="query":show-more="true":closed="closed":mode="1":toggle-more="toggleMore":handle-search="handleSearch":handle-reset="handleReset"><el-row :gutter="24"></el-row><div class="more-row-wrap" v-show="!closed"></div></basic-search></template><script>import ExactSearch from '@/lin/mixin/exact-search'import { customerSourceData } from 'lin/format/replace-sheet'export default {mixins: [ExactSearch],components: {},props: {},data() {return {}},watch: {'query.dateRange':function(val) {if(val && val.length === 2) {this.query.start_time = val[0]this.query.end_time = val[1]} else {this.query.start_time = undefinedthis.query.end_time = undefined}}},beforeCreate() {this.fields = ['phone', 'source', 'name', 'client_type', 'dateRange']},}</script>
然后在table页面引入search组件:
import ExactSearch from './components/exactSearch'import LinTable from '@/component/base/table/lin-table'export default {name: 'CustomerMg',components: {LinTable,ExactSearch,},
最后呈现效果如下图:
二、说一下亮点吧
1、api的封装
每个模块api都是一个构造函数,鄙人之前习惯于将每个模块api写在同一个js文件中,但是每一个接口是一个函数export出去,这样方便组件单独引入每一个接口。当然也可以通过import * as 来将所有的函数作为一个对象暴露出来。也很方便。
2、关于content部分是放在keep-alive中呢,还是不放呢,众说纷纭。本框架显然是没有放的。
三、打包部署和本地ngix来检查你的打包
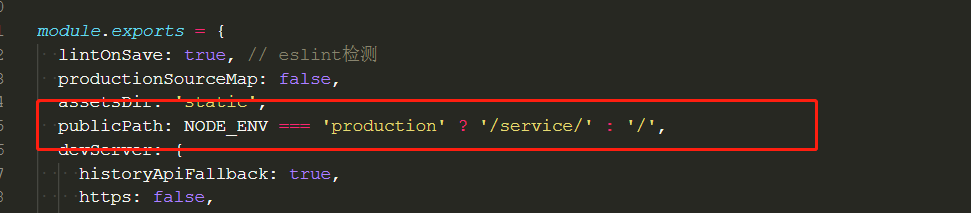
1、配置publicPath
因为项目不是在域名的根目录下,而是子目录/service下,所以有三处地方做了更改:
- vue.config.js中的publicPath
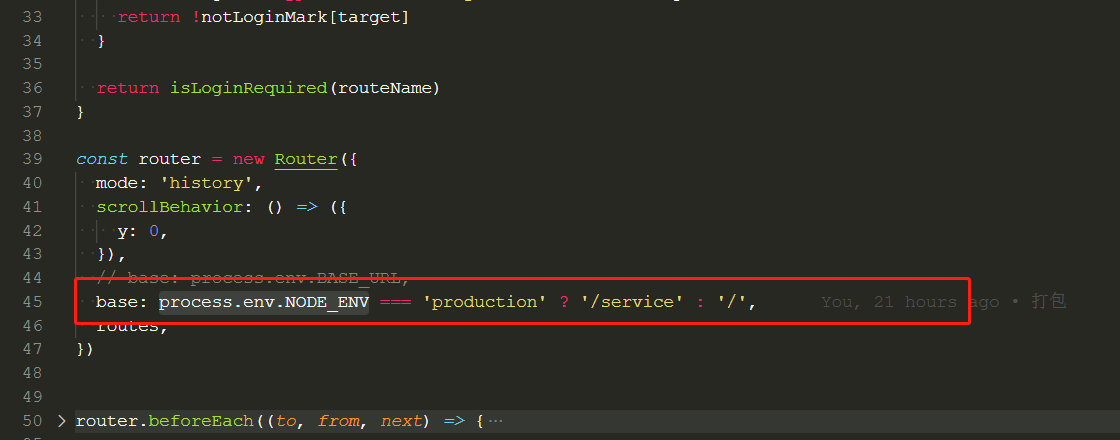
- router中index.js在router实例下添加了base
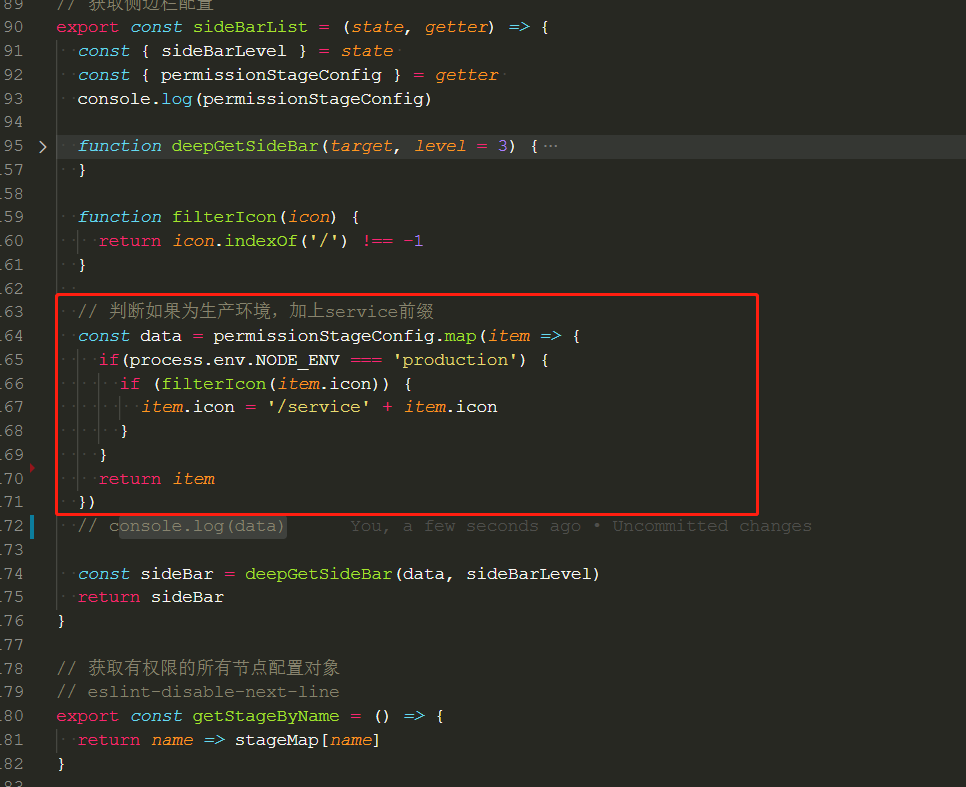
- 因为config中的sade-bar配置都是请求的public中的图片,特意在gutter.js下做了处理
说明一下,因为接口请求的时候服务器也没有nginx代理(通过标识),我都是绝对路径,所以没有必要配置/service。
三处截图如下:
我一直觉得这种处理方式不够优雅,我觉得可以服务器在nginx做配置,我这里不需要做处理了。不过既然服务器没有做nginx配置,那只能我这里处理了。
2、本地nginx检查dist包
为了校验build包是否再服务器可用,我在本地下载了一个适合window版本的nginx。
下载地址:http://nginx.org/en/download.html
我选择的还是1.16.1版本
通过cmd启动nginx,之后配置如下:
我的打包后的文件放在了d盘额Service/service文件夹下:
nginx.conf文件如下:
#user nobody;worker_processes 1;#error_log logs/error.log;#error_log logs/error.log notice;#error_log logs/error.log info;#pid logs/nginx.pid;events {worker_connections 1024;}http {include mime.types;default_type application/octet-stream;#log_format main '$remote_addr - $remote_user [$time_local] "$request" '# '$status $body_bytes_sent "$http_referer" '# '"$http_user_agent" "$http_x_forwarded_for"';#access_log logs/access.log main;sendfile on;#tcp_nopush on;#keepalive_timeout 0;keepalive_timeout 65;#gzip on;# 系统server {listen 3000;server_name localhost;#charset koi8-r;#access_log logs/host.access.log main;root D:/Service/;### 因为模拟了生产环境就是****.cn/service 的子目录location /service{index index.html;### 采用的hsitory模式,此处配置了,当找不到文件路径重定向到index.htmltry_files $uri $uri/ /service/index.html;}location / {### 此处是项目部署的域名proxy_pass http://*******.cn;proxy_set_header Host ********.cn;proxy_set_header X-Forwarded-For $proxy_add_x_forwarded_for;}error_page 500 502 503 504 /50x.html;location = /50x.html {root html;}}}
至此,大功完成,nginx -s reload 后,输入,本地路径http://localhost:3000/service/index.html, 成功进入页面。
、

若有收获,就点个赞吧
0 人点赞
