一、生成公私钥
建议为持续集成环境单独生成一对公私钥,不建议采用个人本地的公私钥对。因为个人本地的公私钥对权限较高,通常对所有项目可能都具有操作权限。
# ssh-keygen -t rsa -b 4096 -C "deploy@163.com"Generating public/private rsa key pair.Enter file in which to save the key (/Users/bgl/.ssh/id_rsa): /Users/bgl/.ssh/deployEnter passphrase (empty for no passphrase):Enter same passphrase again:Your identification has been saved in /Users/bgl/.ssh/deploy.Your public key has been saved in /Users/bgl/.ssh/deploy.pub.The key fingerprint is:SHA256:dP8YW33Stir5eW1NMKt4e7XRPjQCvgoCOxoRqd41R+M deploy@163.comThe key's randomart image is:+---[RSA 4096]----+| || . || o o. . ||. . o... o oo ||.. . o ES . + o+*||. o + o . B.**|| o + . . .=.+=*|| o . . . .+o ++=|| . ...+*...|+----[SHA256]-----+
此处 passphrase 设置为 123456 。
二、Jenkins 任务配置
2.1 配置 GitLab
2.1.1 配置密钥
以管理员账号登录 GitLab,在 Gitlab 上部署密钥(注意是公钥)。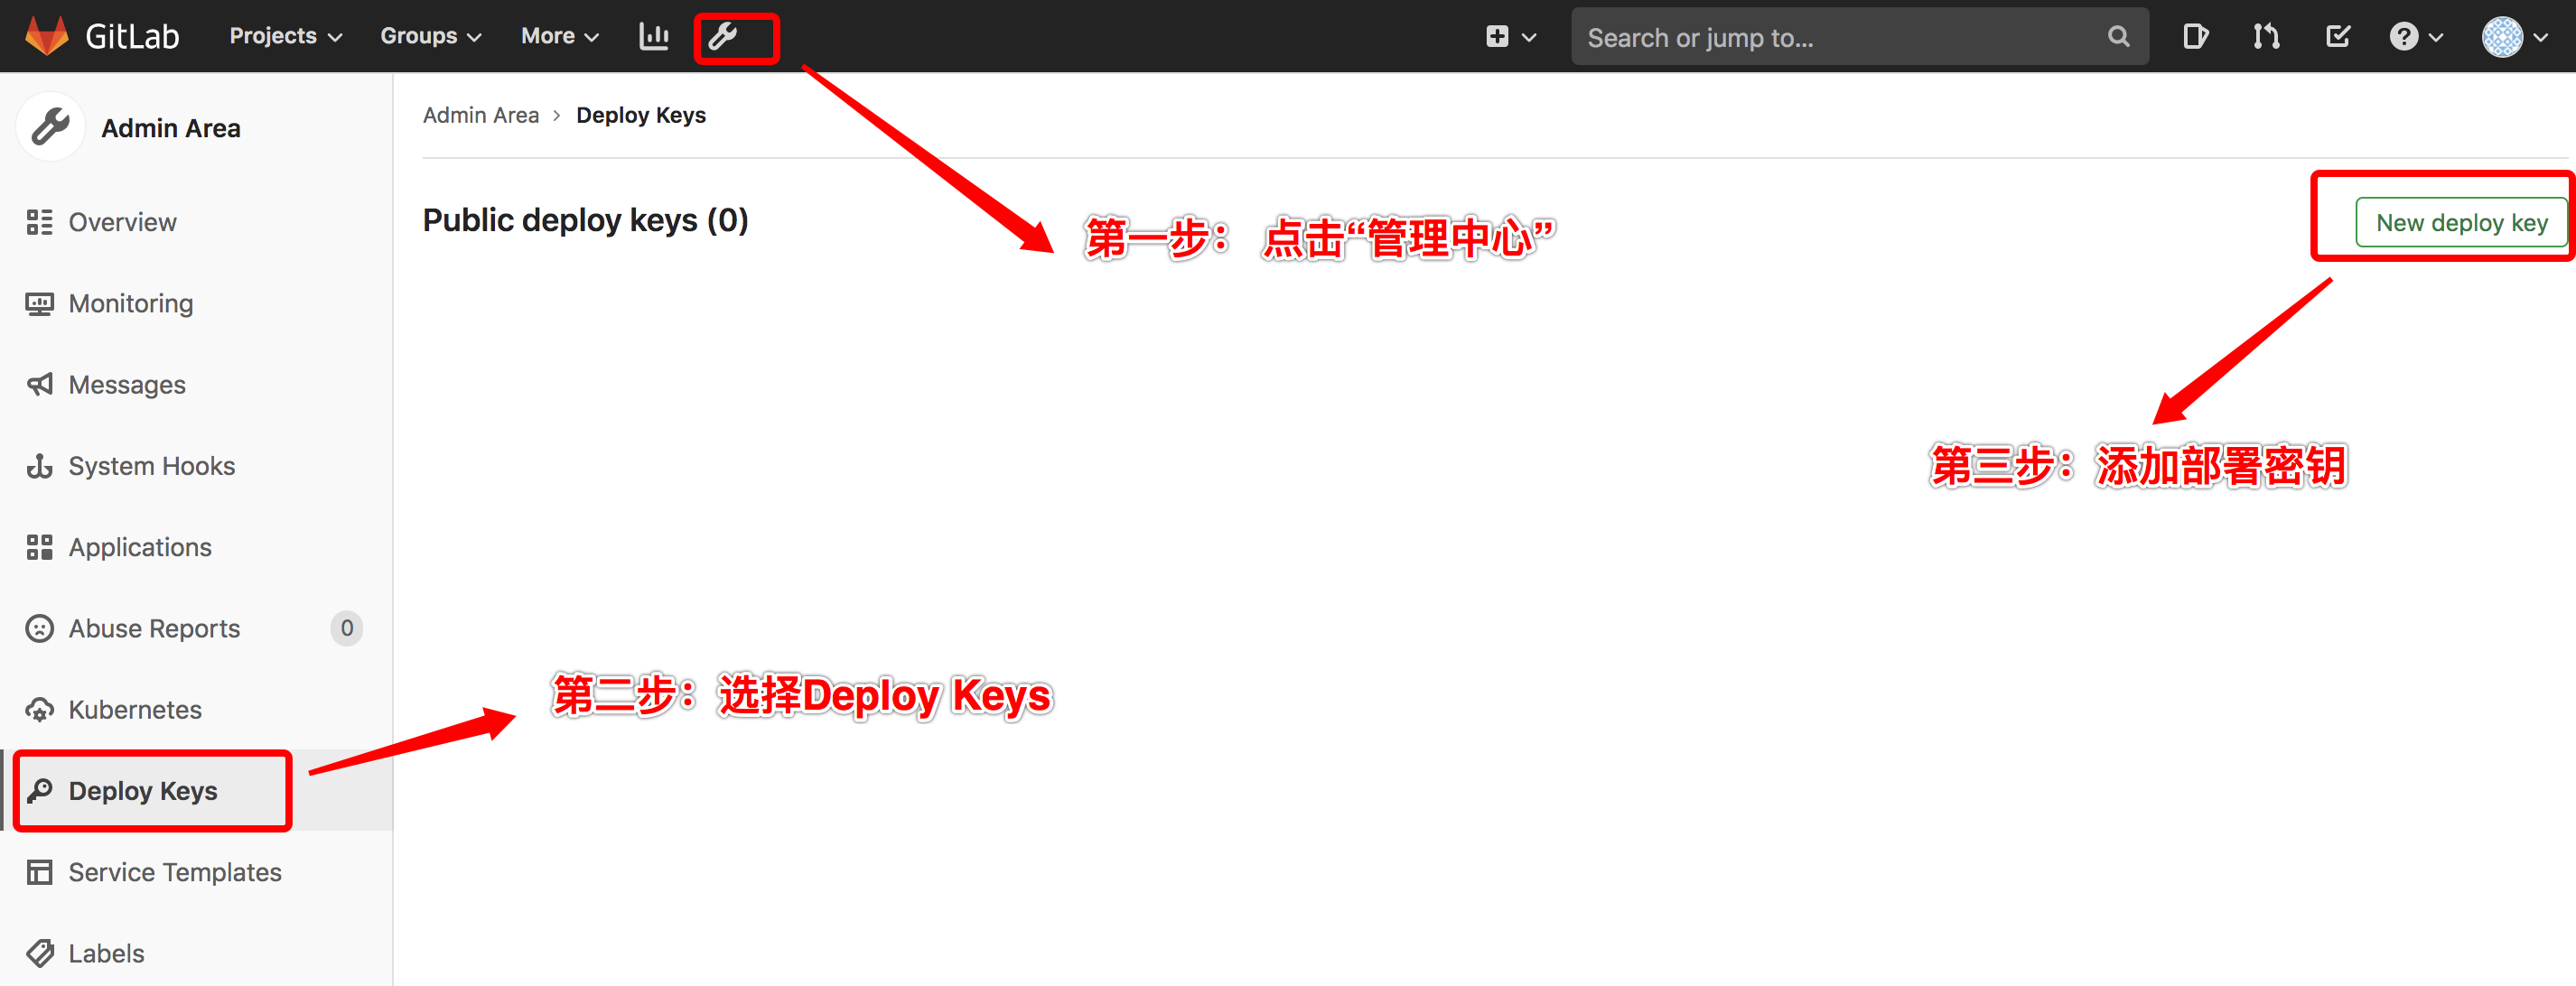
然后回到具体项目仓库,选择要部署的 Deploy Keys,具体操作如下所示: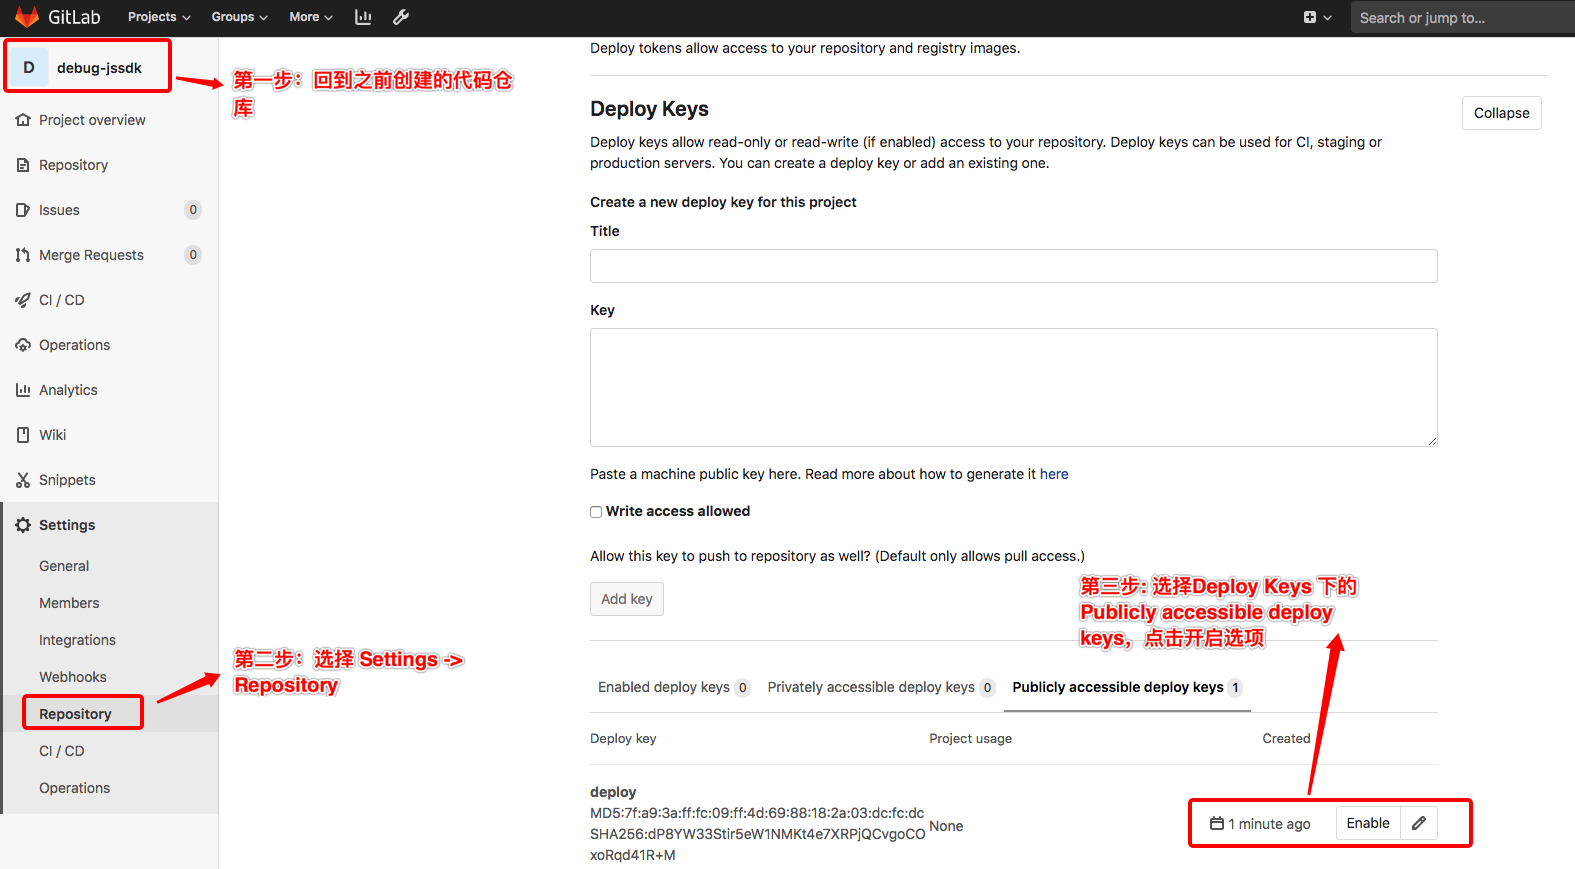
2.1.2 配置网络请求
配置 GitLab 的网络请求,允许来自 Webhook 对本地网络的请求。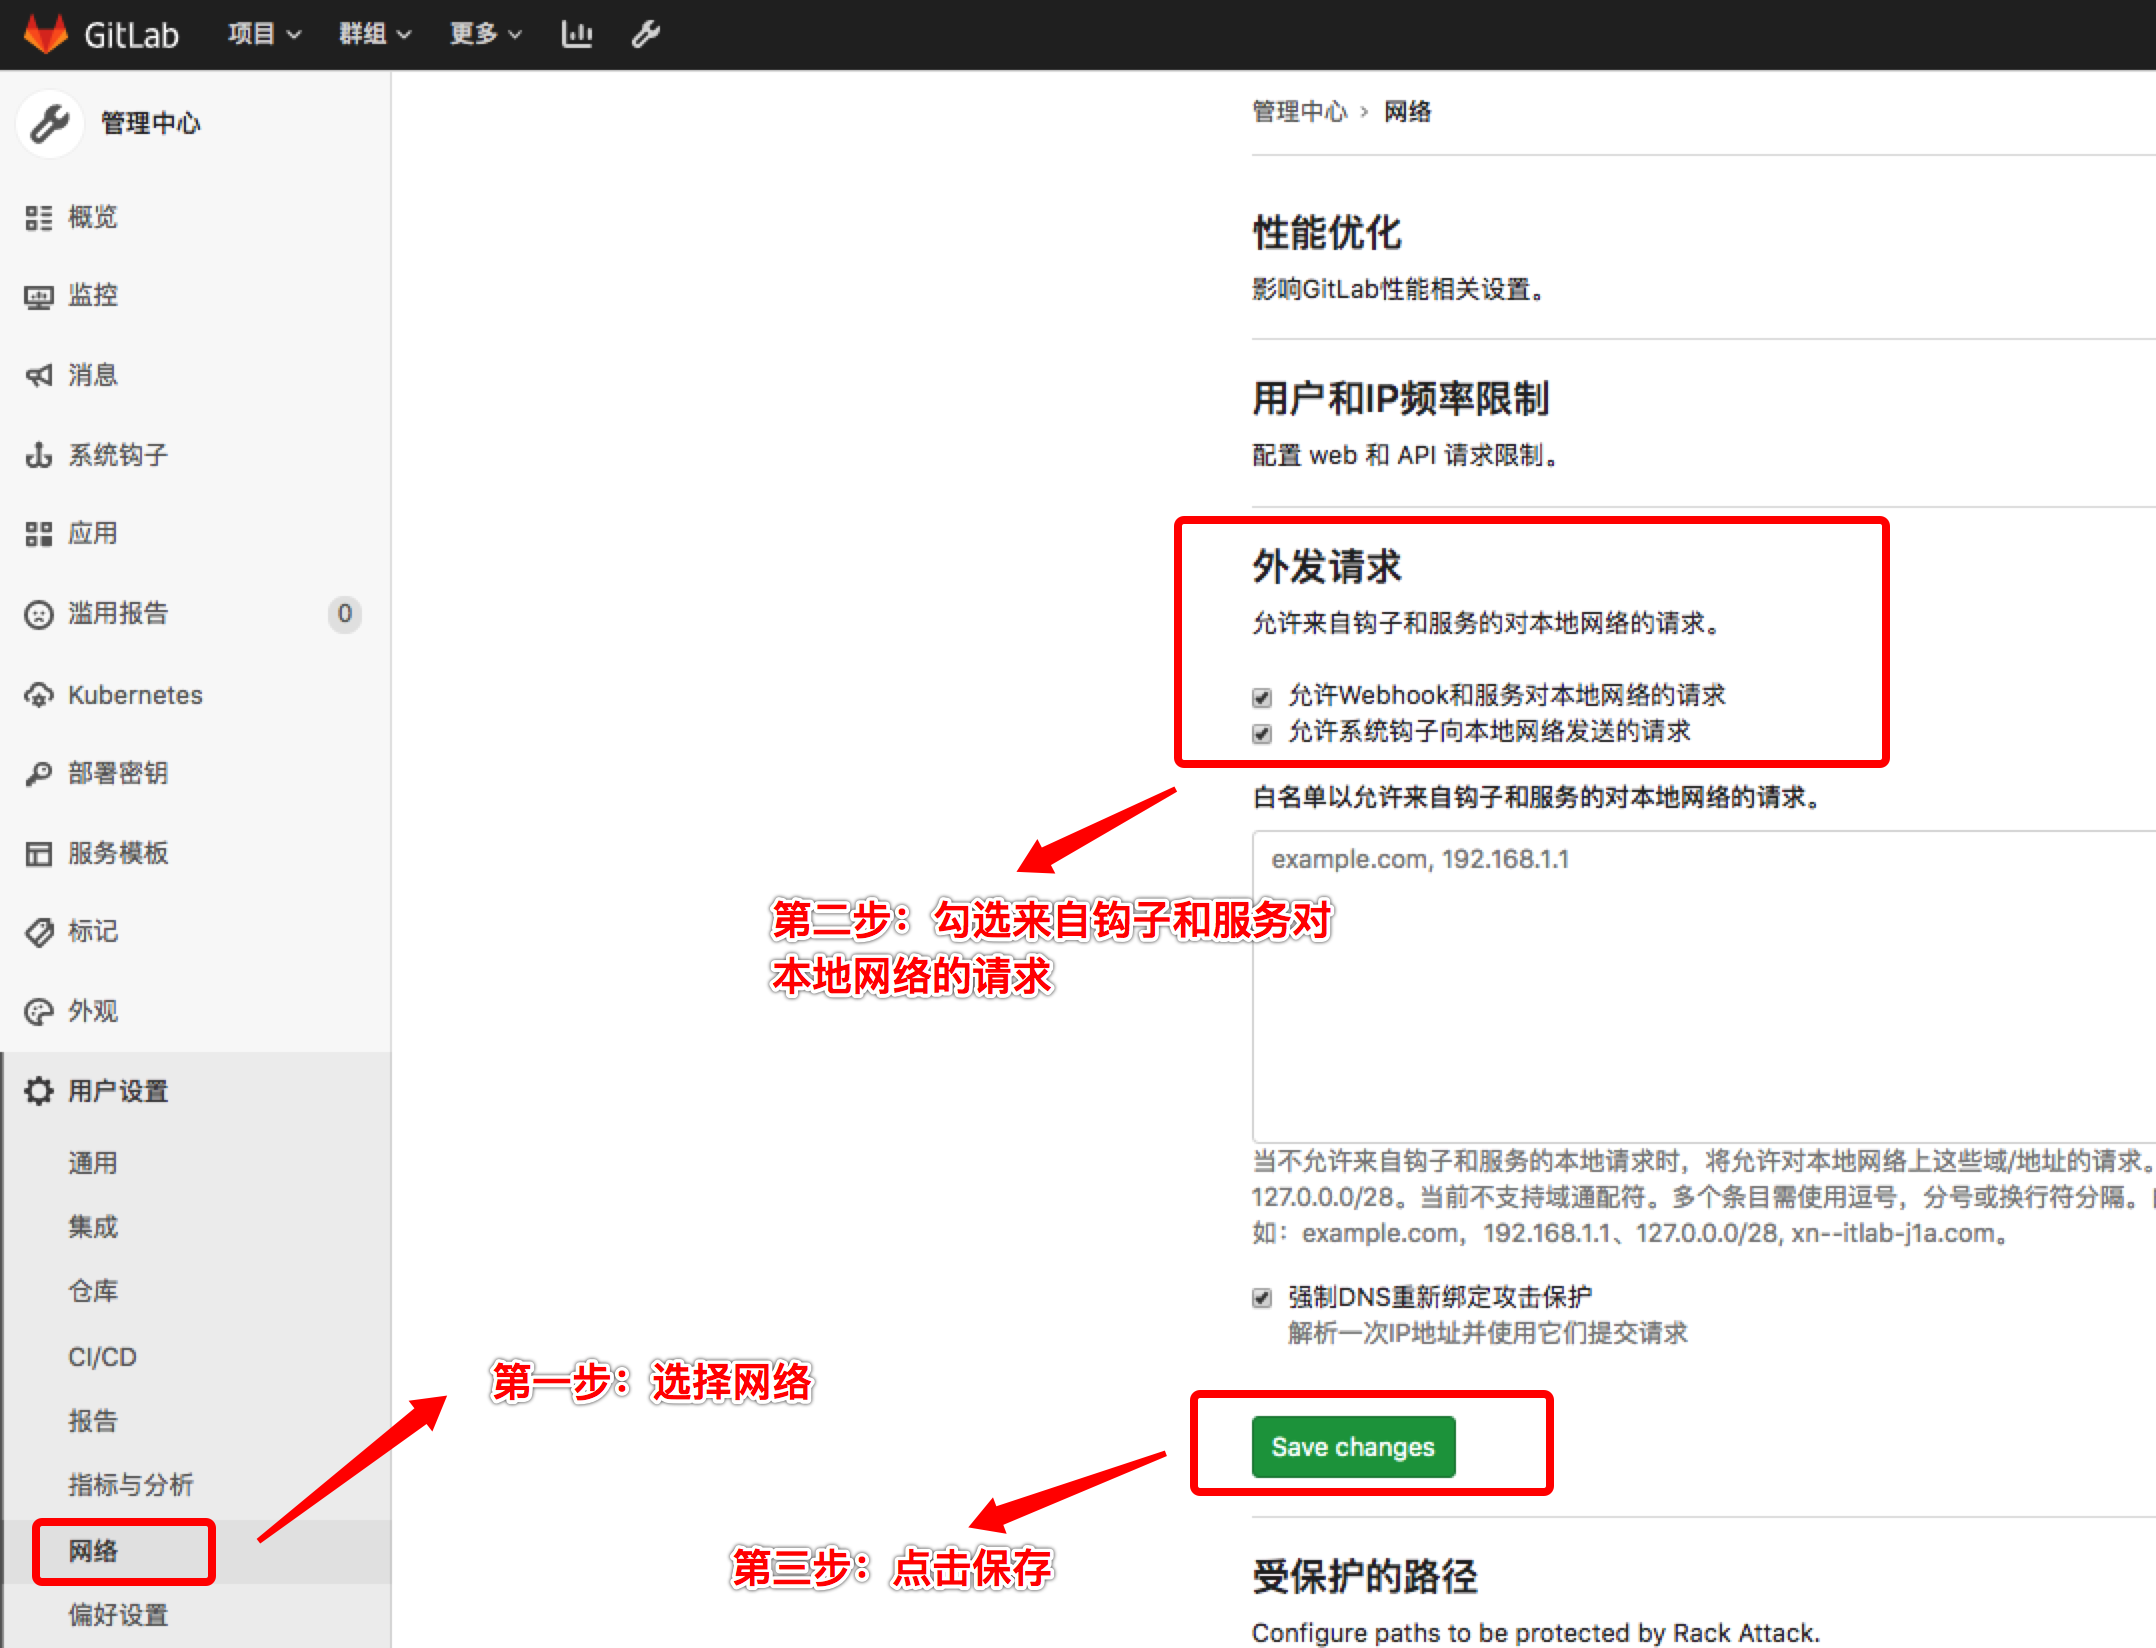
2.2 配置 Jenkins
进入 Jenkins 网站,点击左侧菜单栏下的 凭据 ,选择 系统 ,点击 全局凭据 。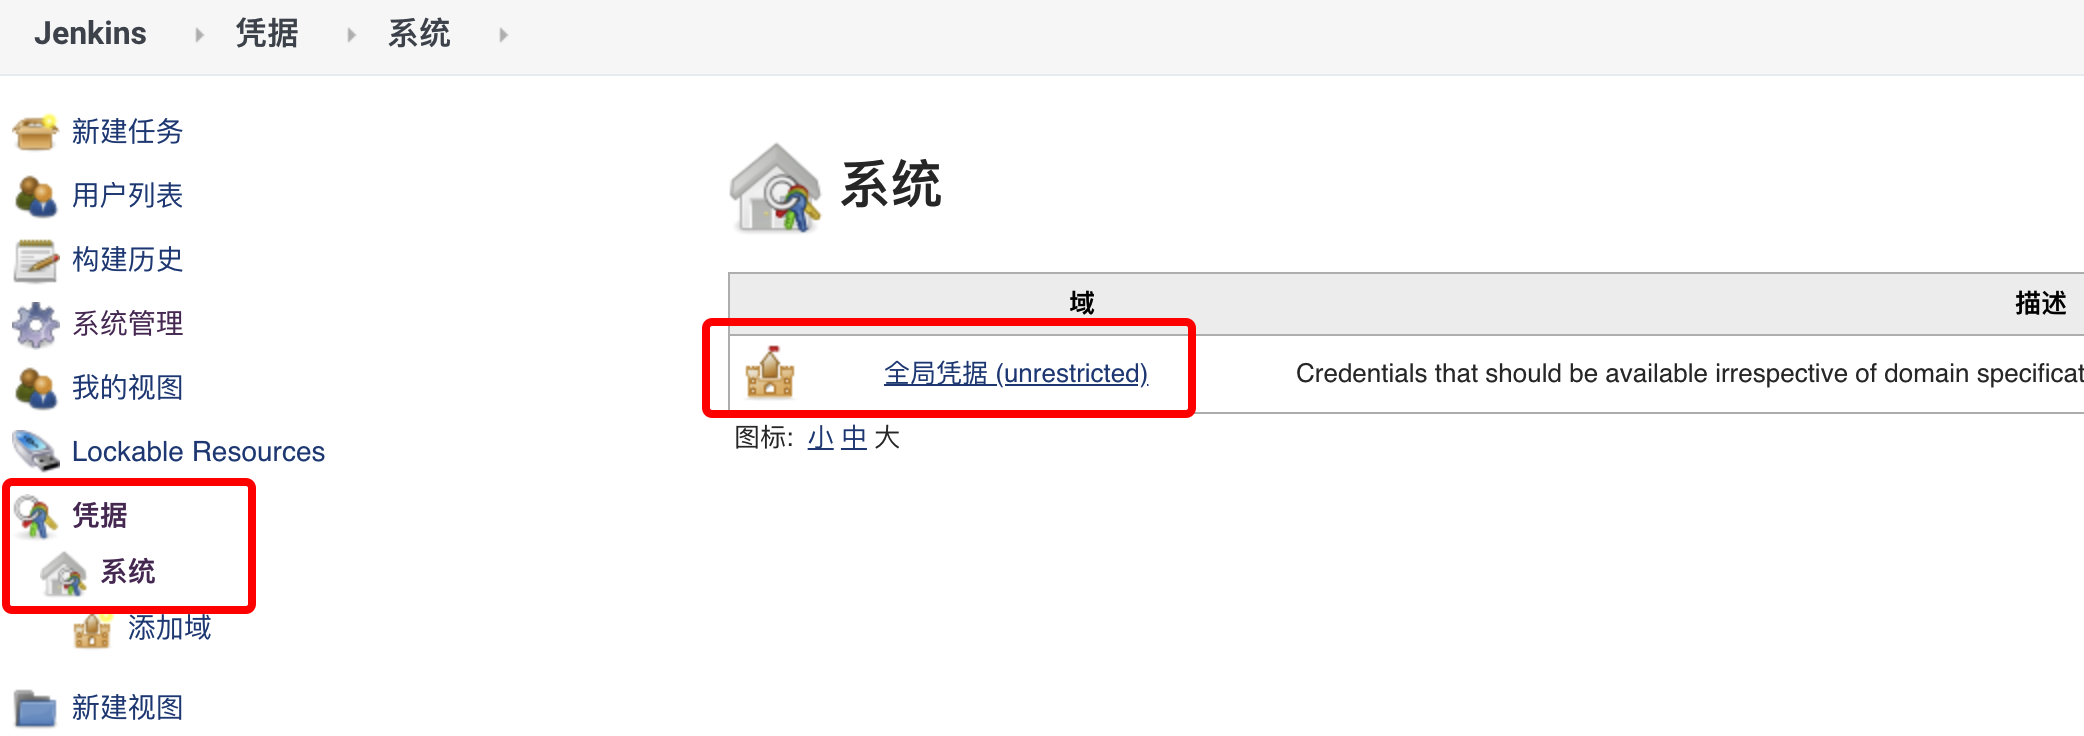
然后点击 添加凭据 ,将之前生成的私钥添加到凭据中,这样 Jenkins 就可以下载 Gitlab上的仓库代码了。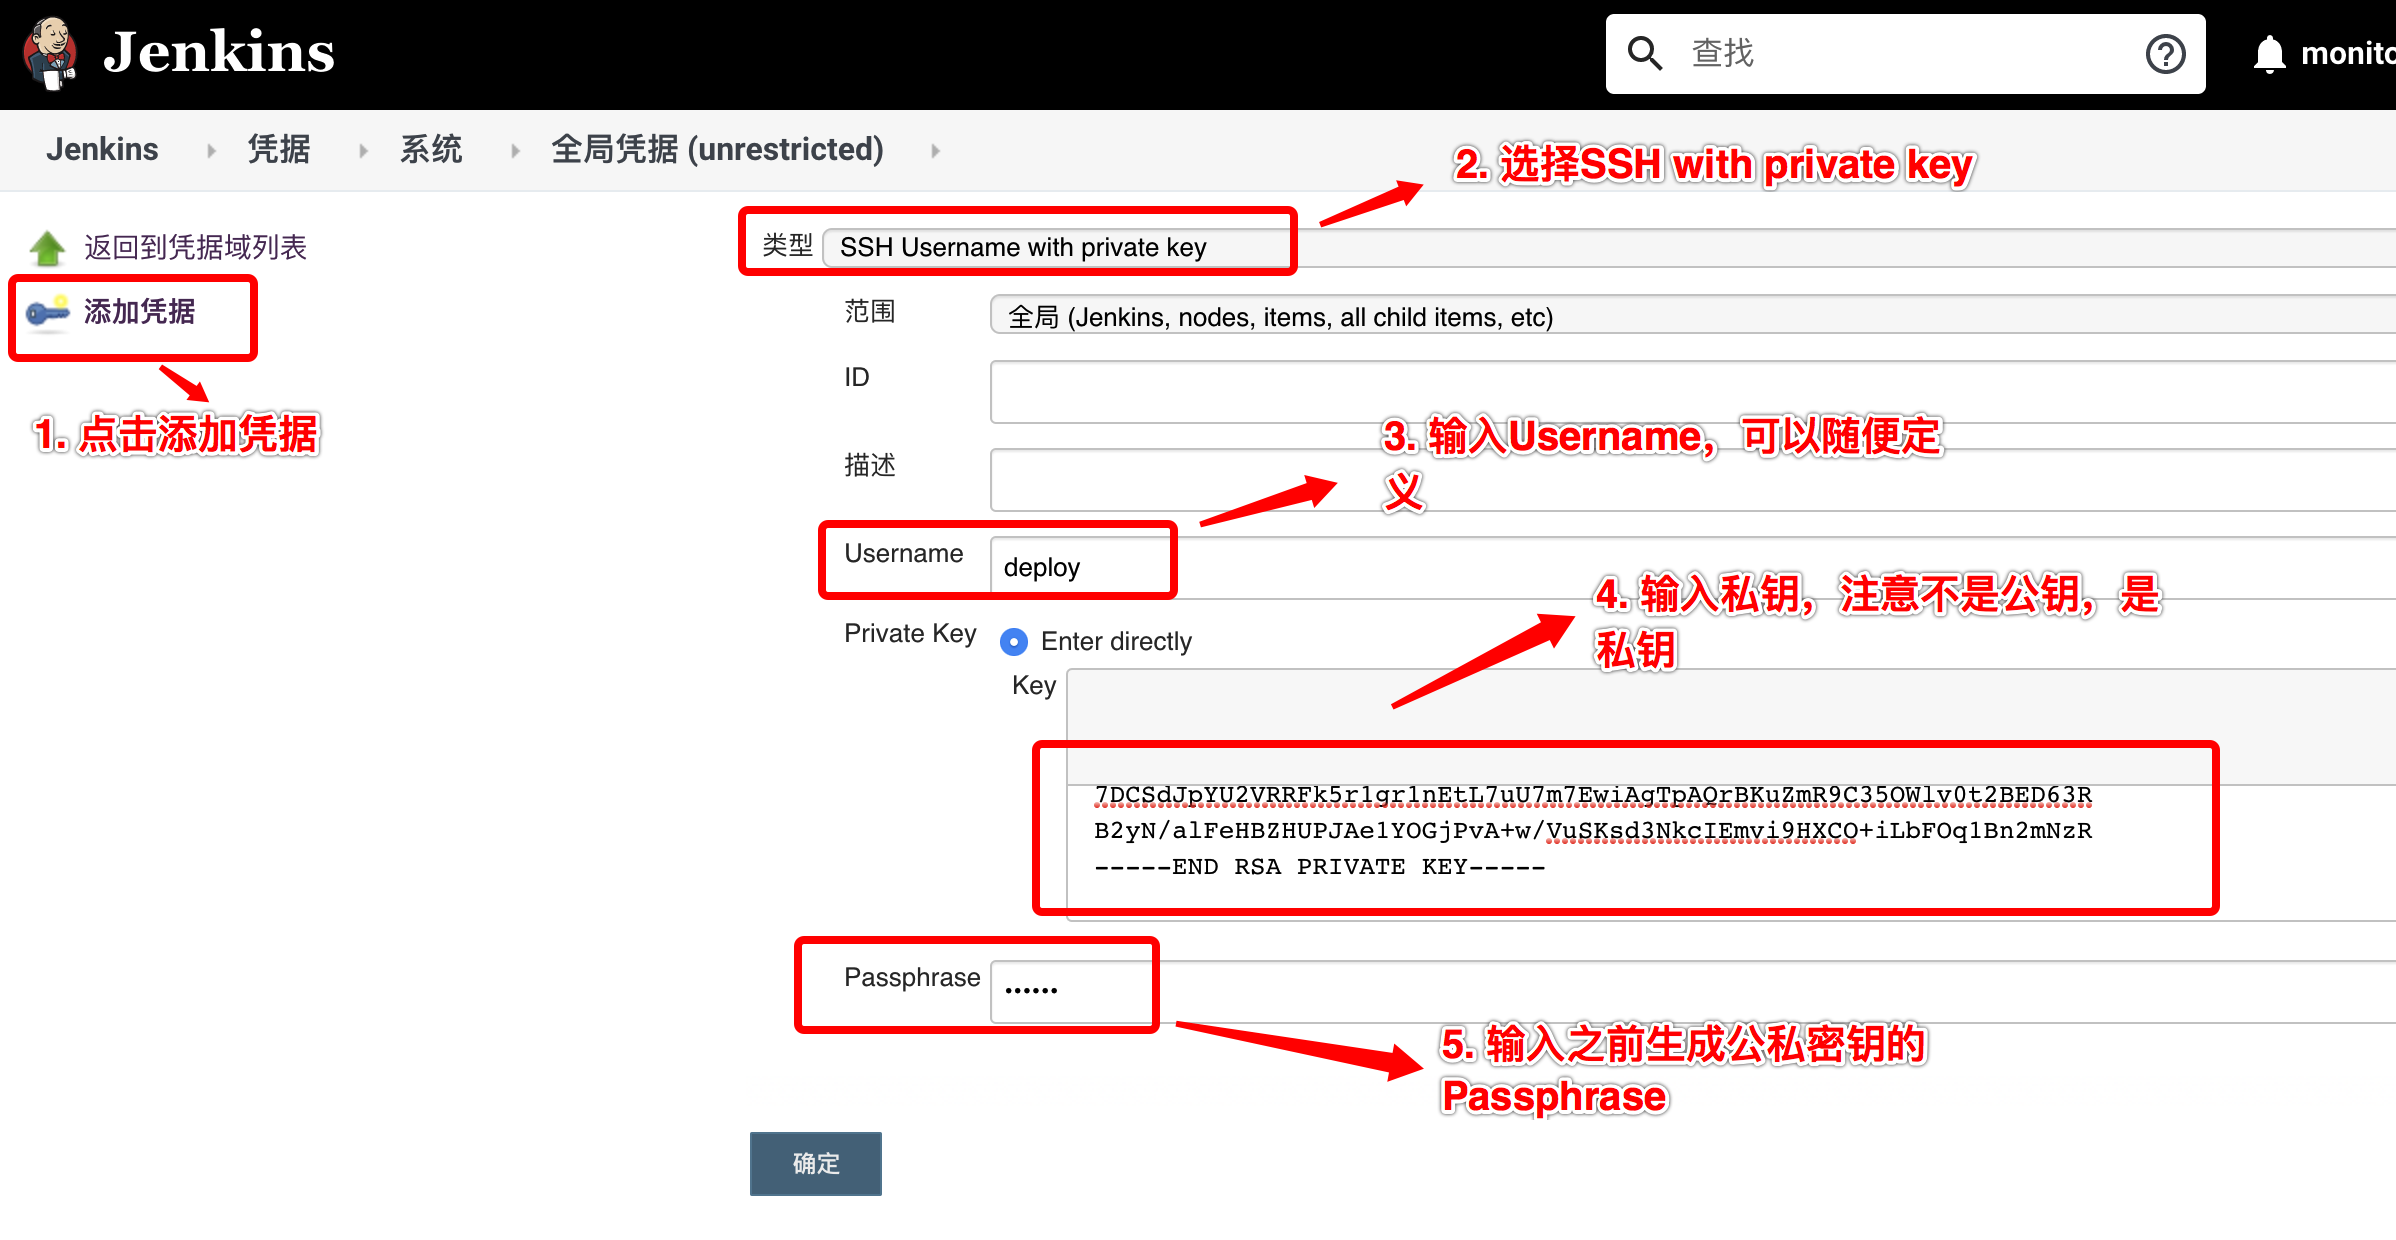
2.3 配置集成任务
2.3.1 配置源码管理
选择 Git,输入我们的代码仓库地址,但要注意在复制 GitLab 的仓库地址到 Jenkins 中时,要将原先的”git@121.46.135.249:fe-group/debug-jssdk.git” 修改成”ssh://git@121.46.135.249:42022/fe-group/debug-jssdk.git”,否则会找不到我们的代码仓库。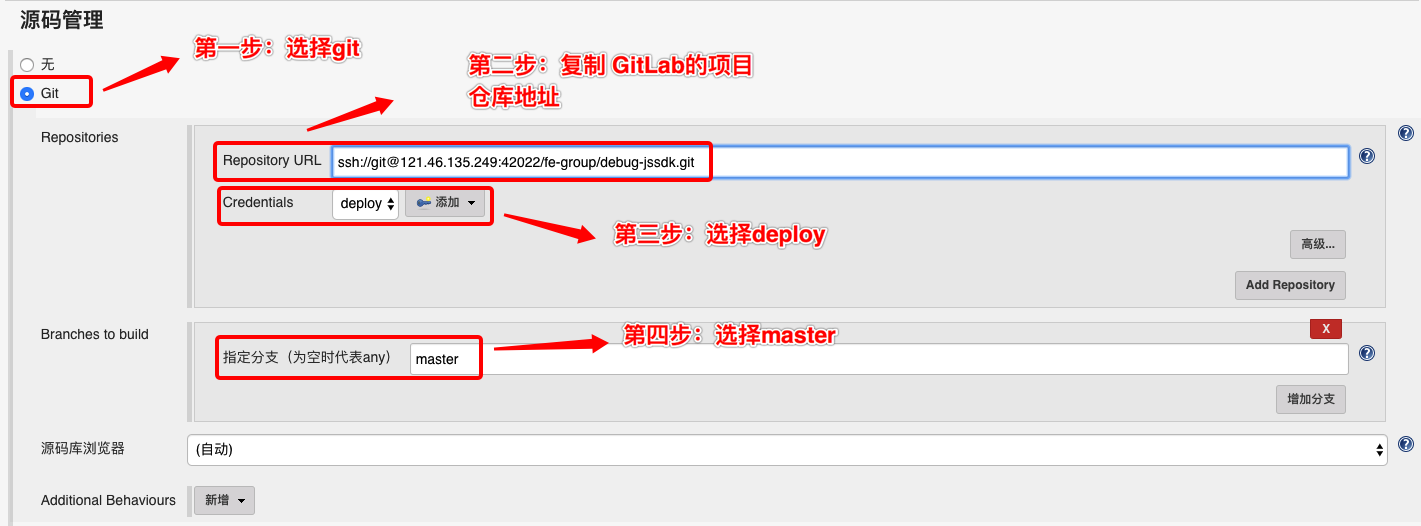
2.3.2 配置构建触发器
配置构建触发器,点击“高级”选项生成 Webhooks 所需的 Secrect Token,具体操作如下: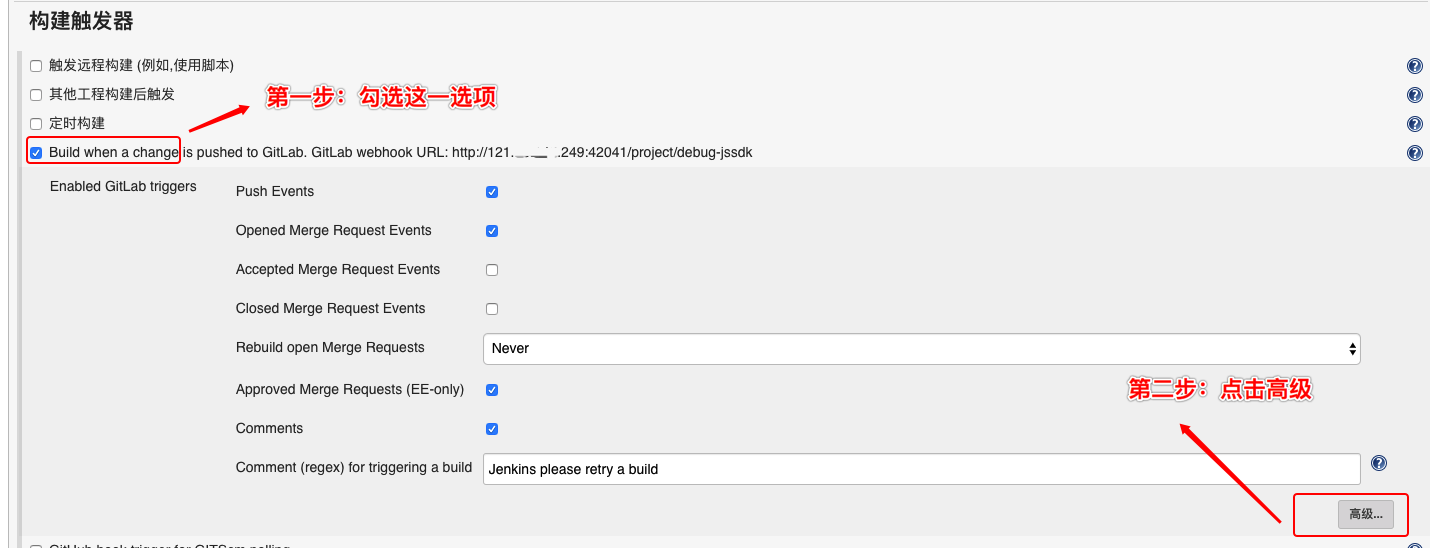
2.3.3 配置 Webhooks
回到 GitLab 代码仓库,将之前生成的 Secrect Token 配置到 Webhooks 当中。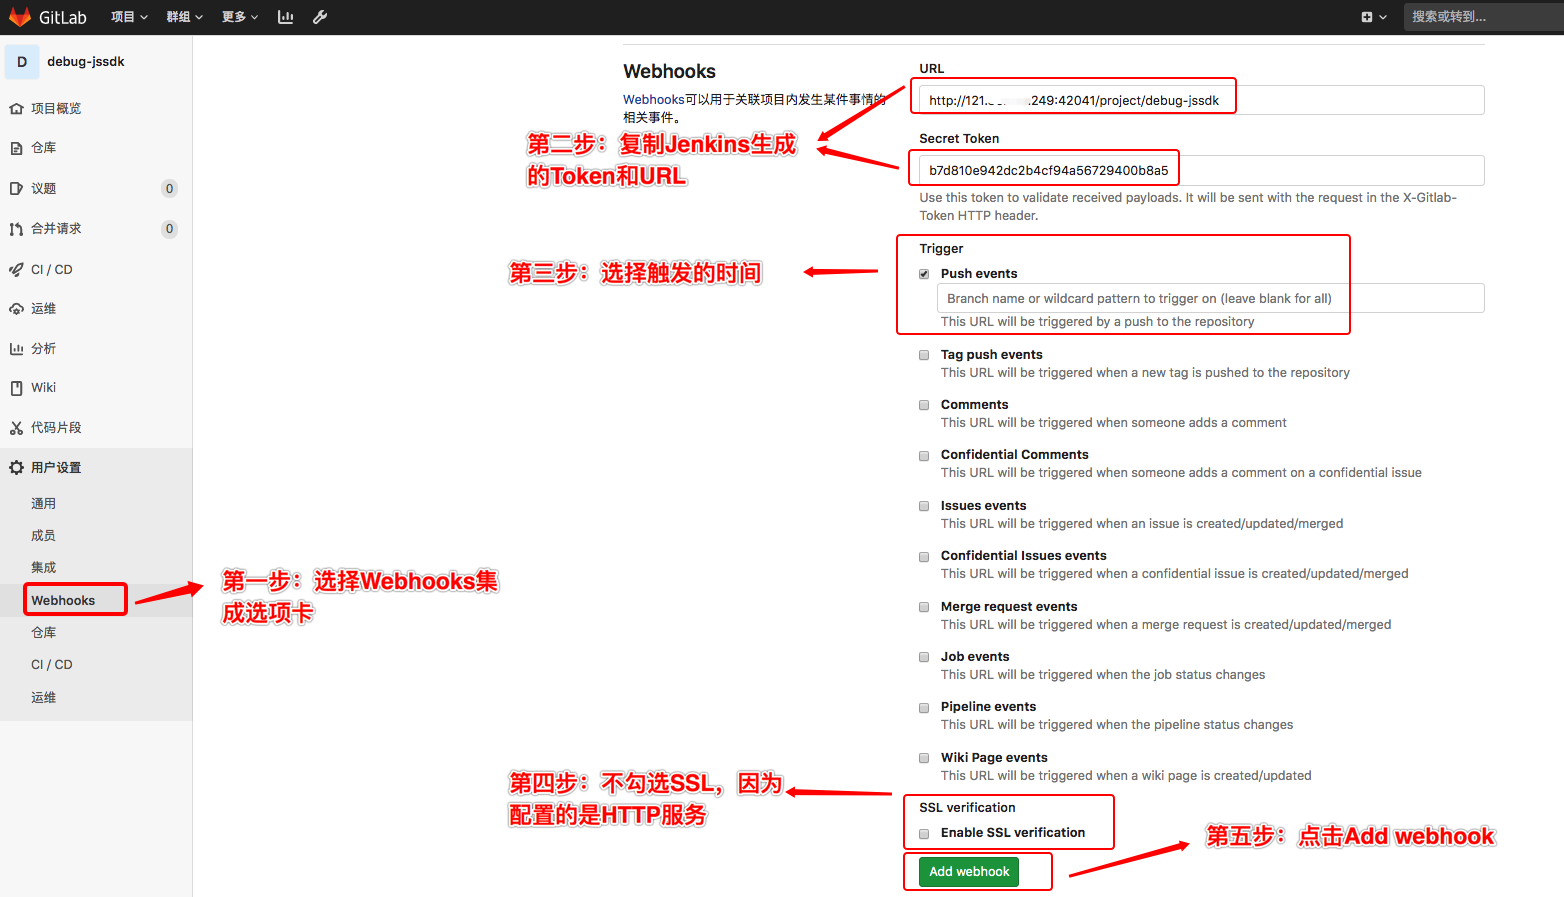
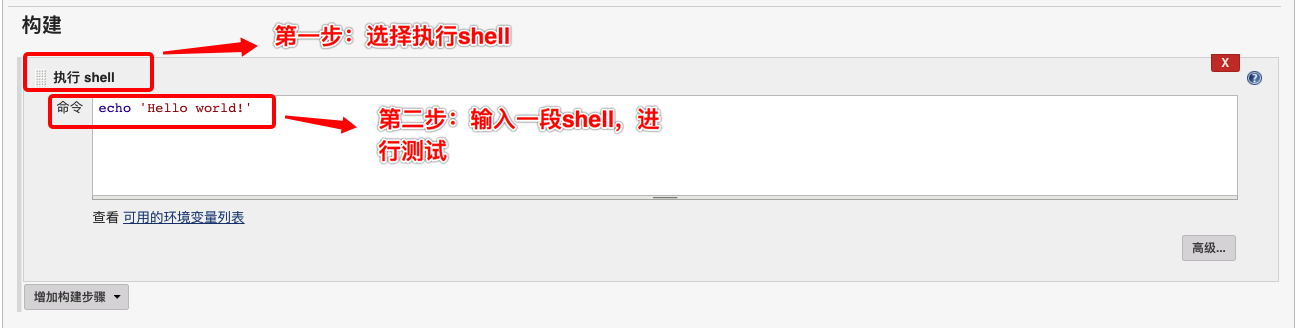
2.3.4 配置构建操作
2.4 集成任务测试
回到刚才配置 Webhooks 的地方,点击“测试”按钮,模拟一个“Push events” 事件。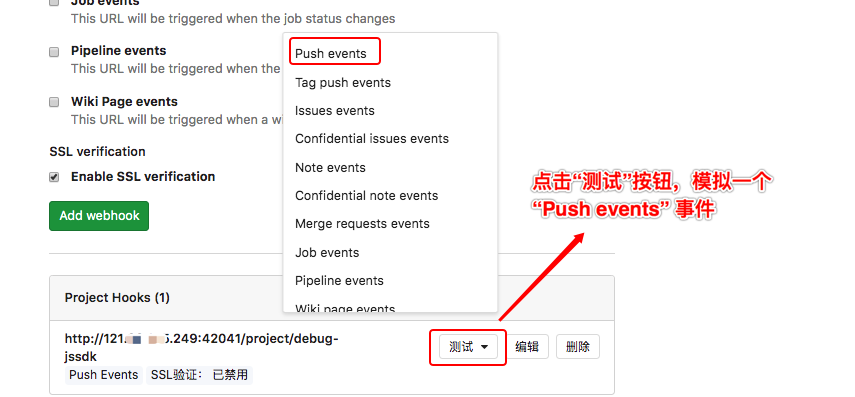
不出意外的话,就可以发现 Jenkins 正常工作了。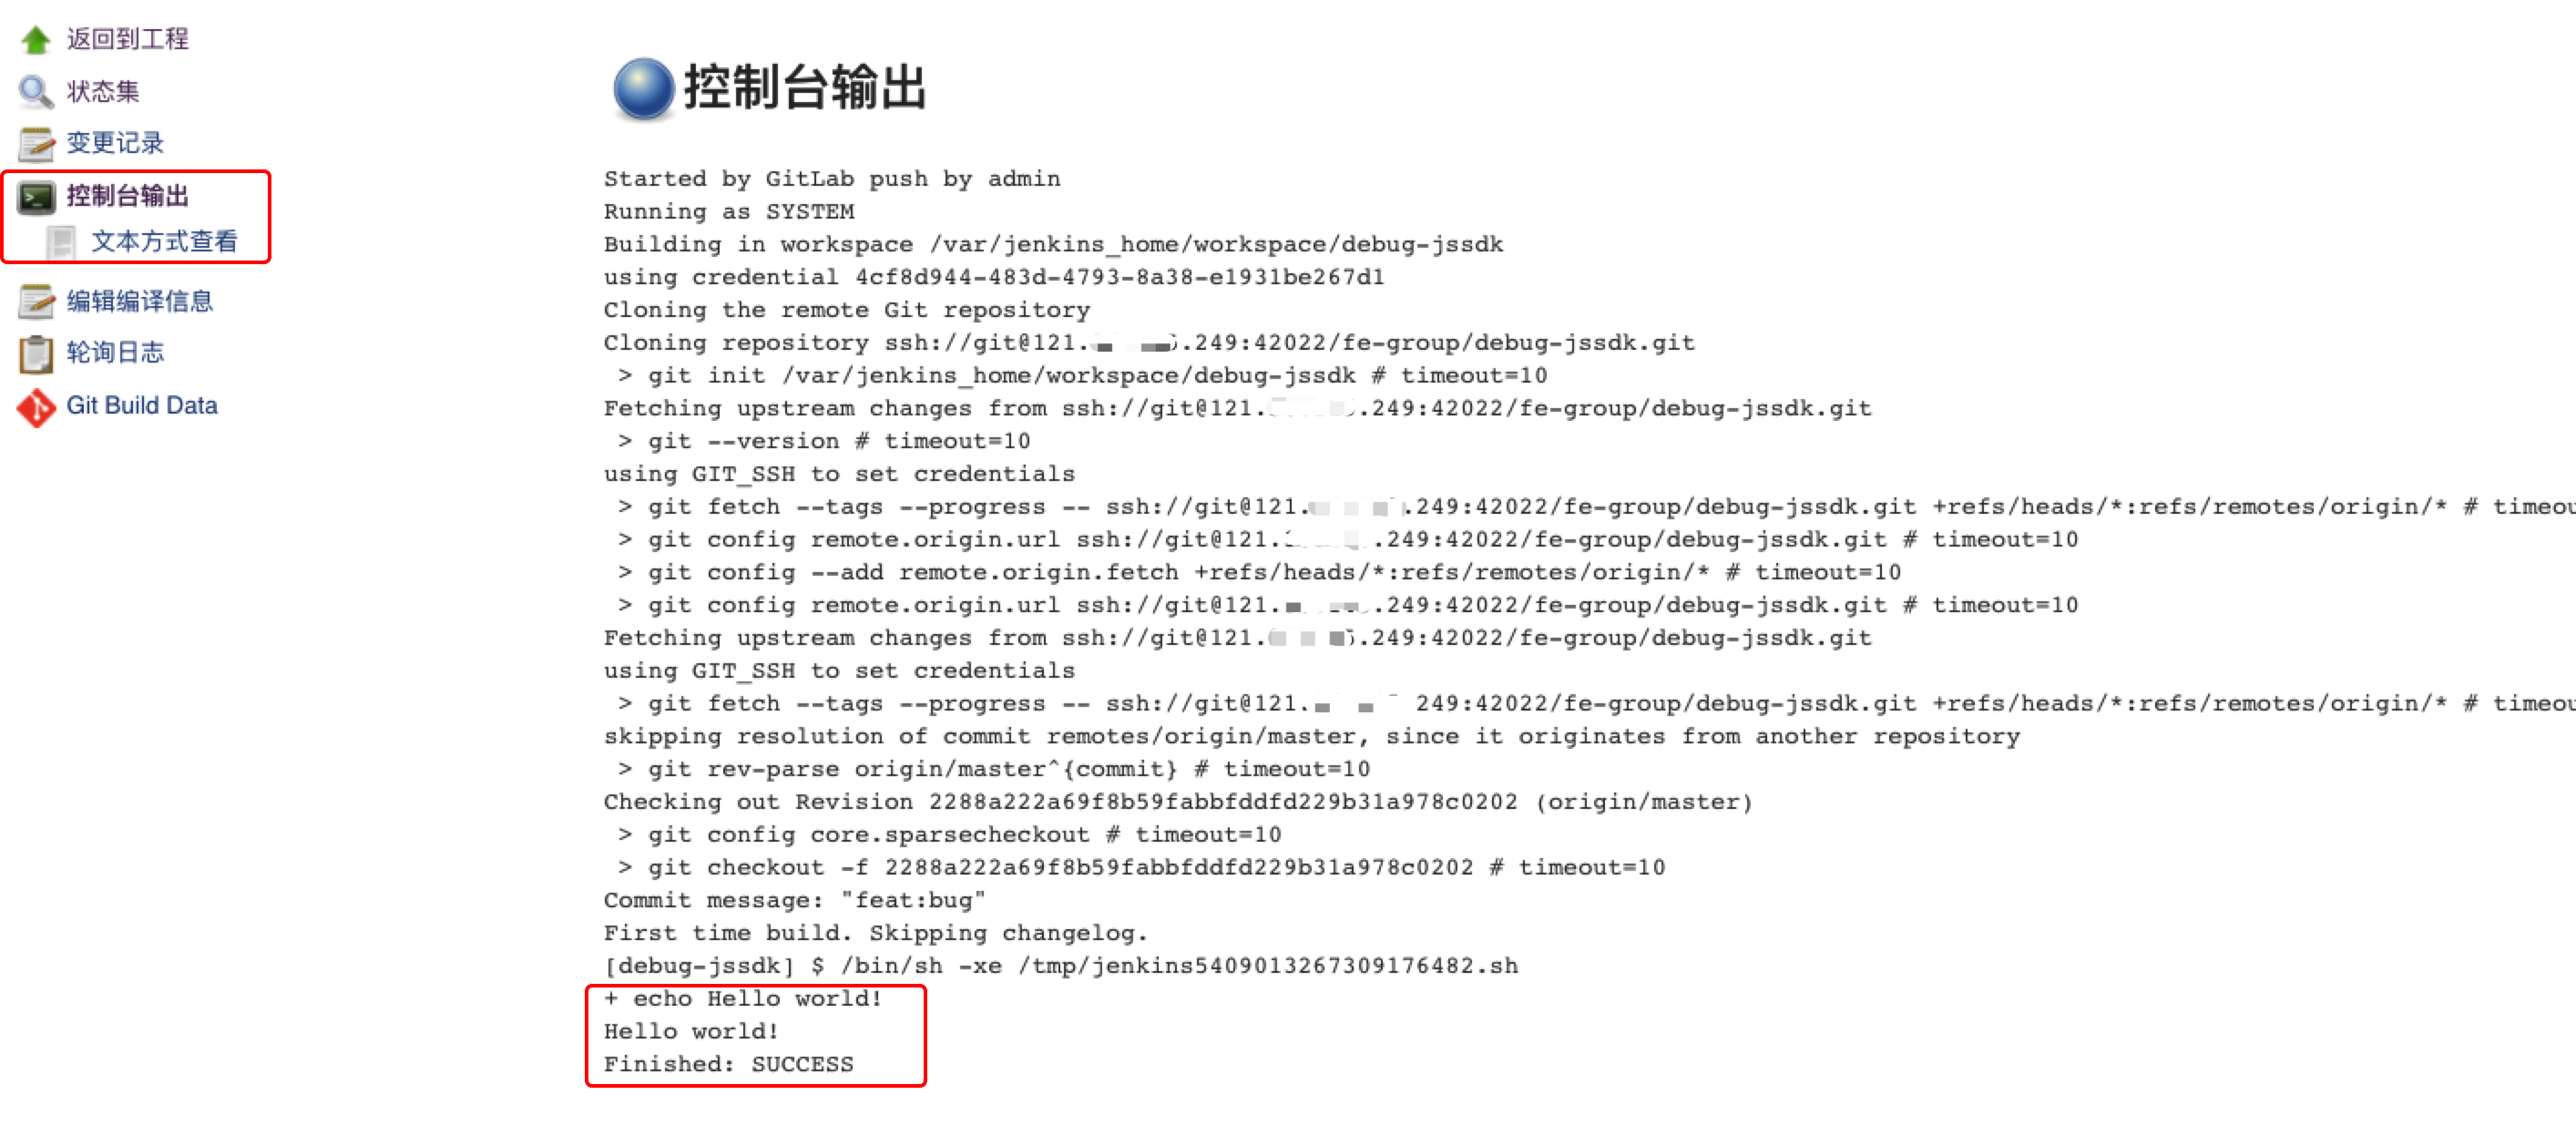
至此大功告成。

若有收获,就点个赞吧
0 人点赞
