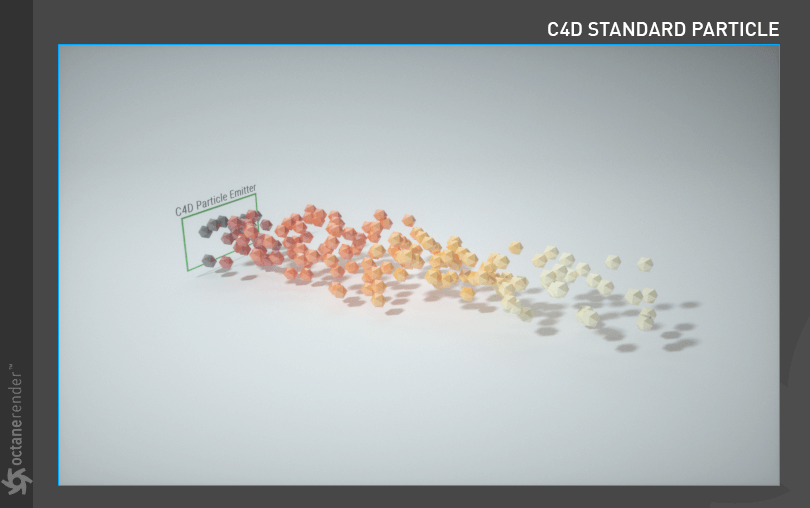
Using Standard C4D Particles
USING THE STANDARD CINEMA 4D PARTICLE EMITTER
This topic has already reviewed in Instance Color but is repeated here. In the mini-Tutorial below you will see how the standard C4D particle emitter works with Octane.
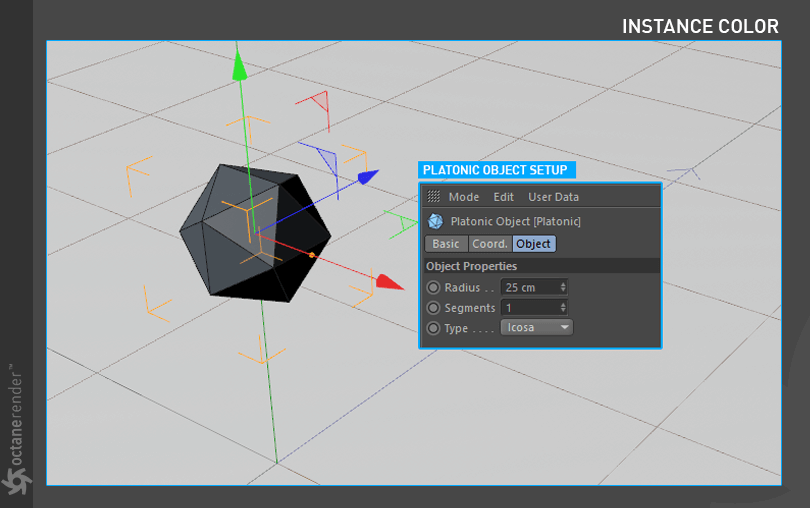
1- First create a Platonic object and change its properties as shown in the image below.
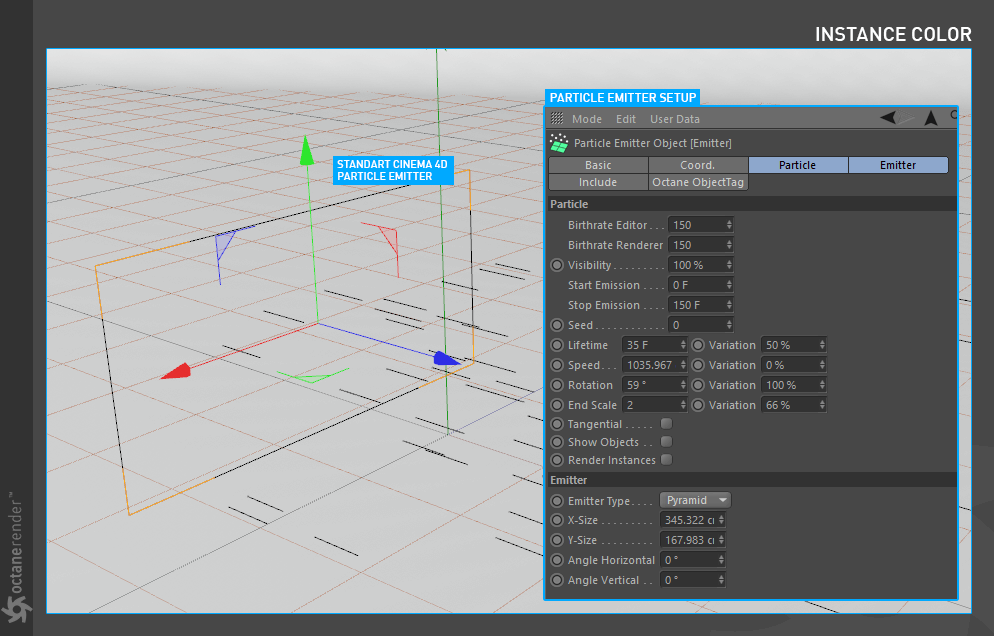
2- Now create a standard Cinema 4D particle emitter object and change its properties as shown in the image. After you finish the setup, press the play button in the Viewport and allow the particles to flow at least 35-40 frames.
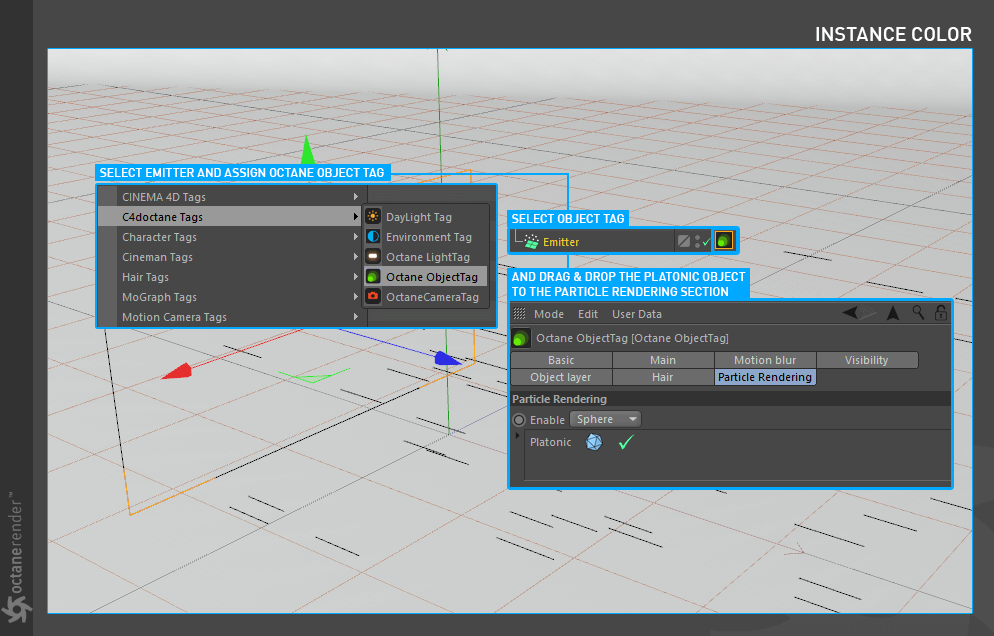
3- Add the “Octane Object tag” to the emitter. Right-click on the Emitter object and select “Octane Object Tag” from the pop-up menu. Then select the Object Tag and drag & drop the “Platonic” object to Particle Rendering Tab. Complete the setup as shown in the following image.
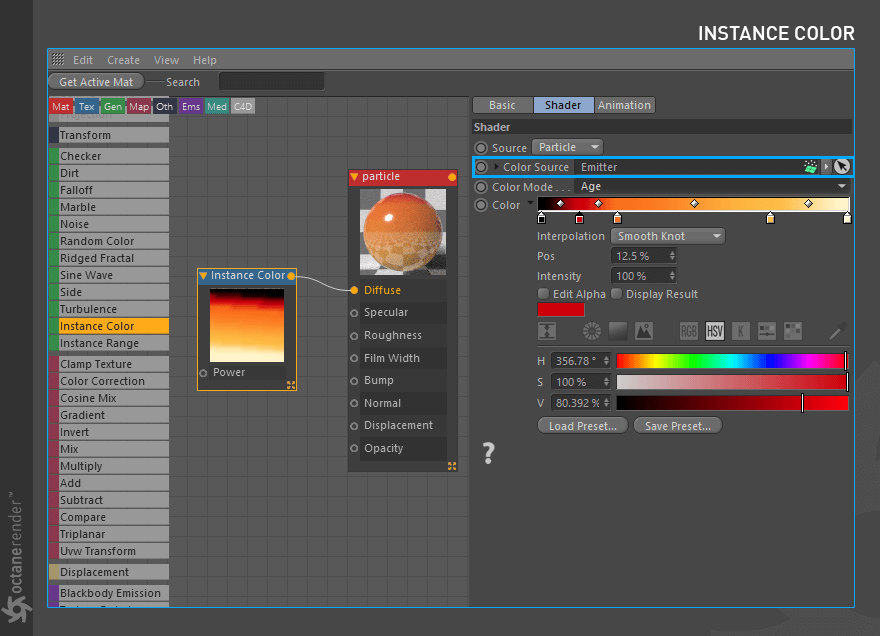
4- Next is the Material setup. We use the Instance Color node for this. Create any material you want and open the Node Editor. Create an Instance Color node and connect it to the diffuse channel. After that, drag and drop the “Emitter” object to the “Color Source” section of the Instance Color settings. Enter the settings you see in the picture and complete the setup. After completing the setup, assign the material to the “Platonic” object.
5- If you have done everything properly, you will get a result similar to the following image. As you can see in the picture, we created the simple particles from platonic objects and define them to Octane. You can also create Instance Color from the particles’ age, speed, etc. or assign any material for your platonic objects. For example, you can use “Random Color” and “Gradient node” for various particle colors.
