- Hardware error
- Cutting and engraving effect
- 001 Why are the cut lines so thick or wavy?
- 002 Why is the processed figure deformed (the figure is not closed or the proportion is wrong)?
- 003 Why the function “bring sketch to life” doesn’t work properly
- 004 Why is the processed graphics offset from the actual placement position?
- 005 Why “Laser what you draw” failed to cut outside edge of your drawing?
- 006 Why does Laserbox detect material’s thickness not accurately or fail?
- 007 Why the official material can’t be cut through with default settings
- 008 Why there is no laser out when the machine is working
- About smoke and smell
- Equipment exception
- 001 Why does laserbox machine not power on?
- 002 The Laserbox software displays “the device is being reset, please try again later”
- 003 Remind on Laserbox software: Temperature of laserbox machine is too high, cannot work normally right now, as below
- 004 Why does the motor of a certain axis suddenly fail to work?
- 005_Why the purifier totally not work (no LED, no sound) when the machine powered on.
- Machine Connecting issue
- Problems after importing other format file to laserbox
- Software related
- Detailed Troubleshooting for hardware exception report
- 001_ Qx012 Abnormal Water Temperature">001_ Qx012 Abnormal Water Temperature
- 002_ Qx017 Can’t Find the Camera">002_ Qx017 Can’t Find the Camera
- 003_ No Visual Interface on Laserbox Software">003_ No Visual Interface on Laserbox Software
- 004_ Qx020 The Air Pump Current Is Too Small">004_ Qx020 The Air Pump Current Is Too Small
- 005_ Qx030 Water Level in Water Tank is Too Low">005_ Qx030 Water Level in Water Tank is Too Low
- 006_ Qx050 The Air Pressure of the Purifier is too Low">006_ Qx050 The Air Pressure of the Purifier is too Low
- 007_ Qx052 The Low Voltage Version Purifier is not Connected">007_ Qx052 The Low Voltage Version Purifier is not Connected
- 008_ Qx060 RGB LED Button Controlling Board is Offline">008_ Qx060 RGB LED Button Controlling Board is Offline
- 009_Firmware Upgrade Failed and Circle LED Off or Blinking">009_Firmware Upgrade Failed and Circle LED Off or Blinking
- 010_Qx080 The Current of Water Pump Is Abnormal">010_Qx080 The Current of Water Pump Is Abnormal
- 011_ Qx183/Qx143 Z Axis Limiter is Abnormal">011_ Qx183/Qx143 Z Axis Limiter is Abnormal
- 012_Faild to connect Laserbox to Windows Computer via USB?">012_Faild to connect Laserbox to Windows Computer via USB?
- 013_Faild to connect Laserbox to Mac Computer via USB?">013_Faild to connect Laserbox to Mac Computer via USB?
- 014_Laserbox Doesn’t Connect via WiFi">014_Laserbox Doesn’t Connect via WiFi
- 015_No Laser Out During Machine Cutting/Engraving">015_No Laser Out During Machine Cutting/Engraving
- 016_Material can’t be cut through">016_Material can’t be cut through
- 017_Engraving and Cutting Patterns are Blurred or Deformed">017_Engraving and Cutting Patterns are Blurred or Deformed
Hardware error
001 Laserbox main after-sale problems checking list
Laserbox main after-sale problems checking list
Cutting and engraving effect
001 Why are the cut lines so thick or wavy?
- Check whether there is dirty on the air nozzle, please clean it refer to the maintenance video “how to clean the air nozzle and laser head“
- Check whether there is dirty on the laser head, please clean it refer the same video “how to clean the air nozzle and laser head“.
- Check whether the refective lenses or focus lense are loose or dirty. Please clean the lenses and place them properly refer to the maintenance video “how to clean the lenses“
002 Why is the processed figure deformed (the figure is not closed or the proportion is wrong)?
Phenomenon
The processed circle or rectangle is not closed or deformed.
Possible causes
- Motor lost step.
- The belt tightness is wrong or the belts on both sides have different belt tightness.
- The light in the environment is too strong.
- There is deviation on laser path (for some not closed issue).
Solution for each of the cause
- Test if the motor lost step by engraving this file refer to the steps in this link. If the motor does lose step, please clean the rails refer to this video.
- Touch the belts to feel whether the belt tightness is abnormal. If yes, please adjust the belt tightness refer to this video (only chinese version).
- Temporarily turn off the light in the environment or pull down the curtain have a test.
- Please refer to video in this link (just watch from 10:40 to 20:09) to test whether there is laser path deviation and adjust the laser path once there is deviation.
003 Why the function “bring sketch to life” doesn’t work properly
- Use Makeblock official materials. Reflective materials or materials too dark will make it much harder for Laserbox to identify images.
- Use Makeblock-recommended markers. Images printed out or too thin(<2mm) will make it much harder for Laserbox to identify. Deli s550 marker pens are recommended.
- Avoid drawing small images. Images smaller than a size of 4mm*4mm could be regarded as distractions and thus be deleted.
- Draw images at the center of materials. Images close to the edges may lead to the failure of Laserbox to accurately position the material scope. Images near the ring code could be regarded as distractions and deleted.
- Keep black lines at a distance with red lines when drawing an image. Make sure the distance is more than 2mm.
- Do not use this function in the sun or very strong light environment.
004 Why is the processed graphics offset from the actual placement position?
Possible causes and solutions:
- The camera position will slightly change after the machine is transported and handled or used for a long time. As a result, the calibration data at the factory is no longer suitable for the current position of the camera, and a secondary calibration is required.
- Due to the characteristics of the fisheye camera, if the consumables are placed on the edge of the honeycomb panel, the recognition effect may be poor. Please place the consumables in the center of the honeycomb board as much as possible.
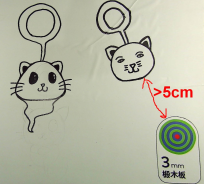
005 Why “Laser what you draw” failed to cut outside edge of your drawing?
Possible reasons and solutions:
The drawing is too closely to the circle code. System will regard the drawing as noise to delete if the distance of the drawing between circle code is less than 5cm
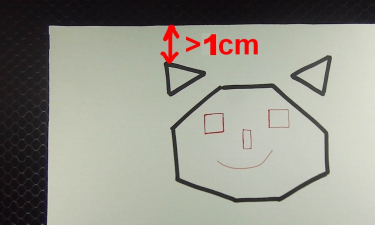
The distance between your picture and material edge should be larger than 1cm, otherwise the camera on Laserbox will not recognize it.
006 Why does Laserbox detect material’s thickness not accurately or fail?
Abnormal as below: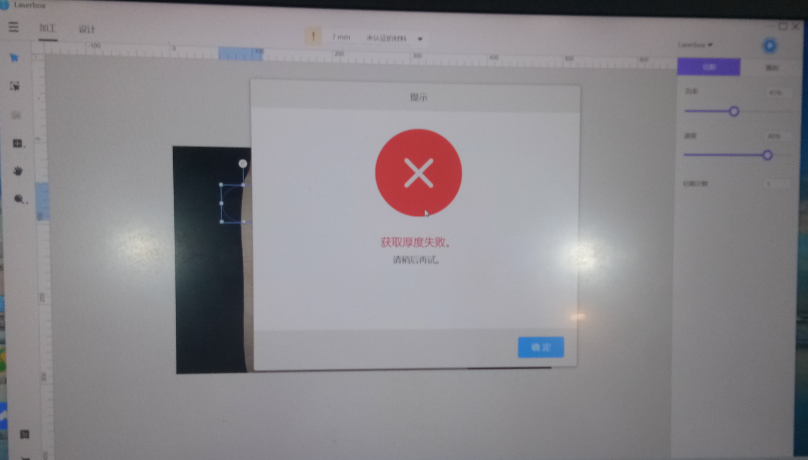
Probable reasons and solutions:
- The table which placed Laserbox machine is not level—>Change a level table with high rigidity to place laserbox machine
- There are too much dust adhering in IR light causing the IR light isn’t bright enough—>Clean IR light surface termly
There are some material residue left on the honeycomb after cutting—>Clean honeycomb in time after the process
007 Why the official material can’t be cut through with default settings
Possible causes:
The material is not placed properly
- The Laser head is dirty
- The lenses (three reflective lenses and one focus lense) are dirty
- There is some offset on the laser path.
- Power reduction due to natural aging of laser tube
Solutions to each of above factors:
- Clean the honeycomb board and place the material flat.
- Clean the laser head refer to this video.
- Clean the reflective lenses and focus lense refer to this video.
- Test the laser path and adjust it if there is offset. Please refer to 11:39~22:18 in this video to do the test and adjustment. Here is the link to download the laser lauch software.
- Power reduction due to natural aging of laser tube is normal phenomenon. In this situation, need to adjust the settings for the official material refer to the instruction “how to change the default settings for the official material“.
008 Why there is no laser out when the machine is working
Problem phenomenon:
The Laserbox machine moves as it should be when cut/engrave, but the laser doesn’t work. Please watch the problem phenomenon in this video.
Note: if the problem phenomenon is that no laser out when testing offline function like “Laser what you draw” but cut/engrave the image sent by laserbox software properly, the following analysis doesn’t fit. In this case, please adjust the out power by increasing it a little like 10% (the default setting is 8%, please don’t change it if everything works properly).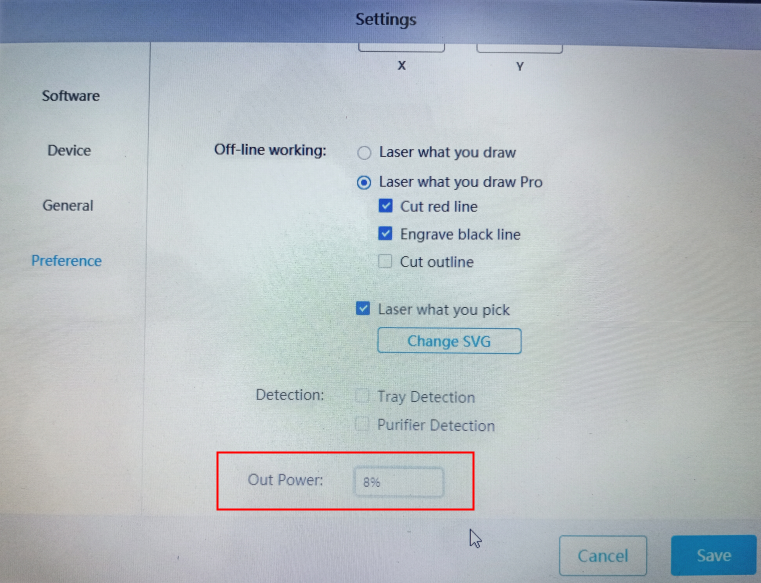
Possible causes:
1. The issue is on the laser tube or laser power;
2. The laser path is deviated;
3. The reflective lenses and focus lense are dirty or place incorrectly
Troubleshooting & Solutions:
First, check if the Laser tube and laser power work refer to the steps below:
1. Disassemble the laser tube cover refer to the video in this link. (just watch the part from 0:00~1:16). Then you can see the laser tube very clear.
Note: please power off the machine while you disassembling the laser tube cover.
2. Test cutting a circle (as shown on picture below) with laserbox software and check if there is laser beam (purple color) in the laser tube while cutting or engraving. 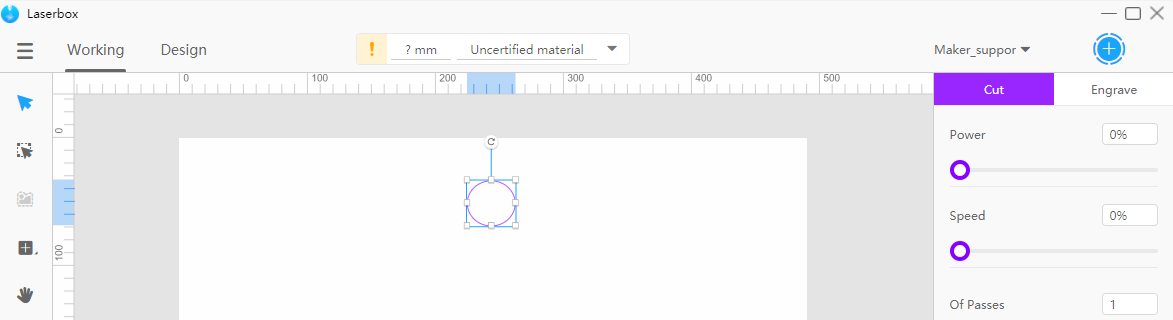
If there is no laser beam, the issue should be on the laser tube or laser power. Please check the points below:
Note: please make sure power off the machine and remove the power supply of the machine during the operation.
- i. look carefully to see whether there is any broken on the laser tube. If there is, need replace the laser tube, if no, follow on step ii.
- ii. Check whether the positive and negative wires of the laser tube are connected properly.
If no, please connect the wires properly.
Positive side wiring (remove the red rubber cover to see it)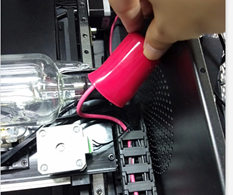

Negative side wiring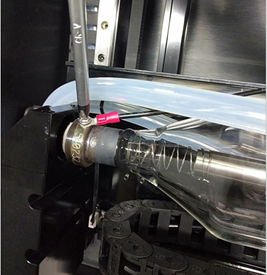
If yes but the issue still exist, follow on step iii.
iii. Check whether the laser power cables loose, please re-plug the laser power cables. Please refer to this video (only watch from 0:00:01~0:05:15 ) to disassemble the right shell of the machine to check and re- plug the laser power cables.
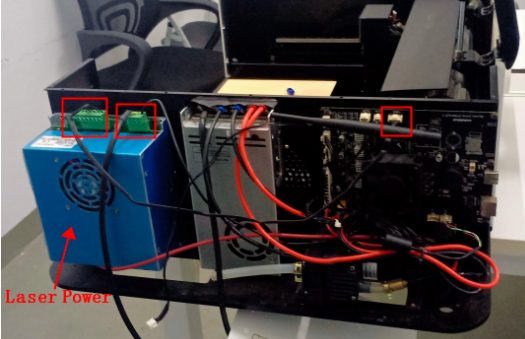<br />Once the issue doesn't fix after re-plugg the cable, follow on step iv .
iv. Replace the laser power. If doesn’t fix the problem, follow on step v.
- v. Replace the laser tube.
If there is laser beam, normally, the laser tube and laser power work properly. Continue checking the laser path and lenses.
Secondly, test whether the laser path is deviated
Please watch this video from 11:40~20:17 to understand the laser path principle, test the laser path and adjust laser path once there is deviation. Click on this link to download the laser launcher software.
Note: please make sure the cover of the machine is closed during test to ensure safty.
If the laser path is already correct in the center, but the issue still exist, please continue checking the lenses.
Thirdly, check whether the lenses are dirty or placed incorrect.
Please refer to this video to find and clean all three reflective lenses and one focus lense, then place the lenses properly with correct direction.
Note: each lense has the top side and bottom side, please make sure the top side is placed towards up.
About smoke and smell
001 Why the smoke generated during cutting/engraving can’t be exhausted by the smoke purifier?
- Check whether the purifier is connected to the machine successfull. Please replug the aviation connector between the smoke purifier and the laserbox machine to ensure the led indicator on purifier is green when powered on.
- Please check if the smoke pipe is placed properly, here are some factors which may affect the normal use of the filter and reduce its life lime.
- The exhaust pipe is folded or squeezed;
- The official exhaust pipe is extended long;
- The exhaust pipe is placed in a higher position than the laserbox.
- Please make sure the filter is placed in the smoke purifier with correct direction and place the filter again have a try. There are placing guidance on the filter.
- Check whether the filter get dirty, please replace a filter have a try.
- Please make sure the laserbox software is the latest version (V1.0.8) and the firmware version of the machine is the latest version (started with 019.xxx). If not, please upgrade the software version and the firmware version.
Equipment exception
001 Why does laserbox machine not power on?
- Situation 1: Power on Laserbox, but the power on/off switch cannot light up
Situation 2: Power on laserbox machine, power on/off switch can light up, but LED light inside the Laserbox cannot light up
Solution:
i):Go setting-help-check for updates to update firmware to latest version.<br /> ii):Pls refer to [this video](http://cdnlab.makeblock.com/Laserbox_How-to-change-the-water.mp4) from 00-00:38 to disassembly decoration cover,and reconnect LED light cable
002 The Laserbox software displays “the device is being reset, please try again later”
- Restart the machine.If not, proceed to next step;
- Download the latest software from the official website, connect the machine to update the latest device firmware. If not, proceed to the next step;
- Save the log and send to the technical support for analyzing;
- You can also refer to the troubleshooting for the issue of the X,Y, Z axis doesn’t reset.
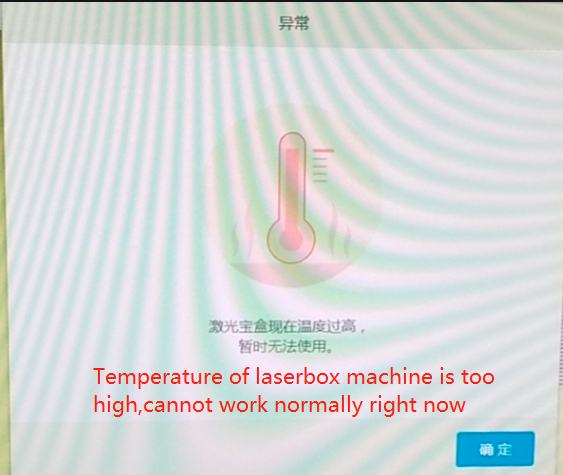
003 Remind on Laserbox software: Temperature of laserbox machine is too high, cannot work normally right now, as below
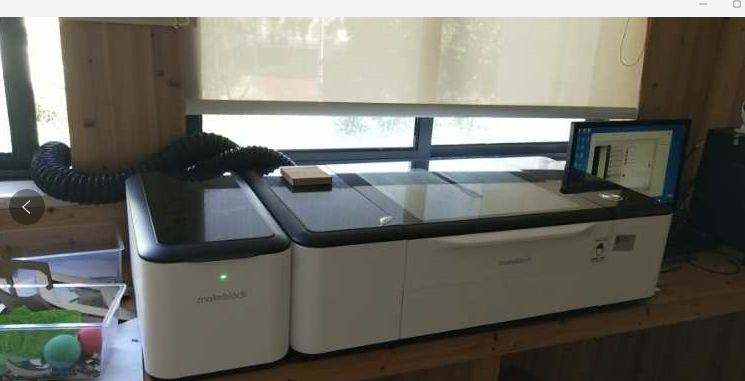
- Check if Purifier is too close to Laserbox(like below) causing the fan unable to cool down the temperature properly. This will cause Laserbox pop up the high temperature warning
Check Laserbox’s cooling system is normal or not:
i):Press Ctrl+F1 or Ctrl+Fn+F1 (Mac PC is Command+Fn+F1) to enter debug interface
ii):Click “Water Pump On/Off” to check if there is a sound of the pump working and water flowing
iii):If it is difficult for you to hear water flowing sound, check on the laser tube to see if there’s cooling liquid running in the tube.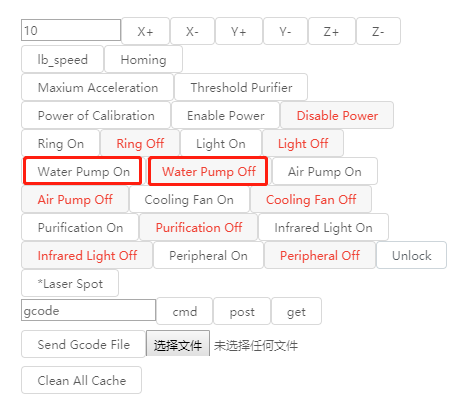
004 Why does the motor of a certain axis suddenly fail to work?
Phenomenon 1: When machine is powered on, any one of the axis doesn’t reset properly;
Solution:Update both the software and device firmware to latest version first;
- Insert a piece of paper to the black plastic slot of the corresponding limit swith to see if the red light on limit switch is on. If no, you need to replug or change the limit control line or even change the limit switch;
- Replace the mainboard of the machine.
Phenomenon 2: During the processing stage, a certain axis suddenly stop working
Solution:
- Update both the software and device firmware to latest version first;
- Check whether the corresponding limit switch control line is loose;
- Check the corresponding limit switch;
- Replace the corresponding motor;
- Replace the motherboard.
Phenomenon 3: After processing, the machine doesn’t reset normally
Solution:
- Update both the software and device firmware to latest version first;
-
005_Why the purifier totally not work (no LED, no sound) when the machine powered on.
First of all, make sure the device has latest software version and firmware version. If yes, but still the issue, then need to check the hardware.
For this situation, it is highly suggested to do a cross test with another purifier or machine to check the issue is on purifier or the laserbox machine first.
If the purifier works with the other machine, but not work on this one, then the issue is on the machine, please refer to the troubleshootings below to figure out the cause: Make sure the purifier is connected to machine properly with the aviation connector. Please replug this cable or change the aviation connector have a try. If doesn’t fix problem, go to next step.
- Check whether both of the purifier signal cable and power supply cable are connected on Y1 board properly. Please replug these cable and check if fix the issue, if not, please go to next step.
Note 1: need disassemble the left shell of the machine to see the Y1 board. Here is the video (only need refer to the part from 0:00 to 6:13) guiding how to disassemble the left shell of the machine.
Note 2: This video and picture is for laserbox pro, if you have first generation machine, please contact us for more guidance.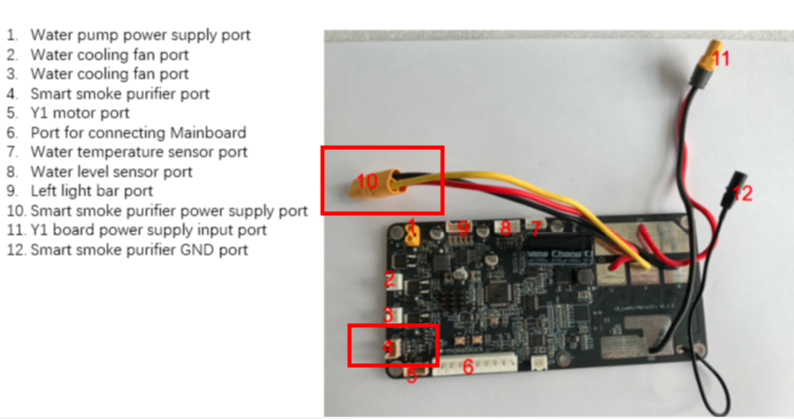
- Change the Y1 board refer to the same video. If doesn’t fix the issue, please go to next step.
Change the aviation plug cable. Will add a picture to show where is the aviation plug cable later.
If the purifier doesn’t work with the other working machine, then the issue should be on the purifier itself, the issue can be fixed by exchanging a purifier quickly.
Machine Connecting issue
001 Why cannot windows PC install the driver successfully?
USB driver for 64 bit system
windows driver.rar
windows usable driver.zip
Notes:
Solutions for windows PC cannot install the driver successfully:
1.Install the driver and laserbox software as an Administrator
2.Close all the VPN softwares and antivirus software to try again.
3.Check on your computer to see if its framework is surface or ARM computer,current driver cannot support surface and ARM framwork very well,we are pushing our vendor to optimize this issue,but it needs long time to fix it.
4.We suggest to use Ethernet to connect,after connected via Ethernet cable,then config wifi for your laserbox machine as well.
If you computer is 32 bit system,you can try to use Ethernet cable to connect.
002 Why can’t the computer connect to the laserbox via USB?
Causes
The reasons are more complex and diverse, most of which are related to the user’s computer environment such as:
- The driver was blocked during driver installation;
- Using proxy and other circumvention software;
- The device firwmare is historical firmware version older than 018, which are not compatible with 10.13 and later Mac computer systems);
Solutions
- Turn off all anti-virus software when installing the laserbox software;
- Close the proxy or other circumvention software;
- Update the laserbox software and device firmware to the latest version (the latest software version is 1.1.2 and latest firmware version start with 022). If the computer cannot connect to the device to update, try to find another computer to connect or connect with Ethernet cable;
- Wait for the machine to totally turn on (6 ring lights are always white) and then connect to the software (if 6 white lights cannot be turned on, it means the machine itself is abnormal), once there is a beep after connecting, the 6 ring lights will change blue;
- Use the network cable to connect the device and the computer;
- If the above operations cannot be solved, try to install the driver:
- Driver for Windows: https://makeblock.yuque.com/mkquality/yyl8ng/nf3xir#UwqZJ
Driver for Mac:
HoRNDIS-9.2_catalina.pkg
The above methods can basically solve more than 90% of the connection problems. If you still can’t solve them, you can only choose to replace the motherboard.
Note: the new mac system Big Sur has changed the driver security mechanism which lead to the USB connection issue with laserbox. In this situation, there are two methods to solve the connection issue:
1. Connect the Mac computer to the Laserbox machine with Ethernet cable.
2. If there is no Ethernet port on some mac computer, need borrow a windows laptop, then connect laserbox to windows computer with USB cable/Ethernet cable to configure the wifi connection. Once the wifi connection is configured, the mac computer can connect to the laserbox through wifi.
003 Why does laserbox machine cannot connect via WIFI?
1.Have you ever connected your laserbox machine with your PC to config WIFI via USB cable or Ethenet cable?
If you didn’t config WIFI for your laserbox before,then you can follow below steps:
i):Make your laserbox machine connect with your PC via USB cable or Ethernet cable.
ii):Keep your laserbox connecting with your PC via USB cable or Ethernet cable,and then select WIFI option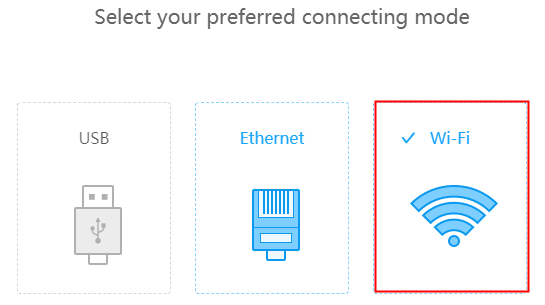
iii): Config WIFI account and password for your laserbox machine,after configured successfully,then you can connect with laserbox machine via WIFI next time.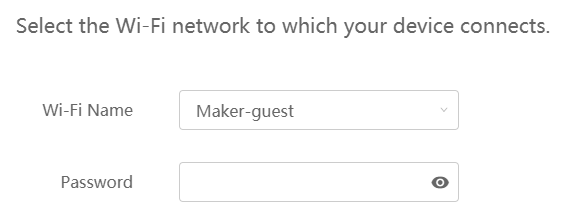
2.We suggest the wifi name and password shouldn’t have special symble to avoid any connection issue,it’s better only have normal letters or numbers in your passward.
3.Laserbox machine cannot connect with the wifi,if the wifi you configured need to be verified.
Problems after importing other format file to laserbox
001 Why can’t open DXF file,why the lines have become coarsen,why straight lines changed curve after import the file?
The original DXF file is not standardization,should save it again under CAD software.
002 Why cannot adjust some lines to cut or engrave after import DXF file to laserbox software ?
The lines which have same colour will be merged into one colour while export to DXF file,this is traditional setting for laser machine,if you want to different effect of lines to cut or engrave,then set the lines to different colours before export to DXF file.
003 Why does the import picture only can engrave but cannot cut?
Abnormal situation as below: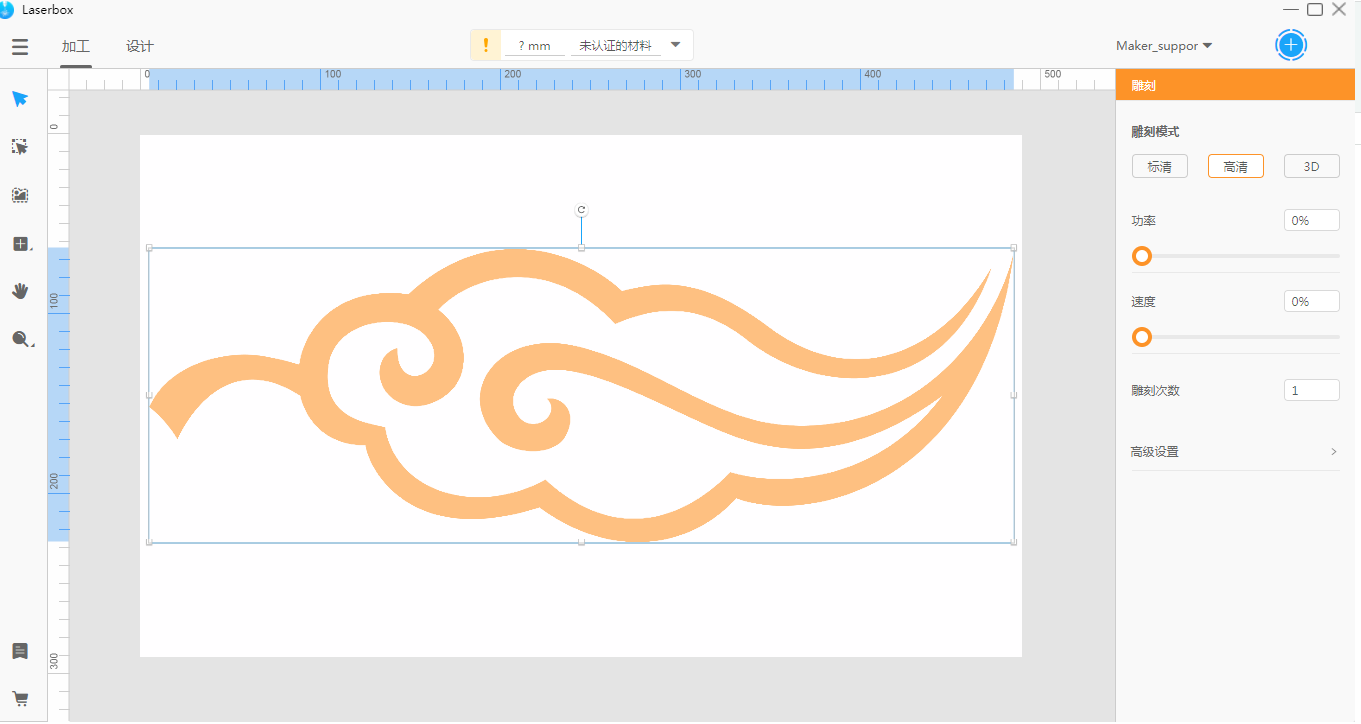
This issue caused by file format(Bitmap doesn’t have path to select),you can use outline function to get its shape,after that you can select it as cut or engrave 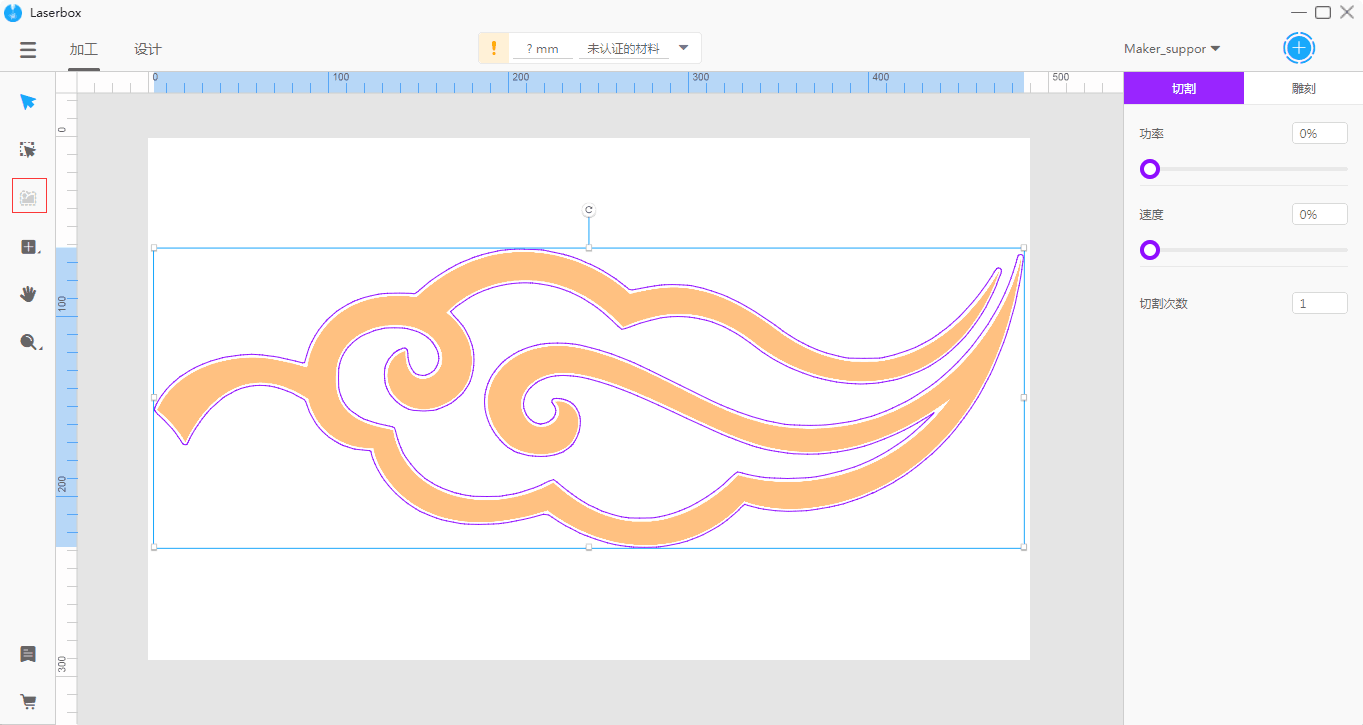
There is
Software related
001_Why it says “laserbox can’t be opened because Apple cannot check it for malicious software” while installting laserbox software on Mac? (Refer to picture below)
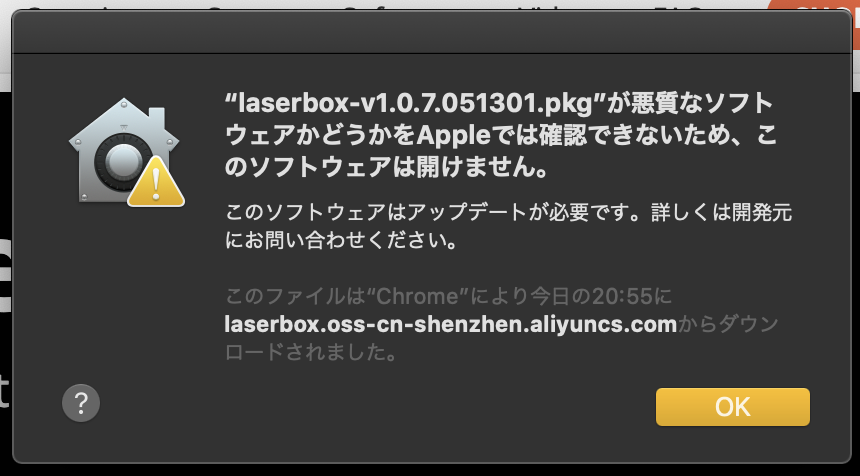
Cause
Generally, it is caused by the incompatibility between the Apple system and our software (some unknown developers’ software that is not on the apple store is likely to be intercepted by the system).
Solutions
1. Download the Mac version Laserbox installation package from the official website and install again;
2. If there is still a failure prompt during installation, turn off the interception as follows:
Note: The following steps take the mLink as example, it also works for laserbox software.
Way 1:
1. Click OK.<br />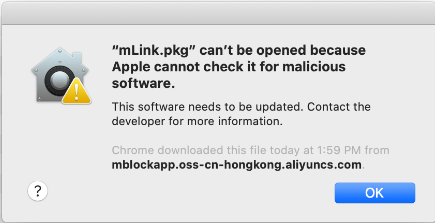<br /> 2. Choose System Preferences > Security & Privacy.<br /><br /> 3. Click Open Anyway.<br />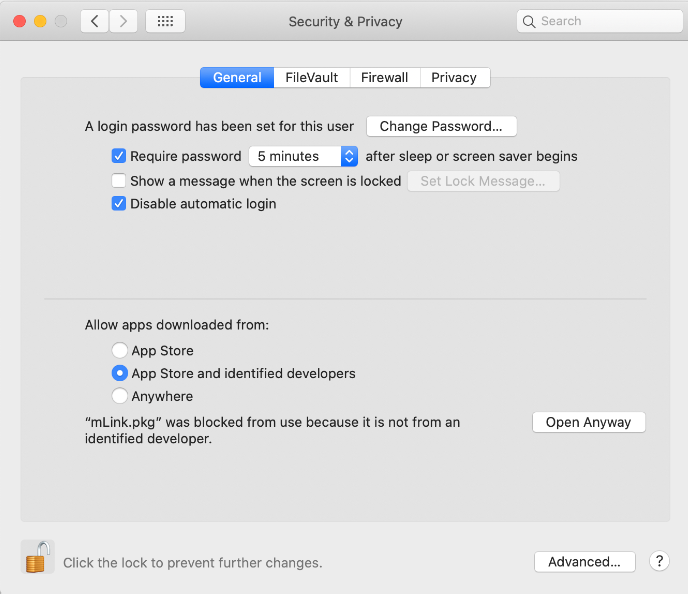<br /> 4. Start the mLink installation process.<br />Way 2:
1. Right-click the installation package and choose Open.<br /><br /> 2. Click Open.<br /><br /> 3. Start the mLink installation process.<br />
002_There is an error appears while updating the laserbox software to version 1.0.8 or later version.
Problem Phenomenon:
An error pops up as shown on picture below while updating the software:
Causes:
The Laserbox software installation is npm installation which require user’s administration permission once the software installed under C disk. This error appear due to the user permission restriction.
Solution:
Solution 1: Run the laserbox with admin right and then try software updating.
Solution 2: Uninstall the laserbox software, then download the latest version v1.0.8 from this link and install again.
Please note: if you install the laserbox software under non C disk, there won’t be such error while updating laserbox software directly without reinstalling, therefore, we suggest that users install the laserbox software under non C disk.
Good news is that this issue will be fixed when upgrade the laserbox v1.1.3 to future version.
Detailed Troubleshooting for hardware exception report
001_ Qx012 Abnormal Water Temperature
002_ Qx017 Can’t Find the Camera
003_ No Visual Interface on Laserbox Software
004_ Qx020 The Air Pump Current Is Too Small
005_ Qx030 Water Level in Water Tank is Too Low
006_ Qx050 The Air Pressure of the Purifier is too Low
007_ Qx052 The Low Voltage Version Purifier is not Connected
008_ Qx060 RGB LED Button Controlling Board is Offline
009_Firmware Upgrade Failed and Circle LED Off or Blinking
010_Qx080 The Current of Water Pump Is Abnormal
011_ Qx183/Qx143 Z Axis Limiter is Abnormal
012_Faild to connect Laserbox to Windows Computer via USB?
013_Faild to connect Laserbox to Mac Computer via USB?
014_Laserbox Doesn’t Connect via WiFi
015_No Laser Out During Machine Cutting/Engraving
016_Material can’t be cut through
017_Engraving and Cutting Patterns are Blurred or Deformed

若有收获,就点个赞吧
0 人点赞
