实践记录
考虑到自己的电脑配置限制,以及暂时貌似没有服务器可以用。所以暂时打算使用Colaboratory进行学习。
实践环境
- Google Colab
实践过程
Colab 项目
因为没有 GPU 所以才用 Colab 的,所以当然要设置GPU加速。
安装 PaddleDetection
根据 PaddlePaddle 提供的安装方法进行安装。
需要注意的是,需要保证 python 版本不能超过 3.7。
然后更具环境条件安装 PaddlePaddle : ```bashCUDA10.1
python -m pip install paddlepaddle-gpu==2.2.0.post101 -f https://www.paddlepaddle.org.cn/whl/linux/mkl/avx/stable.html
CPU
python -m pip install paddlepaddle -i https://mirror.baidu.com/pypi/simple
并用如下命令来检查安装是否成功:```bash# 在Python解释器中确认PaddlePaddle安装成功python>>> import paddle>>> paddle.utils.run_check()# 确认PaddlePaddle版本python -c "import paddle; print(paddle.__version__)"
在 Colab 下,Bash 命令需要以
!开头,所以在 Colab 中键入:
# instal pp-gpu!pip install paddlepaddle-gpuimport paddlepaddle.utils.run_check()print(paddle.__version__)# install pd!git clone https://github.com/PaddlePaddle/PaddleDetection.gitimport osos.chdir("./PaddleDetection")!pip install -r requirements.txt!python setup.py install!python ppdet/modeling/tests/test_architectures.py
部署 PP-TinyPose
官方提供了训练好的模型,由于我现阶段的目的是大概了解流程,所以我先直接下载官方模型。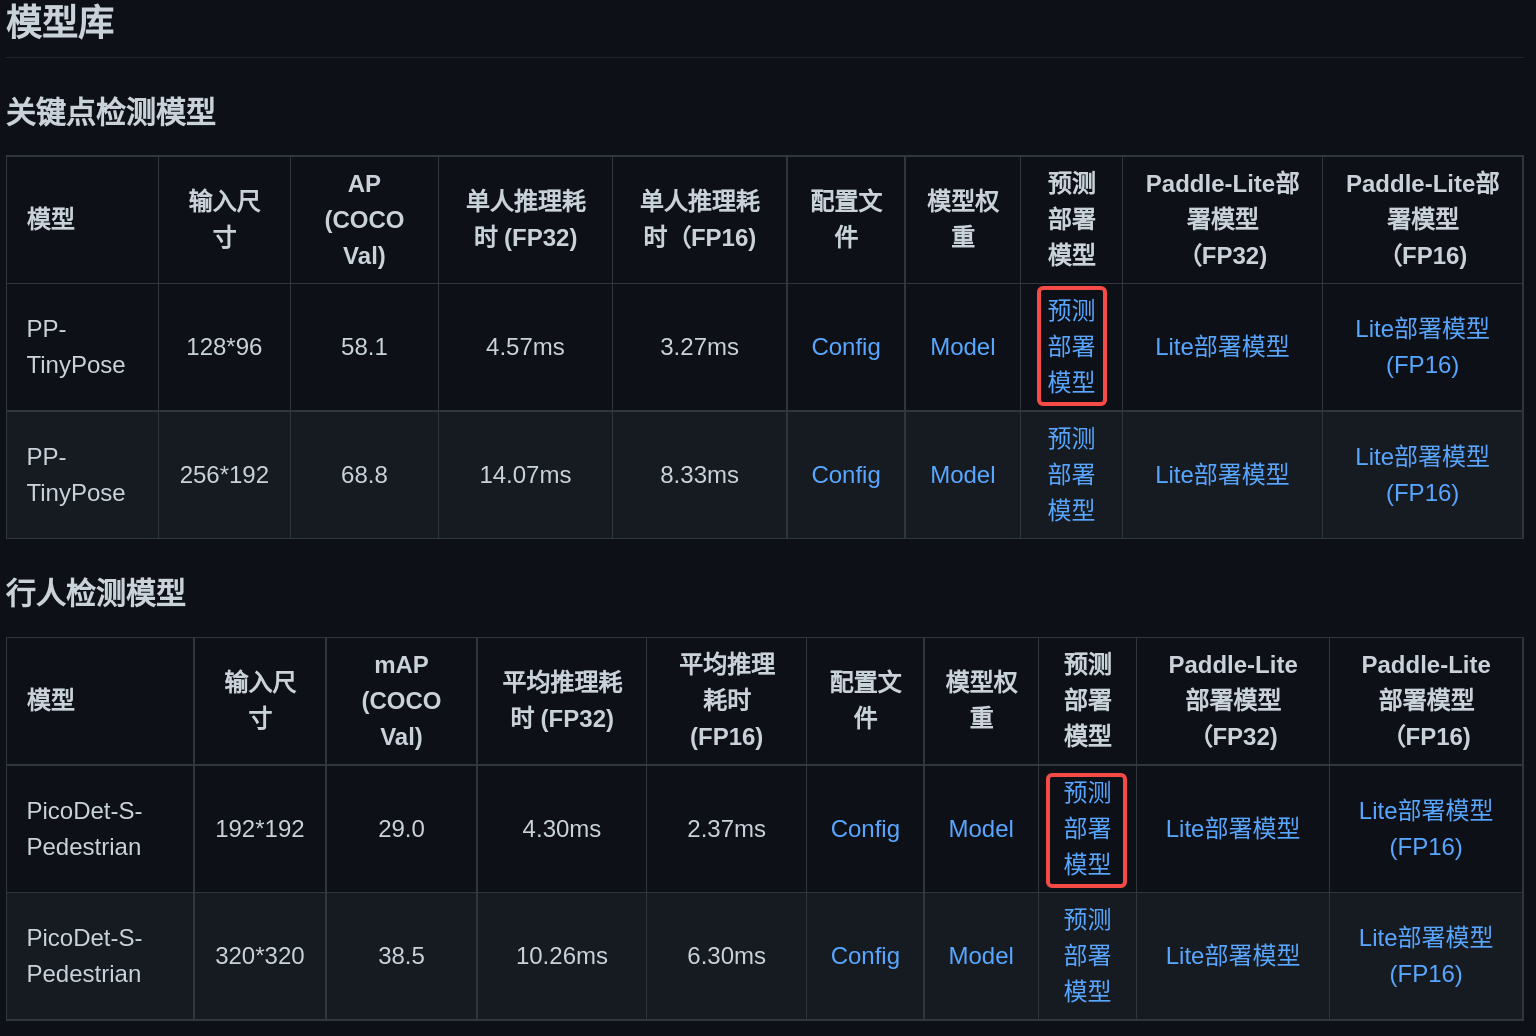
分别下载这两项,得到
picodet_s_192_pedestrian/和tinypose_128x96/这两个文件夹。上传进 Colab 项目的对应文件夹中:
- 在 repo 根目录创建
output_inference/picodet_s_192_pedestrian/和output_inference/tinypose_128x96/- 导入对应文件
快速推理
# single picture!python3 deploy/python/det_keypoint_unite_infer.py --det_model_dir=output_inference/picodet_s_192_pedestrian --keypoint_model_dir=output_inference/tinypose_128x96 --image_file=demo/000000014439_640x640.jpg --device=GPU --save_res=True
参考资料
官方项目仓库
https://github.com/PaddlePaddle/PaddleDetection/blob/develop/docs/tutorials/INSTALL_cn.md
官方网页
实践案例
若干论文

若有收获,就点个赞吧
0 人点赞
