原文: https://howtodoinjava.com/spring5/core/spring-bean-xml-config/
在此 spring bean XML 配置示例中,学习创建定义和创建 spring bean 以及在任何 spring 应用程序中填充应用程序上下文。 本示例使用 xml 配置定义 bean 。 我们将使用 maven 管理 Spring 依赖项,并使用 Eclipse 构建和运行代码。
1. Spring Maven 依赖
要创建能够创建和管理 bean 的 spring 应用程序上下文,我们至少需要三个 maven 依赖项,即spring-core,spring-beans和spring-context。
spring-core模块具有与其他 Spring 模块一起使用所需的最基本的类。spring-beans模块提供了与 Spring bean 一起使用所需的org.springframework.beans.factory.BeanFactory接口。spring-context模块提供org.springframework.context.ApplicationContext接口,该接口可启用其他功能,例如消息资源, AOP 功能,特定类型的应用程序上下文和 bean 生命周期事件监听器。
pom.xml
<project xmlns="http://maven.apache.org/POM/4.0.0" xmlns:xsi="http://www.w3.org/2001/XMLSchema-instance"xsi:schemaLocation="http://maven.apache.org/POM/4.0.0 http://maven.apache.org/xsd/maven-4.0.0.xsd;<modelVersion>4.0.0</modelVersion><groupId>com.howtodoinjava.spring.webmvc</groupId><artifactId>SpringDemos</artifactId><version>0.0.1-SNAPSHOT</version><packaging>jar</packaging><name>SpringDemos</name><url>http://maven.apache.org</url><properties><project.build.sourceEncoding>UTF-8</project.build.sourceEncoding><spring.version>5.2.0.RELEASE</spring.version></properties><dependencies><!-- Spring Dependencies --><dependency><groupId>org.springframework</groupId><artifactId>spring-core</artifactId><version>${spring.version}</version></dependency><dependency><groupId>org.springframework</groupId><artifactId>spring-beans</artifactId><version>${spring.version}</version></dependency><dependency><groupId>org.springframework</groupId><artifactId>spring-context</artifactId><version>${spring.version}</version></dependency></dependencies></project>
2. xml 配置中的 Spring bean 定义
2.1. 具有 bean 定义的单个配置文件
您可以在单个 xml 文件中定义所有 SpringBean 及其传递依赖项。 此 xml 文件可用于创建应用程序上下文。
beans.xml
<?xml version="1.0" encoding="UTF-8"?><beans xmlns="http://www.springframework.org/schema/beans"xmlns:xsi="http://www.w3.org/2001/XMLSchema-instance" xmlns:context="http://www.springframework.org/schema/context"xsi:schemaLocation="http://www.springframework.org/schema/beanshttp://www.springframework.org/schema/beans/spring-beans.xsdhttp://www.springframework.org/schema/contexthttp://www.springframework.org/schema/context/spring-context.xsd"><bean id="operations" class="com.howtodoinjava.spring.beans.Operations"></bean><bean id="employee" class="com.howtodoinjava.spring.beans.Employee"></bean><bean id="department" class="com.howtodoinjava.spring.beans.Department"></bean></beans>
2.2. 在多个配置文件中定义 bean 并导入到主文件中
该方法在编写模块化代码时更有用。 您可以在单独的 xml 文件中定义 bean,然后将文件导入主 xml 文件。
employee.xml
<beans><bean id="employee" class="com.howtodoinjava.spring.beans.Employee"></bean></beans>
department.xml
<beans><bean id="department" class="com.howtodoinjava.spring.beans.Department"></bean></beans>
beans.xml
<?xml version="1.0" encoding="UTF-8"?><beans><import resource="employee.xml"/><import resource="department.xml"/><bean id="operations" class="com.howtodoinjava.spring.beans.Operations"></bean></beans>
3. Spring bean 示例
要创建ApplicationContext,我们可以使用它作为可用实现的一种特定实现,例如 ClassPathXmlApplicationContext,FileSystemXmlApplicationContext,StaticApplicationContext,XmlWebApplicationContext等。
我们将需要将 bean 配置文件名称作为使用类的构造函数参数传递。 不要忘记将文件归档在classpath或资源文件夹中。
Main.java
import org.springframework.context.ApplicationContext;import org.springframework.context.support.ClassPathXmlApplicationContext;public class XmlConfigExample{public static void main( String[] args ){@SuppressWarnings("resource")ApplicationContext ctx = newClassPathXmlApplicationContext( "com/howtodoinjava/core/demo/beans/beans.xml" );Employee employee = ctx.getBean(Employee.class);Department department = ctx.getBean(Department.class);Operations operations = ctx.getBean(Operations.class);System.out.println(department);System.out.println(employee);operations.helloWorld();}}
程序输出:
Console
Jan 02, 2018 3:10:27 PM org.springframework.beans.factory.xml.XmlBeanDefinitionReader loadBeanDefinitionsINFO: Loading XML bean definitions from class path resource [beans.xml]Jan 02, 2018 3:10:27 PM org.springframework.beans.factory.xml.XmlBeanDefinitionReader loadBeanDefinitionsINFO: Loading XML bean definitions from class path resource [employee.xml]Jan 02, 2018 3:10:27 PM org.springframework.beans.factory.xml.XmlBeanDefinitionReader loadBeanDefinitionsINFO: Loading XML bean definitions from class path resource [department.xml]Employee [id=0, name=null]Department [id=0, name=null]Hello World !!
4. 示例中使用的项目结构和其他类
4.1. 项目结构
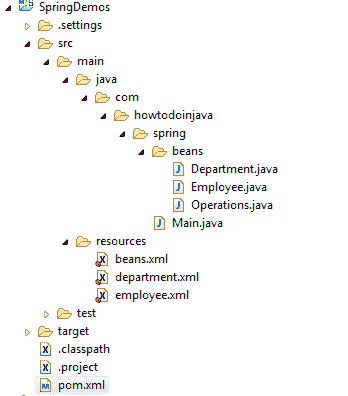
Spring XML Config Project Structure
4.2. Bean
Employee.java
@Getter@Setter@ToStringpublic class Employee{private long id;private String name;}
Department.java
@Getter@Setter@ToStringpublic class Department{private long id;private String name;}
Operations.java
public class Operations{public void helloWorld(){System.out.println("Hello World !!");}}
在评论部分中,将您与基于 Spring XML 配置基于 spring 容器有关的问题交给我。
学习愉快!
有关:

若有收获,就点个赞吧
0 人点赞
