XML配置事务管理
1:在spring配置文件中进行配置
<!-- 开启组件扫描 --><context:component-scanbase-package="com.junjay.spring5"></context:component-scan><!-- 直接通过druidjar配置数据库链接 --><bean id="dataSource"class="com.alibaba.druid.pool.DruidDataSource"><!-- 直接配置 *********************************************************** --><property name="driverClassName"value="com.mysql.jdbc.Driver"></property><property name="url" value="jdbc:mysql://localhost:3306/test"></property><property name="username" value="root"></property><property name="password" value="root"></property></bean><!-- 创建JdbcTemplate对象 --><bean id="jdbcTemplate"class="org.springframework.jdbc.core.JdbcTemplate"><!-- 用set注入dataSource数据源 --><property name="dataSource" ref="dataSource"></property></bean><!-- 1: 创建事务管理器 --><bean id="transactionManager"class="org.springframework.jdbc.datasource.DataSourceTransactionManager"><!-- 注入数据源 --><property name="dataSource" ref="dataSource"></property></bean>
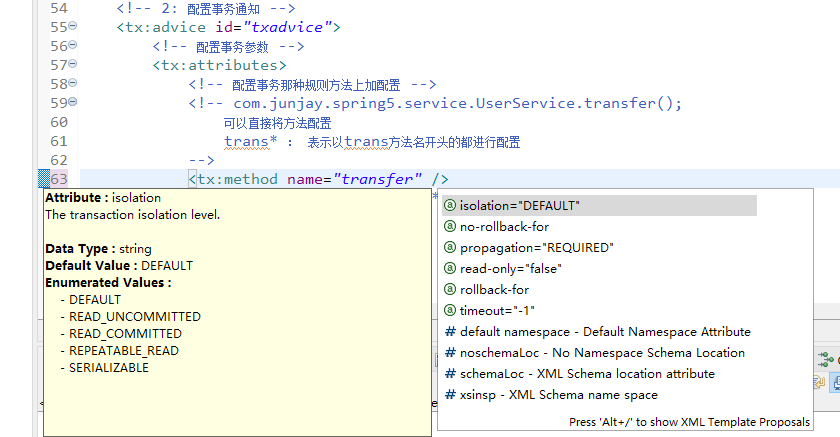
2:配置通知
<!-- 2: 配置事务通知 --><tx:advice id="txadvice"><!-- 配置事务参数 --><tx:attributes><!-- 配置事务那种规则方法上加配置 --><!-- com.junjay.spring5.service.UserService.transfer(); 可以直接将方法配置 trans*: 表示以trans方法名开头的都进行配置 --><tx:method name="transfer" read-only="false" timeout="-1"propagation="REQUIRED" /><!-- <tx:method name="trans*"/> --></tx:attributes></tx:advice>
3:配置切入点和切面
<!-- 3: 配置事务切入点和切面 --><aop:config><!-- 配置切入点,配置UserService下的所有方法都加上以上事务管理 --><aop:pointcutexpression="execution(* com.junjay.spring5.service.UserService.*(..))"id="pt" /><!-- 配置切面 advice-ref:通知名字 pointcut-ref:切入点名字 --><aop:advisor advice-ref="txadvice" pointcut-ref="pt" /></aop:config>
4:完整xml配置
<?xml version="1.0" encoding="UTF-8"?><beans xmlns="http://www.springframework.org/schema/beans"xmlns:xsi="http://www.w3.org/2001/XMLSchema-instance"xmlns:aop="http://www.springframework.org/schema/aop"xmlns:p="http://www.springframework.org/schema/p"xmlns:util="http://www.springframework.org/schema/util"xmlns:tx="http://www.springframework.org/schema/tx"xmlns:context="http://www.springframework.org/schema/context"xsi:schemaLocation="http://www.springframework.org/schema/beanshttp://www.springframework.org/schema/beans/spring-beans-3.0.xsdhttp://www.springframework.org/schema/aophttp://www.springframework.org/schema/aop/spring-aop-3.0.xsdhttp://www.springframework.org/schema/txhttp://www.springframework.org/schema/tx/spring-tx-3.0.xsdhttp://www.springframework.org/schema/contexthttp://www.springframework.org/schema/context/spring-context-3.0.xsdhttp://www.springframework.org/schema/utilhttp://www.springframework.org/schema/util/spring-util.xsd"><!-- 开启组件扫描 --><context:component-scanbase-package="com.junjay.spring5"></context:component-scan><!-- 直接通过druidjar配置数据库链接 --><bean id="dataSource"class="com.alibaba.druid.pool.DruidDataSource"><!-- 直接配置 *********************************************************** --><property name="driverClassName"value="com.mysql.jdbc.Driver"></property><property name="url" value="jdbc:mysql://localhost:3306/test"></property><property name="username" value="root"></property><property name="password" value="root"></property></bean><!-- 创建JdbcTemplate对象 --><bean id="jdbcTemplate"class="org.springframework.jdbc.core.JdbcTemplate"><!-- 用set注入dataSource数据源 --><property name="dataSource" ref="dataSource"></property></bean><!-- 1: 创建事务管理器 --><bean id="transactionManager"class="org.springframework.jdbc.datasource.DataSourceTransactionManager"><!-- 注入数据源 --><property name="dataSource" ref="dataSource"></property></bean><!-- 2: 配置事务通知 --><tx:advice id="txadvice"><!-- 配置事务参数 --><tx:attributes><!-- 配置事务那种规则方法上加配置 --><!-- com.junjay.spring5.service.UserService.transfer(); 可以直接将方法配置 trans*: 表示以trans方法名开头的都进行配置 --><tx:method name="transfer" read-only="false" timeout="-1"propagation="REQUIRED" /><!-- <tx:method name="trans*"/> --></tx:attributes></tx:advice><!-- 3: 配置事务切入点和切面 --><aop:config><!-- 配置切入点,配置UserService下的所有方法都加上以上事务管理 --><aop:pointcutexpression="execution(* com.junjay.spring5.service.UserService.*(..))"id="pt" /><!-- 配置切面 advice-ref:通知名字 pointcut-ref:切入点名字 --><aop:advisor advice-ref="txadvice" pointcut-ref="pt" /></aop:config></beans>
5:测试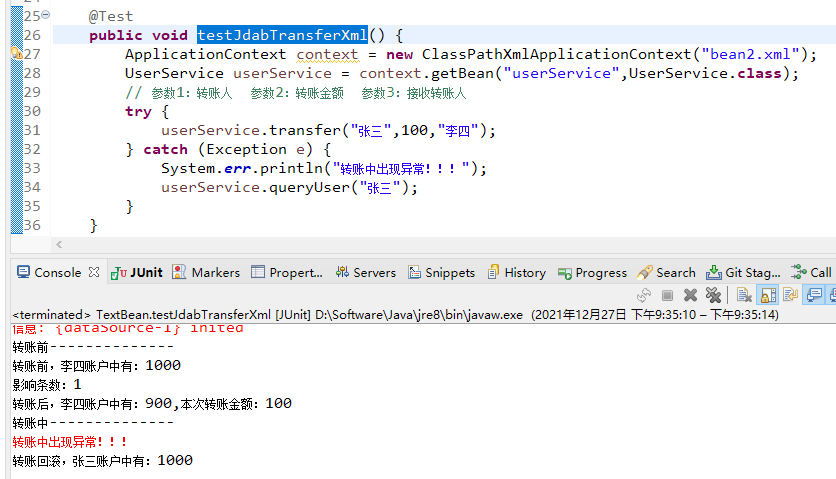

若有收获,就点个赞吧
0 人点赞
