SonarQube简介
SonarQube是一种自动代码审查工具,用于检测代码中的错误,漏洞和代码异味。它可以与您现有的工作流程集成,以便在项目分支和拉取请求之间进行连续的代码检查。
SonarQube平台主要有以下四个组件组成:
1.Web Server2.SonarQube Database3.SonarQube Plugin4.Code analysis Scanners
SonarQube支持分析的语言有如下27种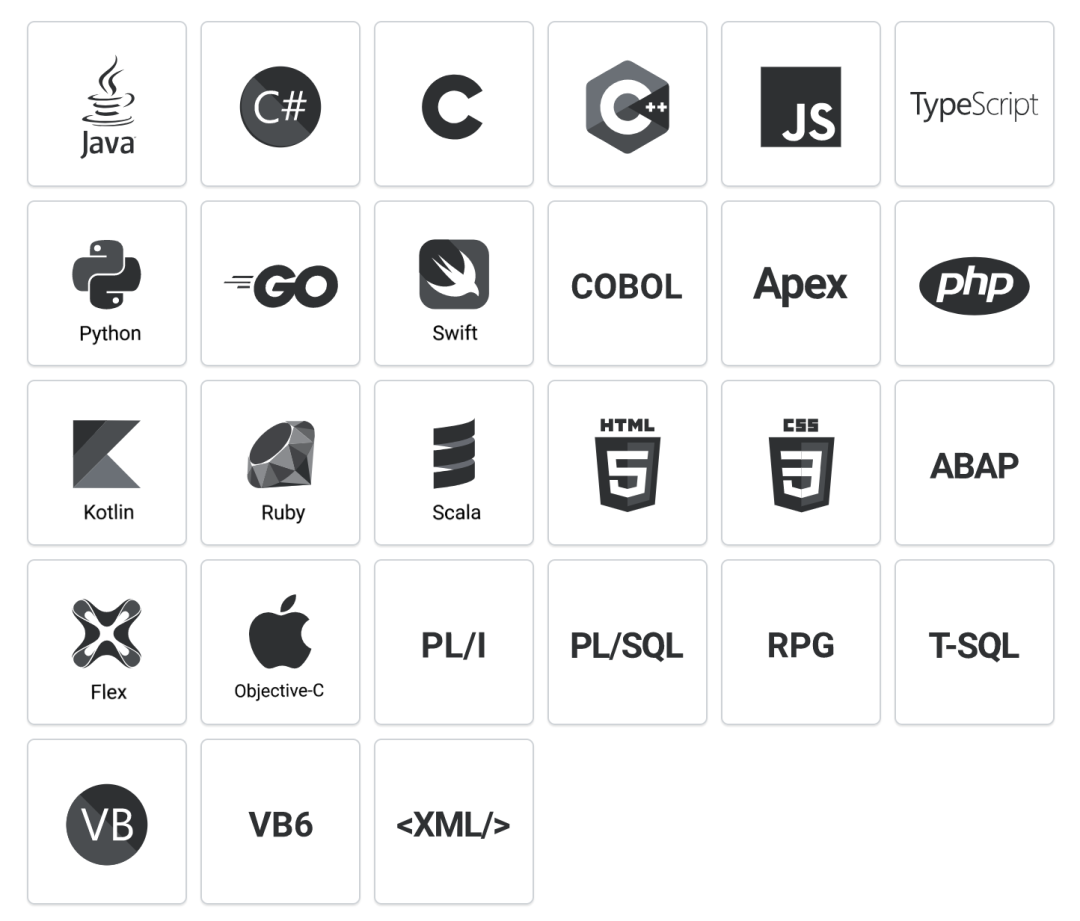
代码质量七宗罪
如果被SonarQube扫描有问题的代码,基本上都符合以下标准:
- 1.编码规范:是否遵循了编码规范,遵循了最佳实践。
- 2.潜在的BUG:可能在最坏的情况下出现问题的代码,以及存在安全漏洞的代码。
- 3.文档和注释:过少(缺少必要信息)、过多(没有信息量)、过时的文档或注释。
- 4.重复代码:违反了Don’tRepeat Yourself原则。
- 5.复杂度:代码结构太复杂(如圈复杂度高),难以理解、测试和维护。
- 6.测试覆盖率:编写单元测试,特别是针对复杂代码的测试覆盖是否足够。
- 7.设计与架构:是否高内聚、低耦合,依赖最少。
安装SonarQube先决条件
硬件需求:
1.SonarQube服务于小型企业至少需要2GB的RAM才能运行。
2.磁盘空间取决于你使用SonarQube分析的代码量。
3.SonarQube必须安装在读写性能较好的磁盘上,最重要的是存储数据的目录中包含了Elasticsearch的索引,当 服务器启动并运行的时候,将会在该索引上进行大量I/O操作,因此读写性能较高的磁盘将对SonarQube分析 速率较好。
4.SonarQube不支持32位操作系统。
JVM需求
SonarQube目前只支持OpenJDK11或者Oracle JRE11版本,代码扫描仪支持8或者11的版本。

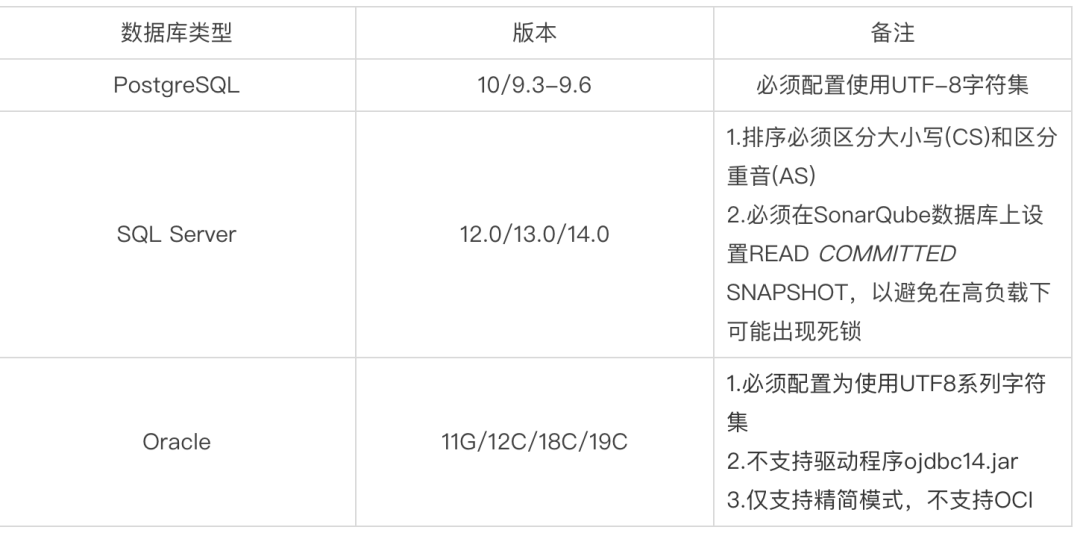
数据库需求
系统需求
如果你运行在LInux服务器上,必须确保以下指标。
• vm.max_map_count 要大于或等于262144
• fs.file-max 要大于或等于65536
• 运行SonarQube的用户至少可以打开65536个文件描述符
• 运行SonarQube的用户可以打开至少4096个线程
部署环境
| IP | 运行用户 | 软件版本 | 应用端口 |
|---|---|---|---|
| 10.0.0.76 | sonarqube | SonarQube 8.0 | 9000 |
| 10.0.0.76 | sonarqube | PostgreSql 13 | 5432 |
| 10.0.0.76 | sonarqube | Scanners 4.0 | |
| 10.0.0.76 | sonarqube | JAVA 11 | |
| 10.0.0.76 | sonarqube | Nodejs 10+ | |
| 10.0.0.76 | sonarqube | Elasticsearch(SonarQube内置) | 9100 |
修改系统指标
1.修改内核指标~]# sysctl -w vm.max_map_count=262144~]# sysctl -w fs.file-max=65536~]# cat <<EOF >> /etc/sysctl.confvm.max_map_count=262144fs.file-max=65536EOF2.创建用户并设置文件及进程打开数~]# useradd -d /home/sonarqube sonarqube~]# cat << EOF >> /etc/security/limits.confsonarqube - nofile 65536sonarqube - nproc 4096EOF3.切换到sonarqube用户验证设置~]# su - sonarqube~]$ ulimit -n65536~]$ ulimit -u4096~]$ sysctl vm.max_map_countvm.max_map_count = 262144~]$ sysctl fs.file-maxfs.file-max = 65536
部署PostgreSQL数据库
本地环境基于:CentOS Linux release 7.9.2009 (Core)
1.安装PostgreSQL yum源
~]# yum -y install unzip git~]# sudo yum -y install https://download.postgresql.org/pub/repos/yum/reporpms/EL-7-x86_64/pgdg-redhat-repo-latest.noarch.rpm~]# yum list | grep postgresql
2.安装PostgreSQL13
~]# yum -y install postgresql13-server
3.初始化PostgreSQL数据库并设置位开机启动
~]# sudo /usr/pgsql-13/bin/postgresql-13-setup initdb
Initializing database ... OK

~]# sudo systemctl start postgresql-13
~]# sudo systemctl enable postgresql-13
Created symlink from /etc/systemd/system/multi-user.target.wants/postgresql-13.service to /usr/lib/systemd/system/postgresql-13.service.
PostgreSQL默认监听5432端口 PostgreSQL默认数据存储路径:/var/lib/pgsql/13/data/
4.修改postgres的监听地址,默认只能为本地连接
# 配置文件:/var/lib/pgsql/13/data/postgresql.conf
~]# echo "listen_addresses = '*'" >> /var/lib/pgsql/13/data/postgresql.conf
5.允许所有地址 来连接该数据库 编辑pg_hba.conf文件,然后到最后,把认证模式改为如下,这个地方是个坑,务必与下方改为一致
源文件内容
# "local" is for Unix domain socket connections only
local   all             all                                     peer
# IPv4 loxcal connections:
host    all             all             127.0.0.1/32            scram-sha-256
# IPv6 local connections:
host    all             all             ::1/128                 scram-sha-256
# Allow replication connections from localhost, by a user with the
# replication privilege.
local   replication     all                                     peer
host    replication     all             127.0.0.1/32            scram-sha-256
host    replication     all             ::1/128                 scram-sha-256


~]# vim /var/lib/pgsql/13/data/pg_hba.conf
...
local   all             all                                     trust
host    all             all             127.0.0.1/32            md5
host    all             all             0.0.0.0/0               md5
host    all             all             ::1/128                 trust
local   replication     all                                     peer
host    replication     all             127.0.0.1/32            trust
host    replication     all             ::1/128                 trust
6.重启postgresql数据库
~]# sudo systemctl restart postgresql-13
7.为SonarQube创建数据库并授权
修改密码
~]# sudo passwd postgres
Changing password for user postgres.
New password:
BAD PASSWORD: The password fails the dictionary check - it is too simplistic/systematic
Retype new password:
passwd: all authentication tokens updated successfully.

~]# su - postgres
-bash-4.2$ psql
psql (9.2.24, server 13.2)
WARNING: psql version 9.2, server version 13.0.
         Some psql features might not work.
Type "help" for help.

# 创建sonarqube数据库角色
postgres=# create user sonarqube with password '123456';
CREATE ROLE

# 创建sonarqube数据库
postgres=# create database sonarqube owner sonarqube;
CREATE DATABASE

# 创建sonarqube数据库
postgres=# grant all on database sonarqube to sonarqube;
GRANT

# 退出数据库
postgres=# \q
-bash-4.2$ exit
logout
8.连接数据库用户测试
~]# psql --username=sonarqube -h localhost
psql (9.2.24, server 13.2)
WARNING: psql version 9.2, server version 13.0.
         Some psql features might not work.
Type "help" for help.

sonarqube=> \q

~]# psql --username=sonarqube -h 127.0.0.1
Password for user sonarqube:
psql (9.2.24, server 13.2)
WARNING: psql version 9.2, server version 13.0.
         Some psql features might not work.
Type "help" for help.

sonarqube=> \q

~]# psql --username=sonarqube -h 10.0.0.76
Password for user sonarqube:
psql (9.2.24, server 13.2)
WARNING: psql version 9.2, server version 13.0.
         Some psql features might not work.
Type "help" for help.

sonarqube=> \q
部署JAVA环境
Oracle JRE下载地址:https://www.oracle.com/java/technologies/javase-jdk11-downloads.html 在此选择 SonarQube、Scanners和Elasticsearch使用 Oracle JRE 的 Java 11版本 服务器系统使用OpenJDK的8版本
华为云镜像站:https://repo.huaweicloud.com/openjdk/
1.Oracle JRE下载完成后上传服务器
~]# wget https://repo.huaweicloud.com/openjdk/11.0.2/openjdk-11.0.2_linux-x64_bin.tar.gz
~]# tar xf openjdk-11.0.2_linux-x64_bin.tar.gz -C /usr/local/
~]# /usr/local/jdk-11.0.2/bin/
jaotc        javap        jhsdb        jmod         jstatd       serialver
jar          jcmd         jimage       jps          keytool      unpack200
jarsigner    jconsole     jinfo        jrunscript   pack200
java         jdb          jjs          jshell       rmic
javac        jdeprscan    jlink        jstack       rmid
javadoc      jdeps        jmap         jstat        rmiregistry
~]# /usr/local/jdk-11.0.2/bin/java --version
openjdk 11.0.2 2019-01-15
OpenJDK Runtime Environment 18.9 (build 11.0.2+9)
OpenJDK 64-Bit Server VM 18.9 (build 11.0.2+9, mixed mode)
2.系统安装OpenJDK
~]# yum install java-1.8.0-openjdk.x86_64 java-1.8.0-openjdk-devel.x86_64 -y
~]# java -version
openjdk version "1.8.0_242"
OpenJDK Runtime Environment (build 1.8.0_242-b08)
OpenJDK 64-Bit Server VM (build 25.242-b08, mixed mode)
部署SonarQube
下载地址:https://binaries.sonarsource.com/Distribution/sonarqube/
1.下载SonarQuibe并解压
~]# wget https://binaries.sonarsource.com/Distribution/sonarqube/sonarqube-8.0.zip

unzip -o sonarqube-8.0.zip -d /usr/local/
2.修改SonarQuibe连接数据库
~]# vim /usr/local/sonarqube-8.0/conf/sonar.properties
...
sonar.jdbc.username=sonarqube
sonar.jdbc.password=123456
sonar.jdbc.url=jdbc:postgresql://localhost/sonarqube
3.添加JDBC数据库驱动程序 除Oracle除外需要驱动程序,其它数据库已经内嵌了JDBC驱动
4.修改SonarQube及Elasticsearch使用的JAVA路径
vim /usr/local/sonarqube-8.0/conf/wrapper.conf
wrapper.java.command=/usr/local/jdk-11.0.2/bin/java
5.修改Elasticsearch数据存储路径
~]# vim /usr/local/sonarqube-8.0/conf/sonar.properties
sonar.path.data=/data/elastic/data
sonar.path.temp=/data/elastic/temp
6.修改文件属性
~]# mkdir -p /data/elastic/{data,temp}
~]# chown -Rf sonarqube.sonarqube /data/elastic/*
~]# chown -Rf sonarqube.sonarqube /usr/local/sonarqube-8.0
7.修改监听地址及端口 默认监听所有地址和9000端口
~]# vim /usr/local/sonarqube-8.0/conf/sonar.properties
sonar.web.host=0.0.0.0
sonar.web.port=9000
8.启动SonarQube服务
#不能以root用户启动
~]# su - sonarqube -c "/usr/local/sonarqube-8.0/bin/linux-x86-64/sonar.sh start"
9.查看程序是否运行
~]# ps -ef|grep sonarqube
~]# ss -anplt | grep java

#如果启动出错,请检查日志
~]# ls /usr/local/sonarqube-8.0/logs/
access.log  es.log  README.txt  sonar.log  web.log
10.浏览器访问并登录修改语言:ip:9000
登录,默认帐号密码为admin/admin
安装中文插件:chinese pack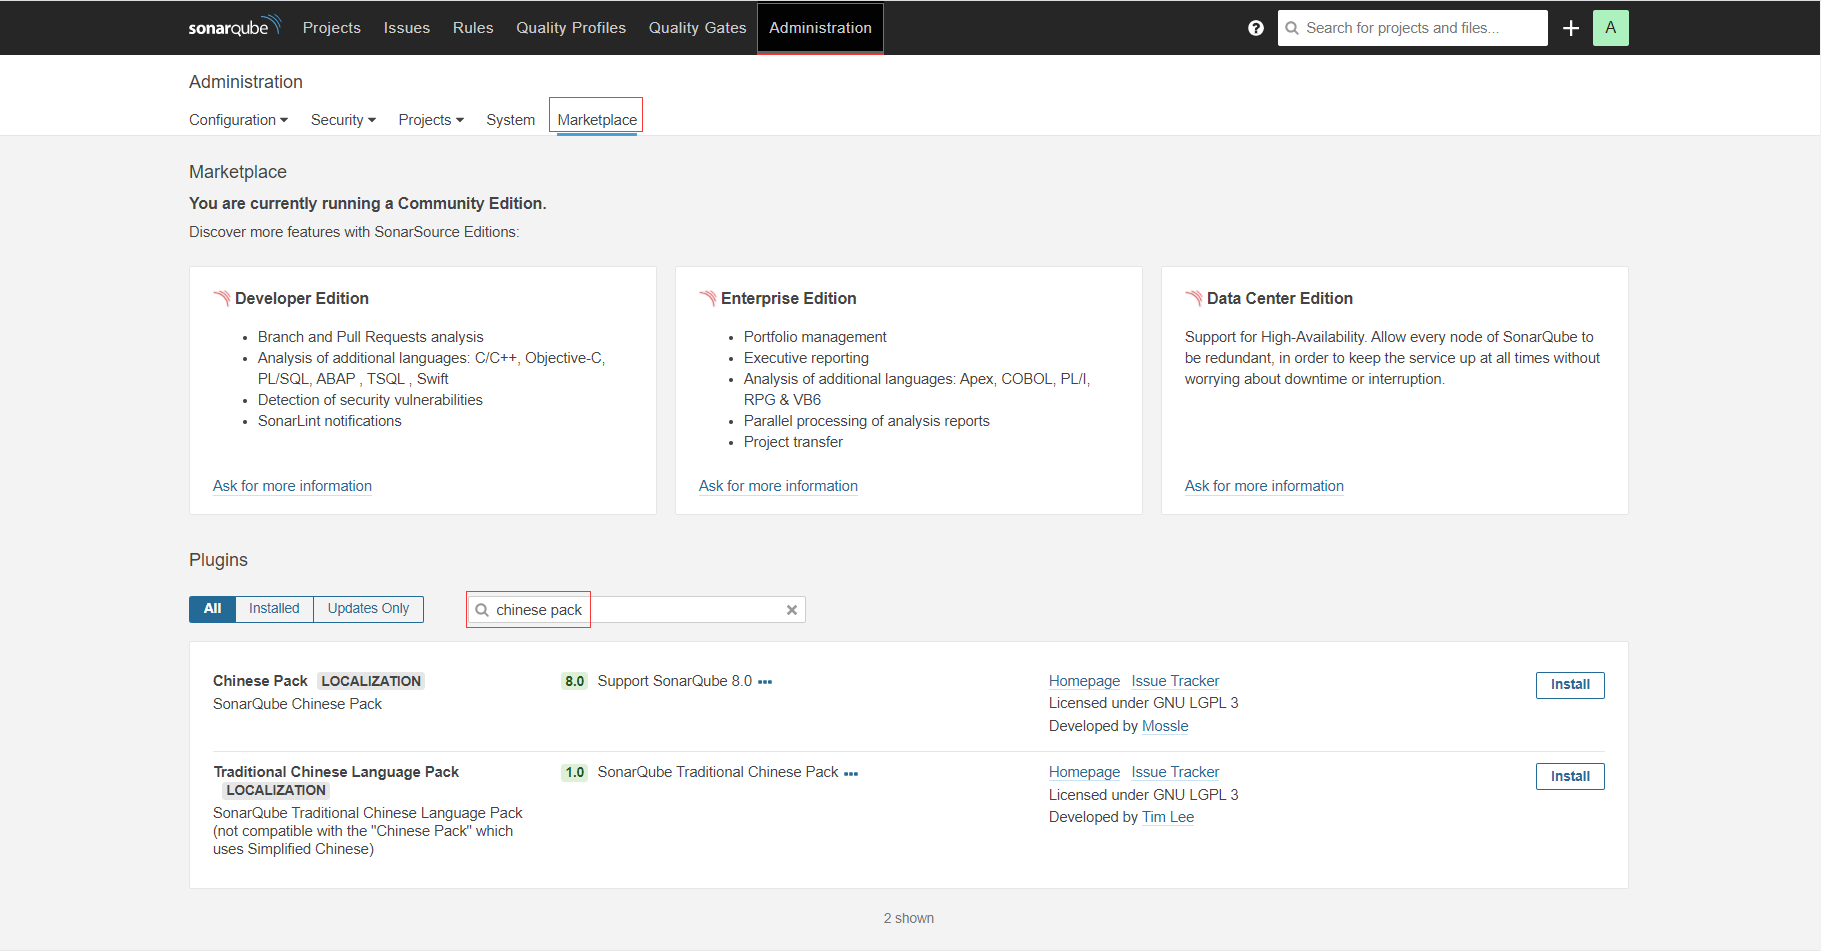
安装成功后点击重启服务器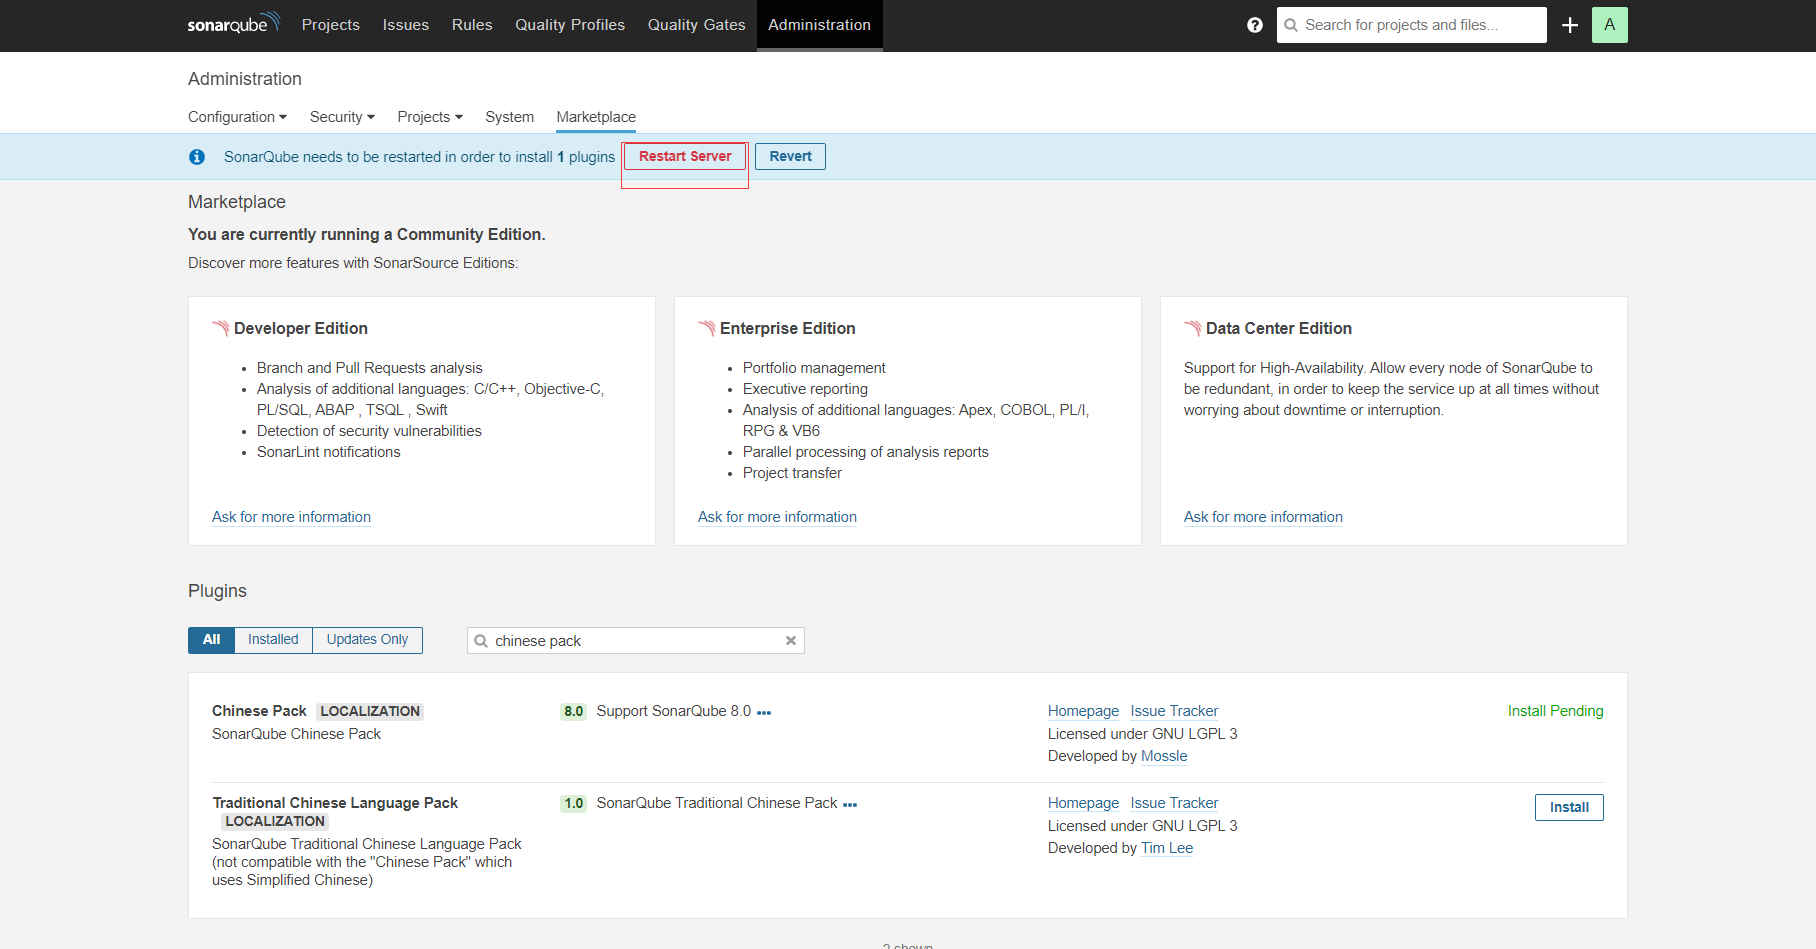
重启成功后需要重新登录,进入主页,界面皆为中文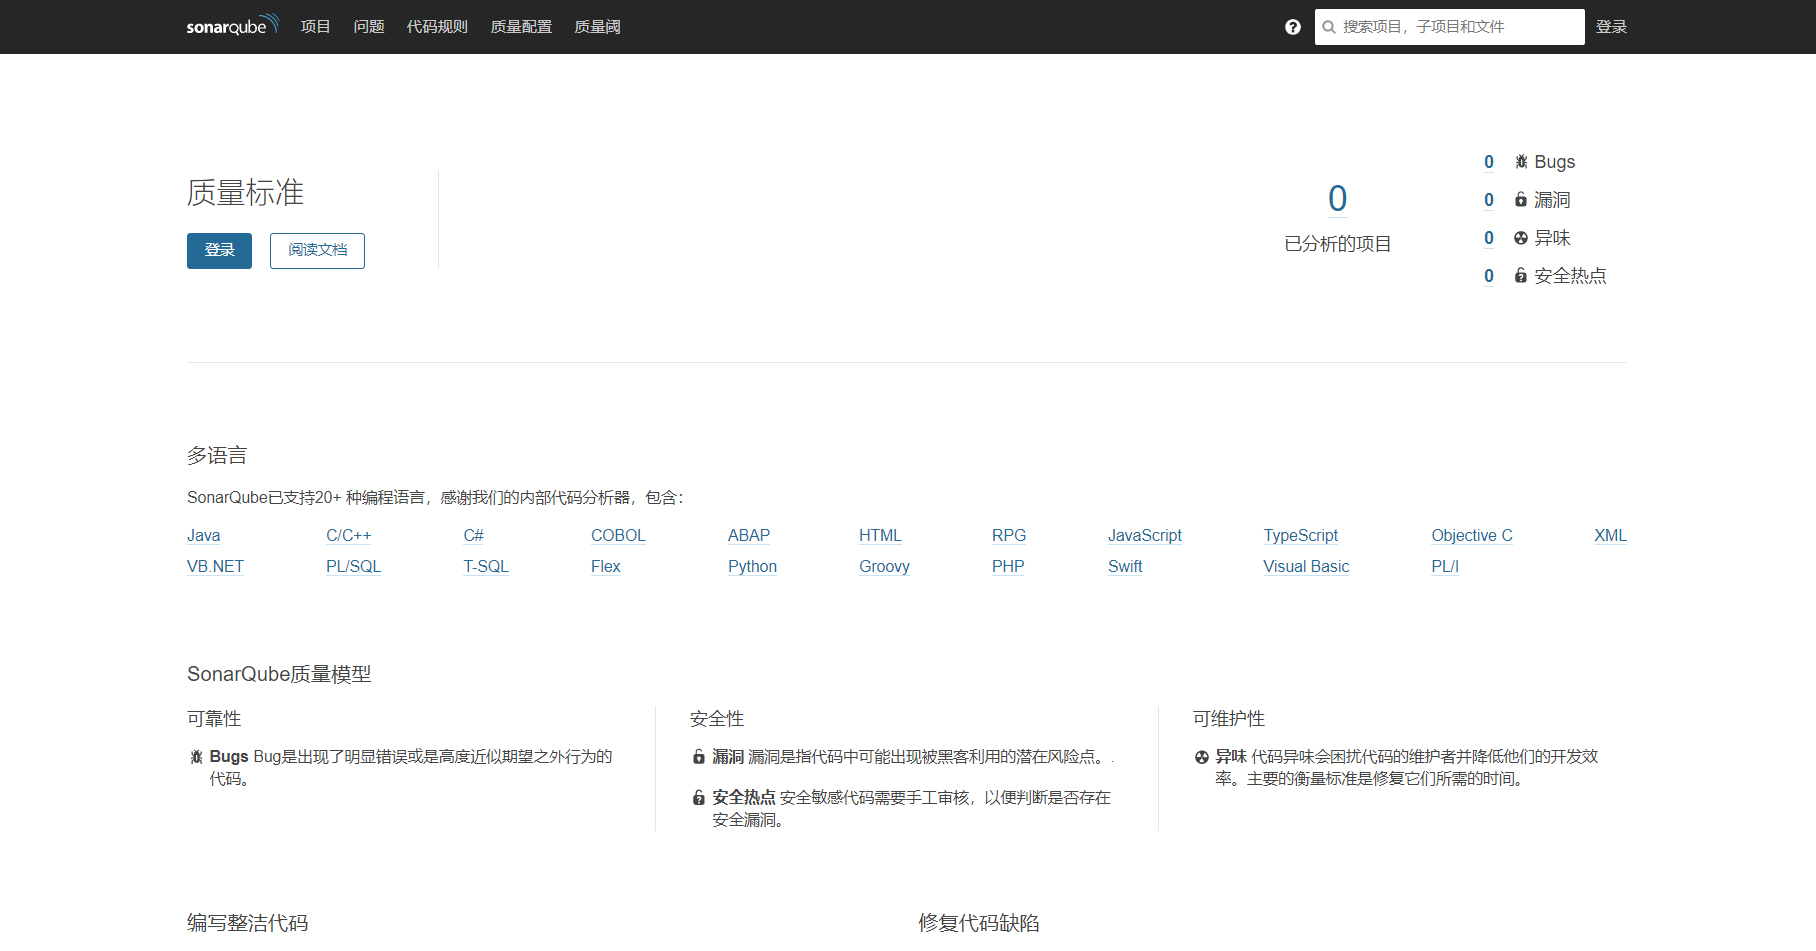
部署Nodejs环境
~]# curl --silent --location https://rpm.nodesource.com/setup_10.x | sudo bash
~]# yum clean all && yum makecache
~]# yum install nodejs.x86_64 -y
~]# node --version
v10.24.0
~]# npm -v
6.14.11
质量扫描插件sonar-scanner
下载地址:https://binaries.sonarsource.com/Distribution/sonar-scanner-cli/
1.下载质量扫描仪
~]# wget https://binaries.sonarsource.com/Distribution/sonar-scanner-cli/sonar-scanner-cli-4.6.0.2311-linux.zip
~]# unzip -o sonar-scanner-cli-4.6.0.2311-linux.zip -d /usr/local/
2.修改配置文件
~]# mv /usr/local/sonar-scanner-4.6.0.2311-linux /usr/local/sonar-
scanner
~]# vim /usr/local/sonar-scanner/conf/sonar-scanner.properties
...
sonar.host.url=http://localhost:9000                    #指定SonarQube的地址
sonar.sourceEncoding=UTF-8                              #指定编码
3.使用方法 在我们要扫描项目的根目录中创建文件 sonar-project.properties
内容如下:
sonar.projectKey=v2.3.8          #项目中给定的唯一值,可自定义,不能与其它项目中的唯一值一致
sonar.projectName=myapp          #显示的名称,sonar-scanner扫描项目后将扫描结果传入到SonarQube中,就是通过此值来显示名称
sonar.projectVersion=1.0
sonar.sources=.                  #项目分析的位置 . 表示当前目录开始分析
sonar.java.binaries=.

# Encoding of the source code. Default is default system encoding
sonar.sourceEncoding=UTF-8
4.样例扫描
1.克隆官方给予提供的案例
~]# mkdir -p /data/git/demo
~]# cd /data/git/demo/
demo]# git init
Initialized empty Git repository in /data/git/demo/.git/
demo]# git clone https://github.com/SonarSource/sonar-scanning-examples.git
Cloning into 'sonar-scanning-examples'...
remote: Enumerating objects: 185, done.
remote: Counting objects: 100% (185/185), done.
remote: Compressing objects: 100% (113/113), done.
remote: Total 916 (delta 39), reused 145 (delta 21), pack-reused 731
Receiving objects: 100% (916/916), 466.20 KiB | 122.00 KiB/s, done.
Resolving deltas: 100% (275/275), done.


2.添加sonar-project.properties文件
demo]# vim sonar-scanning-examples/sonarqube-scanner-maven/sonar-project.properties
sonar.projectKey=v1.0
sonar.projectName=test
sonar.projectVersion=1.0
sonar.sources=.
sonar.java.binaries=.
sonar.sourceEncoding=UTF-8

3.开始扫描
demo]# cd sonar-scanning-examples/sonarqube-scanner-maven
sonarqube-scanner-maven]# /usr/local/sonar-scanner/bin/sonar-scanner
INFO: Scanner configuration file: /usr/local/sonar-scanner/conf/sonar-scanner.properties
INFO: Project root configuration file: /data/git/demo/sonar-scanning-examples/sonarqube-scanner-maven/sonar-project.properties
INFO: SonarScanner 4.6.0.2311
INFO: Java 11.0.3 AdoptOpenJDK (64-bit)
INFO: Linux 3.10.0-1160.11.1.el7.x86_64 amd64
INFO: User cache: /root/.sonar/cache
INFO: Scanner configuration file: /usr/local/sonar-scanner/conf/sonar-scanner.properties
INFO: Project root configuration file: /data/git/demo/sonar-scanning-examples/sonarqube-scanner-maven/sonar-project.properties
INFO: Analyzing on SonarQube server 8.0.0
INFO: Default locale: "en_US", source code encoding: "UTF-8"
INFO: Load global settings
INFO: Load global settings (done) | time=255ms
INFO: Server id: 86E1FA4D-AXfW-5BxpIHExRweR44i
INFO: User cache: /root/.sonar/cache
INFO: Load/download plugins
INFO: Load plugins index
INFO: Load plugins index (done) | time=130ms
INFO: Plugin [l10nzh] defines 'l10nen' as base plugin. This metadata can be removed from manifest of l10n plugins since version 5.2.
INFO: Load/download plugins (done) | time=2253ms
INFO: Process project properties
INFO: Process project properties (done) | time=10ms
INFO: Execute project builders
INFO: Execute project builders (done) | time=5ms
INFO: Project key: v1.0
INFO: Base dir: /data/git/demo/sonar-scanning-examples/sonarqube-scanner-maven
INFO: Working dir: /data/git/demo/sonar-scanning-examples/sonarqube-scanner-maven/.scannerwork
INFO: Load project settings for component key: 'v1.0'
INFO: Load quality profiles
INFO: Load quality profiles (done) | time=265ms
INFO: Load active rules
INFO: Load active rules (done) | time=3132ms
INFO: Indexing files...
INFO: Project configuration:
INFO: 21 files indexed
INFO: 0 files ignored because of scm ignore settings
INFO: Quality profile for java: Sonar way
INFO: Quality profile for kotlin: Sonar way
INFO: Quality profile for xml: Sonar way
INFO: ------------- Run sensors on module test
INFO: Load metrics repository
INFO: Load metrics repository (done) | time=115ms
WARNING: An illegal reflective access operation has occurred
WARNING: Illegal reflective access by net.sf.cglib.core.ReflectUtils$1 (file:/root/.sonar/cache/866bb1adbf016ea515620f1aaa15ec53/sonar-javascript-plugin.jar) to method java.lang.ClassLoader.defineClass(java.lang.String,byte[],int,int,java.security.ProtectionDomain)
WARNING: Please consider reporting this to the maintainers of net.sf.cglib.core.ReflectUtils$1
WARNING: Use --illegal-access=warn to enable warnings of further illegal reflective access operations
WARNING: All illegal access operations will be denied in a future release
INFO: Sensor JavaSquidSensor [java]
INFO: Configured Java source version (sonar.java.source): none
INFO: JavaClasspath initialization
WARN: Bytecode of dependencies was not provided for analysis of source files, you might end up with less precise results. Bytecode can be provided using sonar.java.libraries property.
INFO: JavaClasspath initialization (done) | time=20ms
INFO: JavaTestClasspath initialization
INFO: JavaTestClasspath initialization (done) | time=0ms
INFO: Java Main Files AST scan
INFO: 9 source files to be analyzed
INFO: Load project repositories
INFO: Load project repositories (done) | time=62ms
INFO: Java Main Files AST scan (done) | time=1613ms
INFO: Java Test Files AST scan
INFO: 0 source files to be analyzed
INFO: Java Test Files AST scan (done) | time=5ms
INFO: Sensor JavaSquidSensor [java] (done) | time=2658ms
INFO: Sensor JaCoCo XML Report Importer [jacoco]
INFO: 9/9 source files have been analyzed
INFO: Sensor JaCoCo XML Report Importer [jacoco] (done) | time=16ms
INFO: Sensor Kotlin Sensor [kotlin]
INFO: 2 source files to be analyzed
INFO: 0/0 source files have been analyzed
INFO: Sensor Kotlin Sensor [kotlin] (done) | time=931ms
INFO: Sensor SurefireSensor [java]
INFO: 2/2 source files have been analyzed
INFO: parsing [/data/git/demo/sonar-scanning-examples/sonarqube-scanner-maven/target/surefire-reports]
INFO: Sensor SurefireSensor [java] (done) | time=8ms
INFO: Sensor JaCoCoSensor [java]
INFO: Sensor JaCoCoSensor [java] (done) | time=12ms
INFO: Sensor JavaXmlSensor [java]
INFO: 6 source files to be analyzed
INFO: Sensor JavaXmlSensor [java] (done) | time=596ms
INFO: Sensor HTML [web]
INFO: 6/6 source files have been analyzed
INFO: Sensor HTML [web] (done) | time=14ms
INFO: Sensor XML Sensor [xml]
INFO: 6 source files to be analyzed
INFO: Sensor XML Sensor [xml] (done) | time=357ms
INFO: 6/6 source files have been analyzed
INFO: ------------- Run sensors on project
INFO: Sensor Zero Coverage Sensor
INFO: Sensor Zero Coverage Sensor (done) | time=22ms
INFO: Sensor Java CPD Block Indexer
INFO: Sensor Java CPD Block Indexer (done) | time=34ms
INFO: SCM Publisher SCM provider for this project is: git
INFO: SCM Publisher 17 source files to be analyzed
INFO: SCM Publisher 17/17 source files have been analyzed (done) | time=593ms
INFO: CPD Executor 11 files had no CPD blocks
INFO: CPD Executor Calculating CPD for 0 files
INFO: CPD Executor CPD calculation finished (done) | time=0ms
INFO: Analysis report generated in 139ms, dir size=110 KB
INFO: Analysis report compressed in 107ms, zip size=39 KB
INFO: Analysis report uploaded in 2400ms
INFO: ANALYSIS SUCCESSFUL, you can browse http://localhost:9000/dashboard?id=v1.0
INFO: Note that you will be able to access the updated dashboard once the server has processed the submitted analysis report
INFO: More about the report processing at http://localhost:9000/api/ce/task?id=AXfXvaP0mkMla8OkZUd3
INFO: Analysis total time: 15.944 s
INFO: ------------------------------------------------------------------------
INFO: EXECUTION SUCCESS
INFO: ------------------------------------------------------------------------
INFO: Total time: 21.522s
INFO: Final Memory: 16M/54M
INFO: ------------------------------------------------------------------------
SonarQube Web页面查看扫描结果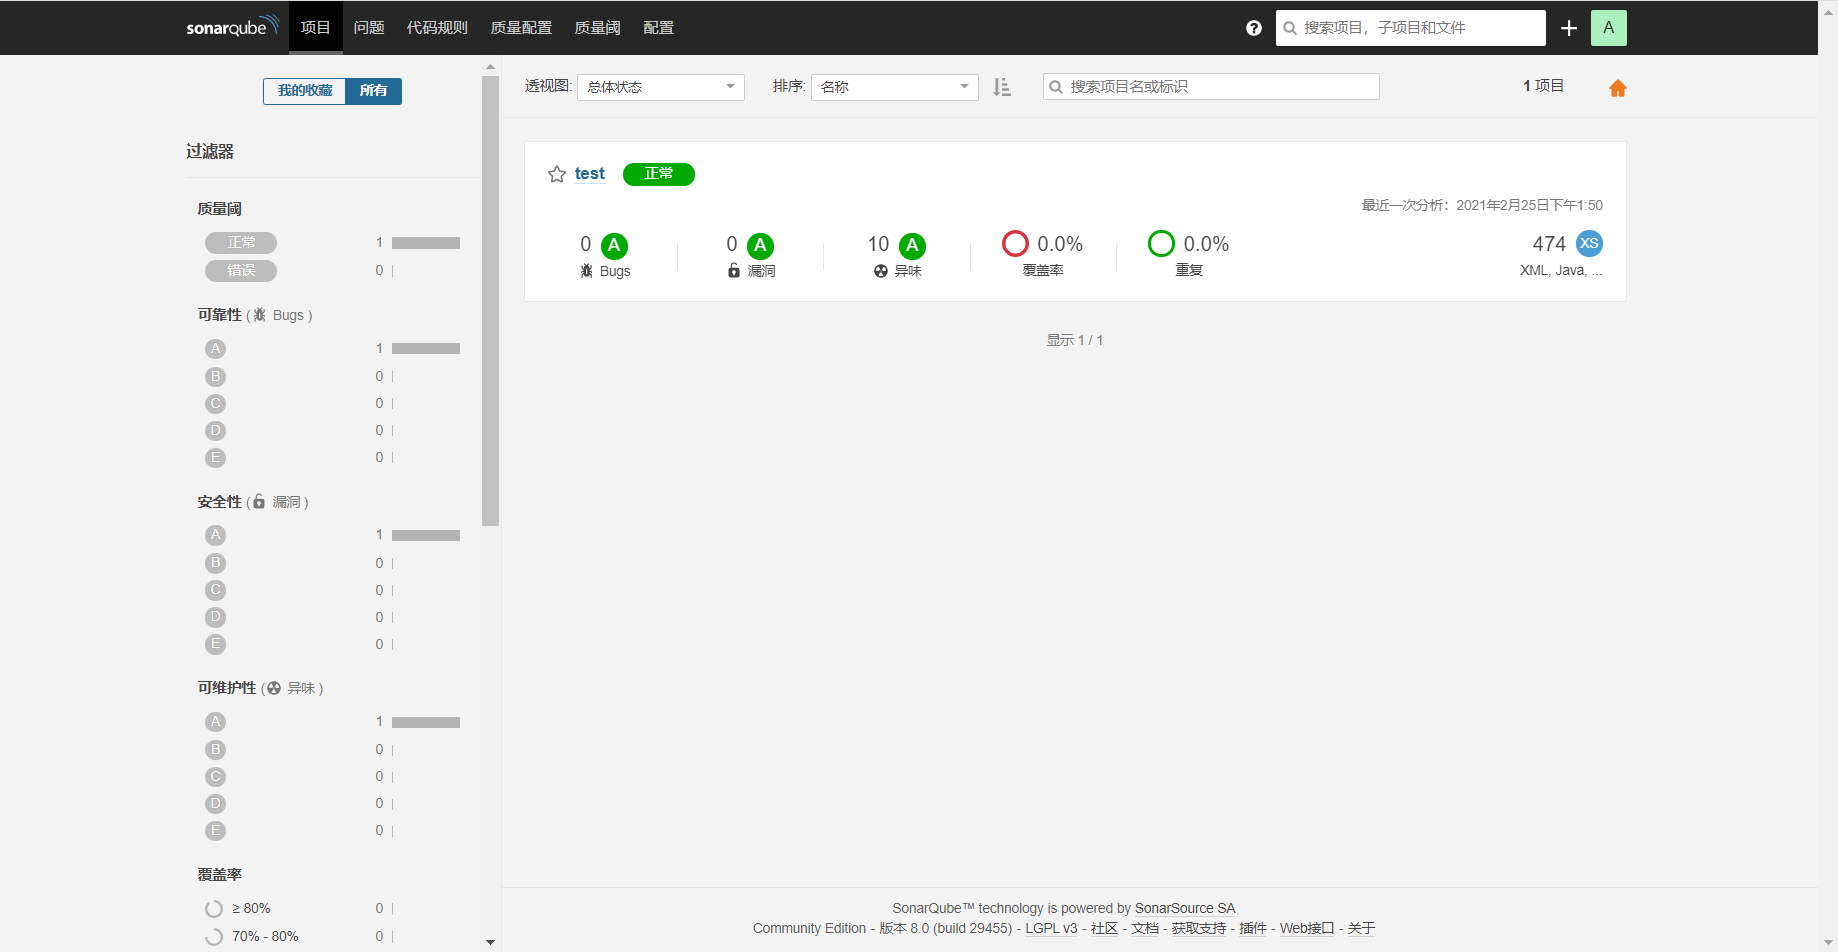
SonarQube设置邮件提醒
配置-通用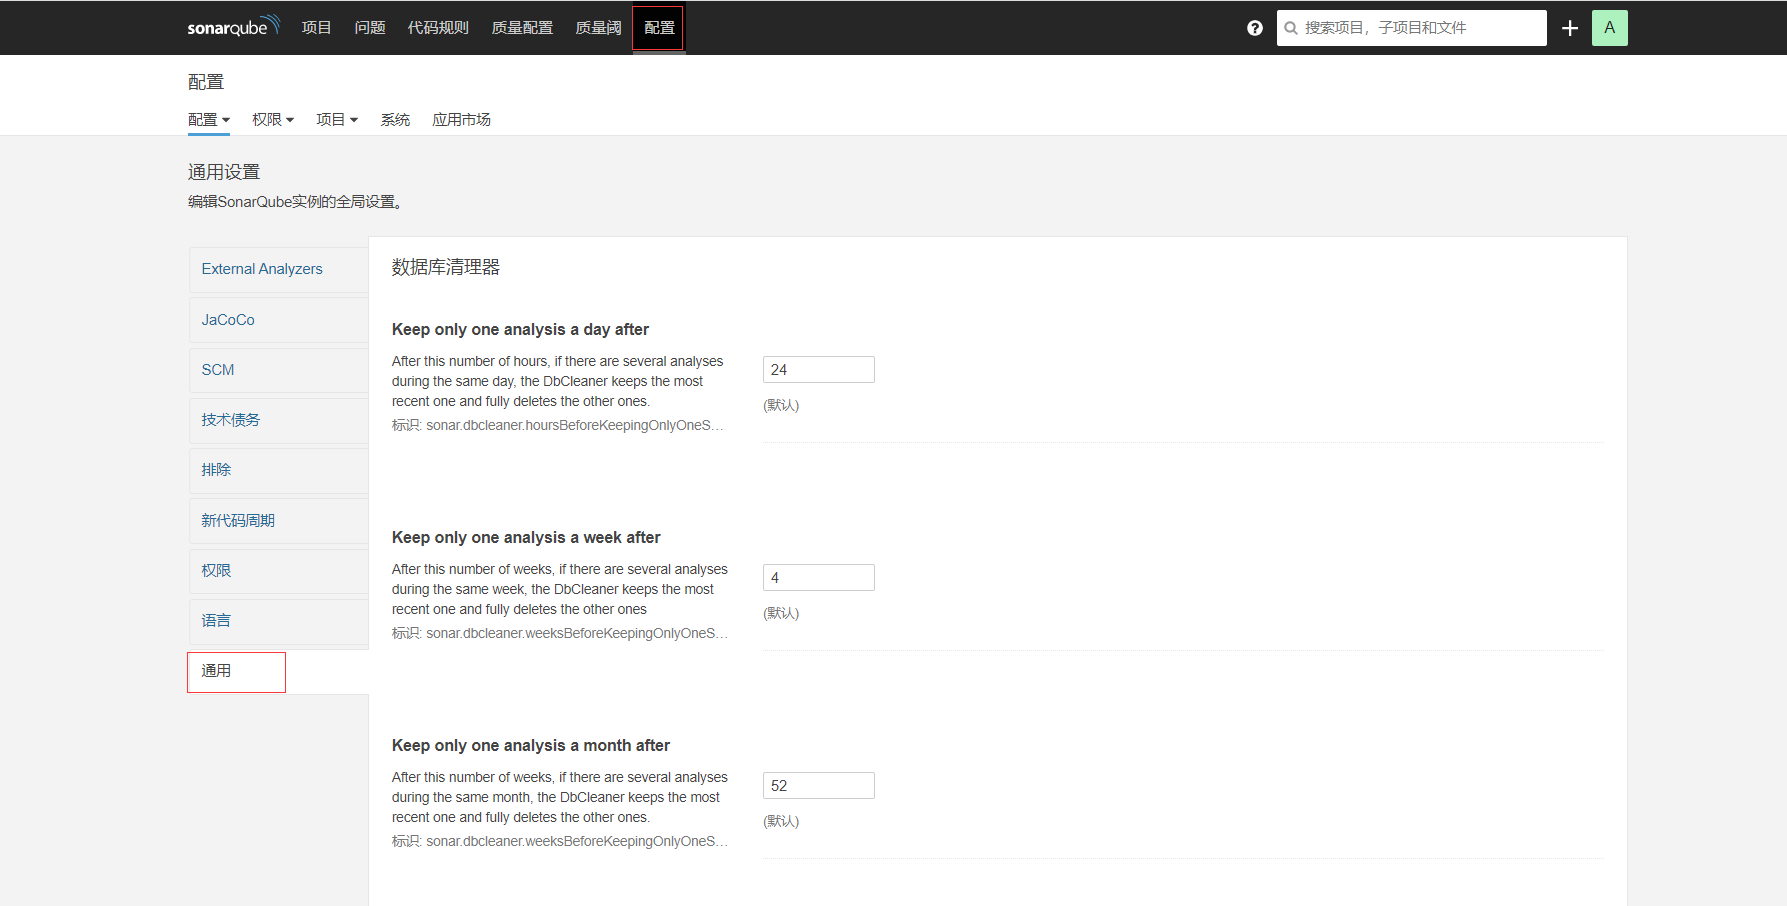
找到邮件,然后进行相关设置
相关设置如下:
- Email prefix: 邮件主题
- From address: 发件人邮箱地址
- From name: 发件人
- Secure connection: 默认
- SMTP host: SMTP邮件服务器地址
- SMTP password: 邮箱授权码
- SMTP port: 邮箱服务器端口
- SMTP username: 邮箱名字
设置项目提醒
1、我的账号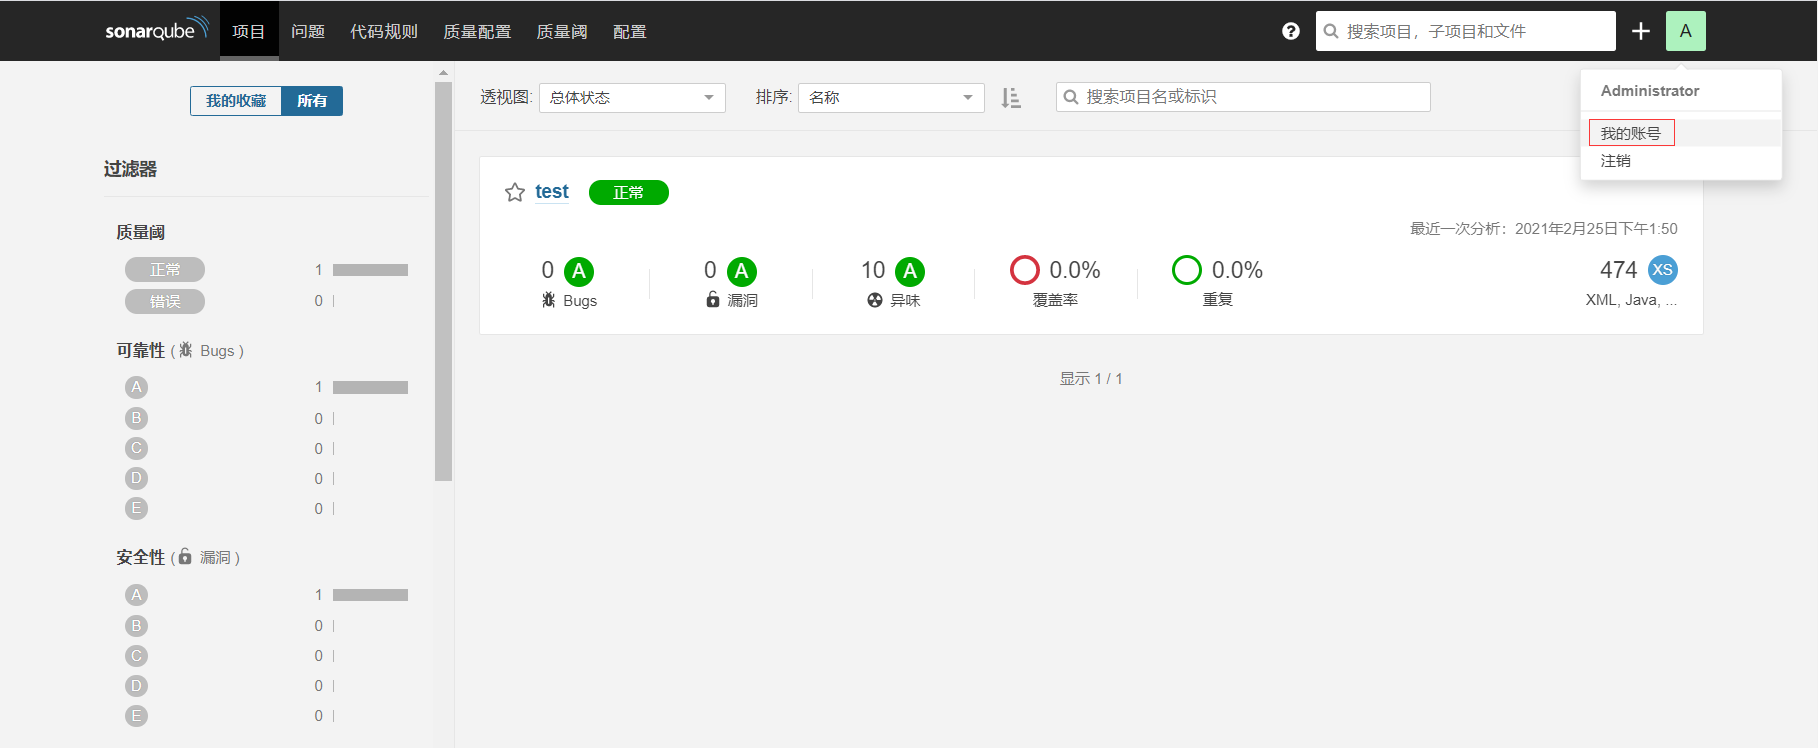
2、进入提醒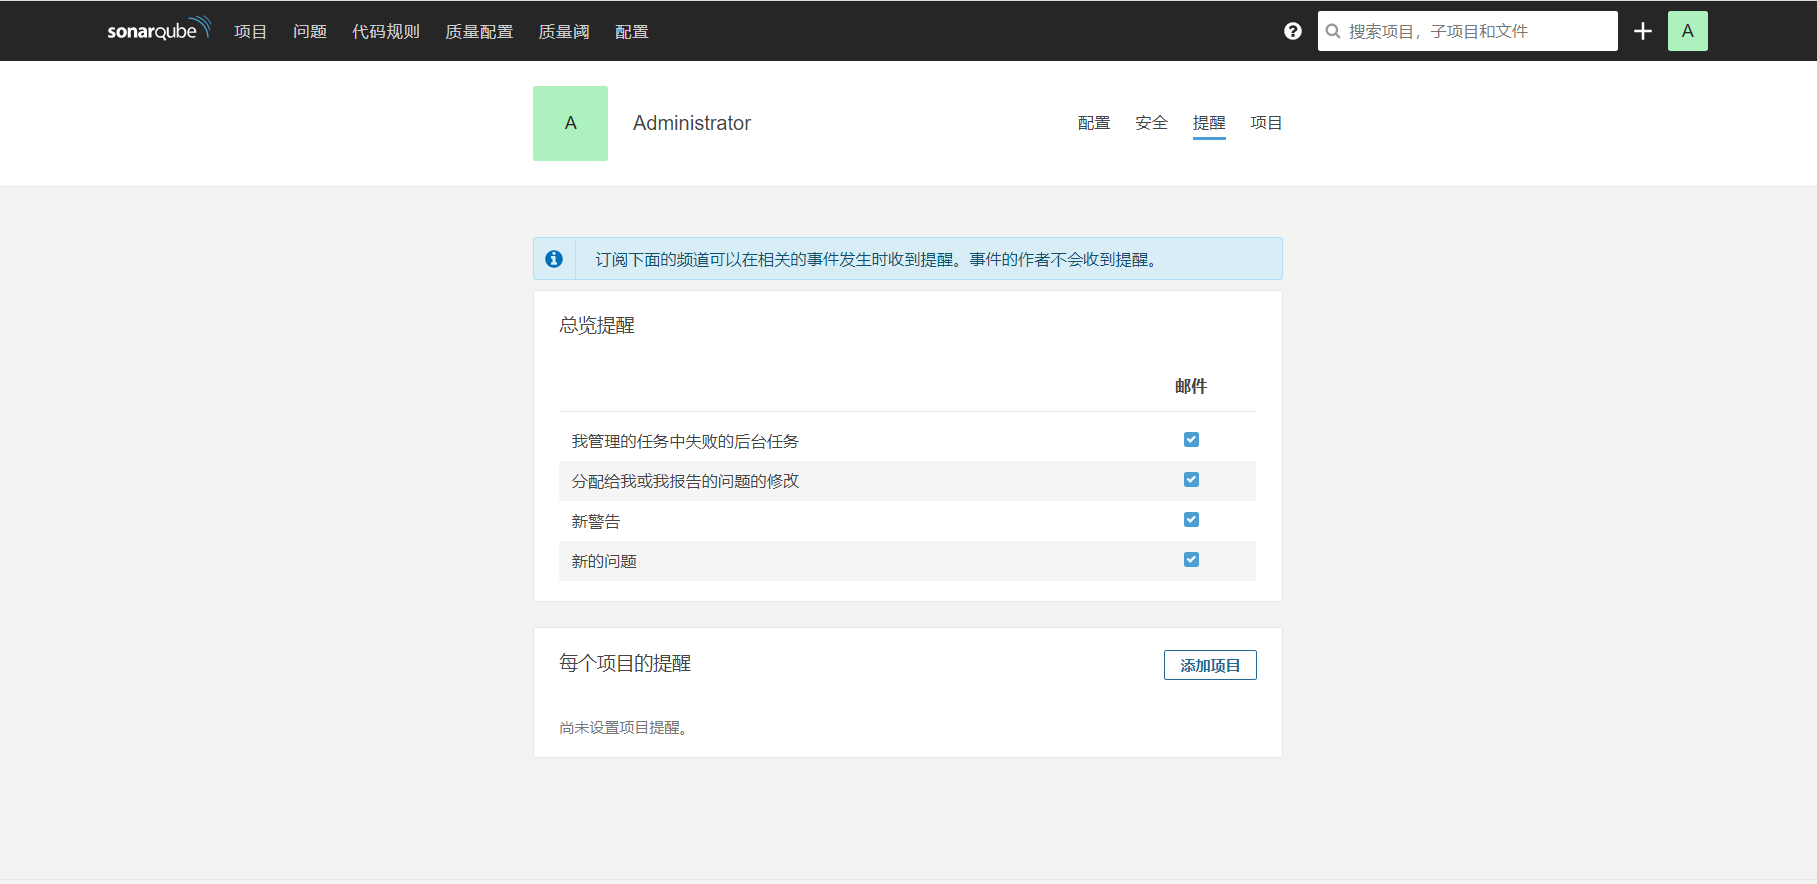
添加项目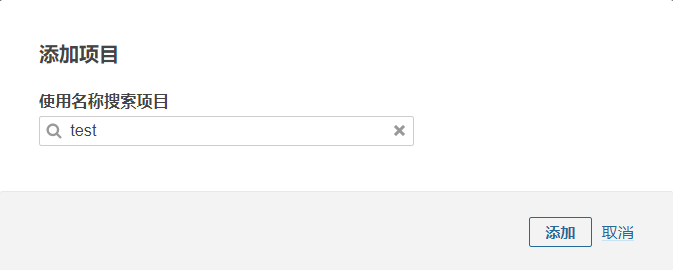
设置邮件提醒规则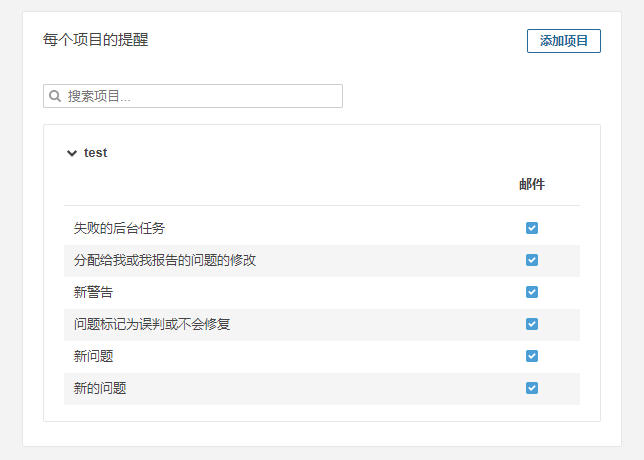
*

若有收获,就点个赞吧
0 人点赞
