说明
SpringWeb 提供了一个 RestTemplate 模板工具类,对基于 Http 的客户端进行了封装,并且实现了对象与 json 的序列化和反序列化,非常方便。RestTemplate 并没有限定 Http 的客户端类型,而是进行了抽象,目前常用的3种都有支持
- HttpClient
- OkHttp
- JDK原生的URLConnection(默认的)
demo
既然RestTemplate的目的是实现远程调用,那么就需要有一个服务的提供者,和一个服务的调用者,两者必须是独立运行的服务。
但是为了方便项目的学习,我们会创建一个聚合项目,然后把服务的提供者、调用者作为其中的两个模块。创建父工程
创建一个父工程,用来管理依赖,聚合子工程
此父工程是用来管理子工程的,所以可以删除src目录,目录结构如下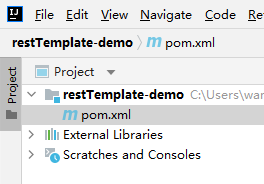
在pom文件中引入相关依赖,打包方式设置为pom<?xml version="1.0" encoding="UTF-8"?><project xmlns="http://maven.apache.org/POM/4.0.0"xmlns:xsi="http://www.w3.org/2001/XMLSchema-instance"xsi:schemaLocation="http://maven.apache.org/POM/4.0.0 http://maven.apache.org/xsd/maven-4.0.0.xsd"><modelVersion>4.0.0</modelVersion><groupId>com.it.learn</groupId><artifactId>restTemplate-demo</artifactId><version>1.0-SNAPSHOT</version><packaging>pom</packaging><parent><groupId>org.springframework.boot</groupId><artifactId>spring-boot-starter-parent</artifactId><version>2.1.12.RELEASE</version><relativePath/></parent><properties><project.build.sourceEncoding>UTF-8</project.build.sourceEncoding><project.reporting.outputEncoding>UTF-8</project.reporting.outputEncoding><java.version>1.8</java.version><spring-cloud.version>Greenwich.SR5</spring-cloud.version><mysql.version>5.1.47</mysql.version></properties><dependencyManagement><dependencies><!-- springCloud --><dependency><groupId>org.springframework.cloud</groupId><artifactId>spring-cloud-dependencies</artifactId><version>${spring-cloud.version}</version><type>pom</type><scope>import</scope></dependency><!-- mysql驱动 --><dependency><groupId>mysql</groupId><artifactId>mysql-connector-java</artifactId><version>${mysql.version}</version></dependency><!--mybatis--><dependency><groupId>org.mybatis.spring.boot</groupId><artifactId>mybatis-spring-boot-starter</artifactId><version>2.1.1</version></dependency></dependencies></dependencyManagement><dependencies><dependency><groupId>org.projectlombok</groupId><artifactId>lombok</artifactId></dependency></dependencies></project>
服务提供者
我们新建一个项目,对外提供查询用户的服务。
此工程为上述父工程的子工程
结构如下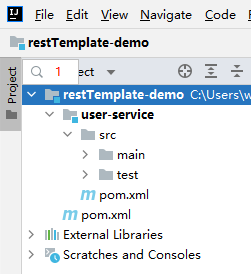
导入相关依赖
新建<?xml version="1.0" encoding="UTF-8"?><project xmlns="http://maven.apache.org/POM/4.0.0"xmlns:xsi="http://www.w3.org/2001/XMLSchema-instance"xsi:schemaLocation="http://maven.apache.org/POM/4.0.0 http://maven.apache.org/xsd/maven-4.0.0.xsd"><parent><artifactId>restTemplate-demo</artifactId><groupId>com.it.learn</groupId><version>1.0-SNAPSHOT</version></parent><modelVersion>4.0.0</modelVersion><artifactId>user-service</artifactId><properties><maven.compiler.source>8</maven.compiler.source><maven.compiler.target>8</maven.compiler.target></properties><dependencies><dependency><groupId>org.springframework.boot</groupId><artifactId>spring-boot-starter-web</artifactId></dependency><dependency><groupId>mysql</groupId><artifactId>mysql-connector-java</artifactId></dependency><!--mybatis--><dependency><groupId>org.mybatis.spring.boot</groupId><artifactId>mybatis-spring-boot-starter</artifactId></dependency></dependencies><build><plugins><plugin><groupId>org.springframework.boot</groupId><artifactId>spring-boot-maven-plugin</artifactId></plugin></plugins></build></project>
application.yml配置文件,编写相关配置信息
编写server:port: 8081spring:datasource:driver-class-name: com.mysql.jdbc.Driverurl: jdbc:mysql://192.168.206.99:3306/db2?useUnicode=true&characterEncoding=utf8&allowMultiQueries=true&useSSL=falseusername: rootpassword: rootapplication:name: user-service # 服务的名称不能使用下划线mybatis:type-aliases-package: com.it.learn.pojoconfiguration:map-underscore-to-camel-case: truelogging:level:com.it.learn: debug
UserServiceApplication启动类
编写package com.it.learn;import org.mybatis.spring.annotation.MapperScan;import org.springframework.boot.SpringApplication;import org.springframework.boot.autoconfigure.SpringBootApplication;@SpringBootApplication@MapperScan("com.it.learn.mapper")public class UserServiceApplication {public static void main(String[] args) {SpringApplication.run(UserServiceApplication.class);}}
pojo实体类
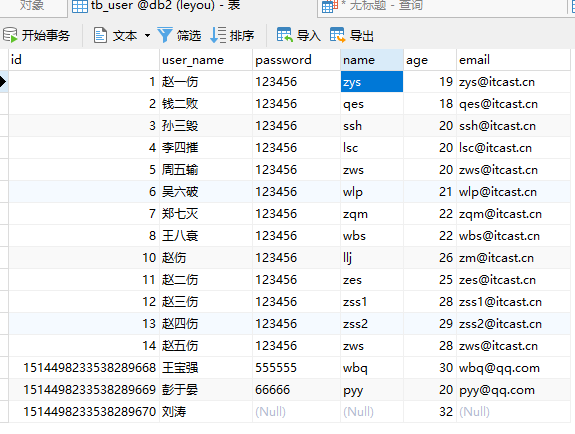
在表中有对应数据表package com.it.learn.pojo;import lombok.Data;@Datapublic class User {private Long id;private String userName;private String password;private String name;private int age;private String email;}
新建UserMapper
新建package com.it.learn.mapper;import com.it.learn.pojo.User;import org.apache.ibatis.annotations.Param;import org.apache.ibatis.annotations.Select;public interface UserMapper {@Select("select * from tb_user where id = #{id}")public User findUserById(@Param("id") Long id);}
UserService
新建package com.it.learn.service;import com.it.learn.pojo.User;public interface UserService {public User findUserById(Long id);}
UserServiceImpl
新建package com.it.learn.service.impl;import com.it.learn.mapper.UserMapper;import com.it.learn.pojo.User;import com.it.learn.service.UserService;import org.springframework.beans.factory.annotation.Autowired;import org.springframework.stereotype.Service;@Service("userService")public class UserServiceImpl implements UserService {@Autowiredprivate UserMapper userMapper;@Overridepublic User findUserById(Long id) {return userMapper.findUserById(id);}}
UserController
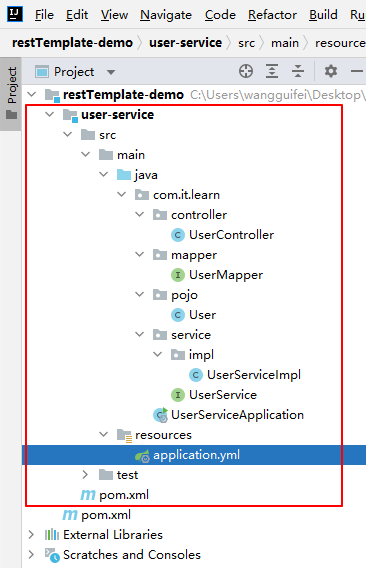
服务提供者项目结构图package com.it.learn.web;import com.it.learn.pojo.User;import com.it.learn.service.UserService;import org.springframework.beans.factory.annotation.Autowired;import org.springframework.web.bind.annotation.PathVariable;import org.springframework.web.bind.annotation.RequestMapping;import org.springframework.web.bind.annotation.RestController;@RestController@RequestMapping("user")public class UserController {@Autowiredprivate UserService userService;@RequestMapping("/{id}")public User findUserById(@PathVariable("id") Long id){return this.userService.findUserById(id);}}
启动项目,测试下, http://localhost:8081/user/5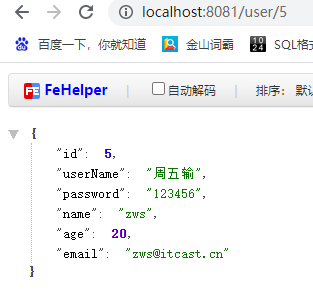
服务调用者
与上面类似,这里不再赘述,需要注意的是,我们调用user-service的功能,因此不需要mybatis相关依赖了。
新建完,结构如下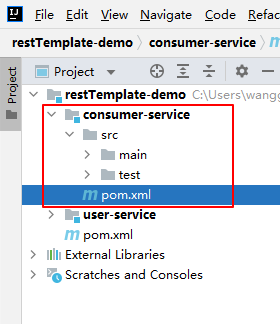
pom文件引入了web的starter依赖,而web的starter中会包含RestTemplate相关依赖。
新建启动类,并且注册一个<?xml version="1.0" encoding="UTF-8"?><project xmlns="http://maven.apache.org/POM/4.0.0"xmlns:xsi="http://www.w3.org/2001/XMLSchema-instance"xsi:schemaLocation="http://maven.apache.org/POM/4.0.0 http://maven.apache.org/xsd/maven-4.0.0.xsd"><parent><artifactId>restTemplate-demo</artifactId><groupId>com.it.learn</groupId><version>1.0-SNAPSHOT</version></parent><modelVersion>4.0.0</modelVersion><artifactId>consumer-service</artifactId><properties><maven.compiler.source>8</maven.compiler.source><maven.compiler.target>8</maven.compiler.target></properties><!-- 导入web启动器 --><dependencies><dependency><groupId>org.springframework.boot</groupId><artifactId>spring-boot-starter-web</artifactId></dependency></dependencies></project>
RestTemplate实例
新建package com.it.learn;import org.springframework.boot.SpringApplication;import org.springframework.boot.autoconfigure.SpringBootApplication;import org.springframework.context.annotation.Bean;import org.springframework.web.client.RestTemplate;@SpringBootApplicationpublic class UserConsumerApplication {public static void main(String[] args) {SpringApplication.run(UserConsumerApplication .class);}// 注册RestTemplate的对象到Spring的容器中@Beanpublic RestTemplate restTemplate(){return new RestTemplate();}}
pojo实体类
新建package com.it.learn.pojo;import lombok.Data;@Datapublic class User {private Long id;private String userName;private String password;private String name;private int age;private String email;}
UserController,在controller中直接调用RestTemplate,远程访问user-service的服务接口RestTemplate会向http://localhost:8081地址发起请求,并且得到响应的JSON数据。然后会将JSON数据反序列化为User类型。
项目结构图package com.it.learn.controller;import com.it.learn.pojo.User;import org.springframework.beans.factory.annotation.Autowired;import org.springframework.web.bind.annotation.PathVariable;import org.springframework.web.bind.annotation.RequestMapping;import org.springframework.web.bind.annotation.RestController;import org.springframework.web.client.RestTemplate;@RestController@RequestMapping("consumer")public class UserController {// 发送基于http协议的远程过程调用(2个服务器相互调用)@Autowiredprivate RestTemplate restTemplate;@RequestMapping("/{id}")public User findUserById(@PathVariable("id") Long id){String url = "http://127.0.0.1:8081/user/" + id;User user = restTemplate.getForObject(url, User.class);return user;}}

启动项目,进行测试,http://localhost:8080/consumer/6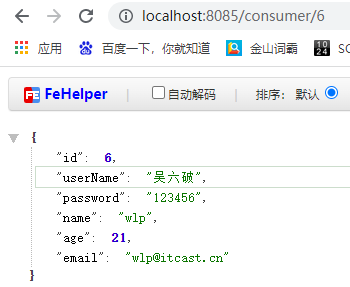
调用链路

项目demo:
restTemplate-demo

若有收获,就点个赞吧
0 人点赞
