说明
参考 eureka-demo 工程中(SpringCloud_RestTemplate.md里有具体步骤)服务之间远程例子,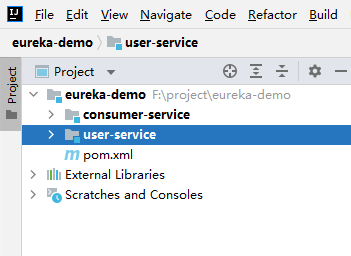
user-service 对外提供服务,需要对外暴露自己的地址。而 consumer-service (调用者)需要记录服务提供者的地址。将来地址出现变更,还需要及时更新。这在服务较少的时候并不觉得有什么,但是在现在日益复杂的互联网环境,一个项目肯定会拆分出十几,甚至数十个微服务。此时如果还人为管理地址,不仅开发困难,将来测试、发布上线都会非常麻烦,这与 DevOps 的思想是背道而驰的。
demo
在 eureka-demo 工程的基础上,进行 demo 测试,
新建 eureka-service 子工程
添加 eureka启动器依赖
<?xml version="1.0" encoding="UTF-8"?><project xmlns="http://maven.apache.org/POM/4.0.0"xmlns:xsi="http://www.w3.org/2001/XMLSchema-instance"xsi:schemaLocation="http://maven.apache.org/POM/4.0.0 http://maven.apache.org/xsd/maven-4.0.0.xsd"><parent><artifactId>spring-cloud-learn</artifactId><groupId>com.it.learn</groupId><version>1.0-SNAPSHOT</version></parent><modelVersion>4.0.0</modelVersion><artifactId>eureka-service</artifactId><properties><maven.compiler.source>8</maven.compiler.source><maven.compiler.target>8</maven.compiler.target></properties><dependencies><!-- 导入Eureka的启动器 --><dependency><groupId>org.springframework.cloud</groupId><artifactId>spring-cloud-starter-netflix-eureka-server</artifactId></dependency></dependencies></project>
添加启动类,并添加 @EnableEurekaServer 注解,
package com.it.learn;import org.springframework.boot.SpringApplication;import org.springframework.boot.autoconfigure.SpringBootApplication;import org.springframework.cloud.netflix.eureka.server.EnableEurekaServer;@SpringBootApplication@EnableEurekaServer // 声明这个应用是一个EurekaServerpublic class EurekaServiceApplication {public static void main(String[] args) {SpringApplication.run(EurekaServiceApplication.class);}}
添加 application.yml 配置文件
server:port: 10086spring:application:name: eureka-serviceeureka:client:service-url:defaultZone: http://127.0.0.1:10086/eureka # 设置eureka服务器地址register-with-eureka: false # 不注册自己fetch-registry: false # 不拉取服务本eureka服务中心的服务信息
项目结构如下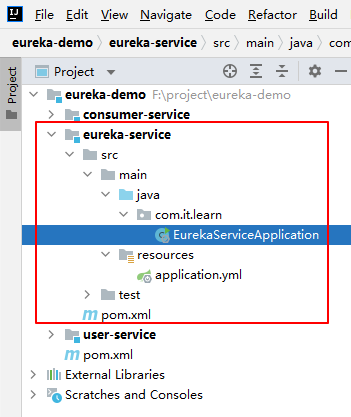
启动服务,浏览器访问 http://127.0.0.1:10086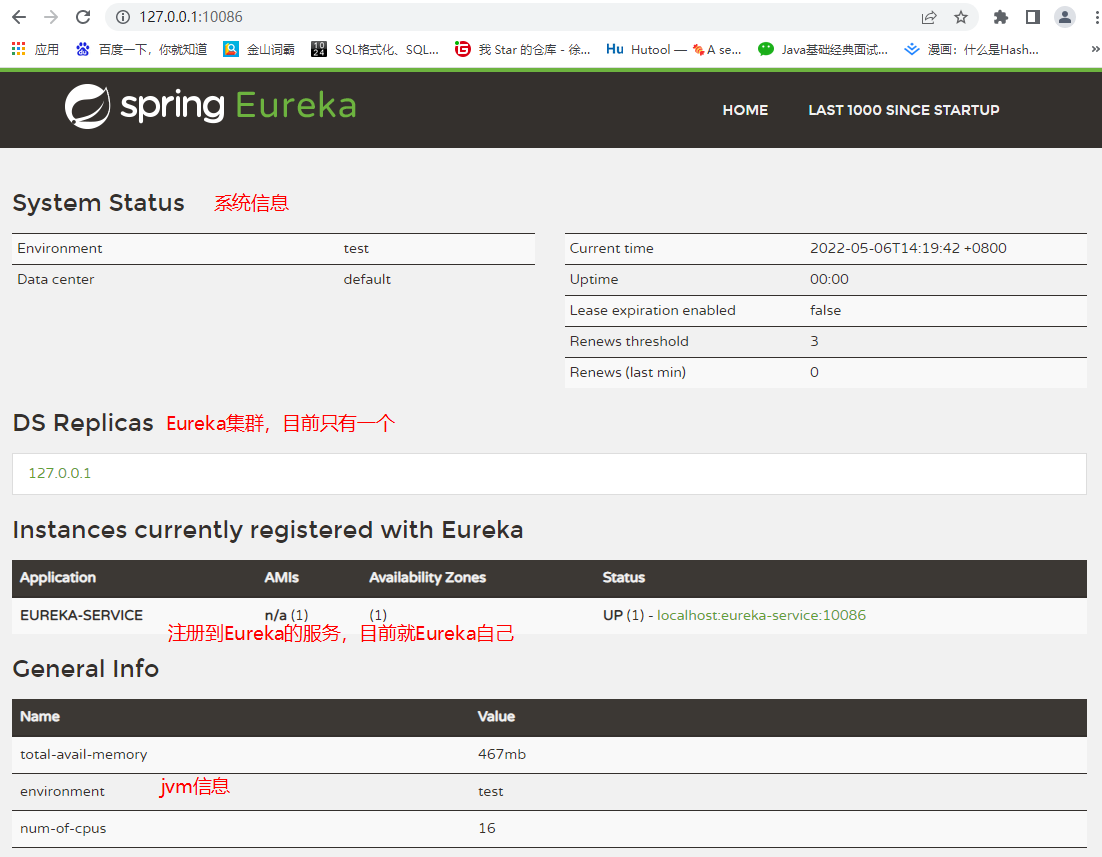
服务注册
注册服务:就是让服务提供者 user-service 把自己的信息注册到 eureka-service 上,方便服务消费者去拉取。
在 user-service 中添加 Eureka 客户端依赖
<!-- Eureka客户端 --><dependency><groupId>org.springframework.cloud</groupId><artifactId>spring-cloud-starter-netflix-eureka-client</artifactId></dependency>
修改 user-service 配置文件,指定 eureka 地址
这里我们添加了 spring.application.name 属性来指定应用名称,将来会作为服务的id使用。
server:port: 8081spring:datasource:driver-class-name: com.mysql.jdbc.Driverurl: jdbc:mysql://192.168.206.99:3306/db2?useUnicode=true&characterEncoding=utf8&allowMultiQueries=true&useSSL=falseusername: rootpassword: rootapplication:name: user-service # 服务的名称不能使用下划线mybatis:type-aliases-package: com.it.learn.pojoconfiguration:map-underscore-to-camel-case: truelogging:level:com.it.learn: debugeureka:client:service-url: # eureka-service地址defaultZone: http://127.0.0.1:10086/eureka/
重启 user-service 工程,查看 eureka 客户端
我们发现 user-service 服务已经注册成功了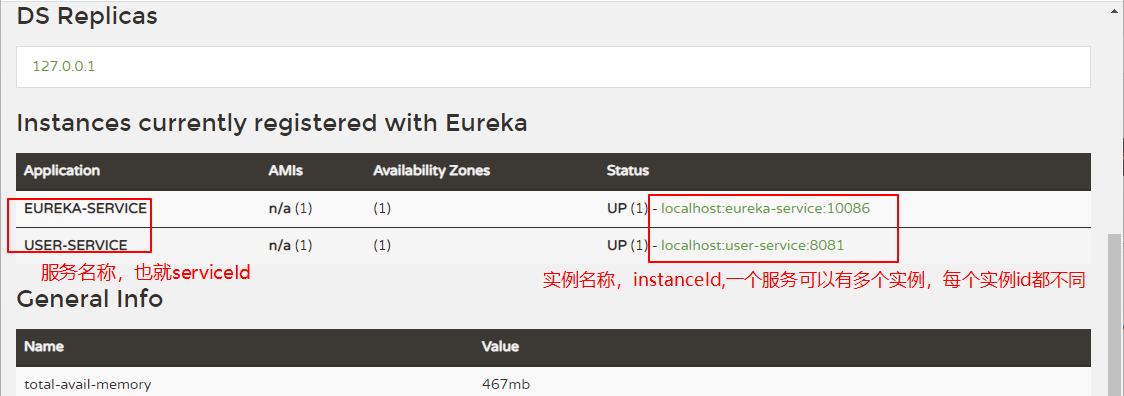
服务发现
接下来我们修改 user-consumer,尝试从 eureka-service 获取服务提供者 user-service 的真实 IP 和端口信息。
添加 Eureka 客户端依赖
<!-- Eureka客户端 --><dependency><groupId>org.springframework.cloud</groupId><artifactId>spring-cloud-starter-netflix-eureka-client</artifactId></dependency>
修改配置,指定 eureka 地址
server:port: 8080spring:application:name: consumer-service # 应用名称eureka:client:service-url: # EurekaServer地址defaultZone: http://127.0.0.1:10086/eureka
服务拉取,修改 UserController,使用 DiscoveryClient 类的方法,根据服务名称,获取服务实例
package com.it.learn.controller;import com.it.learn.pojo.User;import org.springframework.cloud.client.discovery.DiscoveryClient;import org.springframework.beans.factory.annotation.Autowired;import org.springframework.cloud.client.ServiceInstance;import org.springframework.web.bind.annotation.PathVariable;import org.springframework.web.bind.annotation.RequestMapping;import org.springframework.web.bind.annotation.RestController;import org.springframework.web.client.RestTemplate;import java.util.List;@RestController@RequestMapping("consumer")public class UserController {// 发送基于http协议的远程过程调用(2个服务器相互调用)@Autowiredprivate RestTemplate restTemplate;@Autowiredprivate DiscoveryClient discoveryClient;@RequestMapping("/{id}")public User findUserById(@PathVariable("id") Long id){// 从Eureka服务器中拉取提供服务的实例集合List<ServiceInstance> instances = discoveryClient.getInstances("user-service");// 获取服务器提供者信息ServiceInstance serviceInstance = instances.get(0);// 从实例中获取 host 和 port,组成 urlString url = String.format("http://%s:%s/user/%s", serviceInstance.getHost(), serviceInstance.getPort(), id);System.out.println(url); // http://localhost:8081/user/5// 查询User user = restTemplate.getForObject(url, User.class);return user;}}
启动测试,http://localhost:8080/consumer/5
基础架构
Eureka 架构中的3个核心角色
- 服务注册中心 ——
Eureka的服务端应用,提供服务注册和发现功能,就是刚刚我们建立的eureka-service - 服务提供者 —— 提供服务的应用,可以是
SpringBoot应用,也可以是其它任意技术实现,只要对外提供的是Rest风格服务即可。本例中就是我们实现的user-service - 服务消费者 —— 消费应用从注册中心获取服务列表,从而得知每个服务方的信息,知道去哪里调用服务方。本例中就是我们实现的
user-consumer高可用的 Eureka Server
服务的注册中心,在刚才的例子中,我们只有一个eureka-service,事实上,eureka-service也可以是一个集群,形成高可用的Eureka中心
服务同步
多个Eureka Server之间也会互相注册为服务,当服务提供者注册到Eureka Server集群中的某个节点时,该节点会把服务的信息同步给集群中的每个节点,从而实现高可用集群。因此,无论客户端访问到Eureka Server集群中的任意一个节点,都可以获取到完整的服务列表信息。
而作为客户端,需要把信息注册到每个Eureka中: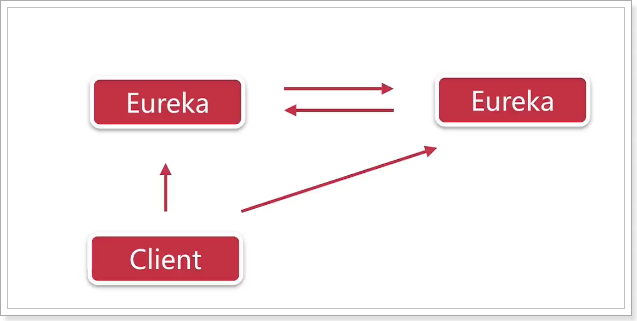
搭建2条eureka-service的集群,端口分别为 10086 和 10087
修改原来的eureka-service配置
重启server:port: 10086spring:application:name: eureka-serviceeureka:client:service-url:defaultZone: http://127.0.0.1:10086/eureka,http://127.0.0.1:10087/eureka # 设置eureka服务器地址register-with-eureka: true # 不注册自己fetch-registry: true # 不拉取服务本eureka服务中心的服务信息
eureka-service
再启动一台eureka服务
因为idea中一个应用不能启动2次,我们需要重新配置一个启动器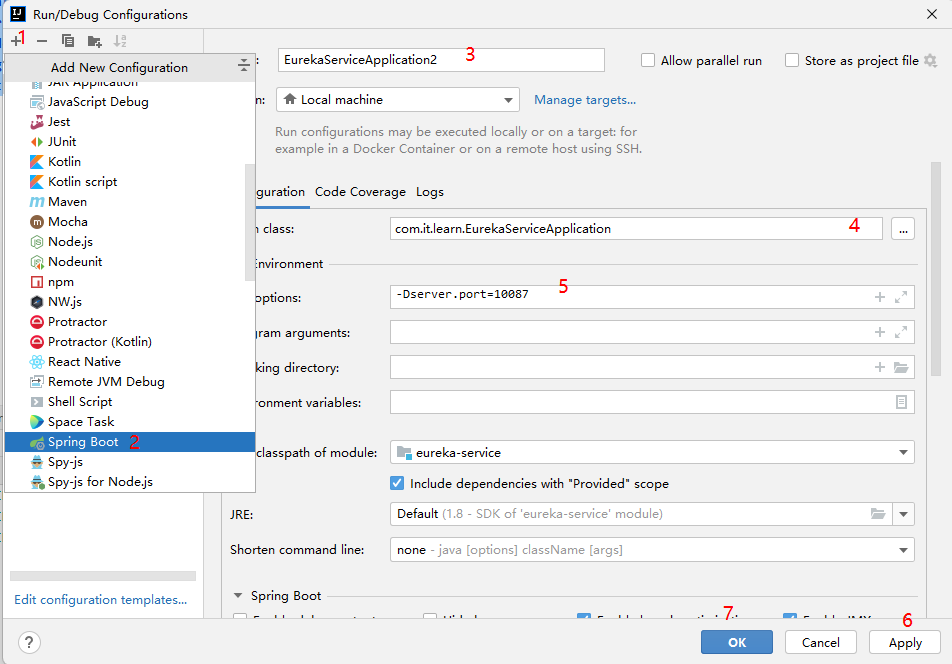
需要保证2个服务端口不同,因此要配置JVM参数,覆盖配置文件中的端口
最终,多个服务如下-Dserver.port=10087
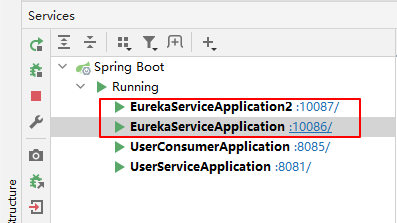
启动,测试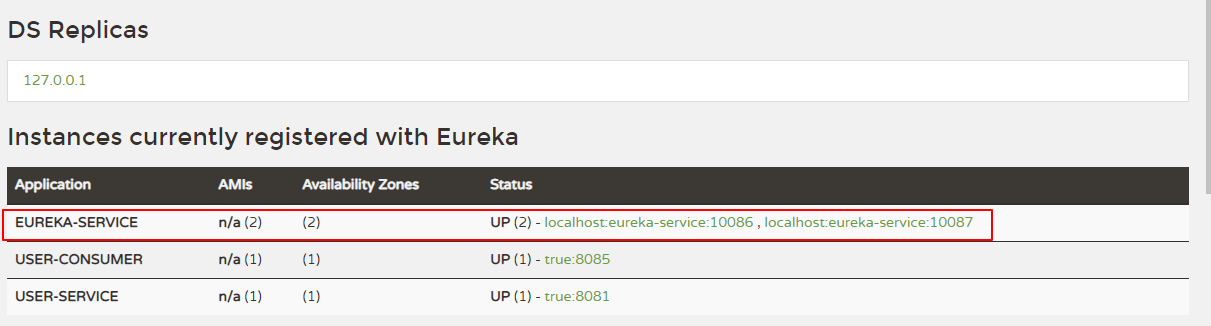
客户端注册服务到集群
因为现在eureka-service不止1个,因此 eureka 的客户端配置服务端地址的时候,service-url参数需要变化user-service和user-consumer2个服务中修改eureka服务端地址
重启eureka:client:service-url:defaultZone: http://127.0.0.1:10086/eureka,http://127.0.0.1:10087/eurekainstance:ip-address: 127.0.0.1 # 配置服务器ip地址prefer-ip-address: true # 更倾向于使用ip,而不是host名instance-id: ${eureka.instance.prefer-ip-address}:${server.port} # 自定义实例的id
user-service和user-consumer测试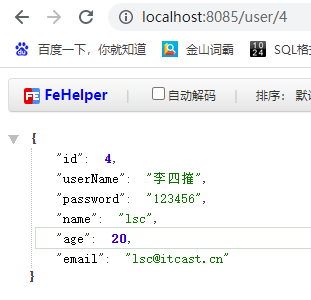
项目demo:
eureka-demo

若有收获,就点个赞吧
0 人点赞
