发起请求
使用 uni.request(OBJECT) 发起一个请求。
例如:
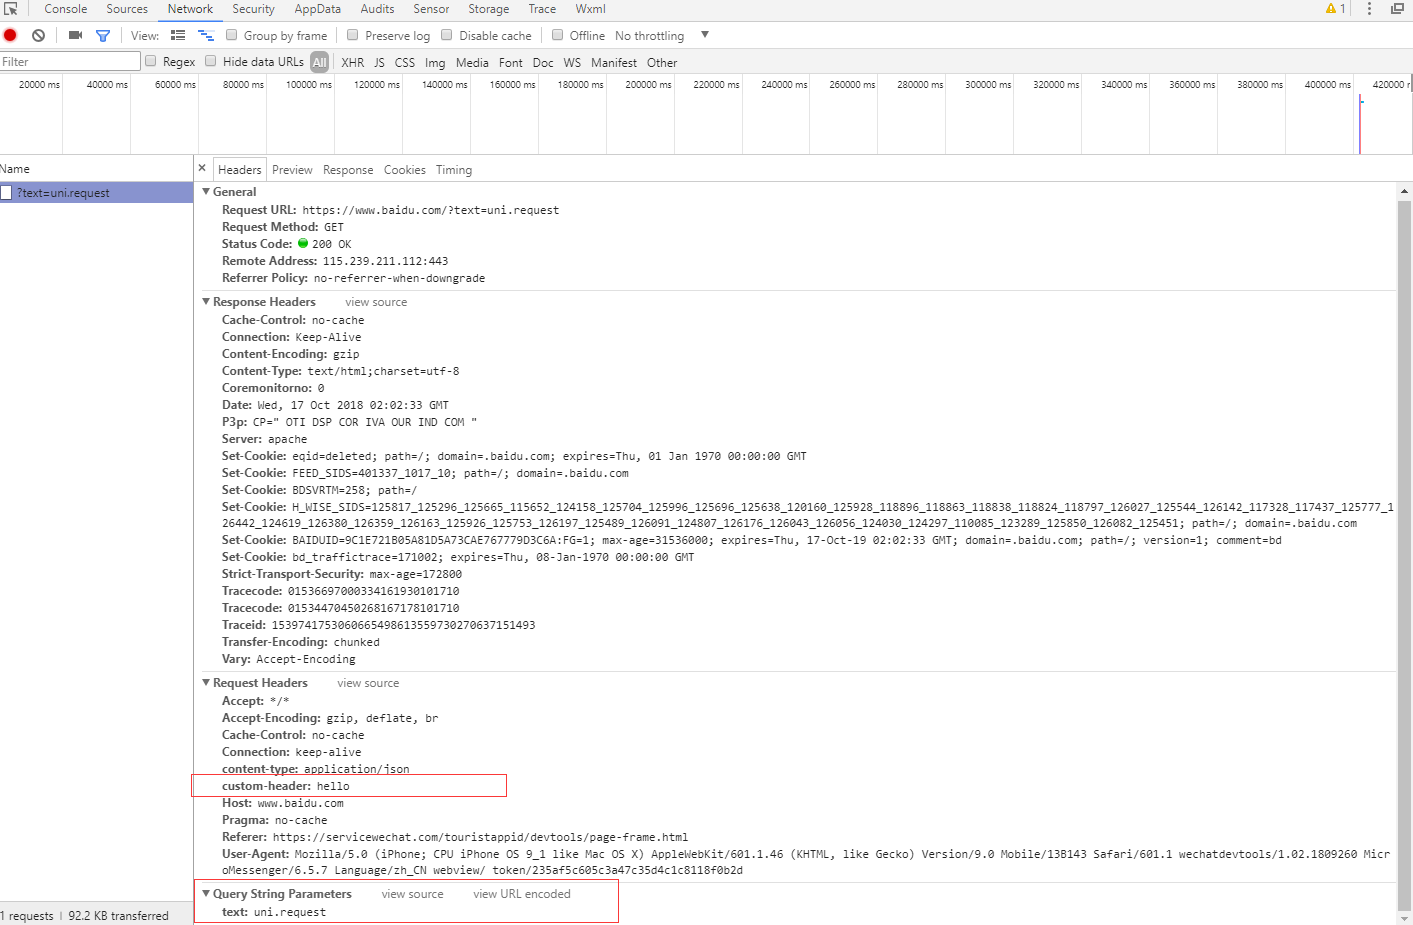
uni.request({url: '//www.baidu.com', //仅为示例,并非真实接口地址。data: {text: 'uni.request'},header: {'custom-header': 'hello' //自定义请求头信息},success (res) {console.log(res);}});
OBJECT 参数说明
| 参数名 | 类型 | 必填 | 默认值 | 说明 |
|---|---|---|---|---|
| url | String | 是 | 开发者服务器接口地址 | |
| data | Object/String/ArrayBuffer | 否 | 请求的参数 | |
| header | Object | 否 | 设置请求的 header,header 中不能设置 Referer。 | |
| method | String | 否 | GET | (需大写)有效值:OPTIONS, GET, HEAD, POST, PUT, DELETE, TRACE, CONNECT |
| dataType | String | 否 | json | 如果设为 json,会尝试对返回的数据做一次 JSON.parse |
| responseType | String | 否 | text | 设置响应的数据类型。合法值:text、arraybuffer |
| success | Function | 否 | 收到开发者服务成功返回的回调函数 | |
| fail | Function | 否 | 接口调用失败的回调函数 | |
| complete | Function | 否 | 接口调用结束的回调函数(调用成功、失败都会执行) |
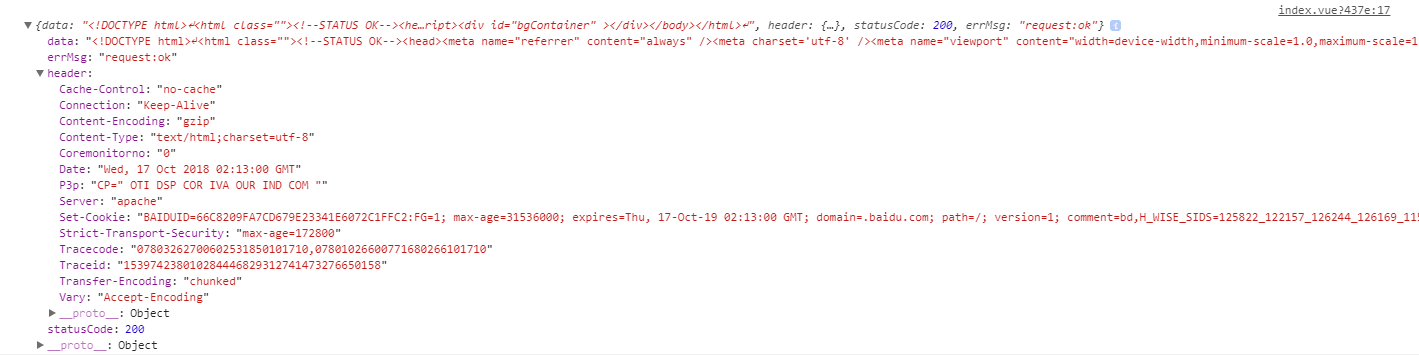
success 返回参数说明
| 参数 | 类型 | 说明 |
|---|---|---|
| data | Object/String/ArrayBuffer | 开发者服务器返回的数据 |
| statusCode | Number | 开发者服务器返回的 HTTP 状态码 |
| header | Object | 开发者服务器返回的 HTTP Response Header |
data 数据说明
最终发送给服务器的数据是 String 类型,如果传入的 data 不是 String 类型,会被转换成 String。转换规则如下:
- 对于
GET方法,会将数据转换为 query string。例如{ name: 'name', age: 18 }转换后的结果是name=name&age=18。 - 对于
POST方法且header['content-type']为application/json的数据,会进行 JSON 序列化。 - 对于
POST方法且header['content-type']为application/x-www-form-urlencoded的数据,会将数据转换为 query string。
请求类的封装
平时使用习惯了 axios,于是按照 axios 的形式将 uni.request 封装了一层:
library/requset.js
class Axios {constructor (baseUrl) {this.baseUrl = baseUrl}base (obj, method) {return new Promise((resolve, reject) => {const tokenObj = {token: uni.getStorageSync('token')}uni.request({url: `${this.baseUrl}${obj.url}`,method,dataType: obj.dataType ? obj.dataType : 'json',responseType: obj.responseType ? obj.responseType : 'text',data: obj.data ? obj.data : {},header: Object.assign(obj.header ? obj.header : {}, tokenObj),success (res) {resolve(res)},fail () {reject()}})})}get (obj) { return this.base(obj, 'GET') }post (obj) { return this.base(obj, 'POST') }put (obj) { return this.base(obj, 'PUT') }delete (obj) { return this.base(obj, 'DELETE') }}const baseUrl = 'https://www.baidu.com/'export default new Axios(baseUrl)
main.js
import axios from './library/request'Vue.prototype.axios = axios
在组件中的使用:
this.axios.get({url: 'index.html',data: { test: 'test' },header: { my_header: 'my_header'}}).then(res => console.log(res)).catch(e => console.log(e))
拦截器模拟
上述封装, 只是一个简单的请求类封装, 并没有额外的功能, 比如响应拦截器, 可以使用以下方式简单地模拟一个拦截器:
class Axios {// ...base (obj, method) {return new Promise((resolve, reject) => {const tokenObj = {'Authorization': `bearer ${uni.getStorageSync('access_token')}`,'Content-Type': 'application/x-www-form-urlencoded'}uni.request({url: `${this.baseUrl}${obj.url}`,method,dataType: obj.dataType ? obj.dataType : 'json',responseType: obj.responseType ? obj.responseType : 'text',data: obj.data ? obj.data : {},header: Object.assign(obj.header ? obj.header : {}, tokenObj),success (res) {// 权限不足认证失败if (res.statusCode === 401 || res.data.status === -1) {interceptor()} else if (res.statusCode === 500 || res.statusCode === 400 || res.statusCode === 404) {reject('接口调用失败')} else if (res.data.status === 0) {reject('数据请求失败')} else {resolve(res)}},fail () {reject('未知错误')}})})}// ...}// ...
参考资料

若有收获,就点个赞吧
0 人点赞
