环境准备
基本yum源
yum install -y epel-releaseyum install -y wget bash-com* gityum update -y
yum -y install gcc bc gcc-c++ ncurses ncurses-devel cmake elfutils-libelf-devel openssl-devel flex* bison* autoconf automake zlib* fiex* libxml* ncurses-devel libmcrypt* libtool-ltdl-devel* make cmake pcre pcre-devel openssl openssl-devel jemalloc-devel tlc libtool vim unzip wget lrzsz bash-comp* ipvsadm ipset jq sysstat conntrack libseccomp conntrack-tools socat curl wget git conntrack-tools psmisc nfs-utils tree bash-completion conntrack libseccomp net-tools crontabs sysstat iftop nload strace bind-utils tcpdump htop telnet lsof
关闭防火墙,swap,selinux
#关闭防火墙
systemctl disable --now firewalld

#关闭swap
swapoff -a
sed -ri '/^[^#]*swap/s@^@#@' /etc/fstab

#关闭selinux
setenforce 0
sed -ri '/^[^#]*SELINUX=/s#=.+$#=disabled#' /etc/selinux/config
主机
| hostname | ip |
|---|---|
| jumpserver | 10.146.0.2 |
安装jumpserver
安装jdk
yum -y install java-1.8.0-openjdk java-1.8.0-openjdk-devel
安装 Python3.6
安装依赖包
yum -y install wget sqlite-devel xz gcc automake zlib-devel openssl-devel git
wget https://www.python.org/ftp/python/3.6.8/Python-3.6.8.tgz
tar xvf Python-3.6.8.tgz && cd Python-3.6.8
./configure && make && make install
cd /opt
python3 -m venv py3
source /opt/py3/bin/activate
安装mysql5.7
wget -c https://dev.mysql.com/get/mysql80-community-release-el7-1.noarch.rpm
rpm -ivh mysql80-community-release-el7-1.noarch.rpm
yum -y install yum-utils
yum-config-manager --disable mysql80-community
yum-config-manager --enable mysql57-community
yum install mysql-community-server mysql-devel -y
#启动mysql
systemctl start mysqld
#开机启动
systemctl enable mysqld
#查看root临时密码
grep 'temporary password' /var/log/mysqld.log
#登陆数据库
mysql -uroot -p'xxxxxx'
#修改root密码
ALTER USER 'root'@'localhost' IDENTIFIED BY '123456@Abc';
配置mysql 参数
在/etc/my.cnf添加以下参数
sql_mode=STRICT_TRANS_TABLES,NO_ZERO_IN_DATE,NO_ZERO_DATE,ERROR_FOR_DIVISION_BY_ZERO,NO_AUTO_CREATE_USER,NO_ENGINE_SUBSTITUTION
skip-name-resolve
lower_case_table_names = 1
max_connections = 4000
character-set-server = utf8mb4
collation-server = utf8mb4_unicode_ci
init_connect='SET NAMES utf8mb4'
skip-character-set-client-handshake = true
[mysql]
default-character-set = utf8mb4

重启mysql
systemctl restart mysqld
登陆数据库
mysql -uroot -p'123456@Abc'
授权
GRANT ALL PRIVILEGES ON *.* TO 'root'@'%' IDENTIFIED BY '123456@Abc';
建库给jumpserver用
create database jumpserver default charset 'utf8' collate 'utf8_bin';
安装redis
yum -y install redis
修改redis配置参数
vim /etc/redis.conf
daemonize yes

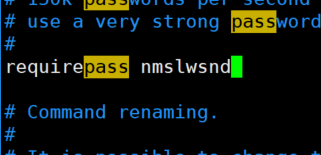
requirepass nmslwsnd
systemctl enable --now redis
下载jumpserver包
cd /opt && \
wget https://github.com/jumpserver/jumpserver/releases/download/v2.5.3/jumpserver-v2.5.3.tar.gz
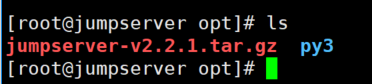
tar xf jumpserver-v2.5.3.tar.gz
mv jumpserver-v2.5.3 jumpserver

安装编译环境依赖
yum -y install gcc krb5-devel libtiff-devel libjpeg-devel libzip-devel freetype-devel lcms2-devel libwebp-devel tcl-devel tk-devel sshpass openldap-devel mysql-devel libffi-devel openssh-clients telnet openldap-clients
source /opt/py3/bin/activate
cd /opt/jumpserver/requirements
pip install wheel && \
pip install --upgrade pip setuptools && \
pip install -r requirements.txt
pip uninstall pycryptodome
pip install pycryptodome
pip uninstall Crypto
pip uninstall pycrypto
pip install pycrypto
修改配置文件
cd /opt/jumpserver && \
cp config_example.yml config.yml && \
vim config.yml
cat /dev/urandom | tr -dc A-Za-z0-9 | head -c 49 # 生成随机SECRET_KEY
cat /dev/urandom | tr -dc A-Za-z0-9 | head -c 16 # 生成随机BOOTSTRAP_TOKEN
# SECURITY WARNING: keep the secret key used in production secret!
# 加密秘钥 生产环境中请修改为随机字符串,请勿外泄, 可使用命令生成
# cat /dev/urandom | tr -dc A-Za-z0-9 | head -c 49;echo
SECRET_KEY: W5Ic3fMXNZ0p5RIy5DhJYJllppTfcfkW8Yuf94VBMfpcssbfu

# SECURITY WARNING: keep the bootstrap token used in production secret!
# 预共享Token coco和guacamole用来注册服务账号,不在使用原来的注册接受机制
BOOTSTRAP_TOKEN: zxffNymGjP79j6BN

# Development env open this, when error occur display the full process track, Production disable it
# DEBUG 模式 开启DEBUG后遇到错误时可以看到更多日志
DEBUG: false

# DEBUG, INFO, WARNING, ERROR, CRITICAL can set. See https://docs.djangoproject.com/en/1.10/topics/logging/
# 日志级别
LOG_LEVEL: ERROR
# LOG_DIR:

# Session expiration setting, Default 24 hour, Also set expired on on browser close
# 浏览器Session过期时间,默认24小时, 也可以设置浏览器关闭则过期
# SESSION_COOKIE_AGE: 86400
SESSION_EXPIRE_AT_BROWSER_CLOSE: true

# Database setting, Support sqlite3, mysql, postgres ....
# 数据库设置
# See https://docs.djangoproject.com/en/1.10/ref/settings/#databases

# SQLite setting:
# 使用单文件sqlite数据库
# DB_ENGINE: sqlite3
# DB_NAME:

# MySQL or postgres setting like:
# 使用Mysql作为数据库
DB_ENGINE: mysql
DB_HOST: 127.0.0.1
DB_PORT: 3306
DB_USER: root
DB_PASSWORD: 123456@Abc
DB_NAME: jumpserver

# When Django start it will bind this host and port
# ./manage.py runserver 127.0.0.1:8080
# 运行时绑定端口
HTTP_BIND_HOST: 0.0.0.0
HTTP_LISTEN_PORT: 8080
WS_LISTEN_PORT: 8070

# Use Redis as broker for celery and web socket
# Redis配置
REDIS_HOST: 127.0.0.1
REDIS_PORT: 6379
REDIS_PASSWORD: nmslwsnd
# REDIS_DB_CELERY: 3
# REDIS_DB_CACHE: 4

# Use OpenID authorization
# 使用OpenID 来进行认证设置
# BASE_SITE_URL: http://localhost:8080
# AUTH_OPENID: false  # True or False
# AUTH_OPENID_SERVER_URL: https://openid-auth-server.com/
# AUTH_OPENID_REALM_NAME: realm-name
# AUTH_OPENID_CLIENT_ID: client-id
# AUTH_OPENID_CLIENT_SECRET: client-secret
# AUTH_OPENID_IGNORE_SSL_VERIFICATION: True
# AUTH_OPENID_SHARE_SESSION: True

# Use Radius authorization
# 使用Radius来认证
# AUTH_RADIUS: false
# RADIUS_SERVER: localhost
# RADIUS_PORT: 1812
# RADIUS_SECRET:

# CAS 配置
# AUTH_CAS': False,
# CAS_SERVER_URL': "http://host/cas/",
# CAS_ROOT_PROXIED_AS': 'http://jumpserver-host:port',
# CAS_LOGOUT_COMPLETELY': True,
# CAS_VERSION': 3,

# LDAP/AD settings
# LDAP 搜索分页数量
# AUTH_LDAP_SEARCH_PAGED_SIZE: 1000
#
# 定时同步用户
# 启用 / 禁用
# AUTH_LDAP_SYNC_IS_PERIODIC: True
# 同步间隔 (单位: 时) (优先)
# AUTH_LDAP_SYNC_INTERVAL: 12
# Crontab 表达式
# AUTH_LDAP_SYNC_CRONTAB: * 6 * * *
#
# LDAP 用户登录时仅允许在用户列表中的用户执行 LDAP Server 认证
# AUTH_LDAP_USER_LOGIN_ONLY_IN_USERS: False
#
# LDAP 认证时如果日志中出现以下信息将参数设置为 0 (详情参见:https://www.python-ldap.org/en/latest/faq.html)
# In order to perform this operation a successful bind must be completed on the connection
# AUTH_LDAP_OPTIONS_OPT_REFERRALS: -1

# OTP settings
# OTP/MFA 配置
# OTP_VALID_WINDOW: 0
# OTP_ISSUER_NAME: Jumpserver

# Perm show single asset to ungrouped node
# 是否把未授权节点资产放入到 未分组 节点中
# PERM_SINGLE_ASSET_TO_UNGROUP_NODE: false
#
# 启用定时任务
# PERIOD_TASK_ENABLE: True
#
# 启用二次复合认证配置
# LOGIN_CONFIRM_ENABLE: False
#
# Windows 登录跳过手动输入密码
WINDOWS_SKIP_ALL_MANUAL_PASSWORD: True
启动 JumpServer
source /opt/py3/bin/activate
cd /opt/jumpserver
./jms stop
ps aux | grep py3 | awk '{print $2}' | xargs kill -9
rm -f tmp/*.pid
./jms start -d
部署 KoKo 组件
cd /opt && \
wget https://github.com/jumpserver/koko/releases/download/v2.5.3/koko-v2.5.3-linux-amd64.tar.gz
tar -xf koko-v2.5.3-linux-amd64.tar.gz && \
mv koko-v2.5.3-linux-amd64 koko && \
chown -R root:root koko && \
cd koko \
mv kubectl /usr/local/bin/ && \
wget https://download.jumpserver.org/public/kubectl.tar.gz && \
tar -xf kubectl.tar.gz && \
chmod 755 kubectl && \
mv kubectl /usr/local/bin/rawkubectl && \
rm -rf kubectl.tar.gz
cp /opt/koko/config_example.yml /opt/koko/config.yml && \
vi config.yml
# 项目名称, 会用来向Jumpserver注册, 识别而已, 不能重复
# NAME: {{ Hostname }}

# Jumpserver项目的url, api请求注册会使用
CORE_HOST: http://127.0.0.1:8080

# Bootstrap Token, 预共享秘钥, 用来注册coco使用的service account和terminal
# 请和jumpserver 配置文件中保持一致,注册完成后可以删除
BOOTSTRAP_TOKEN: zxffNymGjP79j6BN

# 启动时绑定的ip, 默认 0.0.0.0
# BIND_HOST: 0.0.0.0

# 监听的SSH端口号, 默认2222
# SSHD_PORT: 2222

# 监听的HTTP/WS端口号,默认5000
# HTTPD_PORT: 5000

# 项目使用的ACCESS KEY, 默认会注册,并保存到 ACCESS_KEY_STORE中,
# 如果有需求, 可以写到配置文件中, 格式 access_key_id:access_key_secret
# ACCESS_KEY: null

# ACCESS KEY 保存的地址, 默认注册后会保存到该文件中
# ACCESS_KEY_FILE: data/keys/.access_key

# 设置日志级别 [DEBUG, INFO, WARN, ERROR, FATAL, CRITICAL]
LOG_LEVEL: ERROR

# SSH连接超时时间 (default 15 seconds)
# SSH_TIMEOUT: 15

# 语言 [en,zh]
# LANG: zh

# SFTP的根目录, 可选 /tmp, Home其他自定义目录
# SFTP_ROOT: /tmp

# SFTP是否显示隐藏文件
# SFTP_SHOW_HIDDEN_FILE: false

# 是否复用和用户后端资产已建立的连接(用户不会复用其他用户的连接)
# REUSE_CONNECTION: true

# 资产加载策略, 可根据资产规模自行调整. 默认异步加载资产, 异步搜索分页; 如果为all, 则资产全部加载, 本地搜索分页.
# ASSET_LOAD_POLICY:

# zip压缩的最大额度 (单位: M)
# ZIP_MAX_SIZE: 1024M

# zip压缩存放的临时目录 /tmp
# ZIP_TMP_PATH: /tmp

# 向 SSH Client 连接发送心跳的时间间隔 (单位: 秒),默认为30, 0则表示不发送
# CLIENT_ALIVE_INTERVAL: 30

# 向资产发送心跳包的重试次数,默认为3
# RETRY_ALIVE_COUNT_MAX: 3

# 会话共享使用的类型 [local, redis], 默认local
SHARE_ROOM_TYPE: redis

# Redis配置
REDIS_HOST: 127.0.0.1
REDIS_PORT: 6379
REDIS_PASSWORD: nmslwsnd
# REDIS_CLUSTERS:
REDIS_DB_ROOM: 6
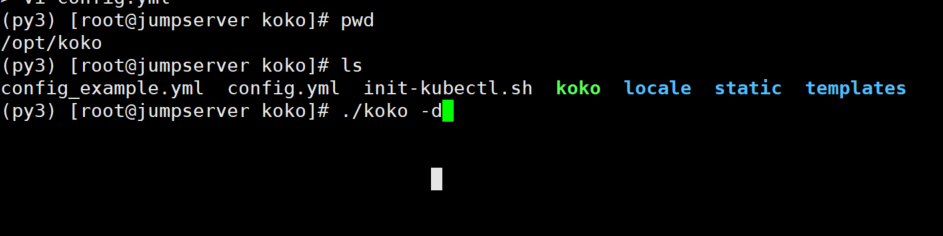
启动koko
./koko -d
部署 Guacamole 组件
yum -y install cairo-devel libjpeg-turbo-devel libjpeg-devel libpng-devel libtool uuid-devel ffmpeg-devel freerdp-devel pango-devel libssh2-devel libtelnet-devel libvncserver-devel libwebsockets-devel pulseaudio-libs-devel openssl-devel libvorbis-devel libwebp-devel
cd /opt && \
wget -O docker-guacamole-v2.5.3.tar.gz https://github.com/jumpserver/docker-guacamole/archive/master.tar.gz
mkdir /opt/docker-guacamole && \
tar -xf docker-guacamole-v2.5.3.tar.gz -C /opt/docker-guacamole --strip-components 1 && \
rm -rf /opt/docker-guacamole-v2.5.3.tar.gz && \
cd /opt/docker-guacamole && \
wget http://download.jumpserver.org/public/guacamole-server-1.2.0.tar.gz && \
tar -xf guacamole-server-1.2.0.tar.gz && \
wget http://download.jumpserver.org/public/ssh-forward.tar.gz && \
tar -xf ssh-forward.tar.gz -C /bin/ && \
chmod +x /bin/ssh-forward
cd /opt/docker-guacamole/guacamole-server-1.2.0
./configure --with-init-dir=/etc/init.d && \
make && \
make install
mkdir -p /config/guacamole /config/guacamole/extensions /config/guacamole/record /config/guacamole/drive && \
chown daemon:daemon /config/guacamole/record /config/guacamole/drive && \
cd /config
下载tomcat9
https://mirrors.tuna.tsinghua.edu.cn/apache/tomcat/tomcat-9

cd /config
export version="9.0.40"
wget https://mirrors.tuna.tsinghua.edu.cn/apache/tomcat/tomcat-9/v$version/bin/apache-tomcat-$version.tar.gz
tar -xf apache-tomcat-$version.tar.gz && \
mv apache-tomcat-$version tomcat9 && \
rm -rf /config/tomcat9/webapps/* && \
sed -i 's/Connector port="8080"/Connector port="8081"/g' /config/tomcat9/conf/server.xml && \
echo "java.util.logging.ConsoleHandler.encoding = UTF-8" >> /config/tomcat9/conf/logging.properties && \
wget http://download.jumpserver.org/release/v2.5.3/guacamole-client-v2.5.3.tar.gz && \
tar -xf guacamole-client-v2.5.3.tar.gz && \
rm -rf guacamole-client-v2.5.3.tar.gz && \
cp guacamole-client-v2.5.3/guacamole-*.war /config/tomcat9/webapps/ROOT.war && \
cp guacamole-client-v2.5.3/guacamole-*.jar /config/guacamole/extensions/ && \
mv /opt/docker-guacamole/guacamole.properties /config/guacamole/ && \
rm -rf /opt/docker-guacamole
export JUMPSERVER_SERVER=http://127.0.0.1:8080
echo "export JUMPSERVER_SERVER=http://127.0.0.1:8080" >> ~/.bashrc
export BOOTSTRAP_TOKEN=zxffNymGjP79j6BN
echo "export BOOTSTRAP_TOKEN=zxffNymGjP79j6BN" >> ~/.bashrc
export JUMPSERVER_KEY_DIR=/config/guacamole/keys
echo "export JUMPSERVER_KEY_DIR=/config/guacamole/keys" >> ~/.bashrc
export GUACAMOLE_HOME=/config/guacamole
echo "export GUACAMOLE_HOME=/config/guacamole" >> ~/.bashrc
export GUACAMOLE_LOG_LEVEL=ERROR
echo "export GUACAMOLE_LOG_LEVEL=ERROR" >> ~/.bashrc
export JUMPSERVER_ENABLE_DRIVE=true
echo "export JUMPSERVER_ENABLE_DRIVE=true" >> ~/.bashrc
启动 Guacamole
/etc/init.d/guacd start
sh /config/tomcat9/bin/startup.sh
下载 Lina 组件
groupadd nginx
useradd -s /bin/bash -g nginx nginx
cd /opt
wget https://github.com/jumpserver/lina/releases/download/v2.5.3/lina-v2.5.3.tar.gz
tar -xf lina-v2.5.3.tar.gz
mv lina-v2.5.3 lina
chown -R nginx:nginx lina
下载 Luna 组件
cd /opt
wget https://github.com/jumpserver/luna/releases/download/v2.5.3/luna-v2.5.3.tar.gz
tar -xf luna-v2.5.3.tar.gz
mv luna-v2.5.3 luna
chown -R nginx:nginx luna
配置 Nginx 整合各组件
yum -y install nginx
echo > /etc/nginx/conf.d/default.conf
vi /etc/nginx/conf.d/jumpserver.conf
server {
    listen 80;
    server_name jump.tk8s.com;
    client_max_body_size 100m;  # 录像及文件上传大小限制

    location /ui/ {
        try_files $uri / /index.html;
        alias /opt/lina/;
    }

    location /luna/ {
        try_files $uri / /index.html;
        alias /opt/luna/;  # luna 路径, 如果修改安装目录, 此处需要修改
    }

    location /media/ {
        add_header Content-Encoding gzip;
        root /opt/jumpserver/data/;  # 录像位置, 如果修改安装目录, 此处需要修改
    }

    location /static/ {
        root /opt/jumpserver/data/;  # 静态资源, 如果修改安装目录, 此处需要修改
    }

    location /koko/ {
        proxy_pass       http://localhost:5000;
        proxy_buffering off;
        proxy_http_version 1.1;
        proxy_set_header Upgrade $http_upgrade;
        proxy_set_header Connection "upgrade";
        proxy_set_header X-Real-IP $remote_addr;
        proxy_set_header Host $host;
        proxy_set_header X-Forwarded-For $proxy_add_x_forwarded_for;
        access_log off;
    }

    location /guacamole/ {
        proxy_pass       http://localhost:8081/;
        proxy_buffering off;
        proxy_http_version 1.1;
        proxy_set_header Upgrade $http_upgrade;
        proxy_set_header Connection $http_connection;
        proxy_set_header X-Real-IP $remote_addr;
        proxy_set_header Host $host;
        proxy_set_header X-Forwarded-For $proxy_add_x_forwarded_for;
        access_log off;
    }

    location /ws/ {
        proxy_set_header X-Real-IP $remote_addr;
        proxy_set_header Host $host;
        proxy_set_header X-Forwarded-For $proxy_add_x_forwarded_for;
        proxy_pass http://localhost:8070;
        proxy_http_version 1.1;
        proxy_buffering off;
        proxy_set_header Upgrade $http_upgrade;
        proxy_set_header Connection "upgrade";
    }

    location /api/ {
        proxy_pass http://localhost:8080;
        proxy_set_header X-Real-IP $remote_addr;
        proxy_set_header Host $host;
        proxy_set_header X-Forwarded-For $proxy_add_x_forwarded_for;
    }

    location /core/ {
        proxy_pass http://localhost:8080;
        proxy_set_header X-Real-IP $remote_addr;
        proxy_set_header Host $host;
        proxy_set_header X-Forwarded-For $proxy_add_x_forwarded_for;
    }

    location / {
        rewrite ^/(.*)$ /ui/$1 last;
    }
}
启动nginx
nginx -t
systemctl start nginx
服务全部启动后, 访问 JumpServer 服务器 nginx 代理的 80 端口, 不要通过8080端口访问 默认账号: admin 密码: admin
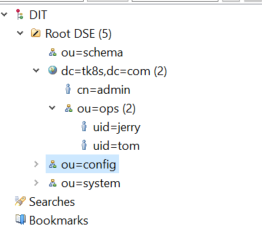
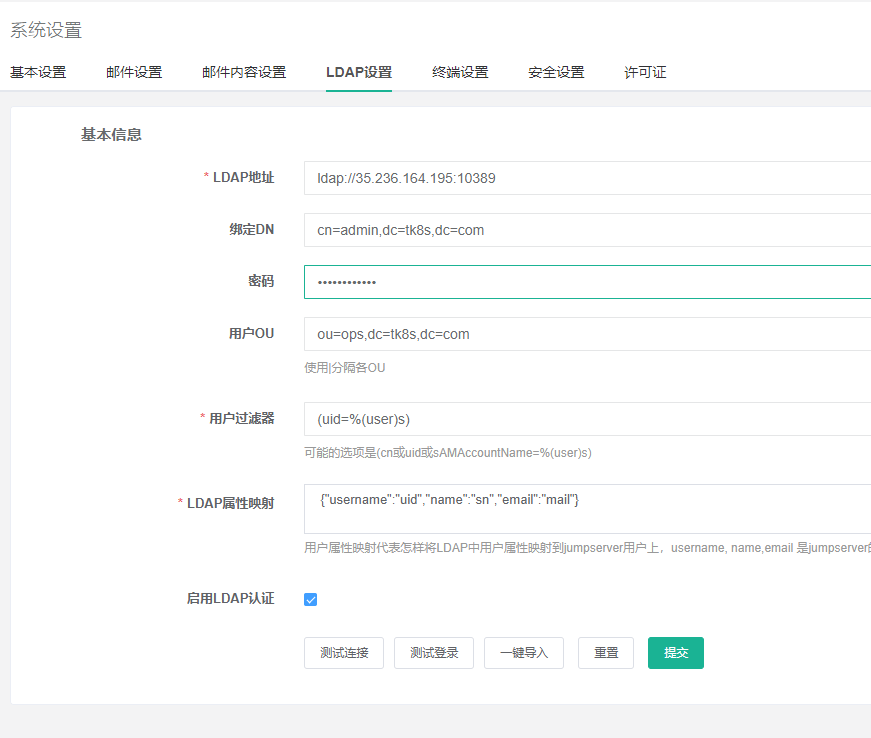
ldap设置


若有收获,就点个赞吧
0 人点赞
