环境准备
基本yum源
yum install -y epel-releaseyum install -y wget bash-com* gityum update -y
yum -y install gcc bc gcc-c++ ncurses ncurses-devel cmake elfutils-libelf-devel openssl-devel flex* bison* autoconf automake zlib* fiex* libxml* ncurses-devel libmcrypt* libtool-ltdl-devel* make cmake pcre pcre-devel openssl openssl-devel jemalloc-devel tlc libtool vim unzip wget lrzsz bash-comp* ipvsadm ipset jq sysstat conntrack libseccomp conntrack-tools socat curl wget git conntrack-tools psmisc nfs-utils tree bash-completion conntrack libseccomp net-tools crontabs sysstat iftop nload strace bind-utils tcpdump htop telnet lsof
关闭防火墙,swap,selinux
#关闭防火墙
systemctl disable --now firewalld

#关闭swap
swapoff -a
sed -ri '/^[^#]*swap/s@^@#@' /etc/fstab

#关闭selinux
setenforce 0
sed -ri '/^[^#]*SELINUX=/s#=.+$#=disabled#' /etc/selinux/config
主机
| hostname | ip | role | 安装组件 |
|---|---|---|---|
| node01 | 10.140.0.5 | mater | es+x-pack,kibana |
| node02 | 10.140.0.6 | node | es+x-pack |
| node03 | 10.140.0.7 | node | es+x-pack |
配置系统参数
cat <<EOF > /etc/sysctl.d/es.conf
net.ipv6.conf.all.disable_ipv6 = 1           #禁用ipv6
net.ipv6.conf.default.disable_ipv6 = 1       #禁用ipv6
net.ipv6.conf.lo.disable_ipv6 = 1            #禁用ipv6
net.ipv4.neigh.default.gc_stale_time = 120   #决定检查过期多久邻居条目
net.ipv4.conf.all.rp_filter = 0              #关闭反向路由校验
net.ipv4.conf.default.rp_filter = 0          #关闭反向路由校验
net.ipv4.conf.default.arp_announce = 2       #始终使用与目标IP地址对应的最佳本地IP地址作为ARP请求的源IP地址
net.ipv4.conf.lo.arp_announce = 2            #始终使用与目标IP地址对应的最佳本地IP地址作为ARP请求的源IP地址
net.ipv4.conf.all.arp_announce = 2           #始终使用与目标IP地址对应的最佳本地IP地址作为ARP请求的源IP地址
net.ipv4.ip_forward = 1                      #启用ip转发功能
net.ipv4.tcp_max_tw_buckets = 5000           #表示系统同时保持TIME_WAIT套接字的最大数量
net.ipv4.tcp_syncookies = 1                  #表示开启SYN Cookies。当出现SYN等待队列溢出时,启用cookies来处理
net.ipv4.tcp_max_syn_backlog = 1024          #接受SYN同包的最大客户端数量
net.ipv4.tcp_synack_retries = 2              #活动TCP连接重传次数
net.bridge.bridge-nf-call-ip6tables = 1      #要求iptables对bridge的数据进行处理
net.bridge.bridge-nf-call-iptables = 1       #要求iptables对bridge的数据进行处理
net.bridge.bridge-nf-call-arptables = 1      #要求iptables对bridge的数据进行处理
net.netfilter.nf_conntrack_max = 2310720     #修改最大连接数
fs.inotify.max_user_watches=89100            #同一用户同时可以添加的watch数目
fs.may_detach_mounts = 1                     #允许文件卸载
fs.file-max = 52706963                       #系统级别的能够打开的文件句柄的数量
fs.nr_open = 52706963                        #单个进程可分配的最大文件数
vm.overcommit_memory=1                       #表示内核允许分配所有的物理内存,而不管当前的内存状态如何
vm.panic_on_oom=0                            #内核将检查是否有足够的可用内存供应用进程使用
vm.swappiness = 0                            #关闭swap
net.ipv4.tcp_keepalive_time = 600            #修复ipvs模式下长连接timeout问题,小于900即可
net.ipv4.tcp_keepalive_intvl = 30            #探测没有确认时,重新发送探测的频度
net.ipv4.tcp_keepalive_probes = 10           #在认定连接失效之前,发送多少个TCP的keepalive探测包
vm.max_map_count=524288                      #定义了一个进程能拥有的最多的内存区域
EOF
sysctl --system
cat>/etc/security/limits.d/es.conf<<EOF
*       soft    nproc   131072
*       hard    nproc   131072
*       soft    nofile  131072
*       hard    nofile  131072
*       soft    memlock unlimited
*       hard    memlock unlimited
root    soft    nproc   131072
root    hard    nproc   131072
root    soft    nofile  131072
root    hard    nofile  131072
EOF
下载es7.5
# 创建目录
mkdir -p /data/install && cd /data/install

# 下载
wget https://artifacts.elastic.co/downloads/elasticsearch/elasticsearch-7.5.0-linux-x86_64.tar.gz -O elasticsearch-7.5.0-linux-x86_64.tar.gz

# 解压
tar zxvf elasticsearch-7.5.0-linux-x86_64.tar.gz
下载es7.5 源码包
# 创建目录
mkdir -p /data/src && cd /data/src

# 下载
wget https://github.com/elastic/elasticsearch/archive/v7.5.0.tar.gz -O elasticsearch-v7.5.0.tar.gz

# 解压
tar zxvf elasticsearch-v7.5.0.tar.gz
jdk安装
直接用es7.5自带的
echo 'export PATH=$PATH:/data/install/elasticsearch-7.5.0/jdk/bin' >> /etc/profile
source /etc/profile
编译x-pack包
mkdir /data/build && cd /data/build

# lib module
ln -s ../install/elasticsearch-7.5.0/lib .
ln -s ../install/elasticsearch-7.5.0/modules .

# License.java
find ../src -name "License.java" | xargs -r -I {} cp {} .
sed -i 's#this.type = type;#this.type = "platinum";#g' License.java
sed -i 's#validate();#// validate();#g' License.java

# 编译
javac -cp "`ls lib/elasticsearch-7.5.0.jar`:`ls lib/elasticsearch-x-content-7.5.0.jar`:`ls lib/lucene-core-*.jar`:`ls modules/x-pack-core/x-pack-core-7.5.0.jar`" License.java

# x-pack-core-7.5.0.jar
mkdir src && cd src
find ../../install -name "x-pack-core-7.5.0.jar" | xargs -r -I {} cp {} .
jar xvf x-pack-core-7.5.0.jar
rm -f x-pack-core-7.5.0.jar
\cp -f ../License*.class org/elasticsearch/license/
jar cvf x-pack-core-7.5.0.jar .
替换jar包

cp -f x-pack-core-7.5.0.jar /data/install/elasticsearch-7.5.0/modules/x-pack-core/

创建es用户
groupadd es && useradd -d /home/es -g es -m es
chown -R es:es /data
修改配置文件
node01
cluster.name: cluster-es
node.name: node01
network.host: 0.0.0.0
node.master: true
node.data: true
bootstrap.memory_lock: true
bootstrap.system_call_filter: false
http.port: 9200
cluster.max_shards_per_node: 100000
# head 插件需要这打开这两个配置
http.cors.allow-origin: "*"
http.cors.enabled: true
http.cors.allow-headers: "Authorization,X-Requested-With,Content-Length,Content-Type"
http.max_content_length: 200mb
# 可以选举的主节点
cluster.initial_master_nodes: ["10.140.0.5:9300"]
discovery.seed_hosts: ["10.140.0.5:9300","10.140.0.6:9300","10.140.0.7:9300"]
gateway.recover_after_nodes: 1
network.tcp.keep_alive: true
network.tcp.no_delay: true
transport.tcp.compress: true
cluster.fault_detection.leader_check.interval: 15s
#集群内同时启动的数据任务个数,默认是2个
cluster.routing.allocation.cluster_concurrent_rebalance: 16
#添加或删除节点及负载均衡时并发恢复的线程个数,默认4个
cluster.routing.allocation.node_concurrent_recoveries: 16
#初始化数据恢复时,并发恢复线程的个数,默认4个
cluster.routing.allocation.node_initial_primaries_recoveries: 16
#开启 xpack 功能,如果要禁止使用密码,请将以下内容注释,直接启动不需要设置密码
xpack.security.enabled: true
xpack.security.transport.ssl.enabled: true
xpack.security.transport.ssl.verification_mode: certificate
xpack.security.transport.ssl.keystore.path: certs/elastic-certificates.p12
xpack.security.transport.ssl.truststore.path: certs/elastic-certificates.p12
node02
cluster.name: cluster-es
node.name: node02
network.host: 0.0.0.0
node.master: false
node.data: true
bootstrap.memory_lock: true
bootstrap.system_call_filter: false
http.port: 9200
cluster.max_shards_per_node: 100000
# head 插件需要这打开这两个配置
http.cors.allow-origin: "*"
http.cors.enabled: true
http.cors.allow-headers: "Authorization,X-Requested-With,Content-Length,Content-Type"
http.max_content_length: 200mb
# 可以选举的主节点
cluster.initial_master_nodes: ["10.140.0.5:9300"]
discovery.seed_hosts: ["10.140.0.5:9300","10.140.0.6:9300","10.140.0.7:9300"]
gateway.recover_after_nodes: 1
network.tcp.keep_alive: true
network.tcp.no_delay: true
transport.tcp.compress: true
cluster.fault_detection.leader_check.interval: 15s
#集群内同时启动的数据任务个数,默认是2个
cluster.routing.allocation.cluster_concurrent_rebalance: 16
#添加或删除节点及负载均衡时并发恢复的线程个数,默认4个
cluster.routing.allocation.node_concurrent_recoveries: 16
#初始化数据恢复时,并发恢复线程的个数,默认4个
cluster.routing.allocation.node_initial_primaries_recoveries: 16
#开启 xpack 功能,如果要禁止使用密码,请将以下内容注释,直接启动不需要设置密码
xpack.security.enabled: true
xpack.security.transport.ssl.enabled: true
xpack.security.transport.ssl.verification_mode: certificate
xpack.security.transport.ssl.keystore.path: certs/elastic-certificates.p12
xpack.security.transport.ssl.truststore.path: certs/elastic-certificates.p12
node03
cluster.name: cluster-es
node.name: node03
network.host: 0.0.0.0
node.master: false
node.data: true
bootstrap.memory_lock: true
bootstrap.system_call_filter: false
http.port: 9200
cluster.max_shards_per_node: 100000
# head 插件需要这打开这两个配置
http.cors.allow-origin: "*"
http.cors.enabled: true
http.cors.allow-headers: "Authorization,X-Requested-With,Content-Length,Content-Type"
http.max_content_length: 200mb
# 可以选举的主节点
cluster.initial_master_nodes: ["10.140.0.5:9300"]
discovery.seed_hosts: ["10.140.0.5:9300","10.140.0.6:9300","10.140.0.7:9300"]
gateway.recover_after_nodes: 1
network.tcp.keep_alive: true
network.tcp.no_delay: true
transport.tcp.compress: true
cluster.fault_detection.leader_check.interval: 15s
#集群内同时启动的数据任务个数,默认是2个
cluster.routing.allocation.cluster_concurrent_rebalance: 16
#添加或删除节点及负载均衡时并发恢复的线程个数,默认4个
cluster.routing.allocation.node_concurrent_recoveries: 16
#初始化数据恢复时,并发恢复线程的个数,默认4个
cluster.routing.allocation.node_initial_primaries_recoveries: 16
#开启 xpack 功能,如果要禁止使用密码,请将以下内容注释,直接启动不需要设置密码
xpack.security.enabled: true
xpack.security.transport.ssl.enabled: true
xpack.security.transport.ssl.verification_mode: certificate
xpack.security.transport.ssl.keystore.path: certs/elastic-certificates.p12
xpack.security.transport.ssl.truststore.path: certs/elastic-certificates.p12
node01配置ca证书
cd /data/install/elasticsearch-7.5.0/config/
mkdir certs
../bin/elasticsearch-certutil  cert -out elastic-certificates.p12 -pass ""
mv ../elastic-certificates.p12  certs/
将证书传送给node02 node03的目录下
scp -r certs node02:/data/install/elasticsearch-7.5.0/config/
创建es启动脚本
vim /etc/init.d/elasticsearch-7.5.0
#!/bin/bash
ROOT=/data/install
USER=es
NAME=elasticsearch-7.5.0

DIR=${ROOT}/${NAME}
BIN=${DIR}/bin/elasticsearch
PID=${DIR}/${NAME}.pid
LOG=${DIR}/logs/${NAME}.log

start(){
  ps -ef |grep ${DIR}|grep -v grep
  PROC_STAT=$?
  if [ ${PROC_STAT} != 0 ]
        then
        su - ${USER} -c "${BIN} > ${LOG} 2>&1 &"
        sleep 1
        PROC_PID=`ps -ef|grep ${DIR}|grep -v grep|awk '{print $2}'| head -n1`
        su - ${USER} -c "echo ${PROC_PID} > ${PID}"
  else
        echo "${NAME} start fail,please check it!"
  fi
}

stop(){
  if [ -f $PID ]
        then
        kill $(cat $PID)
        rm -rf ${PID}
  else
        PROC_PID=`ps -ef |grep ${DIR}|grep -v grep|awk '{print $2}'|head -n1`
        if [ -n ${PROC_PID} ]
                then
                kill ${PROC_PID}
                echo "${NAME} had close."
        else
                echo "${NAME} maybe not run ,please check it!"
        fi
  fi
}
status(){
  ps -ef |grep ${DIR}|grep -v grep
}

case "$1" in
  start)
        start
  ;;
  stop)
        stop
  ;;
  status)
        status
  ;;
  restart)
        stop
        sleep 5
        start
  ;;
  *)
  echo "Usage: /etc/init.d/${NAME} {start|stop|restart}"
  exit 1
esac
exit 0
chmod +x /etc/init.d/elasticsearch-7.5.0
chown -R es:es /data/
启动es
service elasticsearch-7.5.0 start
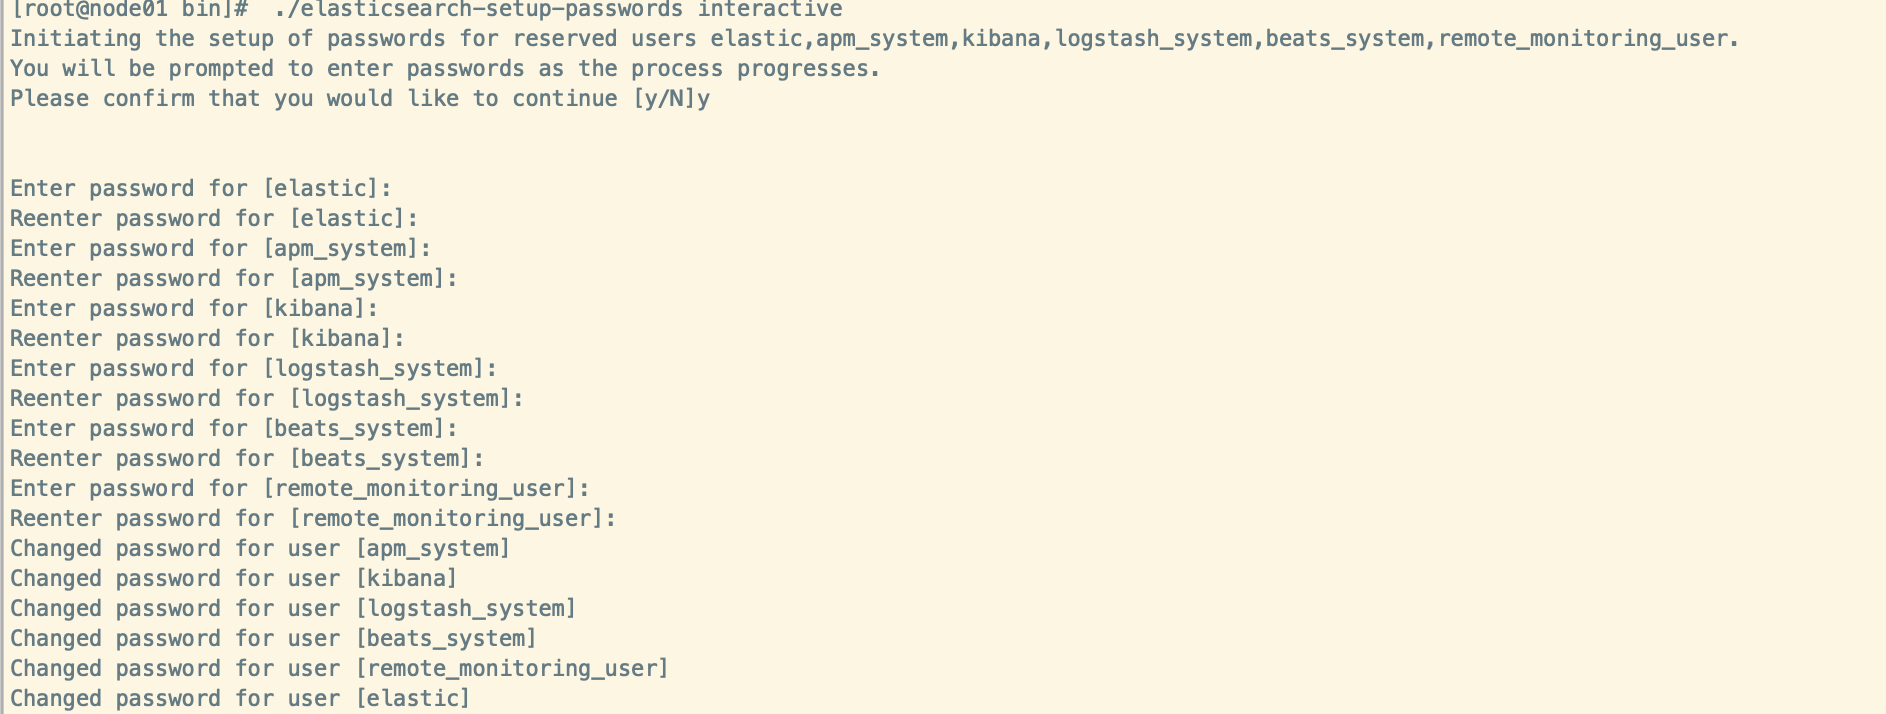
创建密码
./elasticsearch-setup-passwords interactive
curl --user elastic:elastic '127.0.0.1:9200/_cat/nodes?v'

安装kibana
cd /data
wget https://artifacts.elastic.co/downloads/kibana/kibana-7.5.0-linux-x86_64.tar.gz
tar xvf kibana-7.5.0-linux-x86_64.tar.gz
vim /data/kibana-7.5.0-linux-x86_64/config/kibana.yml
server.port: 5601
server.host: "0.0.0.0"
elasticsearch.hosts: ["http://10.140.0.5:9200"]
elasticsearch.username: "elastic"
elasticsearch.password: "elastic"
xpack.security.encryptionKey: encryptionKeysecurity12345678909876543210
xpack.reporting.encryptionKey: encryptionKeyreporting12345678909876543210
cd /data/kibana-7.5.0-linux-x86_64/bin
nohup ./kibana --allow-root &

若有收获,就点个赞吧
0 人点赞
