概述
在本文中,我们将会以 Python 项目为例,演示如何使用 Prometheus 提供的埋点库来实现 Prometheus 的埋点操作。
QuickStart
Step1: 安装 client 库
pip install prometheus-client
Step2: 编写示例程序
from prometheus_client import start_http_server, Summaryimport randomimport time# Create a metric to track time spent and requests made.REQUEST_TIME = Summary('request_processing_seconds', 'Time spent processing request')# Decorate function with metric.@REQUEST_TIME.time()def process_request(t):"""A dummy function that takes some time."""time.sleep(t)if __name__ == '__main__':# Start up the server to expose the metrics.start_http_server(8000)# Generate some requests.while True:process_request(random.random())
Step3: 查看指标
此时,我们可以访问 http://localhost:8000/ 来查询一下相应的 metrics 指标。
可以看到,我们仅仅是使用了一个装饰器,就可以得到如下两个指标:
- request_processing_seconds_count:函数调用的次数;
- request_processing_seconds_sum:函数总计调用的时间。
此外,通过 Prometheus 提供的 rate 函数,你还能够计算出请求的 QPS 以及平均响应时间等指标。
除此之外,你如果是将程序运行在 Linux 系统上,它还能自动收集进程的 CPU、Memory 等一系列其他指标信息。
数据生成
Prometheus 提供了四种类型的指标:Counter, Gauge, Summary 和 Histogram。
Counter
Counter 是一个持续上涨的指标,只有在程序重启时才会重置:
from prometheus_client import Counterc = Counter('my_failures', 'Description of counter')c.inc() # Increment by 1c.inc(1.6) # Increment by given value
在 Prometheus 收集指标时,会自动在指标名称后追加一个 _total 的后缀。
关于 Counter 而言,Prometheus 提供了多种不同的装饰器:
@c.count_exceptions()def f():passwith c.count_exceptions():pass# Count only one type of exceptionwith c.count_exceptions(ValueError):pass
它们都会记录当发生 Exceptions 时对指标指标进行自增操作。
Gauge
Gauge 是一个能增能减的指标。
from prometheus_client import Gaugeg = Gauge('my_inprogress_requests', 'Description of gauge')g.inc() # Increment by 1g.dec(10) # Decrement by given valueg.set(4.2) # Set to a given value
关于 Gauge 指标,有如下一些使用示例:
g.set_to_current_time() # Set to current unixtime# Increment when entered, decrement when exited.# 用于记录当前运行中的任务@g.track_inprogress()def f():passwith g.track_inprogress():pass
Gauge 同样可以从一个 callback 中获取对应的值:
d = Gauge('data_objects', 'Number of objects')my_dict = {}d.set_function(lambda: len(my_dict))
Summary
Summaries 可以用于记录一组任务的数量和大小(耗时)等:
from prometheus_client import Summarys = Summary('request_latency_seconds', 'Description of summary')s.observe(4.7) # Observe 4.7 (seconds in this case)
对于耗时统计而言,可以使用如下一系列装饰器:
@s.time()def f():passwith s.time():pass
Ps: Python 客户端不会暴露和存储分位数信息。
Histogram
Histogram 用于记录 buckets 中事件的大小和数量,从而可以对分位数进行聚合计算:
from prometheus_client import Histogramh = Histogram('request_latency_seconds', 'Description of histogram')h.observe(4.7) # Observe 4.7 (seconds in this case)
默认的 buctet 主要是用于统计 ms 到 s 级别的 web/rpc 请求。可以通过给 Histogram 对象传递一个 buckets 参数来进行显式指定。
其中,可用的一些装饰器包括:
@h.time()def f():passwith h.time():pass
Info
Info 包含一组 key/value 键值对,用于描述 target 的信息:
from prometheus_client import Infoi = Info('my_build_version', 'Description of info')i.info({'version': '1.2.3', 'buildhost': 'foo@bar'})
Enum
Enum 用于描述当前状态处于若干个可选状态中的某一个:
from prometheus_client import Enume = Enum('my_task_state', 'Description of enum',states=['starting', 'running', 'stopped'])e.state('running')
Labels
所有的 metrics 上都可以附加 label,从而可以实现对时间序列数据的分组。
一个 Counter 的使用示例如下:
from prometheus_client import Counterc = Counter('my_requests_total', 'HTTP Failures', ['method', 'endpoint'])c.labels('get', '/').inc()c.labels('post', '/submit').inc()
Labels 同样可以通过 key=value 的格式进行传入:
from prometheus_client import Counterc = Counter('my_requests_total', 'HTTP Failures', ['method', 'endpoint'])c.labels(method='get', endpoint='/').inc()c.labels(method='post', endpoint='/submit').inc()
Ps:带有标签的指标在声明时不会被初始化,因为客户端不知道标签可以有什么值。需要通过单独调用 .labels() 方法来初始化标签值。
Exemplars
可以将 Exemplars 添加到 Counter 和 Histogram 指标中。 Exemplars 可以被设置为一个键值对来进行设置。
例如对于 Counter 而言:
from prometheus_client import Counterc = Counter('my_requests_total', 'HTTP Failures', ['method', 'endpoint'])c.labels('get', '/').inc(exemplar={'trace_id': 'abc123'})c.labels('post', '/submit').inc(1.0, {'trace_id': 'def456'})
对于 Histogram 而言:
from prometheus_client import Histogramh = Histogram('request_latency_seconds', 'Description of histogram')h.observe(4.7, {'trace_id': 'abc123'})
Process 资源收集
Python Client 会自动的收集进程所使用的 CPU、内存、文件描述符、启动时间等一系列信息。这些指标统一都是以 process 开头。目前仅适用于 Linux 系统。
Platform 信息收集
Python Client 还会自动暴露一些关于 Python 的元数据。其中,指标的名称为 python_info,指标的值为1,相关的信息都通过label进行描述:
python_info{implementation="CPython",major="3",minor="8",patchlevel="8",version="3.8.8"} 1.0
数据导出
HTTP
最简单的方式就是通过 start_http_server 来启动一个 HTTP 服务来对外暴露指标了,例如:
from prometheus_client import start_http_serverstart_http_server(8000)
此时,你可以访问 http://localhost:8000/ 来查询对应的指标。
如果你想要在一个已有的 HTTP 服务上增加一个 endpoint 来暴露相关的指标,可以查询 MetricsHandler 类,它提供了一个 BaseHTTPRequestHandler 可以帮助你完成相关工作。
Flask
Flask 是一个流行的 Python Web 框架。对于一个 Flask 项目而言,可以快速的集成 Prometheus 来提供一个对应的能力:
from flask import Flaskfrom werkzeug.middleware.dispatcher import DispatcherMiddlewarefrom prometheus_client import make_wsgi_app# Create my appapp = Flask(__name__)# Add prometheus wsgi middleware to route /metrics requestsapp.wsgi_app = DispatcherMiddleware(app.wsgi_app, {'/metrics': make_wsgi_app()})
此时,我们可以通过如下方式来启动服务:
pip install uwsgiuwsgi --http 127.0.0.1:8000 --wsgi-file myapp.py --callable app
此时,可以访问 http://localhost:8000/metrics 来查询指标。
Flask 框架 + gunicorn 部署
针对 gunicorn 这类多进程模型而言,需要进行一定的处理。
首先,是针对 gunicorn_conf.py 文件中,需要追加如下内容:
def worker_exit(server, worker):from prometheus_client import multiprocessmultiprocess.mark_process_dead(worker.pid)
接下来,我们需要在 Flask app 中注册一个 /metrics 的 endpoints 用于提供相关指标:
from prometheus_client import multiprocessfrom prometheus_client import generate_latest, CollectorRegistry, CONTENT_TYPE_LATEST@app.route("/metrics")def metrics():registry = CollectorRegistry()multiprocess.MultiProcessCollector(registry)data = generate_latest(registry)return Response(data, mimetype=CONTENT_TYPE_LATEST)
最后,我们需要在程序启动时,创建一个多进程共享的目录用于存放指标数据:
rm -rf multiproc-tmpmkdir multiproc-tmpexport prometheus_multiproc_dir=multiproc-tmpgunicorn -c gunicorn_conf.py -w 4 yourapp:app
prometheus-flask-exporter
在上文中,我们讲解了如何使用 Prometheus 的原生 Python Client 进行 Python 埋点。不过,社区的第三方库中包含了一个 Prometheus 针对 Flask 框架封装后的 Lib 库:prometheus-flask-exporter。在下文中,我们将会继续讲解针对 Flask 项目而言,如何使用 prometheus-flask-exporter 来简化 Flask 的插桩过程。
安装
pip install prometheus-flask-exporter==0.18.7
QuickStart
from flask import Flask, requestfrom prometheus_flask_exporter import PrometheusMetricsapp = Flask(__name__)metrics = PrometheusMetrics(app)# static information as metricmetrics.info('app_info', 'Application info', version='1.0.3')@app.route('/')def main():pass # requests tracked by default@app.route('/skip')@metrics.do_not_track()def skip():pass # default metrics are not collected@app.route('/<item_type>')@metrics.do_not_track()@metrics.counter('invocation_by_type', 'Number of invocations by type',labels={'item_type': lambda: request.view_args['type']})def by_type(item_type):pass # only the counter is collected, not the default metrics@app.route('/long-running')@metrics.gauge('in_progress', 'Long running requests in progress')def long_running():pass@app.route('/status/<int:status>')@metrics.do_not_track()@metrics.summary('requests_by_status', 'Request latencies by status',labels={'status': lambda r: r.status_code})@metrics.histogram('requests_by_status_and_path', 'Request latencies by status and path',labels={'status': lambda r: r.status_code, 'path': lambda: request.path})def echo_status(status):return 'Status: %s' % status, statusif __name__ == "__main__":app.run()
默认指标
除非主动指定 export_defaults 为 False,默认情况下,prometheus-flask-exporter 会提供如下指标:
- flask_http_request_duration_seconds(Histogram类型):包含标签 method, path 和 status。用于记录 flask HTTP 请求的持续时间,单位为 s。
- flask_http_request_total(Counter类型),包含标签 method 和 status。用于记录 flask HTTP 接收请求的总数目。
- flask_http_request_exceptions_total(Counter类型),包含标签 method 和 status。用于记录 flask HTTP 接收请求中遇到未捕获异常的总数目。
- flask_exporter_info(Gauge类型),用于记录 Prometheus Flask exporter 自身的信息,例如版本号等。
在 PrometheusMetrics 初始化时,可以传入一个 defaults_prefix 参数用于指定所有指标的默认前缀,默认值为 flask。
此外,PrometheusMetrics 还提供了一个 buckets 参数可以用于更改延迟直方图的桶大小。同时,如果你想要将 flask_http_request_duration_seconds 之类类型调整为 summary,那么可以通过传入 default_latency_as_histogram=False 的参数来实现。
此外,如果你想要在所有的 Flask View 函数中添加你自己定制的默认指标时,可以使用 register_default 函数来实现,类似如下:
app = Flask(__name__)metrics = PrometheusMetrics(app)@app.route('/simple')def simple_get():passmetrics.register_default(metrics.counter('by_path_counter', 'Request count by request paths',labels={'path': lambda: request.path}))
如果要将相同的指标应用于多个(但不是全部)端点,需要先创建一个装饰器,然后添加到每个函数。示例如下:
app = Flask(__name__)metrics = PrometheusMetrics(app)by_path_counter = metrics.counter('by_path_counter', 'Request count by request paths',labels={'path': lambda: request.path})@app.route('/simple')@by_path_counterdef simple_get():pass@app.route('/plain')@by_path_counterdef plain():pass@app.route('/not/tracked/by/path')def not_tracked_by_path():pass
您可以通过使用 @metrics.do_not_track() 装饰它们来避免在单个端点上记录指标,或者在创建 PrometheusMetrics 实例时使用 exclude_paths 参数采用正则表达式(单个字符串或列表)来进行正则匹配的排除机制。
配置
默认情况下,采集指标将在 /metrics endpoints 上提供,并且使用 Prometheus 需要的格式进行输出。当然,你也可以通过 path、export_defaults、registry 等参数进行相关的调整。
group_by 设置了请求持续时间的聚合粒度,可以,你可以设置根据 endpoint 的函数名称进行聚合的,而不使用默认的 URI path。当然,你也可以通过传入一个函数来从一个请求中计算出对应的汇聚标签,示例如下:
PrometheusMetrics(app, group_by='path') # the defaultPrometheusMetrics(app, group_by='endpoint') # by endpointPrometheusMetrics(app, group_by='url_rule') # by URL ruledef custom_rule(req): # the Flask request object""" The name of the function becomes the label name. """return '%s::%s' % (req.method, req.path)PrometheusMetrics(app, group_by=custom_rule) # by a function# Error: this is not supported:PrometheusMetrics(app, group_by=lambda r: r.path)
此外,你还可以传入一个 default_labels 参数来为每个请求增加对应的 labels 信息,default_labels 需要接收一个字典类型的参数。
Labels
在函数中定义指标的 labels 时,支持通过字典的形式传入如下的值:
- 简单的静态值
- 一个无需函数的函数调用
- 将接收 Flask 响应作为参数的单个参数调用函数。
Label 值将会在请求上下文中进行计算。
应用信息
PrometheusMetrics.info() 方法提供了一种将信息公开为 Gauge 指标的方法,例如应用程序版本。
metrics = PrometheusMetrics(app)info = metrics.info('dynamic_info', 'Something dynamic')...info.set(42.1)
示例
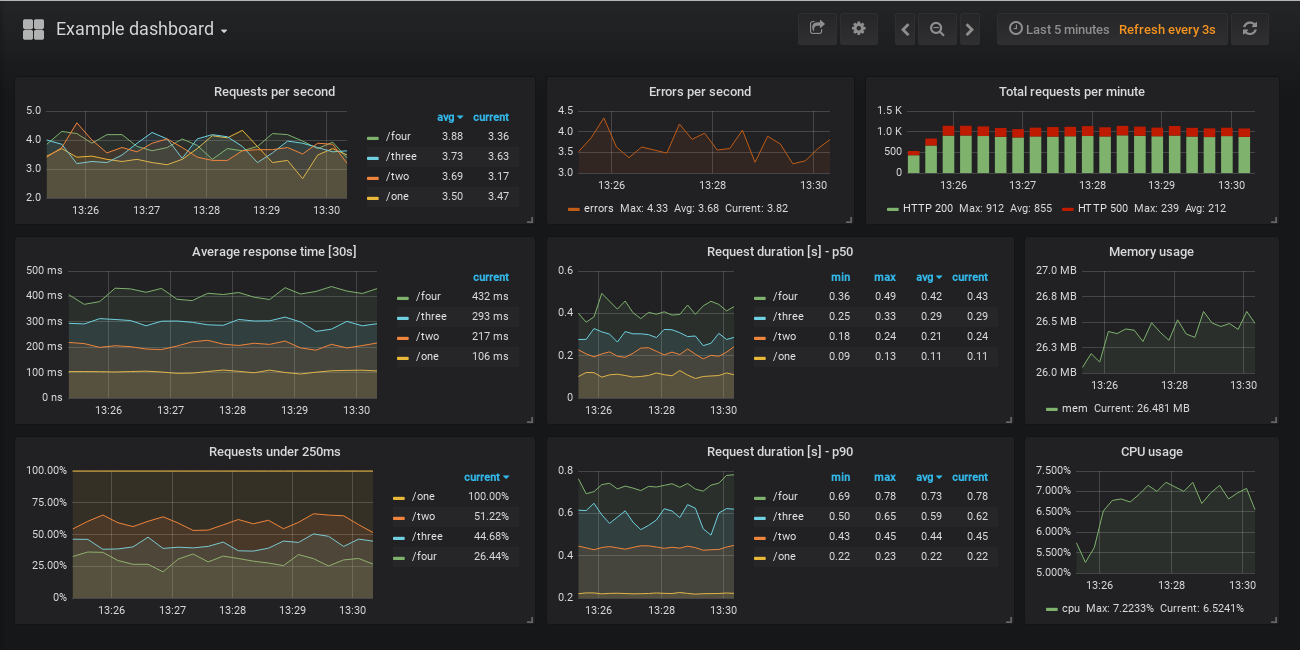
关于使用 Grafana 进行监控数据可视化的一些示例可以参考 https://github.com/rycus86/prometheus_flask_exporter/tree/master/examples/sample-signals 目录下的示例。
Flask-RESTful 集成
如果你的项目已经使用了 Flask-Restful 库,为了简化集成,您可以使用 RESTfulPrometheusMetrics 代替 PrometheusMetrics,后者将 response_converter 设置为使用 Flask-RESTful API 响应的工具。
from flask import Flaskfrom flask_restful import Apifrom prometheus_flask_exporter import RESTfulPrometheusMetricsapp = Flask(__name__)restful_api = Api(app)metrics = RESTfulPrometheusMetrics(app, restful_api)
gunicorn 部署模式
最后,我们来看一下针对 gunicorn 这种多进程模式部署的场景下,我们应该如何进行相关的适配操作。
在 prometheus_flask_exporter.multiprocess 包中,提供了一些相关的工具套件。这些装饰器可以用于将应用程序的多个实例将在单个主机上运行的环境中提供监控指标。
首先,我们需要修改 Flask 主程序如下:
from prometheus_flask_exporter.multiprocess import GunicornInternalPrometheusMetricsapp = Flask(__name__)metrics = GunicornInternalPrometheusMetrics(app)
接下来,我们还需要修改 Gunicorn 的配置文件,增加如下内容:
from prometheus_flask_exporter.multiprocess import GunicornInternalPrometheusMetricsdef child_exit(server, worker):GunicornInternalPrometheusMetrics.mark_process_dead_on_child_exit(worker.pid)
最后,我们需要在程序启动时,创建一个多进程共享的目录用于存放指标数据:
rm -rf multiproc-tmpmkdir multiproc-tmpexport prometheus_multiproc_dir=multiproc-tmpgunicorn -c gunicorn_conf.py -w 4 yourapp:app

