- 4种线程创建方式,3种线程安全问题。
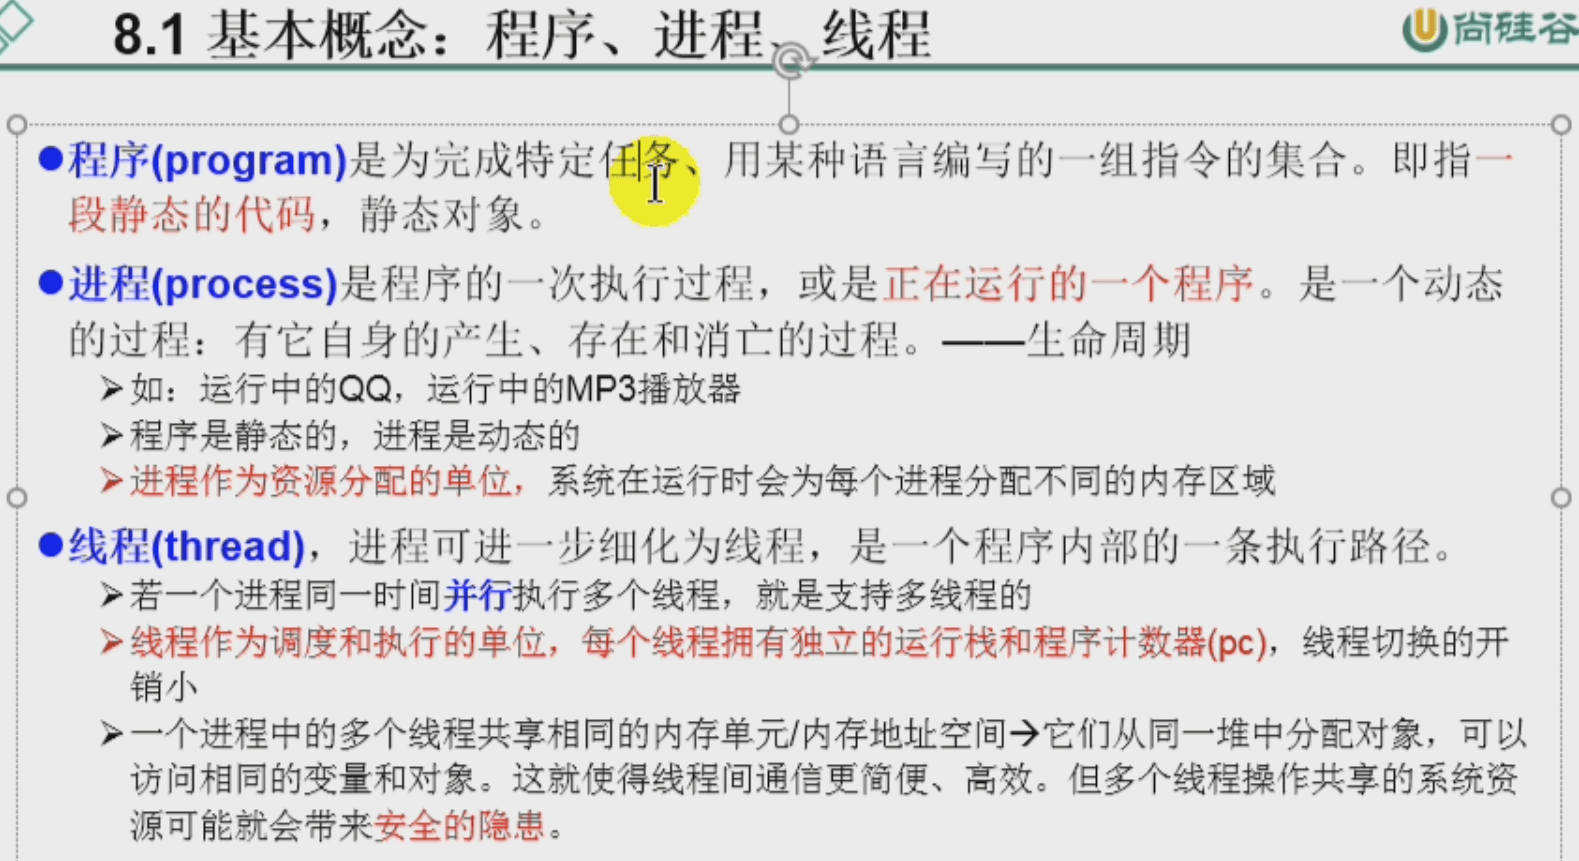
- 基本概念:程序、进程(资源分配单位)、线程(最小调度和执行单位)
- 从JVM看 “进程 、线程”
- CPU单核多核: Java.exe至少有3个线程、并行与并发
- 多线程优点:不管单多核, 都可以同时(并发\并行)做更多事、提高资源利用率。
- 何时需要多线程:进程需要子任务、IO等待频繁、后台运行。
- (仅目前)两种实现多线程方式:1、继承Thread类,2、实现Runable接口(优先选择:没有类的单继承局限、多线程间方便共享数据)
- Thread类:常用方法、线程优先级(概率,而非次序)
- 线程的生命周期(重要)
- 线程安全问题: 由共享数据带来的安全问题、线程同步机制(三种:同步代码块、同步方法、Lock)
- 死锁
- 线程安全方式三:Lock锁 — jdk5.0以上、new ReentrantLock()、lock()、unlock()
- 线程安全建议顺序: Lock > 同步代码块 > 同步方法
- ">
- 线程通信:wait、notify、notifyAll : 1. 这3个方法只能在同步代码块或同步方法中(Lock中有其他方式) 且调用者必须其中的同步监视器。2. wait()阻塞并释放锁。3. 这三个方法定义在Object类中(因为任何类都可以充当同步监视器,故任何类都可能需要它)
- jdk5.0新增-多线程创建之:实现Callable的call接口(有返回值、抛异常、支持范型)-需借助FutureTask类: FutureTask实现了Runnable的接口
- jdk5.0新增-使用线程池(‼️是开发中 实际使用的方式)优点: 响应速度提高,资源重用率提高,关于管理。
- 多线程回顾:创建多线程共4种方式:继承Thread、实现Runnable接口、实现Callable接口、ThreadPool 。 线程安全(基于同步机制)共3种方式:同步代码块、同步方法、Lock锁。
4种线程创建方式,3种线程安全问题。
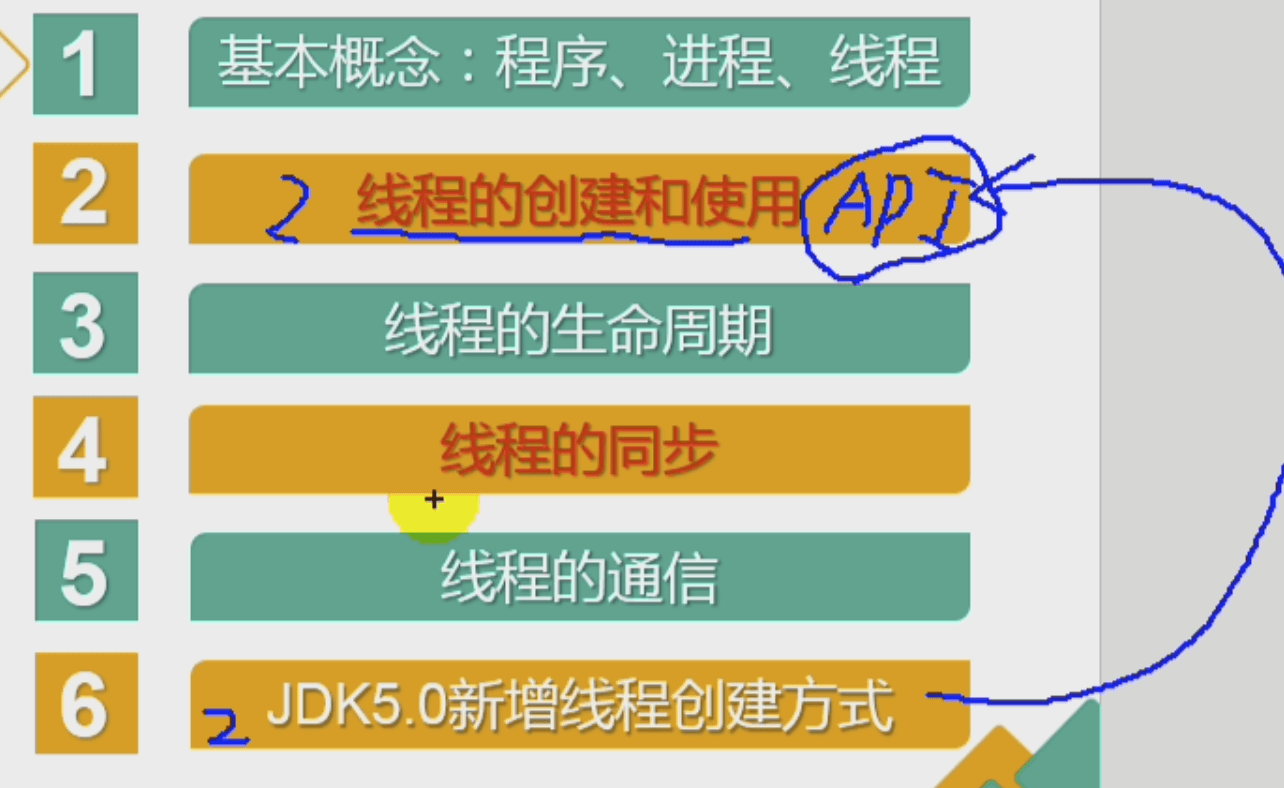
基本概念:程序、进程(资源分配单位)、线程(最小调度和执行单位)
从JVM看 “进程 、线程”
每个线程都有独立的虚拟机栈和程序计数器(最小调度与执行), 而每个进程都独立的方法区和堆(资源分配),且进程的资源被其内部的所有线程所共享(共享也导致了安全隐患)。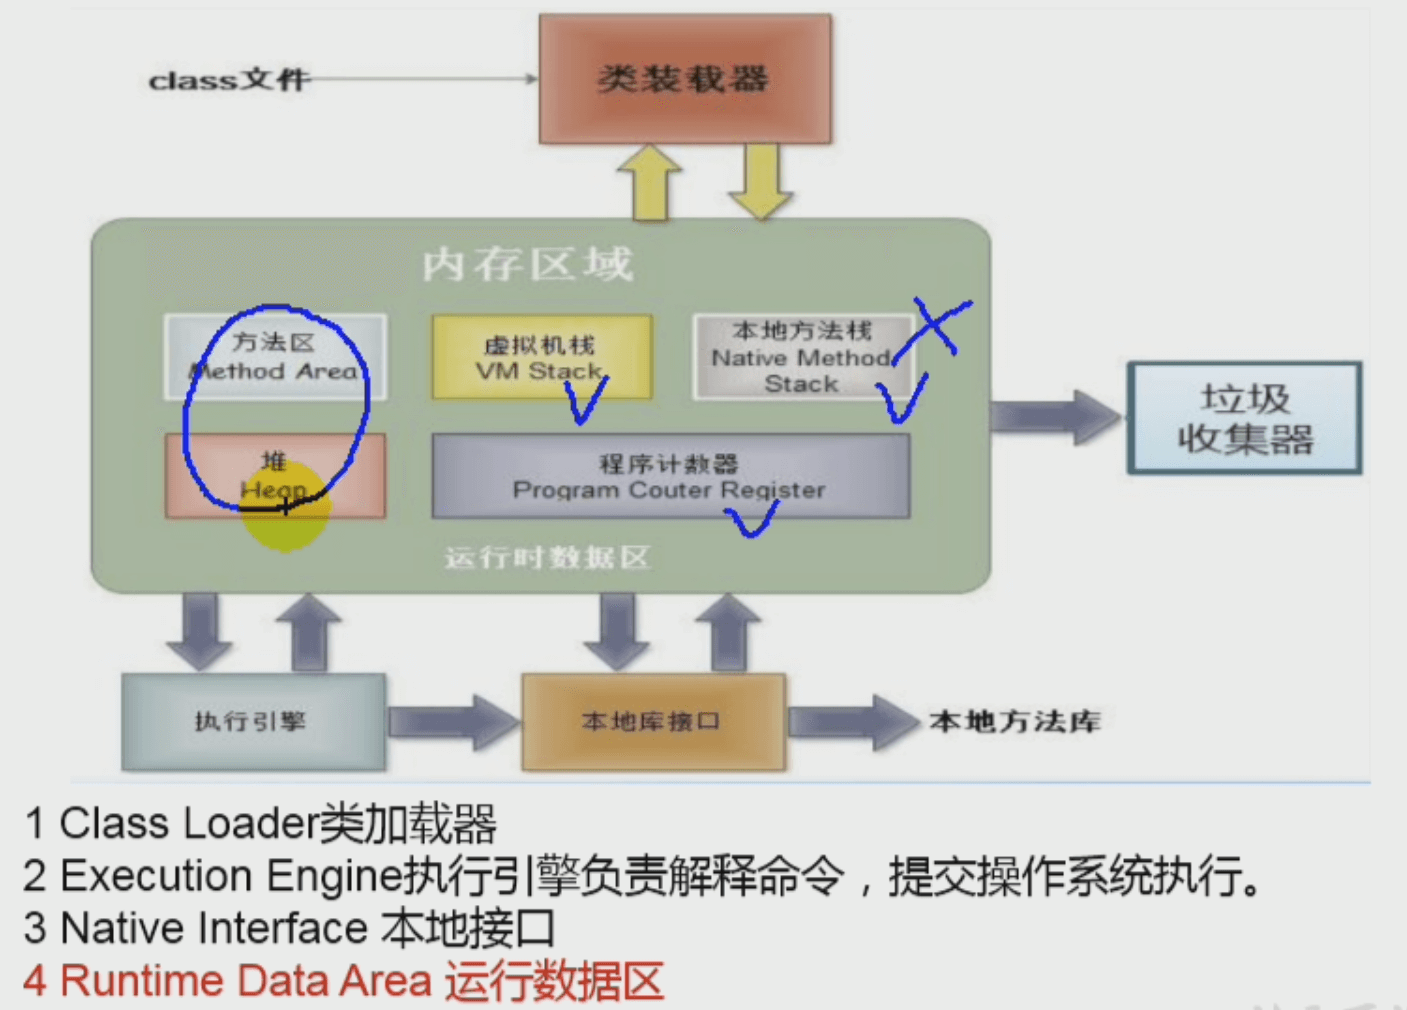
CPU单核多核: Java.exe至少有3个线程、并行与并发
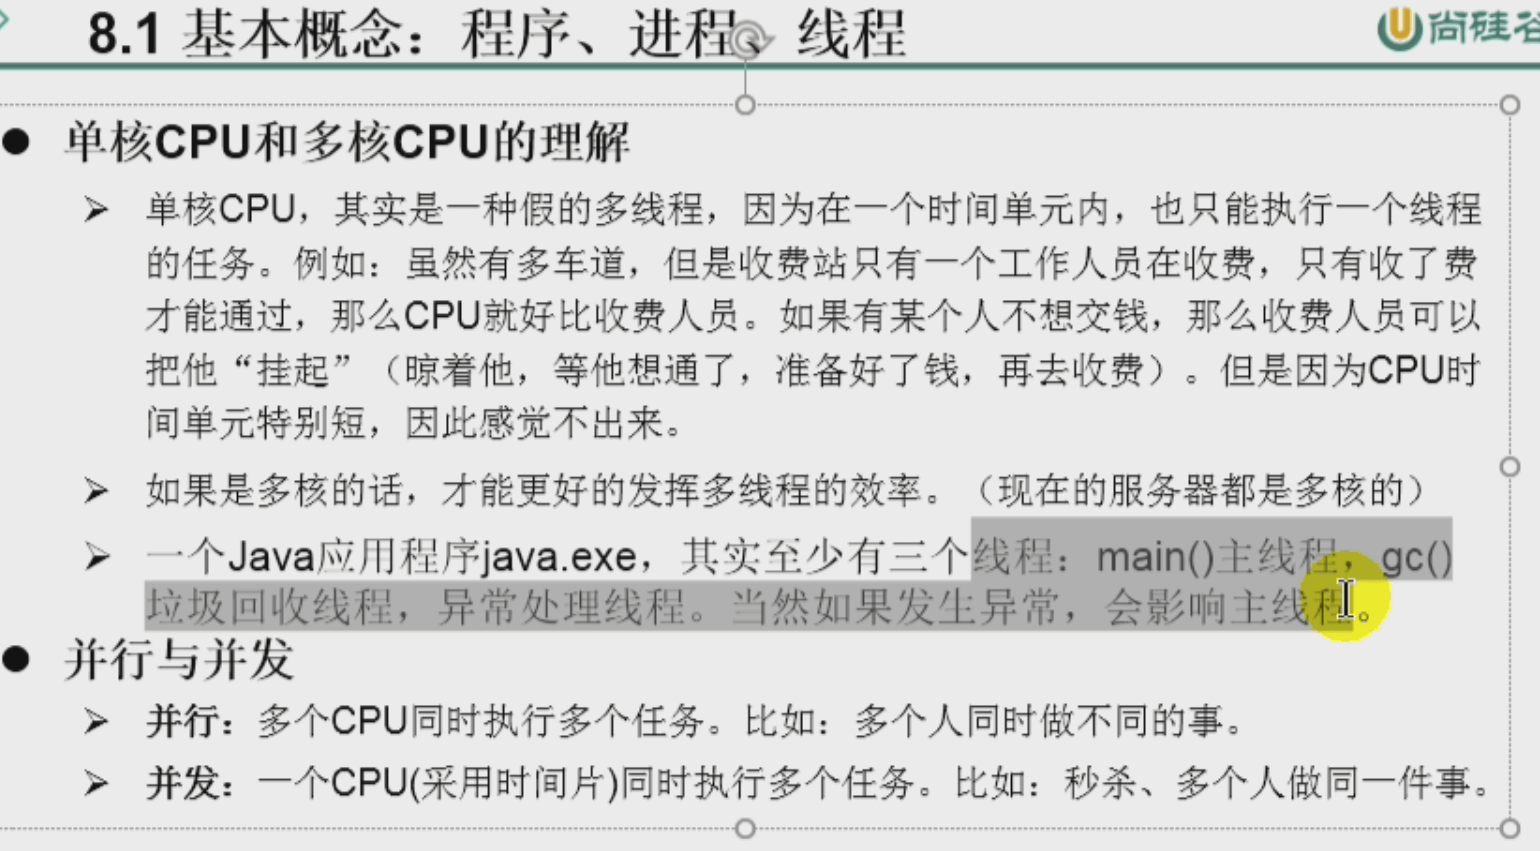
多线程优点:不管单多核, 都可以同时(并发\并行)做更多事、提高资源利用率。


何时需要多线程:进程需要子任务、IO等待频繁、后台运行。
(仅目前)两种实现多线程方式:1、继承Thread类,2、实现Runable接口(优先选择:没有类的单继承局限、多线程间方便共享数据)
方式一:继承Thread类:重写run方法,再调用实例的start方法。
new Thread(){@Overridepublic void run(){ ... } // 1.继承并重写Thread类的run方法}.start(); // 2.调用该实例的start方法
该实例的start方法有两个作用:1启动一个新进程 2. jvm会用这个新进程去执行该实例的run() 。
问题1:不能直接调用该实例的run(),只是单纯方法的调用,并没有启用新线程。
问题2: 不能重复调用实例的start(), 因为每个实例只能启动一个新线程(内部实现有个计数器)。 不过,重新创建实例即可。
方式二:实现Runable接口: 实现run() ,然后new Thread(p).start()

public class Hello {public static void main(String[] args) {Runnable p = new Runnable() {private int total = 10;@Overridepublic void run() {while (total > 0) {System.out.println(Thread.currentThread().getName() + ":" + total--);}}};new Thread(p).start();new Thread(p).start();}}
Thread类:常用方法、线程优先级(概率,而非次序)

yield() 主动从运行状态回到就绪状态。比如爬虫,爬数据的进程已经爬到一节数据了,就可以yield(),以便让其他进程取走这部分数据。
join(): 比如刷微博,当一直向下刷时,已经没有内容展示了,那么“内容展示线程”主动调用“加载数据线程”的join方法, 此时“内容展示线程”阻塞,直到加载数据的线程执行完,“内容展示线程”就绪。 简而言之:join()就像有特定目的的阻塞一样,当达到目的就冲阻塞回到就绪状态。
补充1:线程通信的三个方法定义在Object类中:wait() ,notigy() ,notifyAll()
补充2: 线程分为守护线程和用户线程,守护线程依赖用户线程而存活。
- Thread类线程优先级: 优先级不是次序,而是概率。

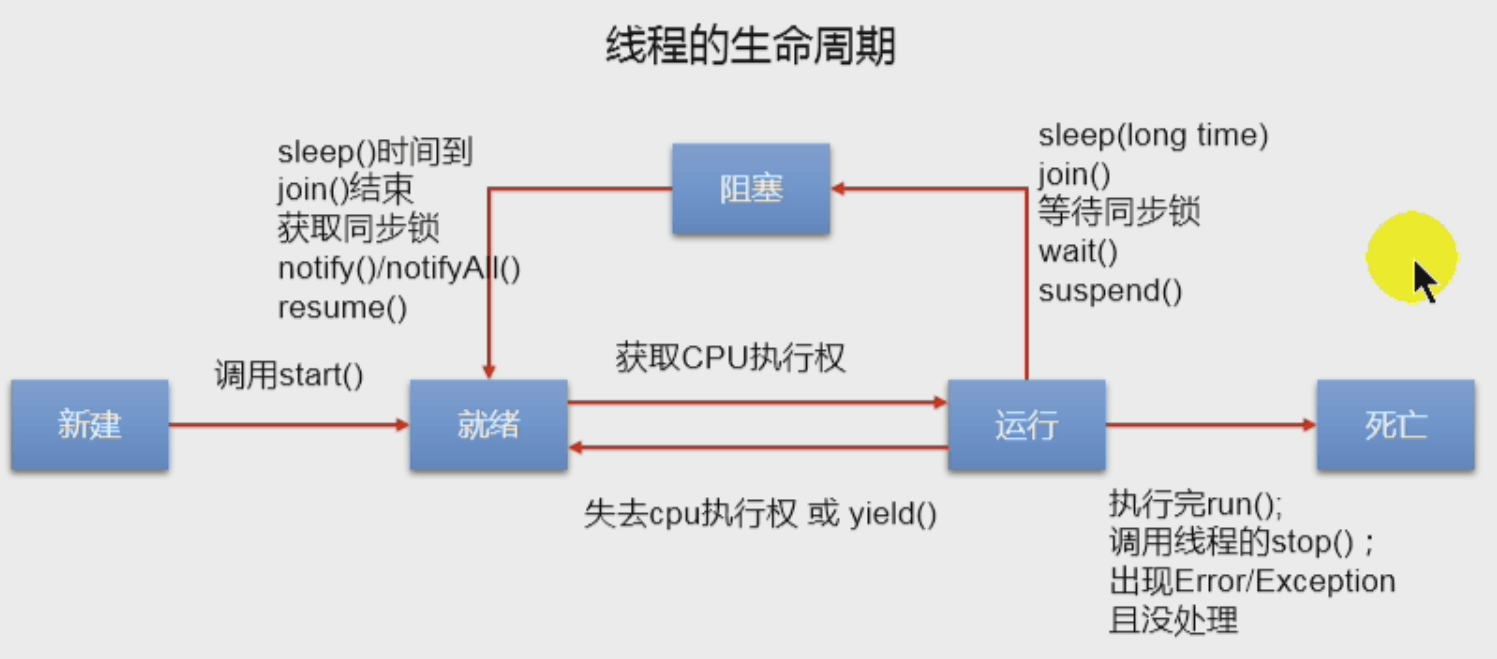
线程的生命周期(重要)
线程安全问题: 由共享数据带来的安全问题、线程同步机制(三种:同步代码块、同步方法、Lock)
解决方案一:同步代码块
(缺点1:效率低,同步代码块内部是相当于单线程。缺点2:不方便,共用一把锁)
- 需要被同步的代码块:操作共享数据的代码块。
- 同步监视器:俗称“锁”,任何类的实例都可以充当锁,比如
new Object()。 但要求,多个线程共用同一把锁。
下面是两个窗口售票的例子:
public class Hello {public static void main(String[] args) {Runnable p = new Runnable() {private int total = 100;Object key = new Object(); // 共用一把锁@Overridepublic void run() {while (true) {// 下面代码块操作了共享数据total,故它就是需要被同步的代码块。// 特别地,有时候可以使用this本身来作为锁// synchronized (key) {// 更方便地,类本身就是唯一的对象,可以作为锁。// synchronized (this) {synchronized (Hello.class) {if (total < 0)break;System.out.println();try {Thread.sleep(10);} catch (InterruptedException e) {e.printStackTrace();}System.out.println(Thread.currentThread().getName() + ":" + total--);}}}};new Thread(p).start();new Thread(p).start();}}
特别注意:对一个实例并发时,可以使用this本身来作为锁。或者,使用类名.class来作为锁,因为在java中类本身也是对象,且它是唯一的。
强调:类本身也是对象。
解决方案二:同步方法: 共享数据被一个方法所全部包含,则该方法可以声明为同步方法。(同步方法其实等价于同步代码块,只是不过同步监视器由JVM隐式为this 或者 类本身)(缺点:如同步的代码块的缺点,即效率低,互斥内部依然为“单线程”)、(非)静态同步方法。
- 非静态同步方法:同步监视器为this,仅处理一个实例并发情况。
静态同步方法和静态共享变量:同步监视器为类,处理该类的并发情况。 ```java // 非静态同步方法:同步监视器为this,仅处理一个实例并发情况。 class Sale implements Runnable { private int total = 100;
@Override public void run() {
while (true) {sales();}
}
private synchronized void sales() {
if (total < 0)return;System.out.println();try {Thread.sleep(10);} catch (InterruptedException e) {e.printStackTrace();}System.out.println(Thread.currentThread().getName() + ":" + total--);
}
public static void main(String[] args) {
Runnable p = new Sale();new Thread(p).start();new Thread(p).start();
}
}
// 静态同步方法:同步监视器为类,处理该类的并发情况。 class Sale implements Runnable { private static int total = 100; // 1. 共享变量static
@Overridepublic void run() {while (true) {sales();}}private static synchronized void sales() { // 同步方法staticif (total < 0)return;System.out.println();try {Thread.sleep(10);} catch (InterruptedException e) {e.printStackTrace();}System.out.println(Thread.currentThread().getName() + ":" + total--);}public static void main(String[] args) {Runnable p1 = new Sale();Runnable p2 = new Sale();new Thread(p1).start();new Thread(p2).start();}
}
<a name="U9nUW"></a>### 多线程线程安全——单例模式```javapublic class Instance {public static Instance instance = null;public static Instance getInstance() {// synchronized (Instance.class) {// // 方式一:效率低:所有之后的线程都要进行排队检查是否为null// if (instance == null) {// instance = new Instance();// }// return instance;// }if (instance == null) {// 方式二:效率高,稍之后的线程都要不再需要为检查null而排队。synchronized (Instance.class) {if (instance == null) {instance = new Instance();}}}return instance;}}
死锁

线程安全方式三:Lock锁 — jdk5.0以上、new ReentrantLock()、lock()、unlock()
疑问🤔️:下面代码只实例化了一个Runable实例,如果不同的Runable实例如何拿到同一个lock,并同步共享资源呢?
class Sale implements Runnable {private int total = 100;// 1.同一个Lock实例private ReentrantLock lock = new ReentrantLock();@Overridepublic void run() {while (true) {// 2. 加锁lock.lock();if (total < 0)return;System.out.println();try {Thread.sleep(10);} catch (InterruptedException e) {e.printStackTrace();}System.out.println(Thread.currentThread().getName() + ":" + total--);// 3. 解锁lock.unlock();}}}public class Test {public static void main(String[] args) {Runnable p = new Sale();new Thread(p).start();new Thread(p).start();}}
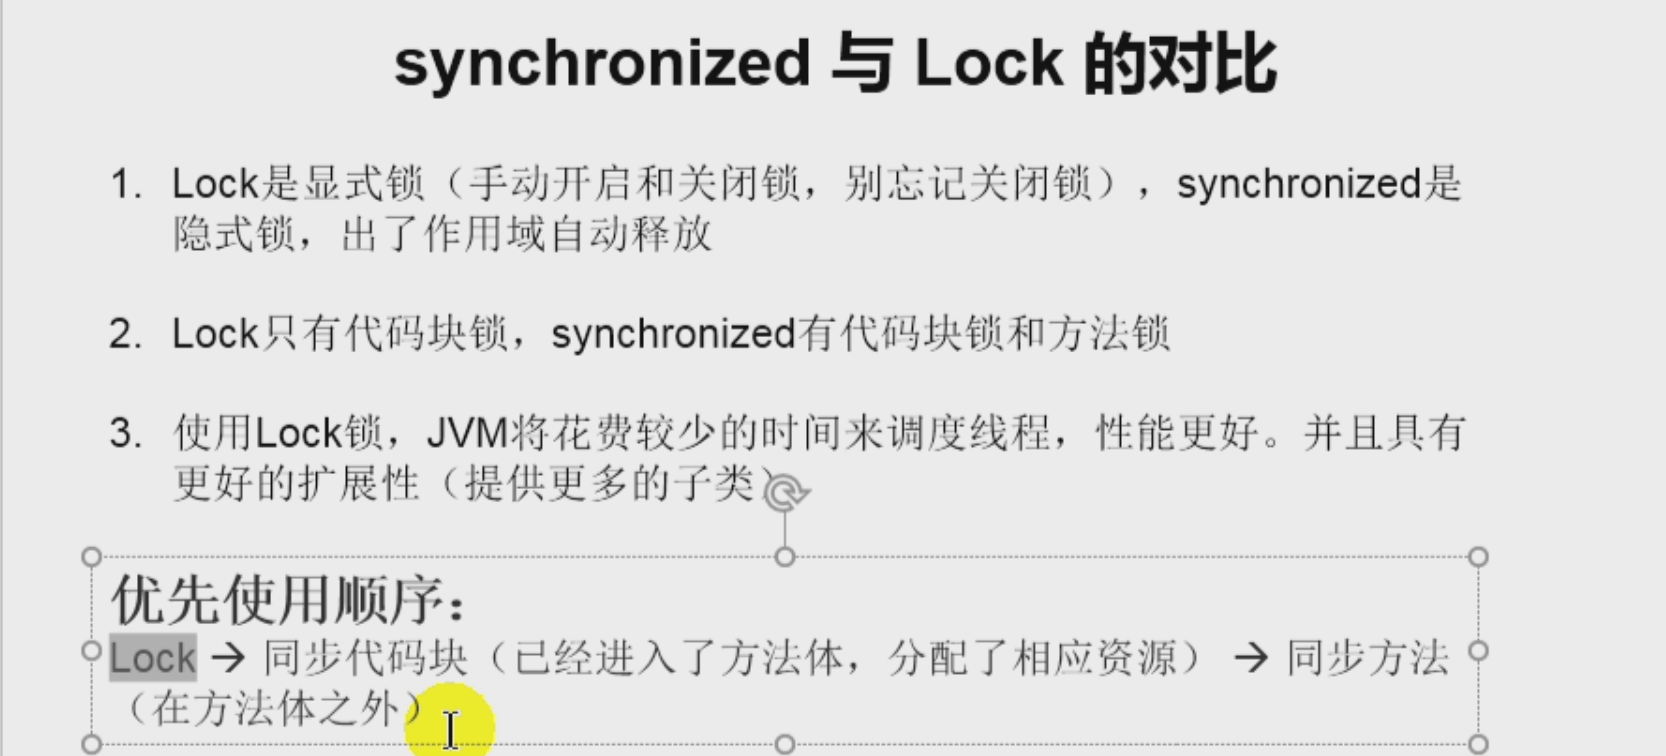
线程安全建议顺序: Lock > 同步代码块 > 同步方法
线程通信:wait、notify、notifyAll : 1. 这3个方法只能在同步代码块或同步方法中(Lock中有其他方式) 且调用者必须其中的同步监视器。2. wait()阻塞并释放锁。3. 这三个方法定义在Object类中(因为任何类都可以充当同步监视器,故任何类都可能需要它)
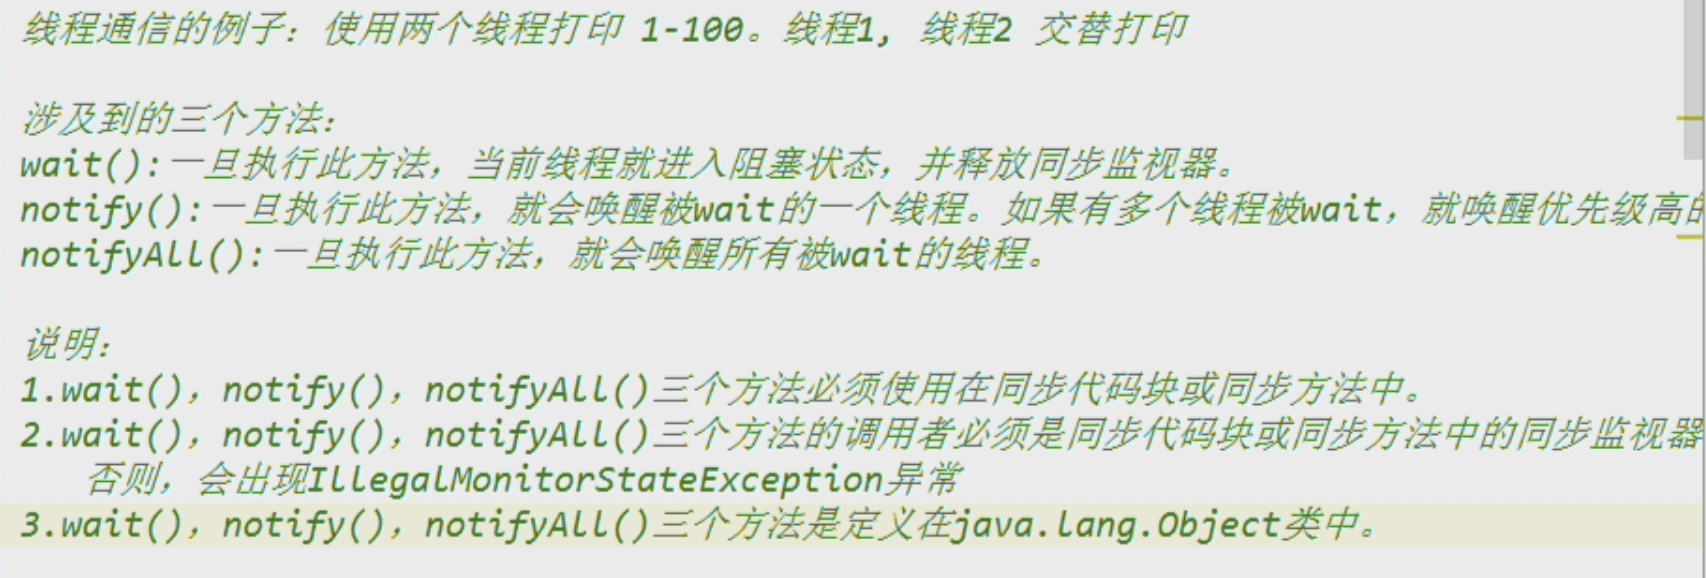
// 两个线程交互打印class Sale implements Runnable {private int total = 100;private Object obj = new Object(); // 1.同步监视器@Overridepublic void run() {while (true) {synchronized (obj) {obj.notifyAll(); // 2.自己先进入,调用同步监视器来唤醒其他进程if (total < 0)break;System.out.println();try {Thread.sleep(10);} catch (InterruptedException e) {e.printStackTrace();}System.out.println(Thread.currentThread().getName() + ":" + total--);try {obj.wait();// 办完事情,调用同步监视器来进入阻塞并释放锁。} catch (InterruptedException e) {// TODO Auto-generated catch blocke.printStackTrace();}}}}}public class Test {public static void main(String[] args) {Runnable p = new Sale();Thread job1 = new Thread(p);Thread job2 = new Thread(p);job1.setName("job1");job2.setName("job2");job1.start();job2.start();}}
面试题:sleep()与wait()异同

线程通信:生产者消费者问题
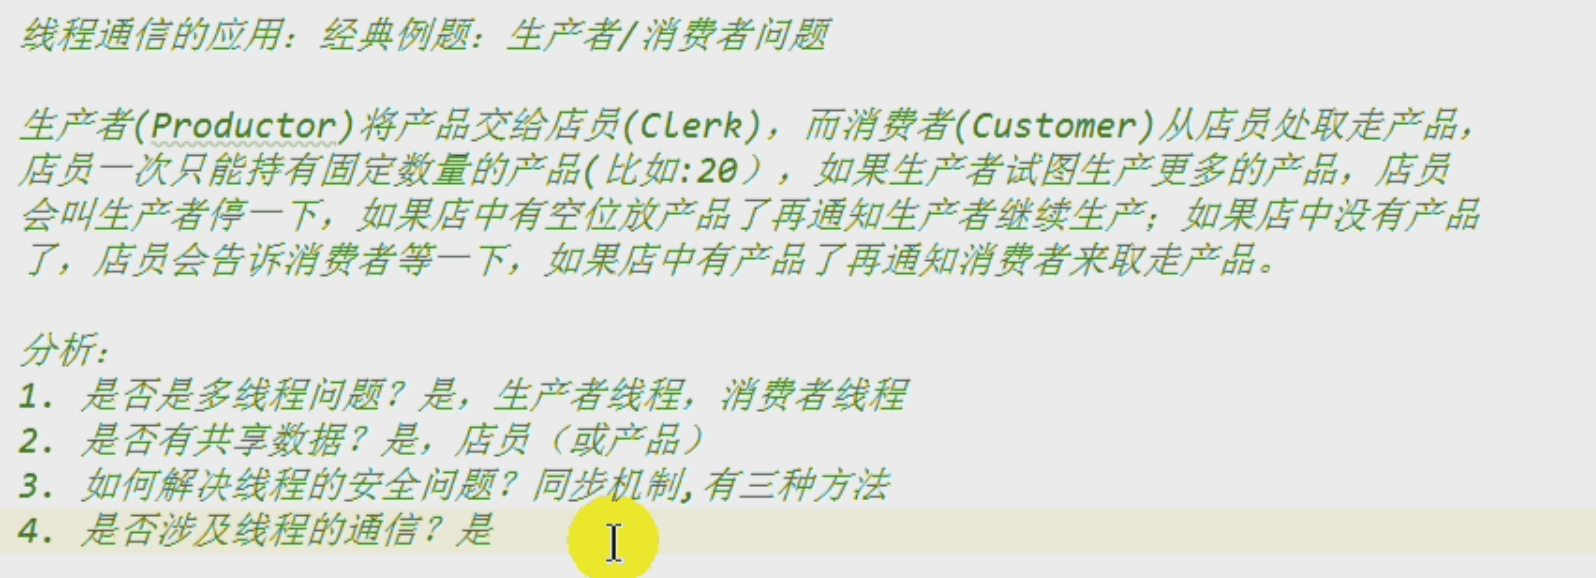
// 下面代码: 同步监视器为Clerk.class, 当生产过剩时生产者主动wait(), 当物料缺乏时消费者主动wait()。 且一旦开始生产,则消费者被唤醒,一旦开始消费,则生产者被唤醒。
public class Product {public static void main(String[] args) {Clerk clerk = new Clerk();Thread producter = new Thread(new Producter(clerk));Thread customer = new Thread(new Custormer(clerk));producter.setPriority(Thread.MAX_PRIORITY);customer.setPriority(Thread.MIN_PRIORITY);producter.setName("生产者1:");customer.setName("消费者1:");producter.start();customer.start();}}class Clerk {private int num = 0;public void addNum() {this.setNum(this.getNum() + 1);}public int getNum() {return num;}public void setNum(int num) {this.num = num;}public void subNum() {this.setNum(this.getNum() - 1);}}// 同步监视器为Clerk.class, 生产者生产过剩时wait(),消费者物料缺乏时wait()。 一旦开始生产,则消费者唤醒,一旦开始消费,则生产者唤醒。class Producter implements Runnable {private Clerk clerk = null;private int i = 50;Producter(Clerk clerk) {this.clerk = clerk;}@Overridepublic void run() {while (i-- > 0) {synchronized (Clerk.class) {Clerk.class.notify();if (clerk.getNum() >= 10)try {Clerk.class.wait();} catch (InterruptedException e) {e.printStackTrace();}System.out.println(Thread.currentThread().getName() + "即将生产第" + clerk.getNum() + "个产品");try {Thread.sleep(50);} catch (InterruptedException e1) {e1.printStackTrace();}clerk.addNum();}}}}class Custormer implements Runnable {private Clerk clerk = null;private int i = 50;Custormer(Clerk clerk) {this.clerk = clerk;}@Overridepublic void run() {while (i-- > 0) {synchronized (Clerk.class) {if (clerk.getNum() <= 0)try {Clerk.class.wait();} catch (InterruptedException e) {e.printStackTrace();}Clerk.class.notify();System.out.println(Thread.currentThread().getName() + "即将消费第" + clerk.getNum() + "个产品");try {Thread.sleep(50);} catch (InterruptedException e1) {// TODO Auto-generated catch blocke1.printStackTrace();}clerk.subNum();}}}}
jdk5.0新增-多线程创建之:实现Callable的call接口(有返回值、抛异常、支持范型)-需借助FutureTask类: FutureTask实现了Runnable的接口
import java.util.concurrent.Callable;import java.util.concurrent.FutureTask;class MyCallable implements Callable {// 1.实现Callable的call接口的类private int[] nums;MyCallable(int[] nums) {this.nums = nums;}public int getSum() {int sum = 0;for (int i : nums) {sum += i;System.out.println(Thread.currentThread().getName() + ":" + i);}return sum;}@Overridepublic Integer call() throws Exception {return getSum();}}public class CallableTest {public static void main(String[] args) {// 2.创建Callable的接口实现类的实例MyCallable MyCallable1 = new MyCallable(new int[] { 1, 2, 3, 4, 5, 6, 7 });MyCallable MyCallable2 = new MyCallable(new int[] { 10, 11, 12, 13, 14, 15 });// 3.使用2中实例来创建FutureTask实例。FutureTask<Integer> futureTask1 = new FutureTask<Integer>(MyCallable1);FutureTask<Integer> futureTask2 = new FutureTask<Integer>(MyCallable2);// 4.使用3中的实例来创建Thread实例。并运行。Thread job1 = new Thread(futureTask1);Thread job2 = new Thread(futureTask2);// 5. 启动多线程job1.setName("job1:");job2.setName("job2:");job1.start();job2.start();// 6.若有必要,FutureTask获取call方法中的返回值try {Integer sum1 = futureTask1.get();Integer sum2 = futureTask2.get();System.out.println("sum1:" + sum1 + " sum2:" + sum2);} catch (Exception e) {// TODO: handle exceptione.printStackTrace();}}}
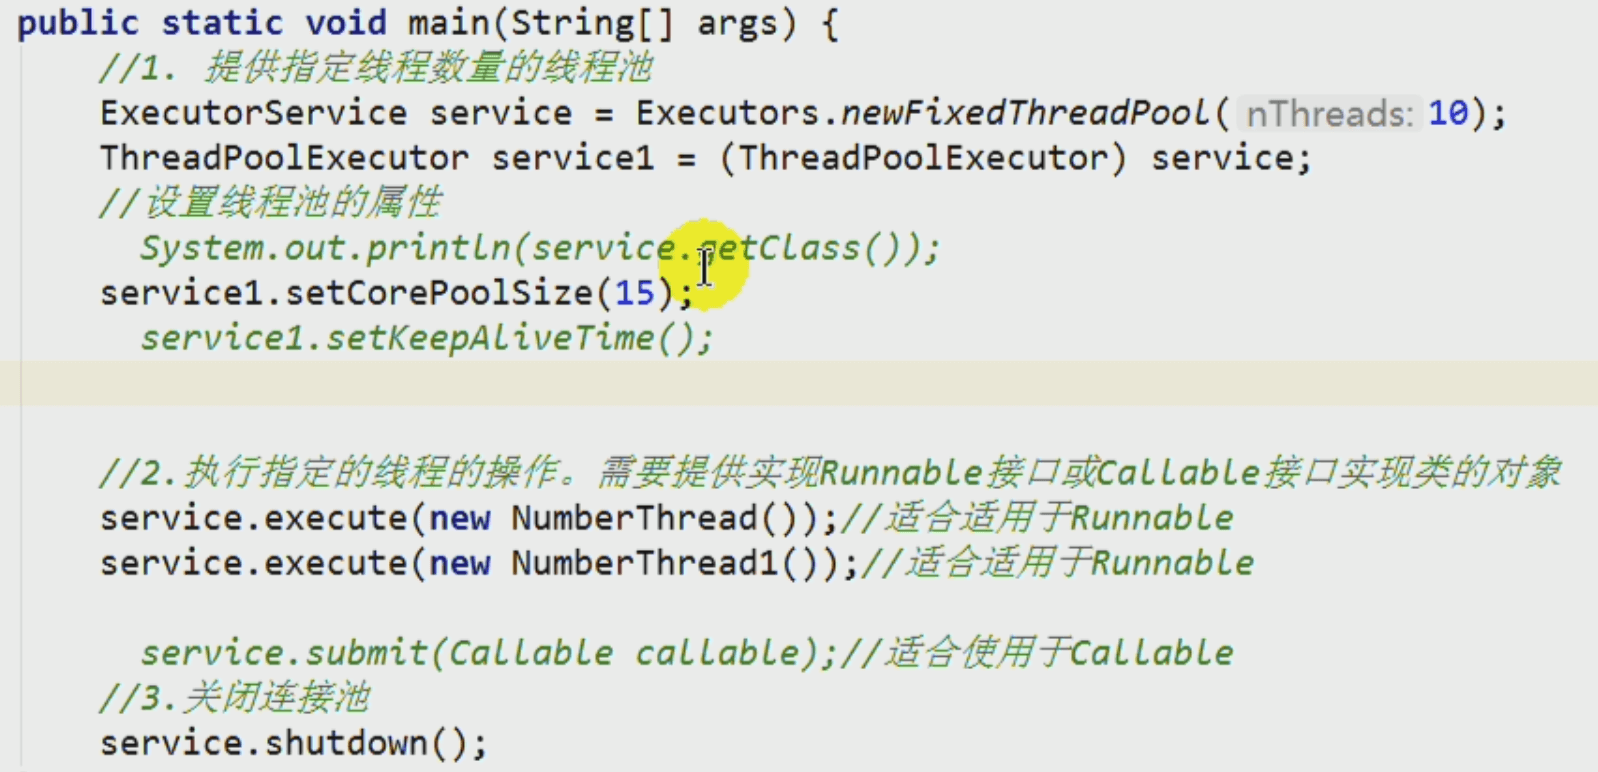
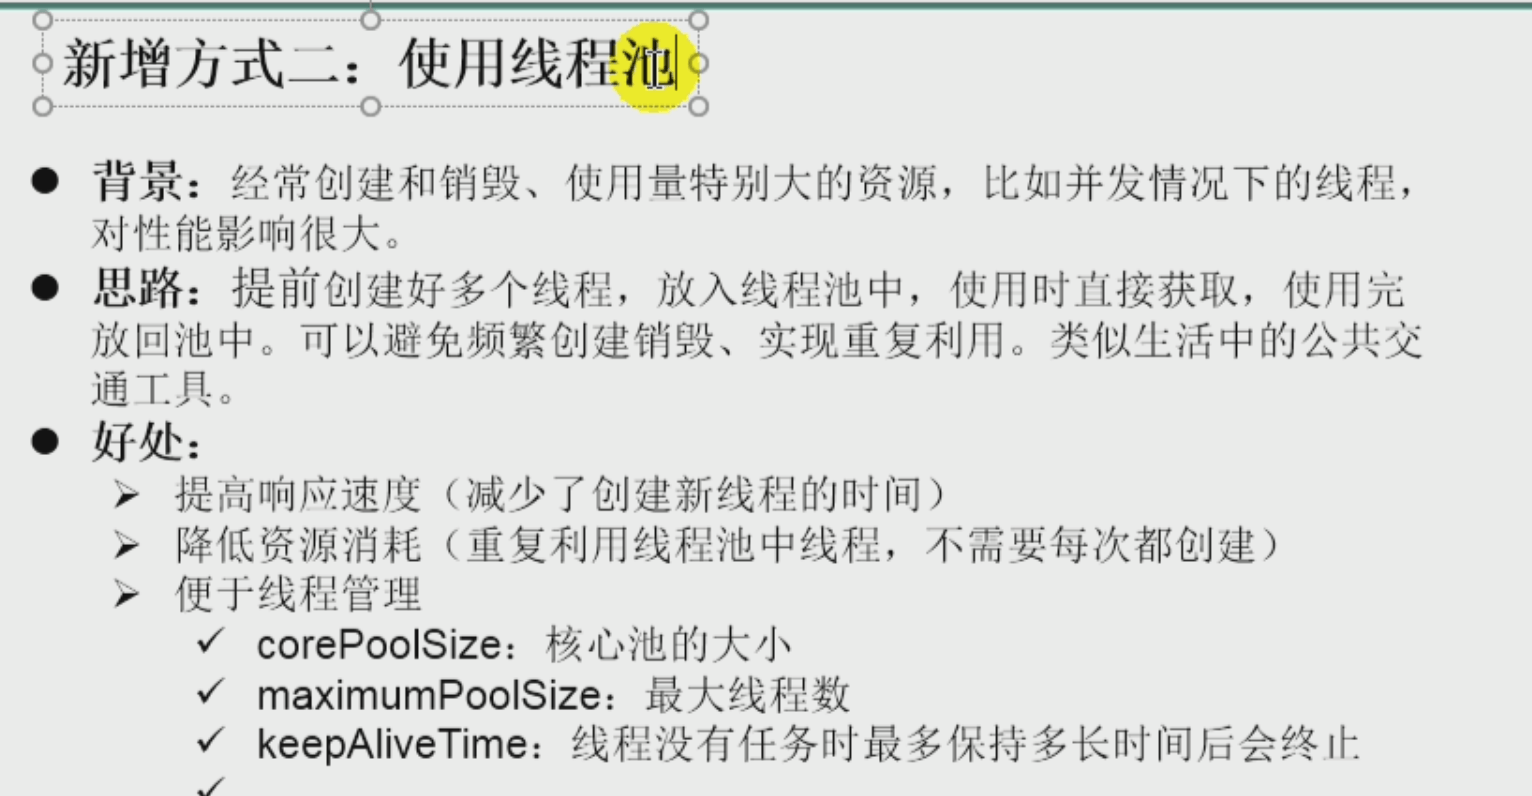
jdk5.0新增-使用线程池(‼️是开发中 实际使用的方式)优点: 响应速度提高,资源重用率提高,关于管理。
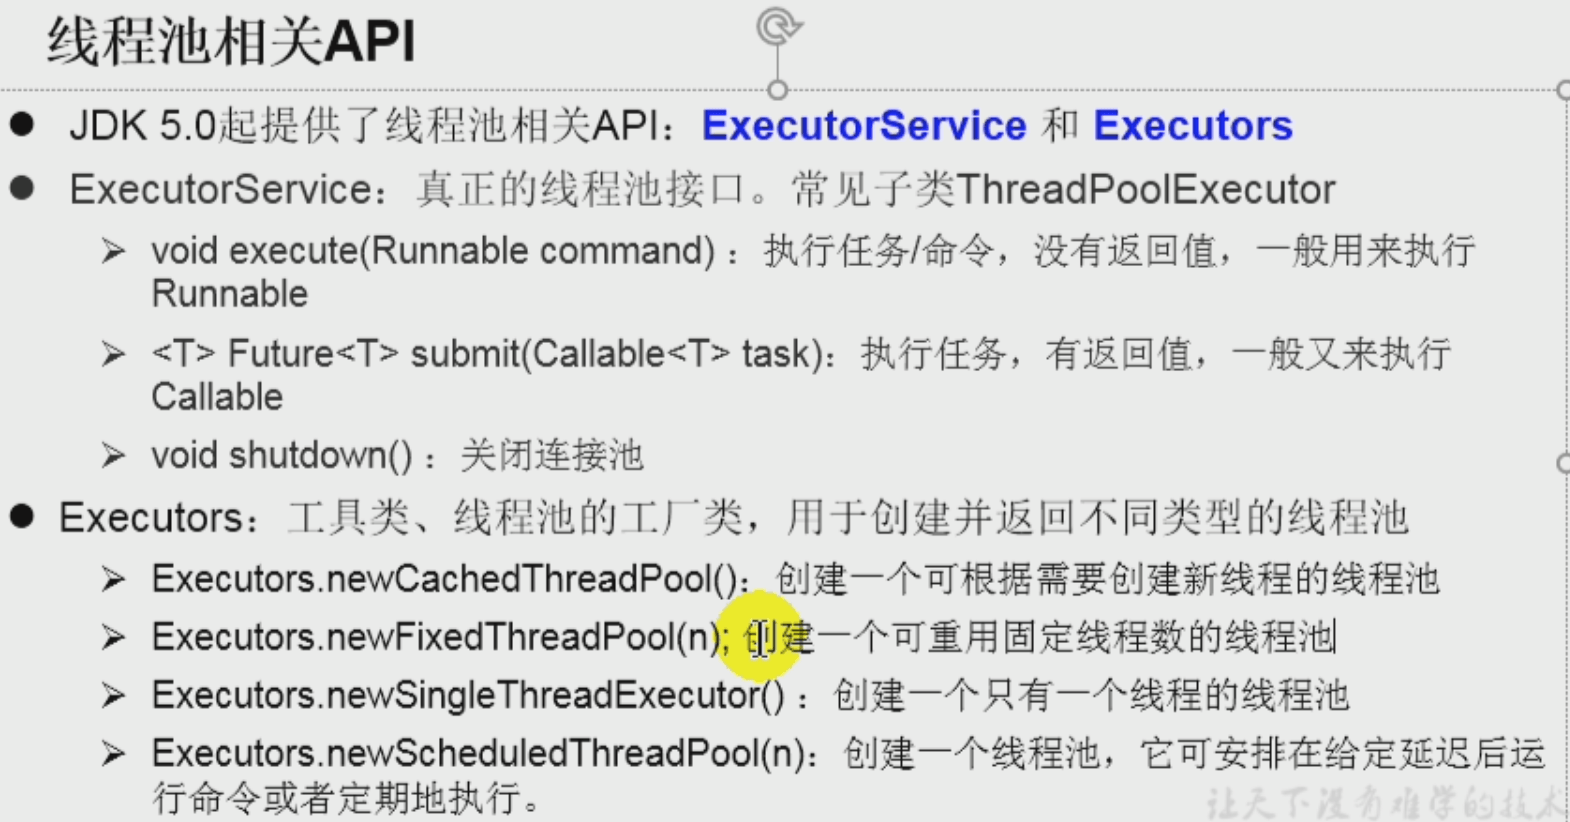
下面代码: