
树莓派是很多动手达人必备的小玩具,本节内容,让我们拿出树莓派,在30分钟内,将树莓派连接到微软云Azure的IoT Hub,然后将温湿度曲线可视化。
(本节内容完整视频在文章末尾。)
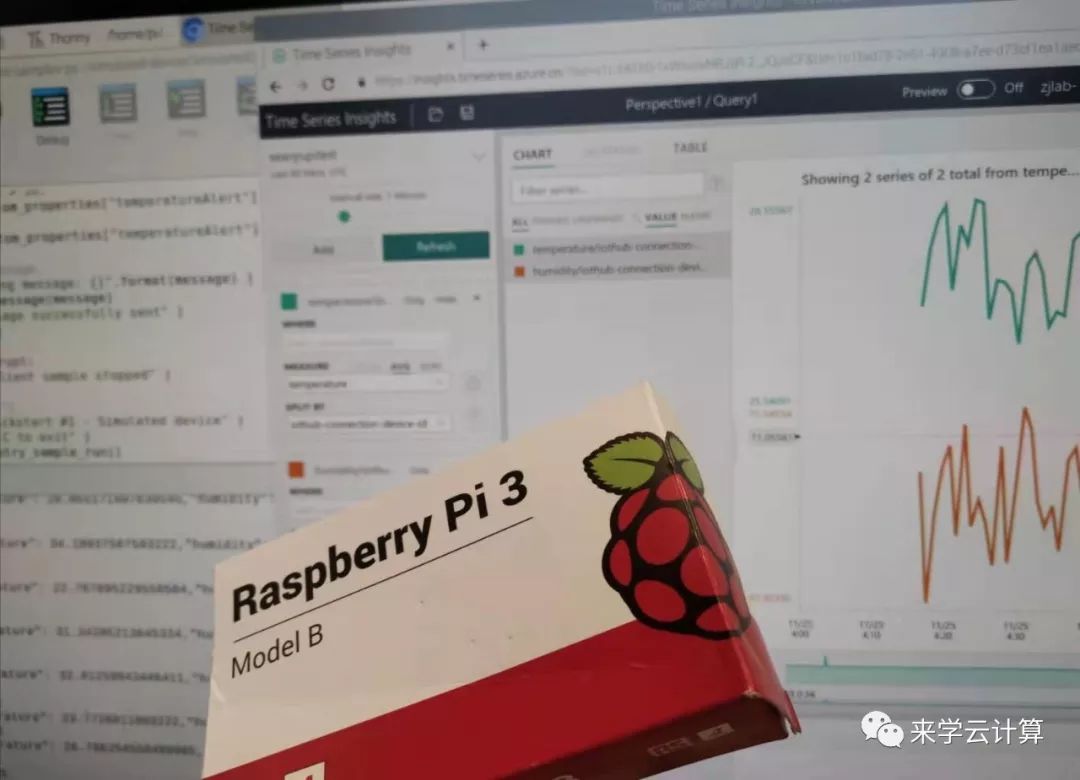
本节内容中,树莓派发送的数据是模拟出来的,并没有真实的连接到传感器,您可以选购不同的传感器来采集真实的环境信息。
Azure IoT Hub 为我们提供了设备与云双向通讯的能力,通过多种语言的SDK,我们能轻松快速的将树莓派接入到云。本案例使用微软官方代码,示例代码一共约70行,非常简单。
关于IoT Hub的更多内容,请参考:
时序见解(Azure Time Series Insights)用来存储时间序列的值,同时提供UI,将数据可视化。
关于时序见解的更多内容,请参考:
Azure Time Series Insights-时序见解(1)
时序见解和IoT Hub可以无缝连接,无需写代码即可将上传到IoT Hub的数据进行可视化。
树莓派上传数据的代码:
import randomimport time# Using the Python Device SDK for IoT Hub:# https://github.com/Azure/azure-iot-sdk-python# The sample connects to a device-specific MQTT endpoint on your IoT Hub.from azure.iot.device import IoTHubDeviceClient, Message# The device connection string to authenticate the device with your IoT hub.# Using the Azure CLI:# az iot hub device-identity show-connection-string --hub-name {YourIoTHubName} --device-id MyNodeDevice --output tableCONNECTION_STRING = "{your string}"# Define the JSON message to send to IoT Hub.TEMPERATURE = 20.0HUMIDITY = 60MSG_TXT = '{{"temperature": {temperature},"humidity": {humidity}}}'def iothub_client_init():# Create an IoT Hub clientclient = IoTHubDeviceClient.create_from_connection_string(CONNECTION_STRING)return clientdef iothub_client_telemetry_sample_run():try:client = iothub_client_init()print ( "IoT Hub device sending periodic messages, press Ctrl-C to exit" )while True:# Build the message with simulated telemetry values.temperature = TEMPERATURE + (random.random() * 15)humidity = HUMIDITY + (random.random() * 20)msg_txt_formatted = MSG_TXT.format(temperature=temperature, humidity=humidity)message = Message(msg_txt_formatted)# Add a custom application property to the message.# An IoT hub can filter on these properties without access to the message body.if temperature > 30:message.custom_properties["temperatureAlert"] = "true"else:message.custom_properties["temperatureAlert"] = "false"# Send the message.print( "Sending message: {}".format(message) )client.send_message(message)print ( "Message successfully sent" )time.sleep(1)except KeyboardInterrupt:print ( "IoTHubClient sample stopped" )if __name__ == '__main__':print ( "IoT Hub Quickstart #1 - Simulated device" )print ( "Press Ctrl-C to exit" )iothub_client_telemetry_sample_run()
IoT Hub 接入文档,请参考:
https://docs.azure.cn/zh-cn/iot-hub/quickstart-send-telemetry-python
树莓派系统下载:
https://www.raspberrypi.org/downloads/
Micro SD卡格式化工具:
https://www.sdcard.org/downloads/index.html
树莓派系统写入Micro SD卡工具:
https://sourceforge.net/projects/win32diskimager/
完整视频如下:
 未完待续…
未完待续…
以下内容将在以后的文章中介绍:
树莓派采集真实的传感器数据;
使用流分析(Stream Analytics)对上传的数据进行时时分析。


若有收获,就点个赞吧
0 人点赞
