3D Computer Game Programming-Note 8
1、简单粒子制作
- 按参考资源要求,制作一个粒子系统
- 使用 3.3 节介绍,用代码控制使之在不同场景下效果不一样
【实现过程】
- 参照参考资源制作一个粒子系统
LightBall,部分有改动。
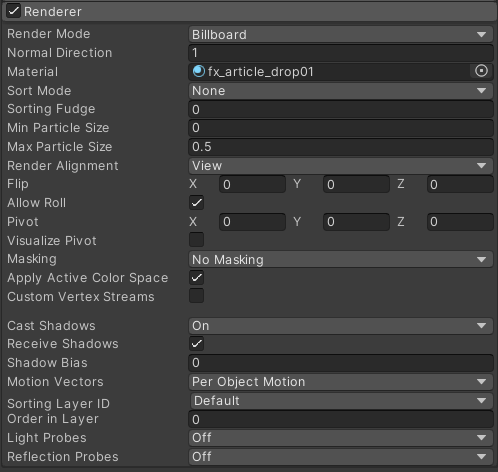
首先新建一个 Particle System 并命名为 LightBall 作为该粒子系统的主体部分,基础参数如下:
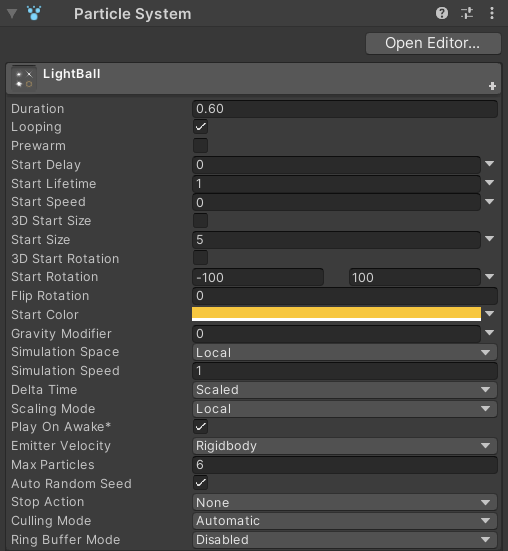
简单解释一些重要参数:
Start Lifetime:粒子的生命周期,即粒子从发射到消失的时间,因为我们的目的是得到一个“持续散发光芒”的粒子系统,下一个粒子必须在现有粒子消失之前发射,尽管勾选了 Looping,但发射周期仍然有一个阈值,因此需要设置一个合适的生命周期来达到想要的效果;Start Speed:粒子开始的速度,作为骨架部分粒子应保持不动,因此设置为 0;Start Rotation:粒子开始的旋转方向,设置一个旋转角度区间以达到粒子系统光晕方向不断变化的效果;Max Particles:单个周期内粒子系统发出的最大粒子数,对于 LightBall 来说,设置一个不太低的值即可。
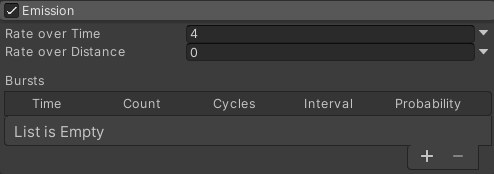
调整粒子的发射速率为合适的值。作为骨架部分发射速率影响其闪烁效果,速率过高导致闪烁过于频繁甚至跳帧,频率过低则导致闪烁不连续:
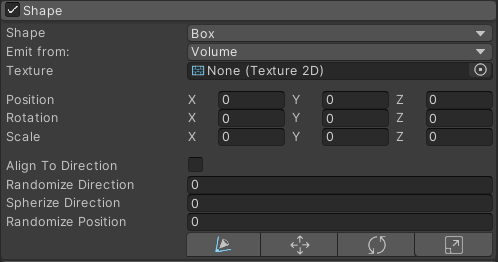
选择 Shape 为 Box,使粒子被约束在较小空间内,以达到光晕填充的效果:
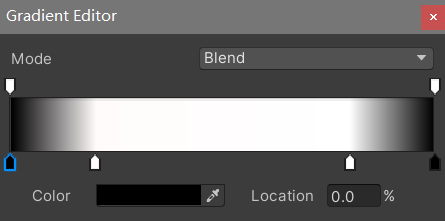
设置 Color Over Time 为从黑过渡到白再过渡到黑,达到光从暗到亮再渐渐消失的效果:
为粒子选择渲染材质——使用参考资源提供的素材:
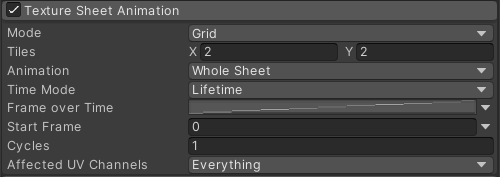
勾选 Texture Sheet Animation 使纹理能以动画帧的形式呈现:
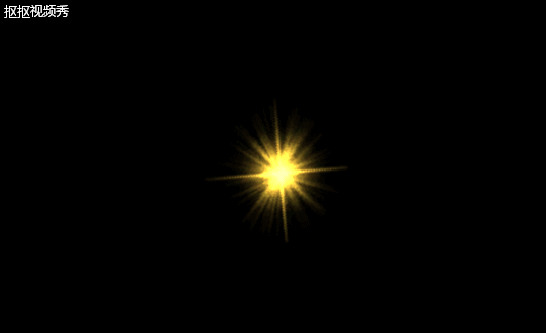
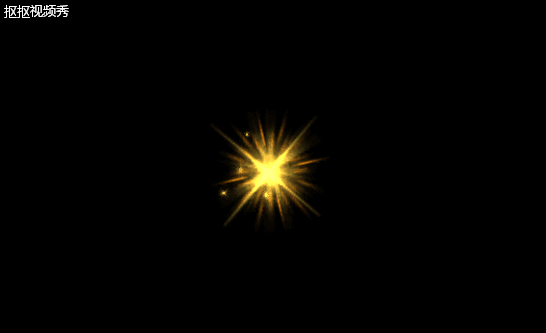
现在 LightBall 效果如下:
在 LightBall 下创建一个 Particle System 作为其子节点,命名为 StarLight,作为装饰用的星光部分,基础参数如下:
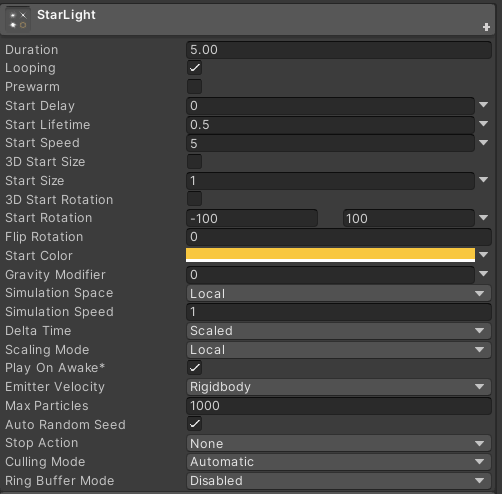
其他部分参数如下,大多与 LightBall 设置相同。其中,Shape 选择 Sphere,使粒子朝各个方向自由发射。
<br /> 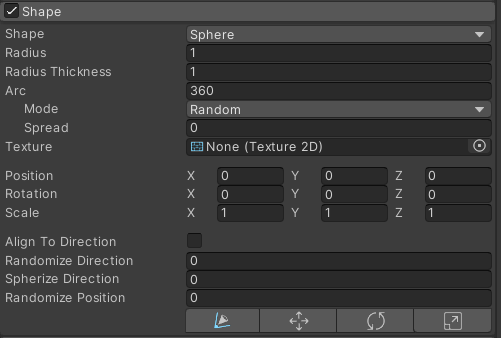<br /> <br /> <br /> 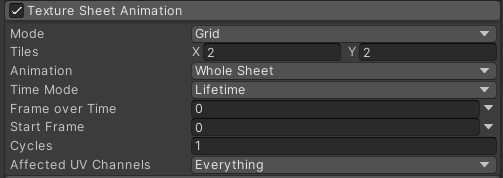<br /> 
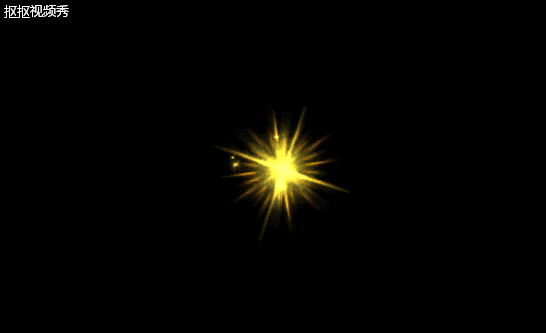
现在 LightBall 效果如下:
编写
ColorGradient.cs,使粒子系统在发射过程中呈现颜色渐变:public class ColorGradient : MonoBehaviour {private ParticleSystem ball;private float r, g, b;private bool flag = true;void Start() {ball = this.GetComponent<ParticleSystem>();r = 1.0f;g = 0.3f;b = 0.25f;}void Update() {if (g >= 0.95f) {flag = false;}else if (g <= 0.3f) {flag = true;}if (flag) {g += 0.001f;}else {g -= 0.001f;}var main = ball.main;main.startColor = new ParticleSystem.MinMaxGradient(new Color(r, g, b));}}
将上述脚本挂载到LightBall 和 StarLight 上,运行:
实现了粒子系统颜色在红黄色调间来回变化。
对上述粒子系统 LightBall 稍微改造并制成预制 Star,结合天空盒可以创建一个星空场景:
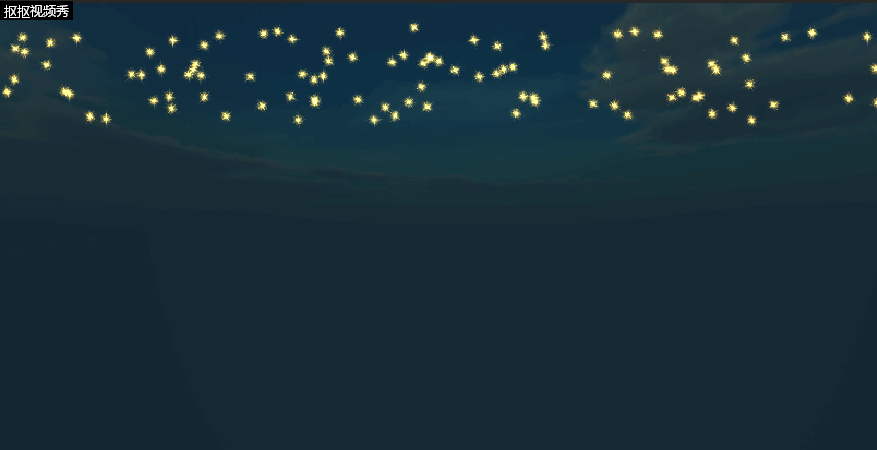
“星星”由脚本控制在随机位置生成:
public class Sky : MonoBehaviour {void Start() {for (int i = 0; i < 100; ++i) {ParticleSystem star = Instantiate(Resources.Load<ParticleSystem>("Prefabs/Star"), new Vector3(Random.Range(-14.0f, 14.0f), Random.Range(3.5f, 6.5f), 0), Quaternion.identity);}}}
这说明粒子系统还有很多应用场景等待着我们去发现!

若有收获,就点个赞吧
0 人点赞
