摘要:CT等医学图像都是三维立体形式的,本篇文章简要介绍了如何使用VTK工具对这类三维图像进行可视化。
一、VTK在Python中的安装
VTK的全称为Visualization Toolkit,内核是通过C++构造的,但可以自由地通过Python使用VTK,考虑到笔者对python编程语言更为熟悉,因此最先尝试使用Python调用VTK。
使用pip安装命令如下:
pip install vtk
学习VTK的一些例子:
二、对实际数据的三维可视化
VTK进行数据三维可视化时,总体而言顺序为source—filter——mapper——actor——render——renderwindow——interactor,以下通过一些具体的例子进行实际说明。
- VTK自带的例子
https://gitlab.kitware.com/vtk/vtk/-/blob/master/Examples/Medical/Python/Medical3.py
对头骨数据的可视化
读入的数据是图像序列文件,每张图像代表每一帧,均为RAW格式的文件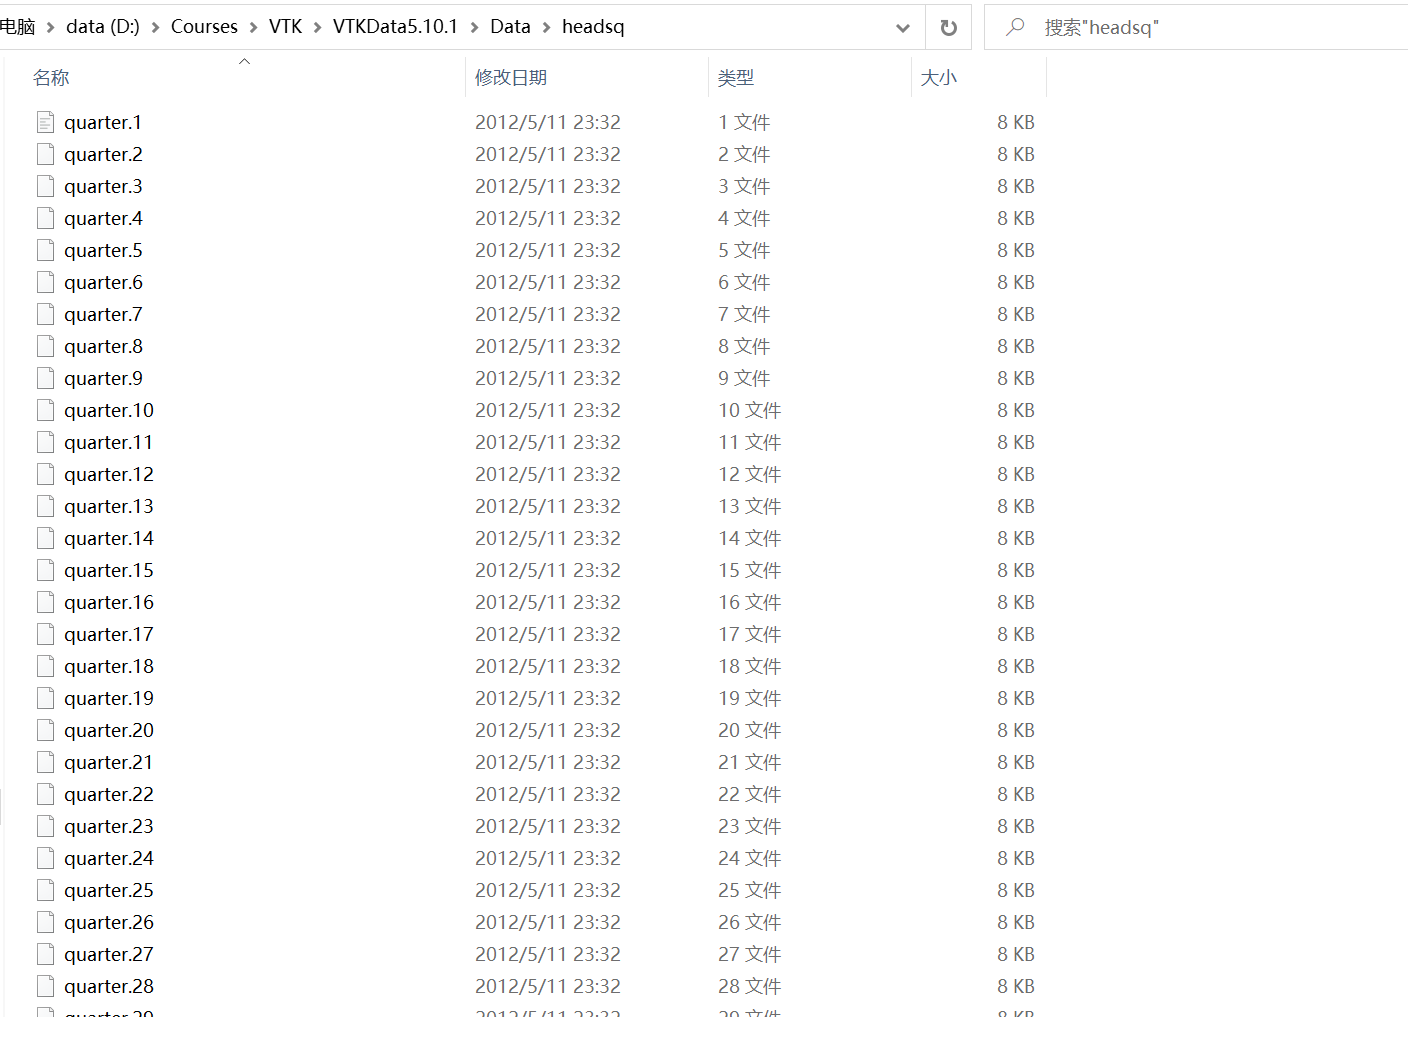
- 医院收集的DICOM文件
由于从医院采集的CT DICOM文件为压缩格式的,无法使用vtk.vtkDICOMImageReader()进行读取,因此考虑将一次扫描中所有帧DICOM文件合并成为一份nii文件。
import numpyimport osimport cv2import pydicomimport SimpleITK# 路径和列表声明# 与python文件同一个目录下的文件夹,存储dicom文件,该文件路径最好不要含有中文PathDicom = "D:/Data_windows/3D-vtk/5"# 与python文件同一个目录下的文件夹,用来存储nii文件,该文件路径最好不要含有中文SaveNii = "D:/Data_windows/3D-vtk/5-nii"lstFilesDCM = []# 将PathDicom文件夹下的dicom文件地址读取到lstFilesDCM中for dirName, subdirList, fileList in os.walk(PathDicom):for filename in fileList:if ".dcm" in filename.lower(): # 判断文件是否为dicom文件print(filename)lstFilesDCM.append(os.path.join(dirName, filename)) # 加入到列表中# 第一步:将第一张图片作为参考图片,并认为所有图片具有相同维度RefDs = pydicom.read_file(lstFilesDCM[0]) # 读取第一张dicom图片# 第二步:得到dicom图片所组成3D图片的维度ConstPixelDims = (int(RefDs.Rows), int(RefDs.Columns), len(lstFilesDCM)) # ConstPixelDims是一个元组# 第三步:得到x方向和y方向的Spacing并得到z方向的层厚ConstPixelSpacing = (float(RefDs.PixelSpacing[0]), float(RefDs.PixelSpacing[1]), float(RefDs.SliceThickness))# 第四步:得到图像的原点Origin = RefDs.ImagePositionPatient# 根据维度创建一个numpy的三维数组,并将元素类型设为:pixel_array.dtypeArrayDicom = numpy.zeros(ConstPixelDims, dtype=RefDs.pixel_array.dtype) # array is a numpy array# 第五步:遍历所有的dicom文件,读取图像数据,存放在numpy数组中i = 0for filenameDCM in lstFilesDCM:ds = pydicom.read_file(filenameDCM)ArrayDicom[:, :, lstFilesDCM.index(filenameDCM)] = ds.pixel_array# cv2.imwrite("out_" + str(i) + ".png", ArrayDicom[:, :, lstFilesDCM.index(filenameDCM)])i += 1# 第六步:对numpy数组进行转置,即把坐标轴(x,y,z)变换为(z,y,x),这样是dicom存储文件的格式,即第一个维度为z轴便于图片堆叠ArrayDicom = numpy.transpose(ArrayDicom, (2, 0, 1))# 第七步:将现在的numpy数组通过SimpleITK转化为mhd和raw文件sitk_img = SimpleITK.GetImageFromArray(ArrayDicom, isVector=False)sitk_img.SetSpacing(ConstPixelSpacing)sitk_img.SetOrigin(Origin)SimpleITK.WriteImage(sitk_img, os.path.join(SaveRawDicom, "sample" + ".mhd"))SimpleITK.WriteImage(sitk_img, os.path.join(SaveNii, "sample" + ".nii"))
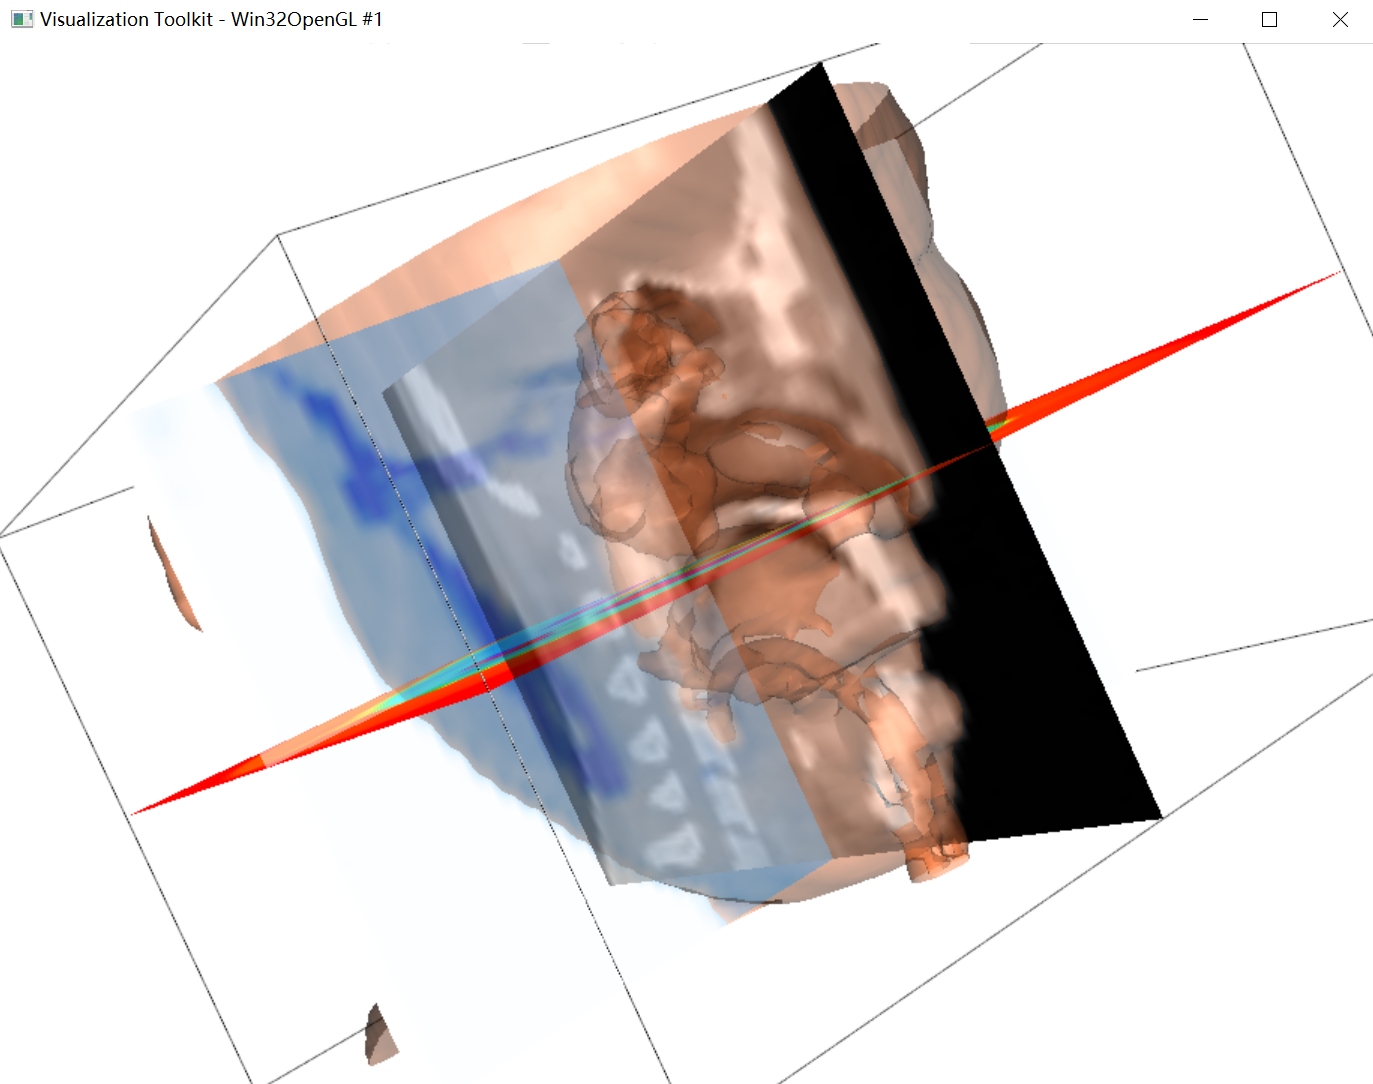
之后使用VTK对得到的nii文件进行3D可视化
#// 3d reconstruction used by vtkfrom vtk.util.vtkImageImportFromArray import *import vtkimport SimpleITK as sitkimport numpy as npimport time# path = '../vtk/nii_data_low/1_1.nii' #segmentation volumepath = "D:\\Data_windows\\3D-vtk\\5-nii\\sample.nii"#segmentation volumeds = sitk.ReadImage(path) #读取nii数据的第一个函数sitk.ReadImageprint('ds: ',ds)data = sitk.GetArrayFromImage(ds) #把itk.image转为arrayprint('data: ',data)print('shape_of_data',data.shape)spacing = ds.GetSpacing() #三维数据的间隔print('spacing_of_data',spacing)# data = data[50:]# data = data[:,:,300:]srange = [np.min(data),np.max(data)]print('shape_of_data_chenged',data.shape)img_arr = vtkImageImportFromArray() #创建一个空的vtk类-----vtkImageImportFromArrayprint('img_arr: ',img_arr)img_arr.SetArray(data) #把array_data塞到vtkImageImportFromArray(array_data)img_arr.SetDataSpacing(spacing) #设置spacingorigin = (0,0,0)img_arr.SetDataOrigin(origin) #设置vtk数据的坐标系原点img_arr.Update()# srange = img_arr.GetOutput().GetScalarRange()print('spacing: ',spacing)print('srange: ',srange)# 键盘控制交互式操作class KeyPressInteractorStyle(vtk.vtkInteractorStyleTrackballCamera):def __init__(self,parent=None):self.parent = vtk.vtkRenderWindowInteractor()if(parent is not None):self.parent = parentself.AddObserver("KeyPressEvent",self.keyPress)def keyPress(self,obj,event):key = self.parent.GetKeySym()if key == 'Up':gradtfun.AddPoint(-100, 1.0)gradtfun.AddPoint(10, 1.0)gradtfun.AddPoint(20, 1.0)volumeProperty.SetGradientOpacity(gradtfun)#下面这一行是关键,实现了actor的更新renWin.Render()if key == 'Down':tfun.AddPoint(1129, 0)tfun.AddPoint(1300.0, 0.1)tfun.AddPoint(1600.0, 0.2)tfun.AddPoint(2000.0, 0.1)tfun.AddPoint(2200.0, 0.1)tfun.AddPoint(2500.0, 0.1)tfun.AddPoint(2800.0, 0.1)tfun.AddPoint(3000.0, 0.1)#下面这一行是关键,实现了actor的更新renWin.Render()def StartInteraction():renWin.SetDesiredUpdateRate(10)def EndInteraction():renWin.SetDesiredUpdateRate(0.001)def ClipVolumeRender(obj):obj.GetPlanes(planes)volumeMapper.SetClippingPlanes(planes)ren = vtk.vtkRenderer()renWin= vtk.vtkRenderWindow()renWin.AddRenderer(ren) #把一个空的渲染器添加到一个空的窗口上renWin.AddRenderer(ren)iren = vtk.vtkRenderWindowInteractor()iren.SetRenderWindow(renWin) #把上面那个窗口加入交互操作iren.SetInteractorStyle(KeyPressInteractorStyle(parent = iren)) #在交互操作里面添加这个自定义的操作例如up,downmin = srange[0]max = srange[1]# diff = max - min #体数据极差# slope = 4000 / diff# inter = -slope * min# shift = inter / slope# print(min, max, slope, inter, shift) #这几个数据后面有用diff = max - min #体数据极差inter = 4200 / diffshift = -minprint(min, max, inter, shift) #这几个数据后面有用shifter = vtk.vtkImageShiftScale() # 对偏移和比例参数来对图像数据进行操作 数据转换,之后直接调用shiftershifter.SetShift(shift)shifter.SetScale(inter)shifter.SetOutputScalarTypeToUnsignedShort()shifter.SetInputData(img_arr.GetOutput())shifter.ReleaseDataFlagOff()shifter.Update()tfun = vtk.vtkPiecewiseFunction() # 不透明度传输函数---放在tfuntfun.AddPoint(1129, 0)tfun.AddPoint(1300.0, 0.1)tfun.AddPoint(1600.0, 0.12)tfun.AddPoint(2000.0, 0.13)tfun.AddPoint(2200.0, 0.14)tfun.AddPoint(2500.0, 0.16)tfun.AddPoint(2800.0, 0.17)tfun.AddPoint(3000.0, 0.18)gradtfun = vtk.vtkPiecewiseFunction() # 梯度不透明度函数---放在gradtfungradtfun.AddPoint(-1000, 9)gradtfun.AddPoint(0.5, 9.9)gradtfun.AddPoint(1, 10)ctfun = vtk.vtkColorTransferFunction() # 颜色传输函数---放在ctfunctfun.AddRGBPoint(0.0, 0.5, 0.0, 0.0)ctfun.AddRGBPoint(600.0, 1.0, 0.5, 0.5)ctfun.AddRGBPoint(1280.0, 0.9, 0.2, 0.3)ctfun.AddRGBPoint(1960.0, 0.81, 0.27, 0.1)ctfun.AddRGBPoint(2200.0, 0.9, 0.2, 0.3)ctfun.AddRGBPoint(2500.0, 1, 0.5, 0.5)ctfun.AddRGBPoint(3024.0, 0.5, 0.5, 0.5)volumeMapper = vtk.vtkGPUVolumeRayCastMapper() #映射器volumnMapper使用vtk的管线投影算法volumeMapper.SetInputData(shifter.GetOutput()) #向映射器中输入数据:shifter(预处理之后的数据)volumeProperty = vtk.vtkVolumeProperty() #创建vtk属性存放器,向属性存放器中存放颜色和透明度volumeProperty.SetColor(ctfun)volumeProperty.SetScalarOpacity(tfun)# volumeProperty.SetGradientOpacity(gradtfun)volumeProperty.SetInterpolationTypeToLinear() #???volumeProperty.ShadeOn()newvol = vtk.vtkVolume() #演员newvol.SetMapper(volumeMapper)newvol.SetProperty(volumeProperty)outline = vtk.vtkOutlineFilter()outline.SetInputConnection(shifter.GetOutputPort())outlineMapper = vtk.vtkPolyDataMapper()outlineMapper.SetInputConnection(outline.GetOutputPort())outlineActor = vtk.vtkActor()outlineActor.SetMapper(outlineMapper)ren.AddActor(outlineActor)#outlineActor.GetProperty().SetOpacity(0.1)#ren.AddVolume(newvol)ren.SetBackground(1, 1, 1)renWin.SetSize(600, 600)## Now create a lookup table that consists of the full hue circle (from# HSV).hueLut = vtk.vtkLookupTable()hueLut.SetTableRange(0, 2000)hueLut.SetHueRange(0, 1)hueLut.SetSaturationRange(1, 1)hueLut.SetValueRange(1, 1)hueLut.Build()axialColors = vtk.vtkImageMapToColors()axialColors.SetInputConnection(shifter.GetOutputPort())axialColors.SetLookupTable(hueLut)axial = vtk.vtkImageActor()axial.GetMapper().SetInputConnection(axialColors.GetOutputPort())axial.SetDisplayExtent(0, 512, 0, 512, 23, 23)ren.AddActor(axial)#planes = vtk.vtkPlanes()boxWidget = vtk.vtkBoxWidget()boxWidget.SetInteractor(iren)boxWidget.SetPlaceFactor(1.0)boxWidget.PlaceWidget(0,0,0,0,0,0)boxWidget.InsideOutOn()boxWidget.AddObserver("StartInteractionEvent", StartInteraction)boxWidget.AddObserver("InteractionEvent", ClipVolumeRender)boxWidget.AddObserver("EndInteractionEvent", EndInteraction)outlineProperty = boxWidget.GetOutlineProperty()outlineProperty.SetRepresentationToWireframe()outlineProperty.SetAmbient(1.0)outlineProperty.SetAmbientColor(1, 1, 1)outlineProperty.SetLineWidth(9)selectedOutlineProperty = boxWidget.GetSelectedOutlineProperty()selectedOutlineProperty.SetRepresentationToWireframe()selectedOutlineProperty.SetAmbient(1.0)selectedOutlineProperty.SetAmbientColor(1, 0, 0)selectedOutlineProperty.SetLineWidth(3)ren.ResetCamera()iren.Initialize()renWin.Render()iren.Start()
可视化的结果如下图所示: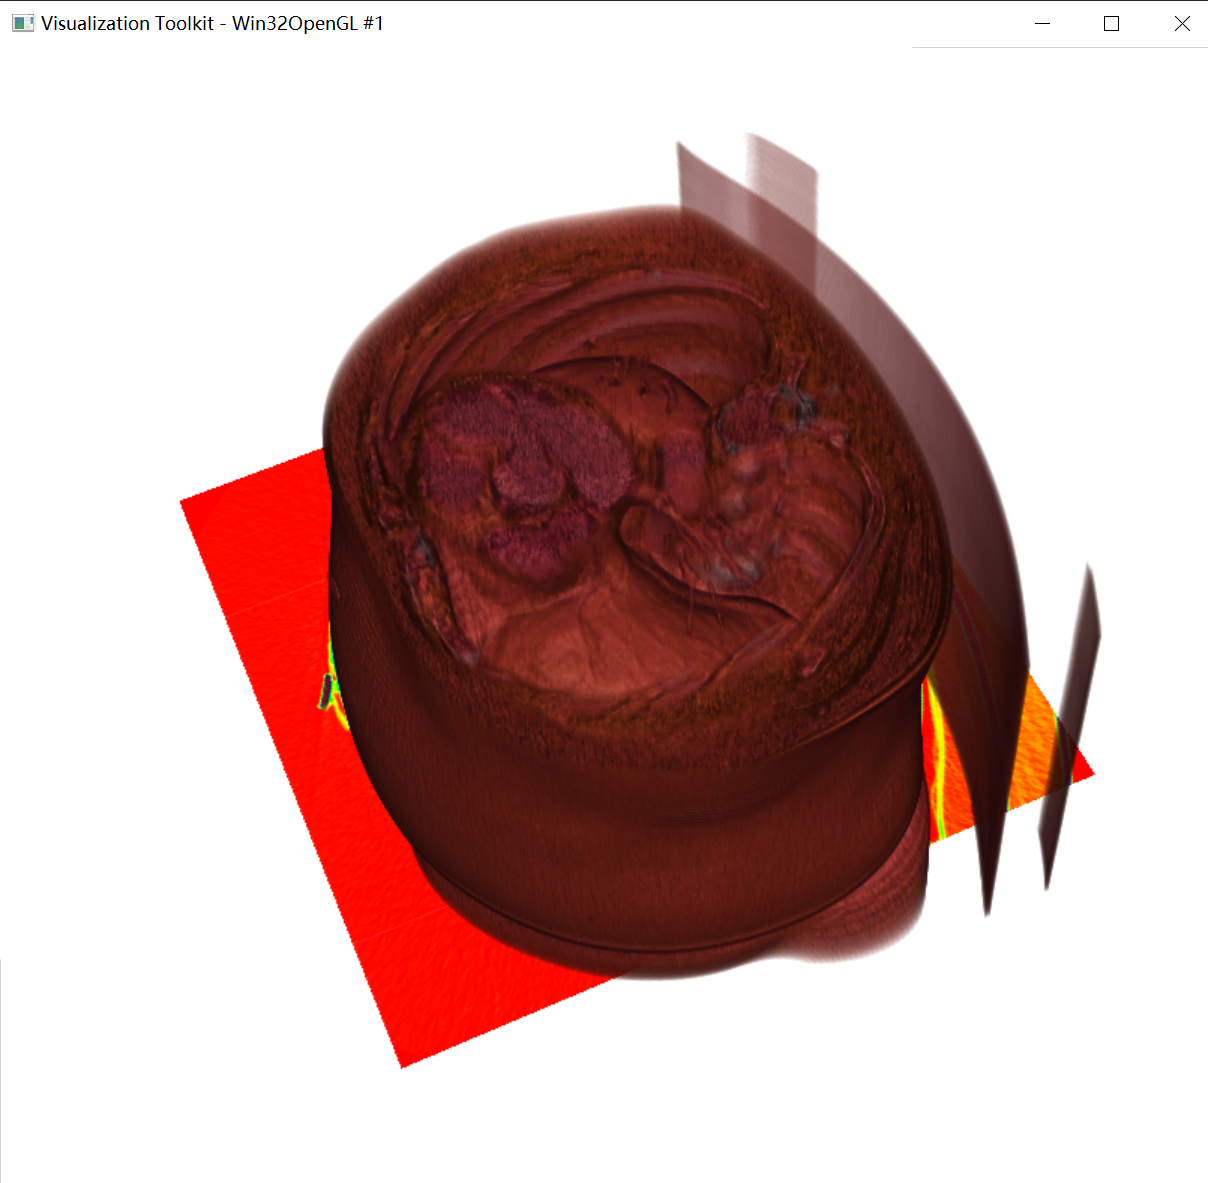
- 对三维的binary mask文件进行可视化(tif格式)
import vtk

reader = vtk.vtkTIFFReader()
reader.SetFileDimensionality(3)
reader.SetFileName("masked.tif")
reader.SetDataExtent(0,512,0,512,0,134)
reader.SetDataSpacing(0.9765625,0.9765625,3)


contour=vtk.vtkContourFilter()
contour.SetInputConnection(reader.GetOutputPort())
contour.ComputeNormalsOn()
contour.SetValue(0,1)

mapper = vtk.vtkPolyDataMapper()
mapper.SetInputConnection(contour.GetOutputPort())
mapper.ScalarVisibilityOff()

actor = vtk.vtkActor()
actor.SetMapper(mapper)

renderer=vtk.vtkRenderer()
renderer.SetBackground([0.1, 0.2, 0.3])
renderer.AddActor(actor)

window = vtk.vtkRenderWindow()
window.SetSize(1000, 1000)
window.AddRenderer(renderer)

interactor = vtk.vtkRenderWindowInteractor()
interactor.SetRenderWindow(window)

window.Render()
interactor.Initialize()
interactor.Start()
对 masked.tif 该3D binary mask文件可视化的结果如下所示:
PS:在kaggle上找到一个教程,有关对DICOM CT文件的VTK可视化教程,可供参考:https://www.kaggle.com/wrrosa/advanced-dicom-ct-3d-visualizations-with-vtk

若有收获,就点个赞吧
0 人点赞
