解决方案
- @CrossOrigin注解
- WebMvcConfigurer对象配置
Spring Boot 2.X 如何优雅的解决跨域问题?
一、什么是源和跨域
源(origin)就是协议、域名和端口号。
URL由协议、域名、端口和路径组成,如果两个URL的协议、域名和端口全部相同,则表示他们同源。否则,只要协议、域名、端口有任何一个不同,就是跨域。对https://www.baidu.com/index.html进行跨域比较:
| URL | 是否跨域 | 原因 | | —- | —- | —- | | https://www.baidu.com/more/index.html | 不跨域 | 三要素相同 | | https://map.baidu.com/ | 跨域 | 域名不同 | | http://www.baidu.com/index.html | 跨域 | 协议不同 | | https://www.baidu.com:81/index.html | 跨域 | 端口号不同 |
二、什么是同源策略?
同源策略(Same origin policy)是一种约定,它是浏览器最核心也最基本的安全功能,如果缺少了同源策略,则浏览器的正常功能可能都会受到影响。可以说Web是构建在同源策略基础之上的,浏览器只是针对同源策略的一种实现。
同源策略又分为以下两种:
- DOM同源策略:禁止对不同源页面DOM 进行操作。这里主要场景是iframe跨域的情况,不同域名的iframe是限制互相访问的。
- XMLHttpRequest同源策略:禁止使用XHR对象向不同源的服务器地址发起HTTP请求。
三、Spring Boot跨域解决方案
本例使用Spring Boot 2.1.2.RELEASE演示,分别用8080和8081端口启动,部分代码如下:
跨域页面:testOtherDomain.html
接口类:HelloController ```java package com.example.helloSpringBoot.controller; import org.springframework.web.bind.annotation.RequestMapping; import org.springframework.web.bind.annotation.RestController;<!DOCTYPE html><html lang="en"><head><meta charset="UTF-8"><title>不同域名-Java碎碎念</title></head><body><button id="b1">点我测试</button><script src="https://cdn.bootcss.com/jquery/3.3.1/jquery.js"></script><script>$("#b1").click(function () {$.ajax({url: "http://localhost:8081/hello",type: "post",success:function (res) {console.log(res);}})});</script></body></html>
@RestController public class HelloController {
@RequestMapping(“/hello”)
public String HelloSpring (){
return “hello Java碎碎念!”;
}
}
未解决跨域前运行截图:<br />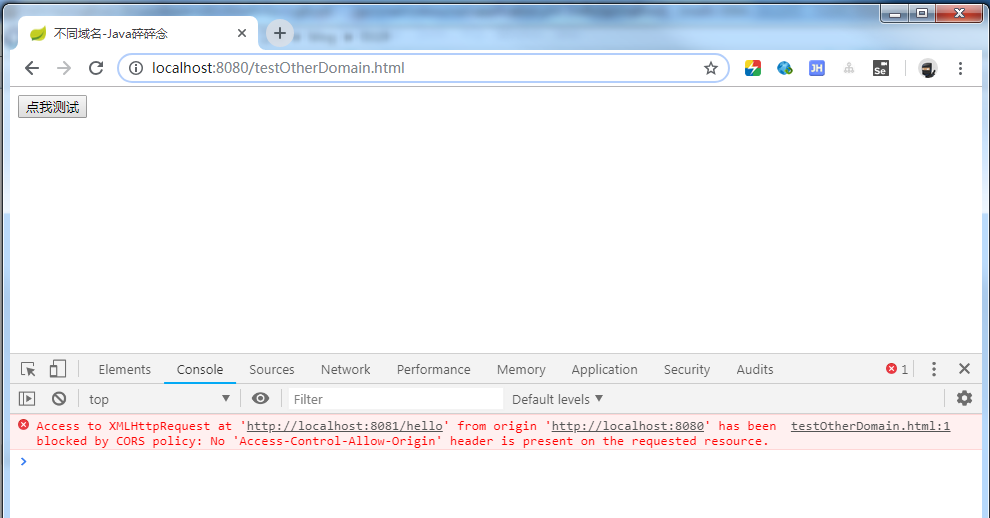在Spring Boot 2.X应用程序中可以使用注解@CrossOrigin,也可以通过使用WebMvcConfigurer对象来定义全局CORS配置。1. @CrossOrigin注解示例代码```javapackage com.example.helloSpringBoot.controller;import org.springframework.web.bind.annotation.CrossOrigin;import org.springframework.web.bind.annotation.RequestMapping;import org.springframework.web.bind.annotation.RestController;@RestControllerpublic class HelloController {@CrossOrigin@RequestMapping("/hello")public String HelloSpring (){return "hello Java碎碎念!";}}
- WebMvcConfigurer对象示例代码 ```java package com.example.helloSpringBoot.config; import org.springframework.context.annotation.Bean; import org.springframework.context.annotation.Configuration; import org.springframework.web.servlet.config.annotation.CorsRegistry; import org.springframework.web.servlet.config.annotation.WebMvcConfigurer;
@Configuration
public class MyConfiguration {
@Bean
public WebMvcConfigurer corsConfigurer() {
return new WebMvcConfigurer() {
@Override
public void addCorsMappings(CorsRegistry registry) {
registry.addMapping(“/“)
.allowedOrigins(““)
.allowCredentials(true)
.allowedMethods(“GET”, “POST”, “DELETE”, “PUT”,”PATCH”)
.maxAge(3600);
}
};
}
}
```
按照上面两种方式的一种配置完成后,即可实现对跨域的支持,运行成功截图如下: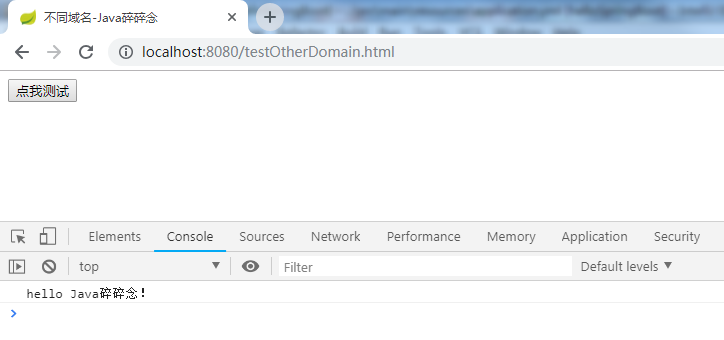

若有收获,就点个赞吧
0 人点赞
