- 引言
作为一个iOS开发,alloc init 在日常开发中应该是出现频率最高的了。只是你真的了解alloc运行原理了么?本文就OC对象原理进行探究。 - 示例
1、来到objc_alloc
2、继续点击箭头,来到libobjc.A.dylib objc_alloc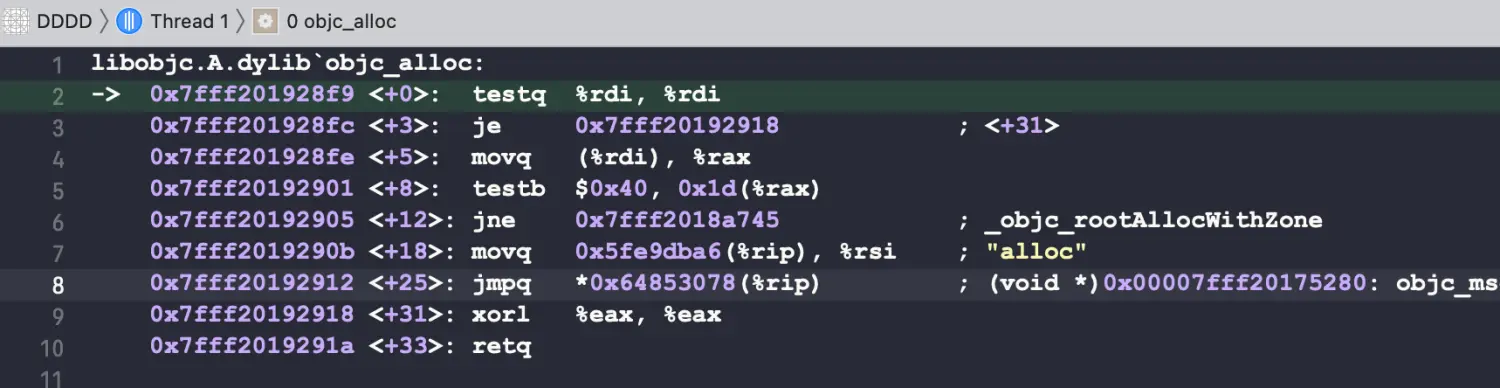
3、_objc_rootAllocWithZone">探究方法
####方法一
添加断点:QLPerson *person1 = [QLPerson alloc] ;在xcode断点环境下,按住control键,鼠标点击向下箭头step into instruction进入底层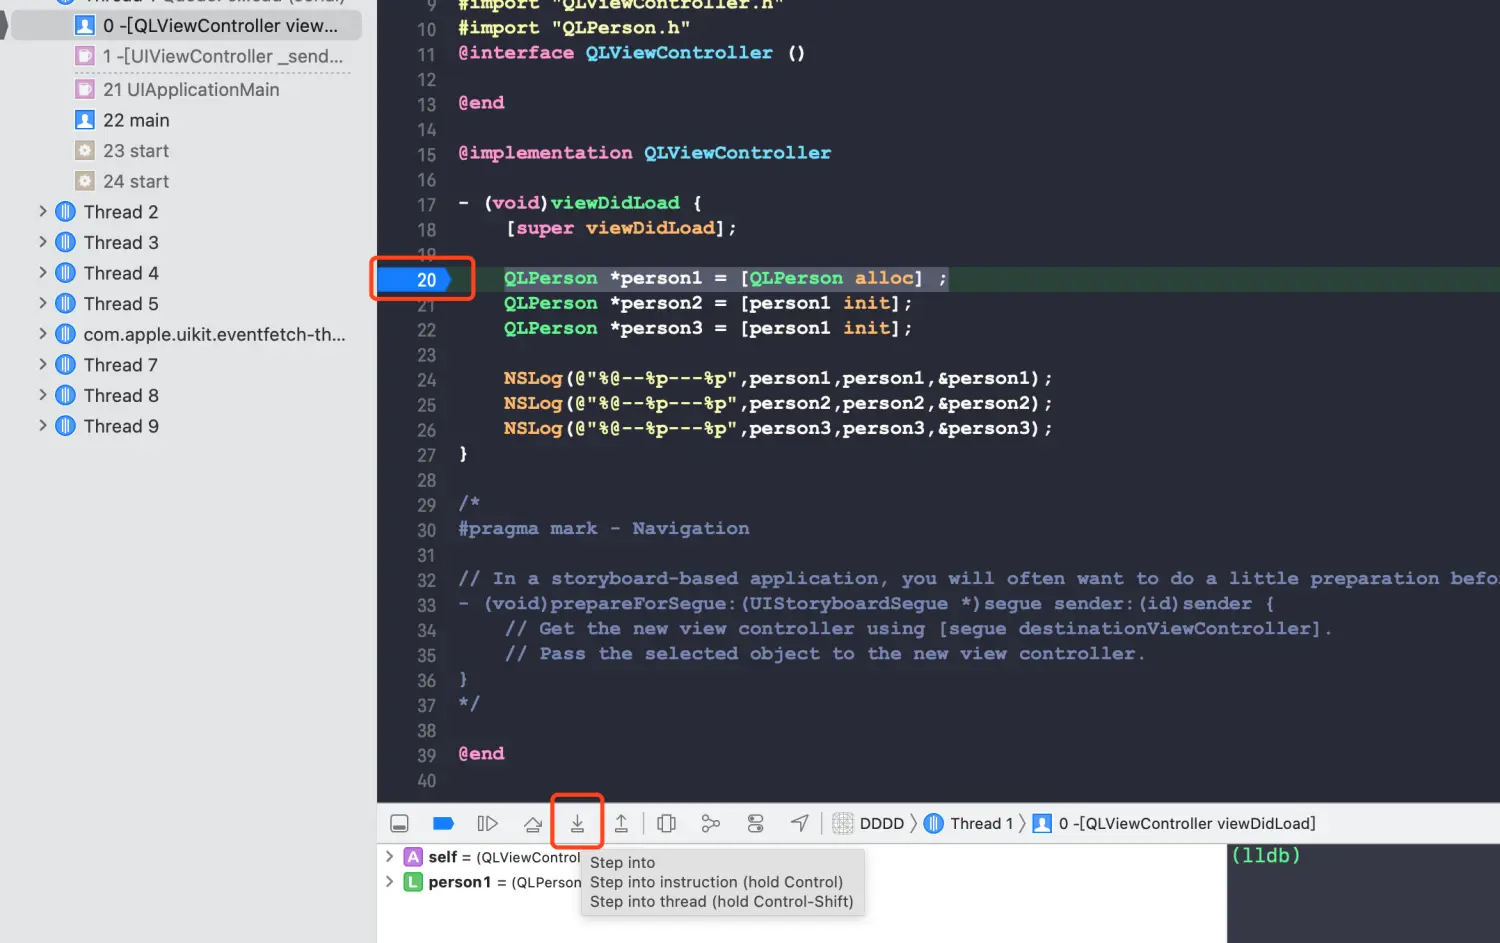
1、来到objc_alloc
2、继续点击箭头,来到libobjc.A.dylib objc_alloc
3、_objc_rootAllocWithZone- 总结:
本文为oc对象的初步探究,仅提到oc对象alloc的流程,init过程将在下一章讲述。如有不同意见,请留言。
引言
作为一个iOS开发,alloc init 在日常开发中应该是出现频率最高的了。只是你真的了解alloc运行原理了么?本文就OC对象原理进行探究。
示例
QLPerson *person1 = [QLPerson alloc] ;QLPerson *person2 = [person1 init];QLPerson *person3 = [person1 init];NSLog(@"%@--%p---%p",person1,person1,&person1);NSLog(@"%@--%p---%p",person2,person2,&person2);NSLog(@"%@--%p---%p",person3,person3,&person3);
请问打印的结果是什么?
<QLPerson: 0x600000a38390>--0x600000a38390---0x7ffeee8ffcf8<QLPerson: 0x600000a38390>--0x600000a38390---0x7ffeee8ffcf0<QLPerson: 0x600000a38390>--0x600000a38390---0x7ffeee8ffce8
打印结果可以看到:三者打印的结果只有&person1,&person2,&person3是不一样的,为连续的三个地址,其余打印地址均为0x600000a38390,为什么会出现这种情况?下面我们来探究其原理流程。
探究方法
####方法一
添加断点:QLPerson *person1 = [QLPerson alloc] ;在xcode断点环境下,按住control键,鼠标点击向下箭头step into instruction进入底层
1、来到objc_alloc
2、继续点击箭头,来到libobjc.A.dylib objc_alloc
3、_objc_rootAllocWithZone
方法二
通过汇编,找到符号
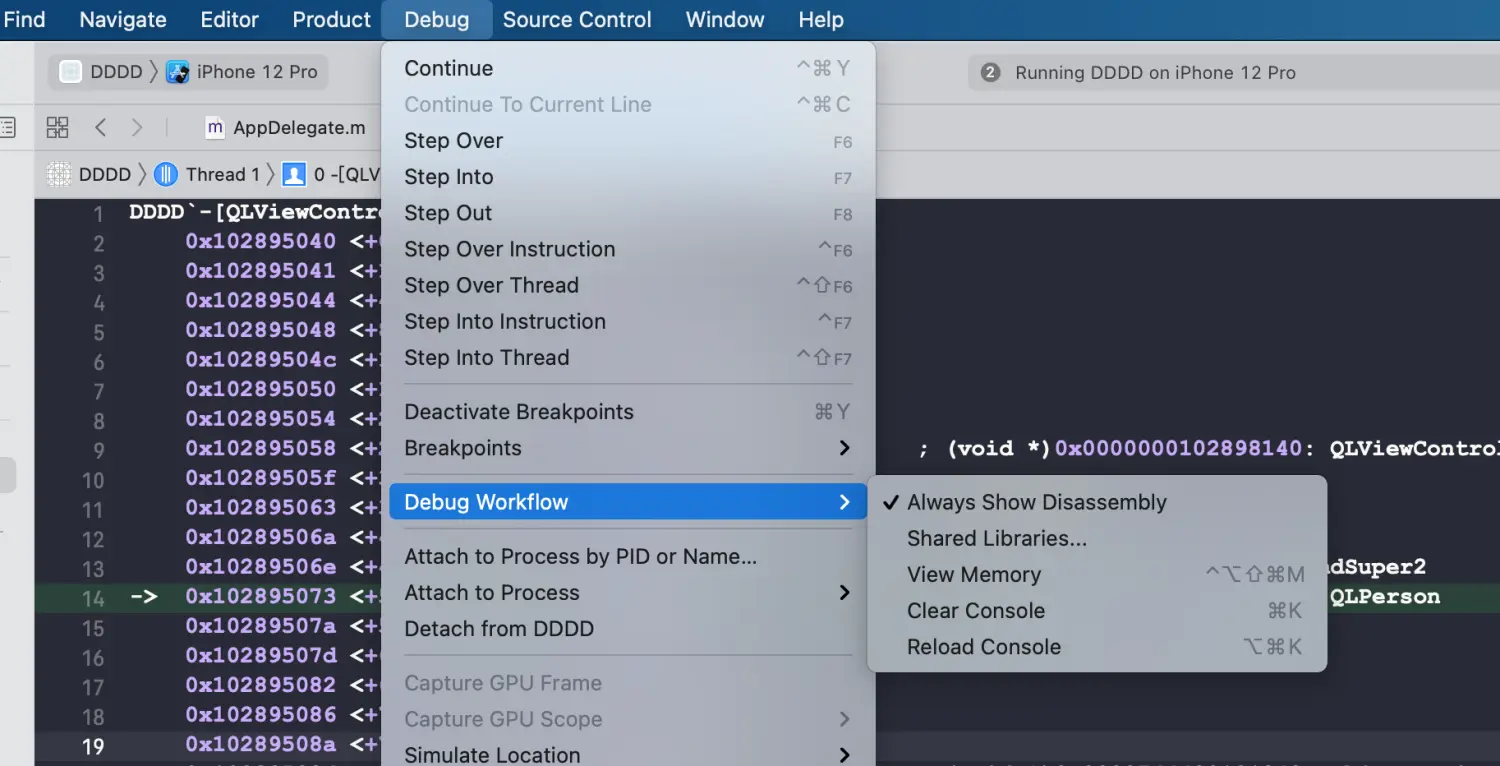
显示汇编:Xcode-->Debug-->Debug Workflow-->Always Show Disassembly
在汇编中可以看到symbol stub for: objc_alloc,按住control键,点击向下箭头,进入到objc_alloc中,重复方法一的步骤,不再赘述。
####方法三
添加符号断点:objc_alloc,_objc_rootAllocWithZone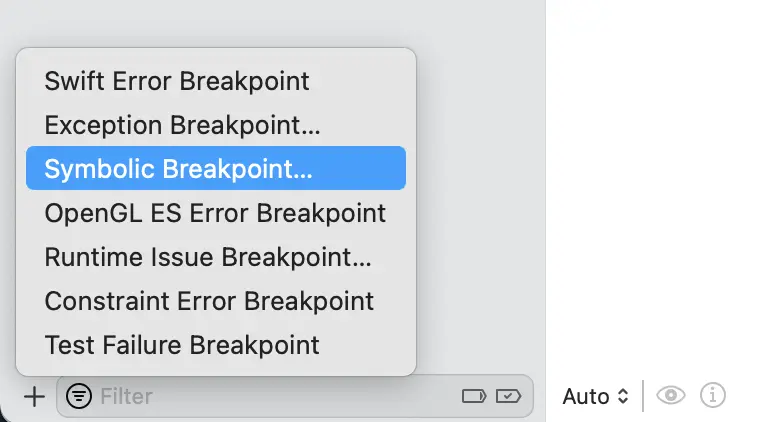

以上三种方法为探究alloc的思路过程,接下来我们将苹果提供的源码来探究alloc的流程,通过源码调试来达到目的。
首先将objc源码可以在Apple source获取
编译流程较为麻烦,请参考Cooci大神的编译过程。
完成以上步骤后,我们开始探究alloc流程:
1、在objc编译成功的源码工程中,添加测试target,在main.m中代码如下:
int main(int argc, const char * argv[]) {@autoreleasepool {QLPerson *person1 = [QLPerson alloc];// QLPerson *person2 = [person1 init];// QLPerson *person3 = [person1 init];// NSLog(@"%@--%p---%p",person1,person1,&person1);// NSLog(@"%@--%p---%p",person2,person2,&person2);// NSLog(@"%@--%p---%p",person3,person3,&person3);NSLog(@"%@",person1);}return 0;}
操作流程如下:command + 左键进入NSObject.mm,调用源码如下:
+ (id)alloc {return _objc_rootAlloc(self);}id _objc_rootAlloc(Class cls){return callAlloc(cls, false/*checkNil*/, true/*allocWithZone*/);}static ALWAYS_INLINE id callAlloc(Class cls, bool checkNil, bool allocWithZone=false){#if __OBJC2__if (slowpath(checkNil && !cls)) return nil;if (fastpath(!cls->ISA()->hasCustomAWZ())) {return _objc_rootAllocWithZone(cls, nil);}#endif// No shortcuts available.if (allocWithZone) {return ((id(*)(id, SEL, struct _NSZone *))objc_msgSend)(cls, @selector(allocWithZone:), nil);}return ((id(*)(id, SEL))objc_msgSend)(cls, @selector(alloc));}
选择进入objc-runtime-new.mm
NEVER_INLINE id _objc_rootAllocWithZone(Class cls, malloc_zone_t *zone __unused){// allocWithZone under __OBJC2__ ignores the zone parameterreturn _class_createInstanceFromZone(cls, 0, nil,OBJECT_CONSTRUCT_CALL_BADALLOC);}static ALWAYS_INLINE id _class_createInstanceFromZone(Class cls, size_t extraBytes, void *zone,int construct_flags = OBJECT_CONSTRUCT_NONE,bool cxxConstruct = true,size_t *outAllocatedSize = nil){ASSERT(cls->isRealized());// Read class's info bits all at once for performancebool hasCxxCtor = cxxConstruct && cls->hasCxxCtor();bool hasCxxDtor = cls->hasCxxDtor();bool fast = cls->canAllocNonpointer();size_t size;size = cls->instanceSize(extraBytes);if (outAllocatedSize) *outAllocatedSize = size;id obj;if (zone) {obj = (id)malloc_zone_calloc((malloc_zone_t *)zone, 1, size);} else {obj = (id)calloc(1, size);}if (slowpath(!obj)) {if (construct_flags & OBJECT_CONSTRUCT_CALL_BADALLOC) {return _objc_callBadAllocHandler(cls);}return nil;}if (!zone && fast) {obj->initInstanceIsa(cls, hasCxxDtor);} else {// Use raw pointer isa on the assumption that they might be// doing something weird with the zone or RR.obj->initIsa(cls);}if (fastpath(!hasCxxCtor)) {return obj;}construct_flags |= OBJECT_CONSTRUCT_FREE_ONFAILURE;return object_cxxConstructFromClass(obj, cls, construct_flags);}
在以上源码中添加断点后,调试过程我总结成了一张图: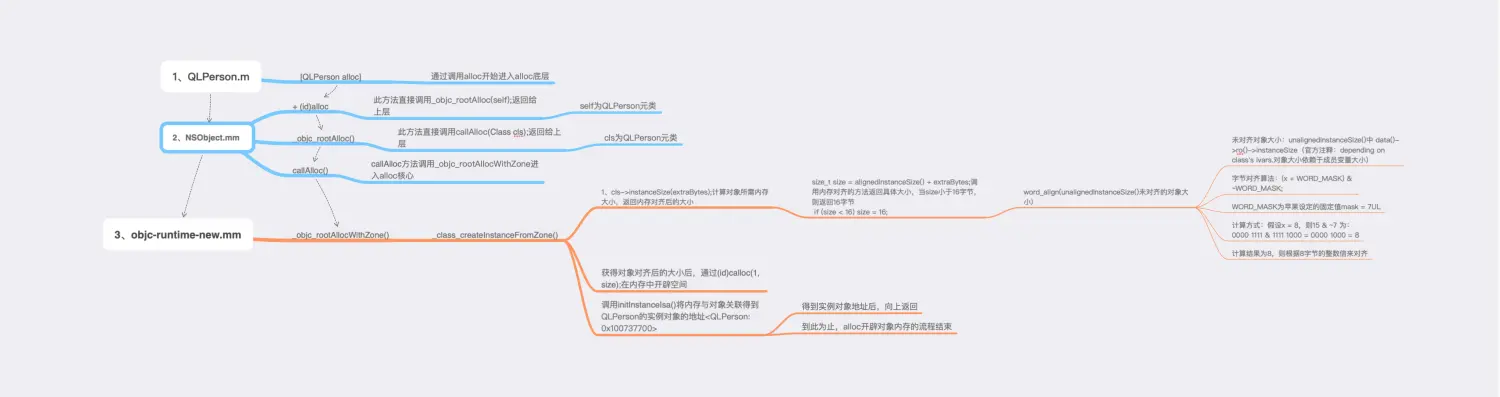
文字流程:+ alloc—_objc_rootAlloc—callAlloc—_objc_rootAllocWithZone—_class_createInstanceFromZone (核心实现,在方法中,完成对象大小计算,对齐,开辟,关联)
总结:
本文为oc对象的初步探究,仅提到oc对象alloc的流程,init过程将在下一章讲述。如有不同意见,请留言。

若有收获,就点个赞吧
0 人点赞
