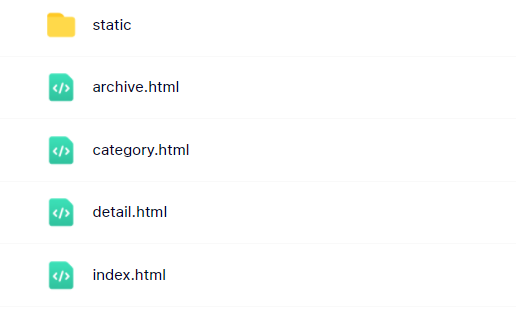
1、博客Web项目的模板-资源
2、将模板导入项目
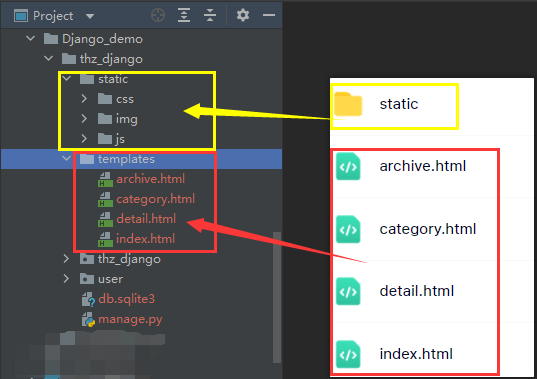
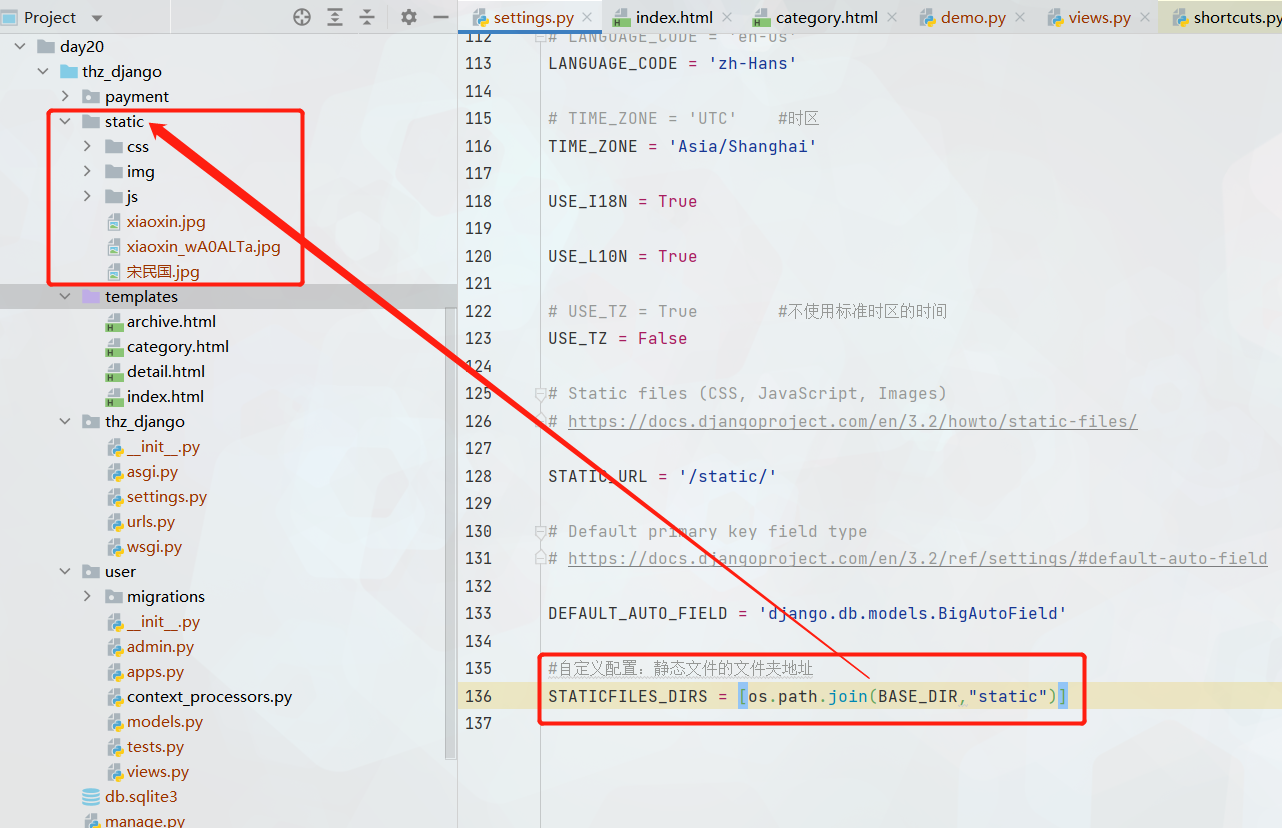
2.1、在项目中创建templates文件夹
创建模板文件夹 <项目名>/templates
用来存放这个Web应用的html文件
2.2、在项目中创建static文件夹
3、修改项目的配置文件
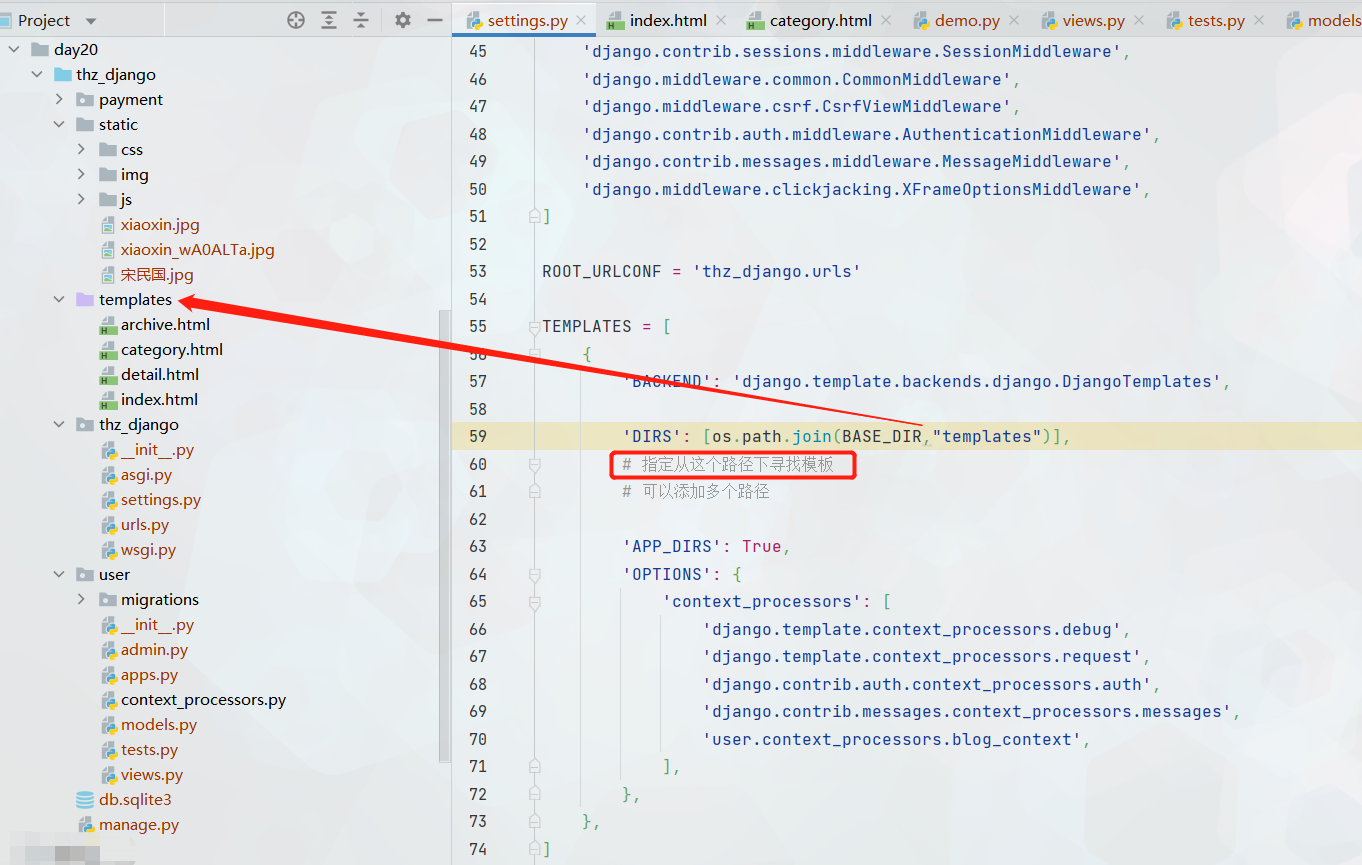
3.1、修改TEMPLATES公有配置
‘DIRS’: [os.path.join(BASE_DIR,”templates”)],
- 指定从这个路径下寻找模板
可以添加多个路径
TEMPLATES = [{'BACKEND': 'django.template.backends.django.DjangoTemplates',# 指定模板的引擎'DIRS': [os.path.join(BASE_DIR,"templates")],# 模板的搜索目录# 指定从这个路径下寻找模板# 可以是一个或者多个'APP_DIRS': True,# 是否要在应用中的templates文件夹中搜索模板文件# OPTIONS 有关模板的选项'OPTIONS': {'context_processors': ['django.template.context_processors.debug','django.template.context_processors.request','django.contrib.auth.context_processors.auth','django.contrib.messages.context_processors.messages','user.context_processors.blog_context',],},},]
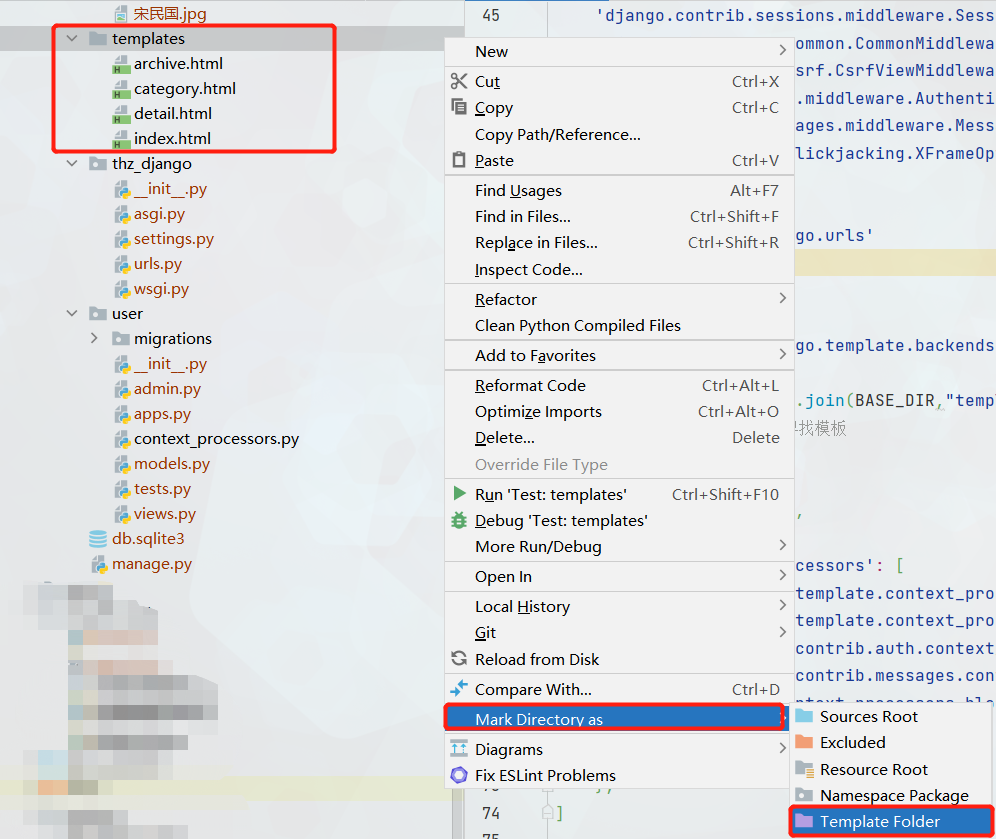
3.2、将templates文件设置为Template Folder
便于以后引用,添加关系映射时,pycharm可以自动识别带出
4、编辑urls.py,给路由绑定视图函数
```python “””thz_django URL Configuration
The urlpatterns list routes URLs to views. For more information please see:
https://docs.djangoproject.com/en/3.2/topics/http/urls/
Examples:
Function views
1. Add an import: from my_app import views2. Add a URL to urlpatterns: path('', views.home, name='home')
Class-based views
1. Add an import: from other_app.views import Home2. Add a URL to urlpatterns: path('', Home.as_view(), name='home')
Including another URLconf
1. Import the include() function: from django.urls import include, path2. Add a URL to urlpatterns: path('blog/', include('blog.urls'))
“”” from django.contrib import admin from django.urls import path from user import views
urlpatterns = [ path(‘admin/‘, admin.site.urls), path(‘login/‘, views.login), path(‘index/‘, views.index), # 新增的映射关系 ]
<a name="MUUyq"></a># 5、编辑views.py,添加视图函数。```pythonfrom django.shortcuts import render, HttpResponseimport json# Create your views here.# 新增的视图函数def index(request):return render(request, "index.html")
5.1、模板的加载方式
使用 render() 直接加载响应模板
在视图函数中
render()语法:
from django.shortcuts import renderreturn render(request,'模板文件名',字典数据)
6、验证路由和视图函数是否绑定成功
6.1、启动项目
python manage.py runserver
如果项目在启动中,就不用重新启动了,调试模式检测代码改动后,会自动重启服务
6.2、浏览器验证
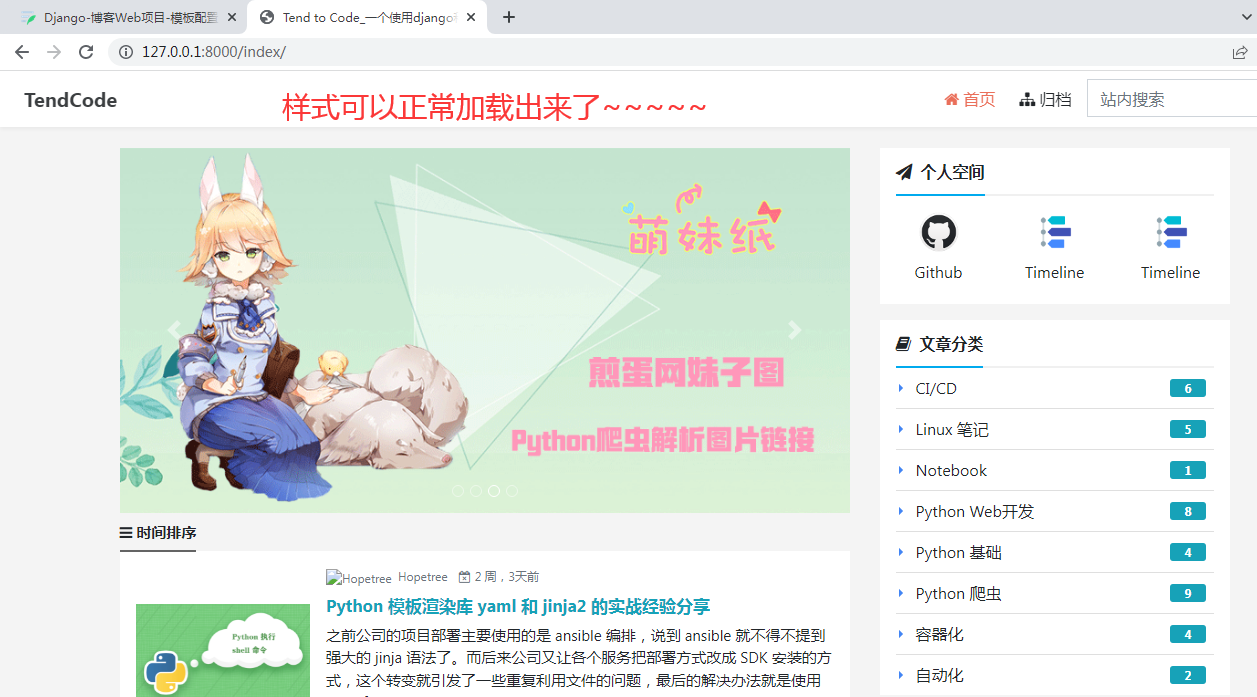
在浏览器中访问 127.0.0.1:8000/index/
验证映射关系
可以正常访问~~
但是这个页面,没有加载样式。继续解决样式问题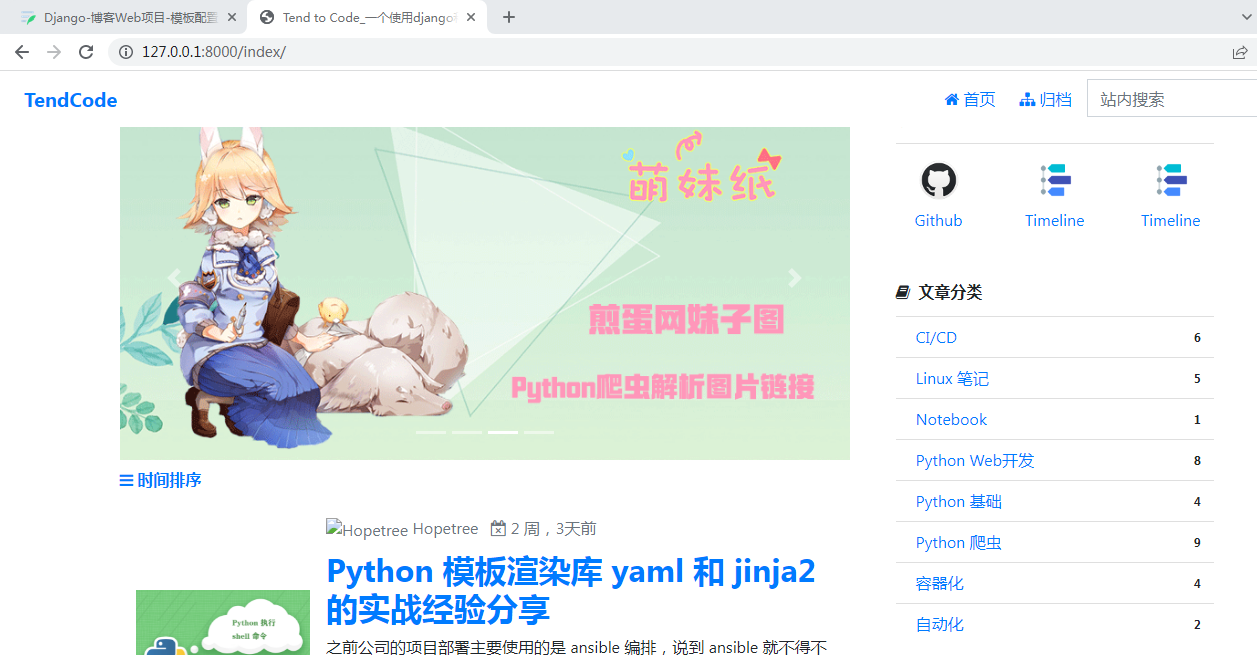
7、调整HTML模板中静态资源的引用
7.1、编辑settings.py,新增自定义配置
import os #新增部分from pathlib import Path# Build paths inside the project like this: BASE_DIR / 'subdir'.BASE_DIR = Path(__file__).resolve().parent.parent#自定义配置:静态文件的文件夹地址STATICFILES_DIRS = [os.path.join(BASE_DIR,"static")]
7.2、修改模板中静态资源的引用
将原来的“./static” 全部替换为“/static”
<!doctype html><html lang="en"><head><!-- Required meta tags --><meta charset="utf-8"><meta name="viewport" content="width=device-width, initial-scale=1, shrink-to-fit=no"><meta name="referrer" content="origin"><!-- TDK and ICO --><title>Tend to Code_一个使用django和bootstrap搭建的个人博客_TendCode</title><meta name="description"content="TendCode是一个Django搭建的博客,本网站后端使用Django框架搭建,前端使用Bootstrap框架,主要分享博主在Python以及其他编程语言的学习心得。"><meta name="keywords" content="Python自学,Python爬虫,Django博客,Python web开发,个人博客"><!--站长验证--><link rel="shortcut icon" href="/static/blog/img/favicon.ico" type="image/x-icon"/><!-- Bootstrap and font-awesome CSS --><link href="https://cdn.bootcss.com/twitter-bootstrap/4.3.1/css/bootstrap.min.css" rel="stylesheet"><link href="https://cdn.bootcss.com/font-awesome/4.7.0/css/font-awesome.min.css" rel="stylesheet"><!-- 将原来的“./static” 全部替换为“/static” --><script src="./static/js/headroom.min.js"></script><!-- blog CSS --><!-- 将原来的“./static” 全部替换为“/static” --><link href="./static/css/base.css" rel="stylesheet"><!--根据cookies判断是否启用暗色主题--></head>
