概述
Vue 不像 jQuery 内置了 ajax 请求函数,在 Vue 中没有提供这样的功能。所以当我们需要在 Vue 中和服务端进行通信的时候可选择的方式会更灵活一些。
注意:Vue 不提供的原因是为了让 Vue 本身更专注于视图部分,保持其渐进灵活的特性。
所以 Vue 给了我们更多的选择空间,例如我们可以使用下面的可选方案:
- 原生的 XMLHttpRequest
- 原生的 Fetch
- 也可以结合使用 jQuery 自带的 Ajax 请求函数
- 早期大家开发 Vue 应用喜欢使用一个第三方插件:Vue Resource
- 目前主流的方案是使用社区中知名的第三方库 axios
- …
JSON Server
- JSON Server 是一个提供测试环境接口的工具,它可以帮我们快速生成一套接口服务,专门用于学习测试。
- 它是免费开源的命令行工具
安装并启动服务
1、首先,安装:
npm install -g json-server# 该命令用于测试是否安装成功,如果看到一个版本输出,就证明OK了json-server --version
如果 json-server 安装失败,尝试以下方式解决:
- 如果使用 git-bash 安装是看不到进度条的,只要不报错你就耐心等待,建议去
cmd中执行安装命令- 网络原因,npm 的服务器在国外,所以国内安装的话非常缓慢
- 建议把 npm 的安装源切换到淘宝,淘宝的开发团队做了镜像源(复制了一个 npm 数据放到了国内)
可以使用 npm config list 这条命令查看 npm 相关的配置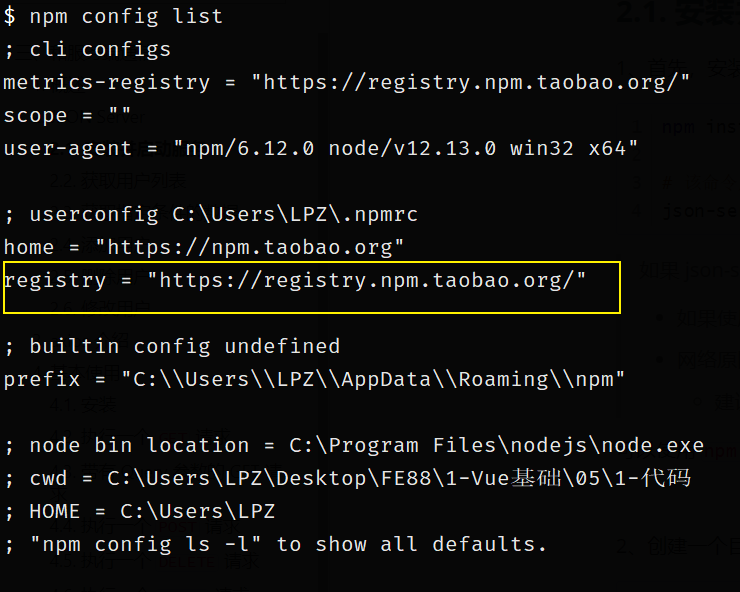
registry 显示的就是当前的安装源
如果这个地址不是 https://registry.npm.taobao.org/,那么我们执行以下的命令把它修改成这个地址:
npm config set registry https://registry.npm.taobao.org/
执行完以上命令以后,再次输入 npm config list 确认是否修改成功。
注意:所有使用
-g参数安装的包,只需要安装一次,以后就不用安装了,永久使用。
2、创建一个目录 json-server-demo,然后在该目录中创建一个文件 db.json 并写入以下内容:
{"posts": [{ "id": 1, "title": "json-server", "author": "typicode" }],"comments": [{ "id": 1, "body": "some comment", "postId": 1 }],"profile": { "name": "typicode" },"users": [{"id": 1,"name": "张三","age": 18,"gender": "男"}]}
3、最后,在命令行中进入 db.json 文件所属目录,执行
json-server --watch db.json
如果成功,你将看到以下输出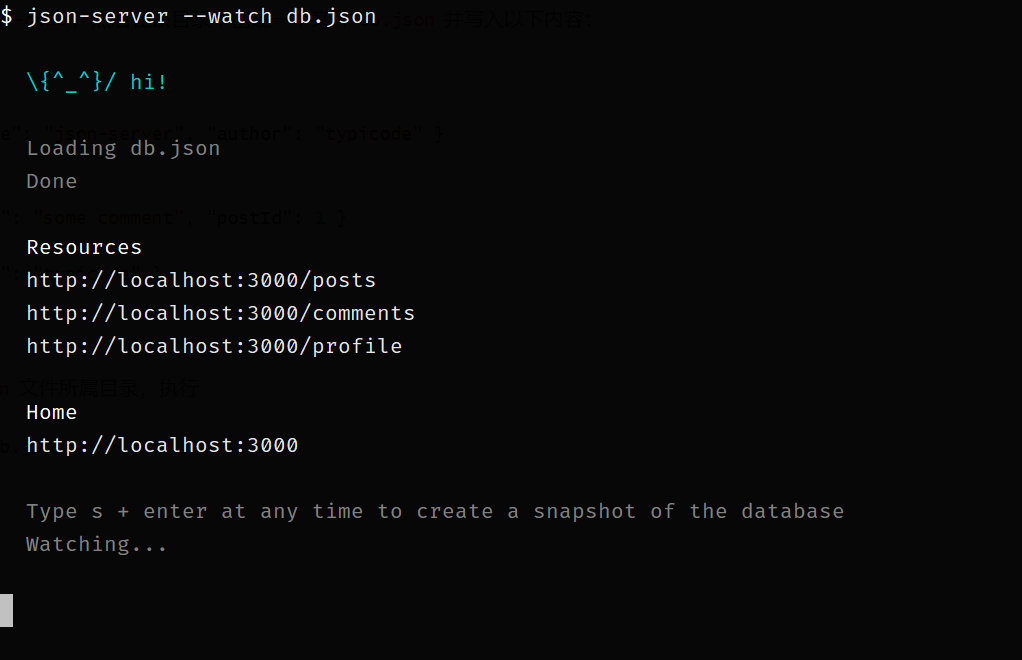
接口服务默认占用 3000 端口
然后把这个窗口最小化就不要动了,在接下来的学习测试期间一定要保持开启状态,如果窗口关闭了,接口服务也就关了。
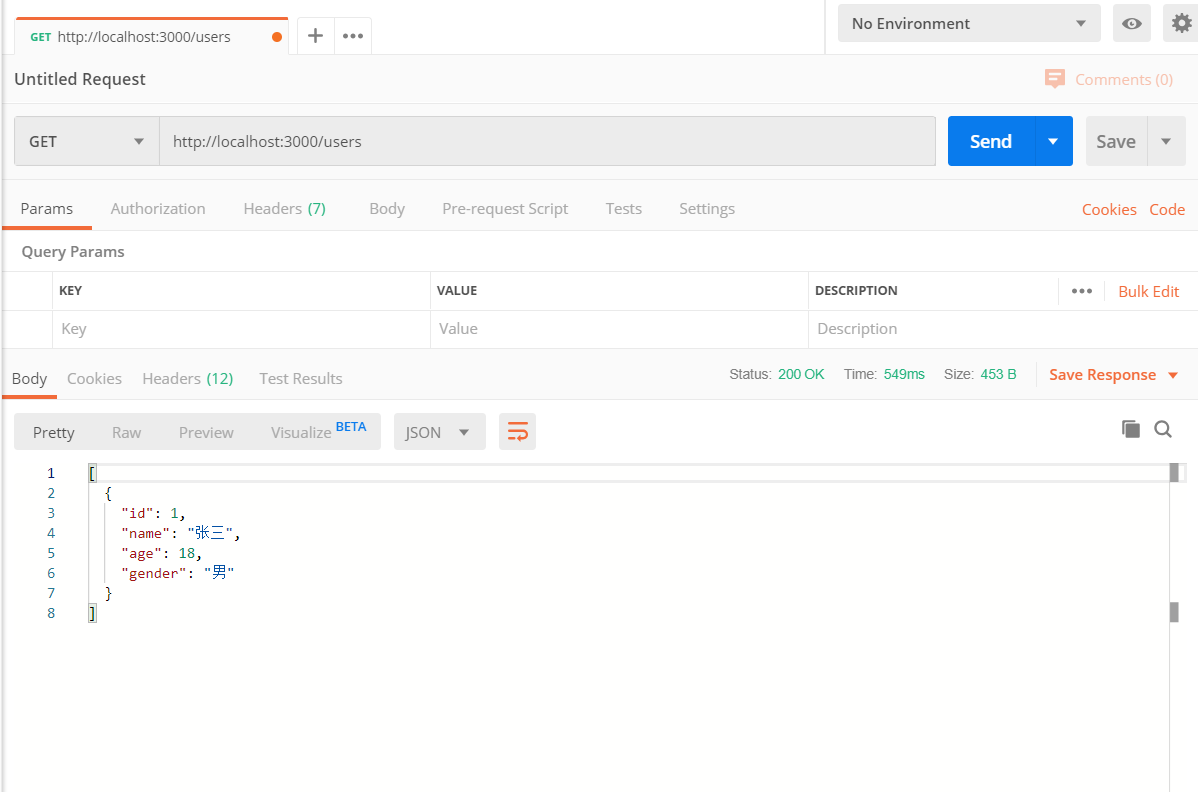
获取用户列表
- 请求方法:
GET - 请求路径
/users - 请求参数
- 响应数据 一个数组,用户列表
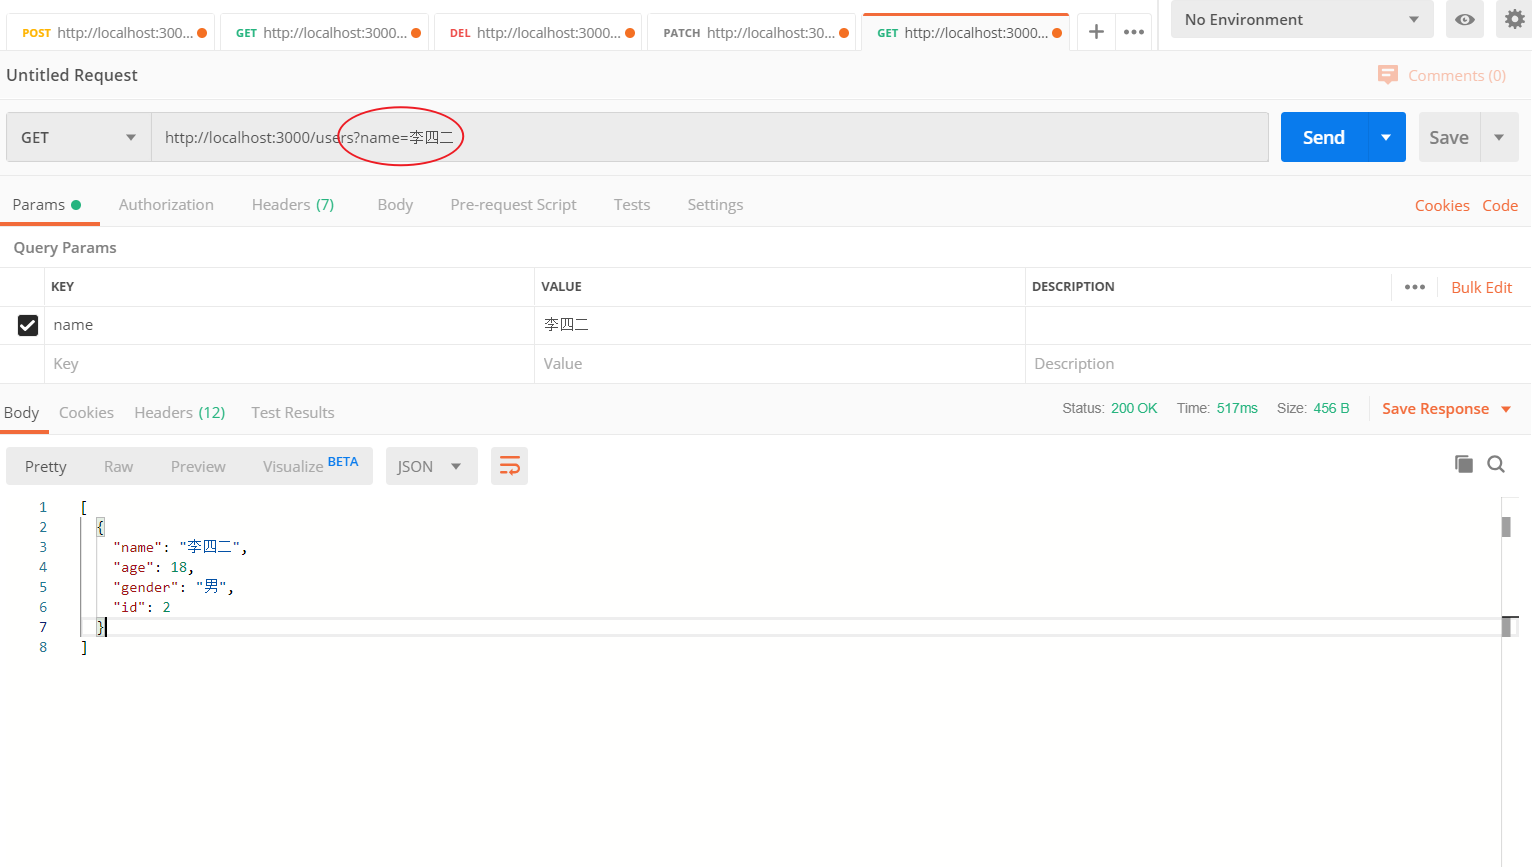
获取指定条件的数据
- 请求方法:
GET - 请求路径
/users - 请求参数
Query (查询字符串)参数:
- name 姓名
- age 年龄
- gender 性别
示例:
http://localhost:3000/users?name=张三丰

http://localhost:3000/users?age=18

http://localhost:3000/users?age=18&name=李四二
- 响应数据 一个数组,查询结果
添加用户
- 请求方法:
POST - 请求路径
/users - 请求参数
{
  "name": 姓名,
  "age": 年龄,
  "gender": 性别
}
- 响应数据
新增的用户信息
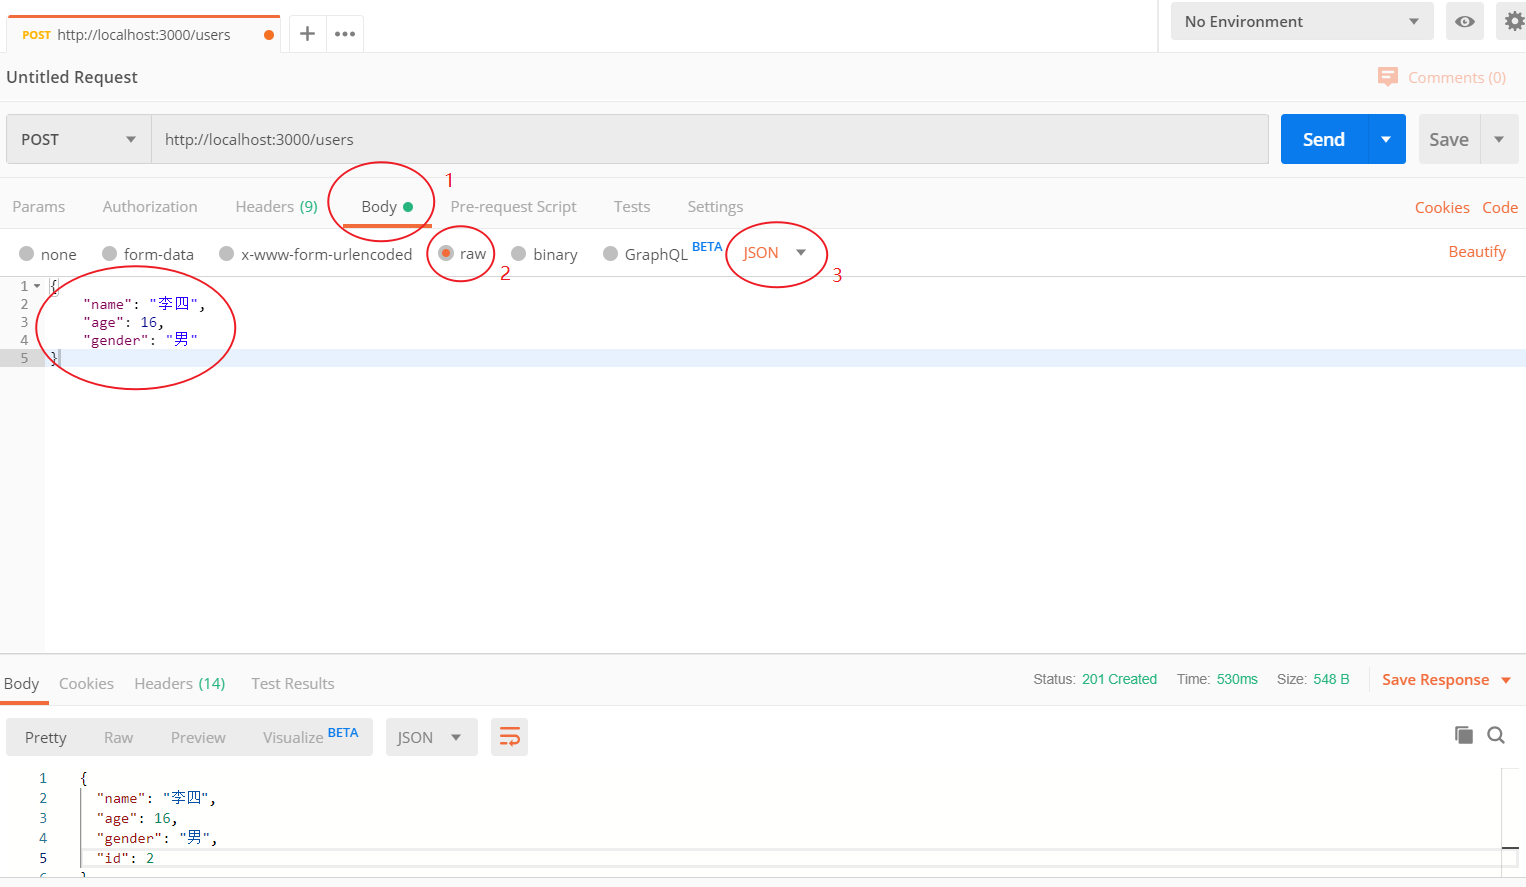
注意:请求体数据必须是 JSON 格式字符串
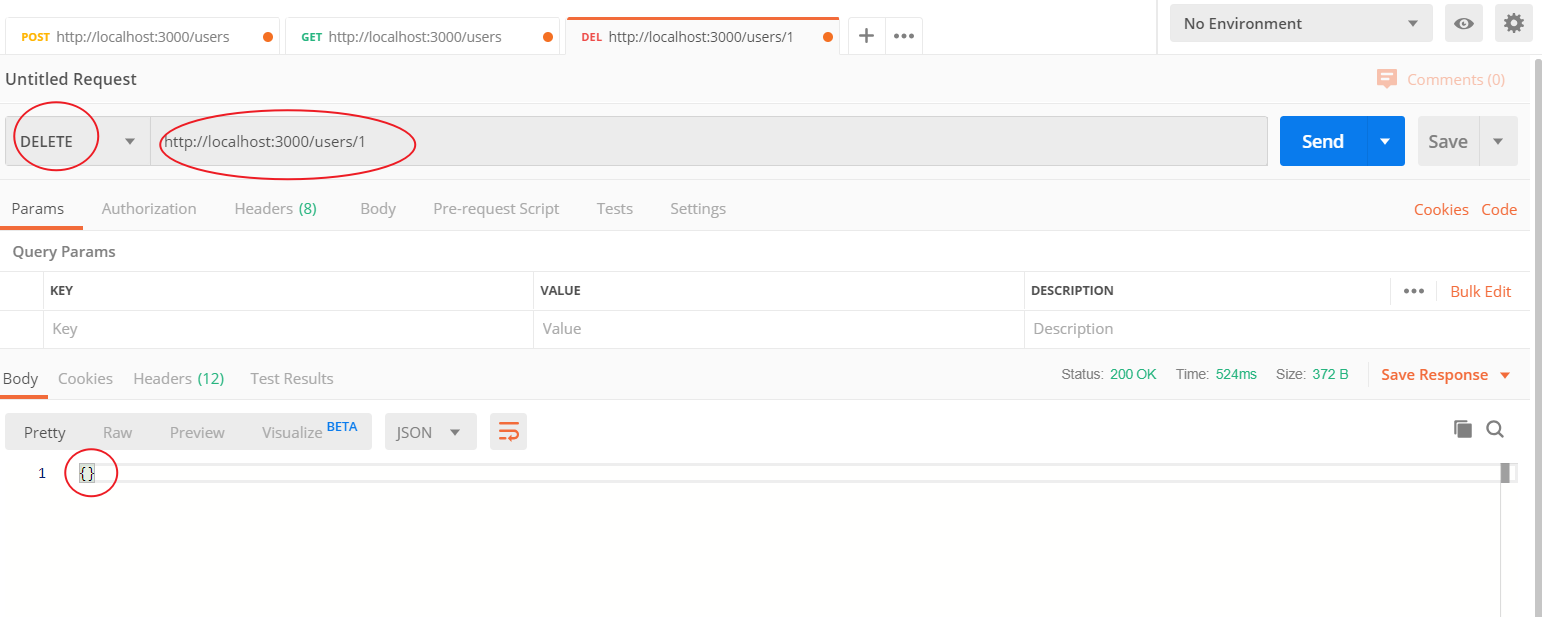
删除用户
- 请求方法:
DELETE - 请求路径
/users/用户id- 例如删除 id 为 3 的用户:
http://localhost:3000/users/3
- 例如删除 id 为 3 的用户:
- 请求参数
- 响应数据
{}
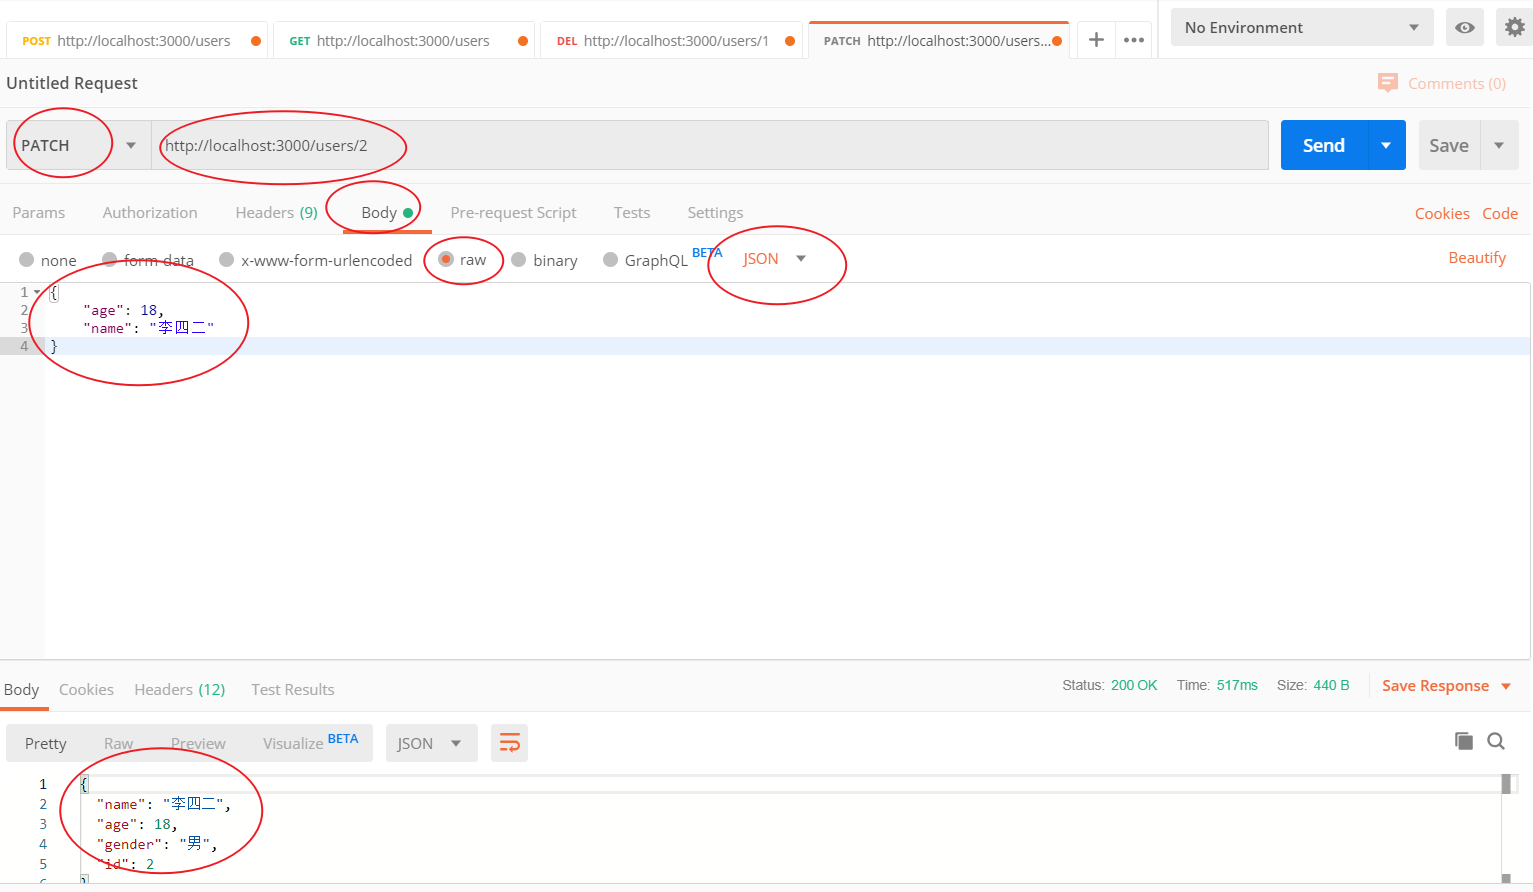
修改用户
- 请求方法:
PATCH - 请求路径
/users/用户id- 例如修改 id 为 3 的用户:
http://localhost:3000/users/3
- 例如修改 id 为 3 的用户:
- 请求参数
Body 请求体数据:
{
  "name": 名称,
  "age": 年龄,
  "gender": 性别
}
注意:name、age、gender 都是可选的,修改谁就传谁
- 响应数据(修改之后的用户的完整信息)
{
  "name": "李四二",
  "age": 18,
  "gender": "男",
  "id": 2
}
axios 介绍
axios 是一个基于 Promise 的第三方 HTTP 客户端请求库,可以用于浏览器或者 Node.js。
axios 本身和 Vue 没有一毛钱关系,只是简单纯粹的封装了 HTTP 请求功能。可以运行在任何支持 JavaScript 环境的平台。
- 在浏览器端使用的是 XMLHttpRequest
- 在 Node 中使用的是 http
- 支持 Promise
- 支持请求拦截和响应拦截
- 支持转换请求和响应数据
- 支持取消请求
- 自动转换 JSON 数据
- 客户端支持防止 XSRF
axios 依赖原生的 ECMAScript 6 Promise 支持。 如果浏览器不支持 ECMAScript 6 Promise,可以使用 es6-promise 进行兼容处理。
基本使用
安装
npm install axios
执行一个 GET 请求
axios({
  // 配置请求相关数据信息
  method: "GET", // 请求方法
  url: "http://localhost:3000/users" // 请求路径
  // params: {}, // Query 参数
  // data: {} // Body 参数
}).then(function(res) {
  // res 是响应对象
  // 接口返回的数据再 res.data 中
  //    config: {url: "http://localhost:3000/users", method: "get", headers: {…}, transformRequest: Array(1), transformResponse: Array(1), …}
  //      本次请求配置信息对象,很少使用
  //    data: [{…}]
  //      真正的响应结果数据
  //    headers: {cache-control: "no-cache", content-length: "84", content-type: "application/json; charset=utf-8", expires: "-1", pragma: "no-cache"}
  //      响应头数据,很少使用
  //    request: XMLHttpRequest {readyState: 4, timeout: 0, withCredentials: false, upload: XMLHttpRequestUpload, onreadystatechange: ƒ, …}
  //      请求对象,几乎不适用
  //    status: 200
  //      响应状态码
  //    statusText: "OK"
  //      响应状态短语
  console.log(res.data);
});
带有 Query 参数的 GET 请求
const user = {
  name: "张三",
  age: 18
};

axios({
  method: "GET",
  // url: 'http://localhost:3000/users?name=' + name + '&age=' + age,
  // url: `http://localhost:3000/users?name=${name}&age=${age}`,
  url: "http://localhost:3000/users",
  // 配置 Query 查询参数
  // axios 在内部把 params 对象转换为 key=value&key=value 的数据格式
  // 然后放到 url 后面,把请求发出去
  params: {
    // name: user.name,
    age: user.age
  }
}).then(res => {
  console.log(res);
});
执行一个 POST 请求
axios({
  method: "POST",
  url: "http://localhost:3000/users",
  data: {
    // POST 请求体放到 data 中
    name: "张三风",
    age: 50,
    gender: "男"
  }
}).then(res => {
  if (res.status === 201) {
    console.log("添加成功");
  }
});
执行一个 DELETE 请求
axios({
  method: "DELETE",
  url: "http://localhost:3000/users/3"
}).then(res => {
  console.log(res);
});
执行一个 PATCH 请求
axios({
  method: "PATCH",
  url: "http://localhost:3000/users/4",
  data: {
    // Body 请求体
    name: "张三丰"
  }
}).then(res => {
  console.log(res);
});
axios API
axios(config)
我们可以像使用 $.ajax() 一样来使用 axios。
// Send a POST request
axios({
  method: "post",
  url: "/user/12345",
  data: {
    firstName: "Fred",
    lastName: "Flintstone"
  }
});
// GET request for remote image
axios({
  method: "get",
  url: "http://bit.ly/2mTM3nY",
  responseType: "stream"
}).then(function(response) {
  response.data.pipe(fs.createWriteStream("ada_lovelace.jpg"));
});
请求方法别名(了解即可)
为了方便,axios 为所有的请求方法都提供了别名支持。
- axios.request(config)
- axios.get(url[, config])
- axios.delete(url[, config])
- axios.head(url[, config])
- axios.options(url[, config])
- axios.post(url[, data[, config]])
- axios.put(url[, data[, config]])
- axios.patch(url[, data[, config]])
注意:当使用了这些别名方法时,
url,method和data属性不需要声明在配置对象中。
响应体结构
请求的响应包含以下信息。
{
  // `data` is the response that was provided by the server
  "data": {},

  // `status` is the HTTP status code from the server response
  "status": 200,

  // `statusText` is the HTTP status message from the server response
  "statusText": "OK",

  // `headers` the headers that the server responded with
  // All header names are lower cased
  "headers": {},

  // `config` is the config that was provided to `axios` for the request
  "config": {},

  // `request` is the request that generated this response
  // It is the last ClientRequest instance in node.js (in redirects)
  // and an XMLHttpRequest instance the browser
  "request": {}
}
当使用 then 方法时,将收到如下结果
axios.get("/user/12345").then(function(response) {
  console.log(response.data);
  console.log(response.status);
  console.log(response.statusText);
  console.log(response.headers);
  console.log(response.config);
});
配置
配置 baseUrl
// 配置请求的基础路径
axios.defaults.baseURL = "https://api.example.com";
错误处理
axios({
  method: "PATCH",
  url: "/users/2",
  data: {
    name: "abc"
  }
})
  .then(res => {
    // 成功执行 then
    // 在 axios 中,默认只有 >=200 和 <400 的状态码都认为是成功的
    // axios 在请求失败以后就不执行 then 里面的代码了
    console.log("请求结果 => ", res);
  })
  .catch(err => {
    // 失败执行 catch
    console.log("请求失败了", err);
    window.alert("更新失败,请稍后重试!");
  });
在 Vue 中配合使用 axios
准备页面模板
<!DOCTYPE html>
<html lang="en">
  <head>
    <meta charset="UTF-8" />
    <title>Document</title>
  </head>
  <body>
    <div id="app">
      <form>
        <div>
          <label for="">姓名</label>
          <input type="text" />
        </div>
        <div>
          <label for="">年龄</label>
          <input type="text" />
        </div>
        <div>
          <label for="">性别</label>
          <input type="radio" value="男" name="gender" /> 男
          <input type="radio" value="女" name="gender" /> 女
        </div>
        <div>
          <button>添加</button>
        </div>
      </form>

      <table>
        <thead>
          <tr>
            <th>id</th>
            <th>姓名</th>
            <th>年龄</th>
            <th>性别</th>
            <th>操作</th>
          </tr>
        </thead>
        <tbody>
          <tr>
            <td>1</td>
            <td>张三</td>
            <td>18</td>
            <td>男</td>
            <td>
              <button>删除</button>
            </td>
          </tr>
          <tr>
            <td>1</td>
            <td>张三</td>
            <td>18</td>
            <td>男</td>
            <td>
              <button>删除</button>
            </td>
          </tr>
        </tbody>
      </table>
    </div>
  </body>
</html>
安装依赖
# 安装 Vue
npm i vue

# 安装 axios
npm i axios
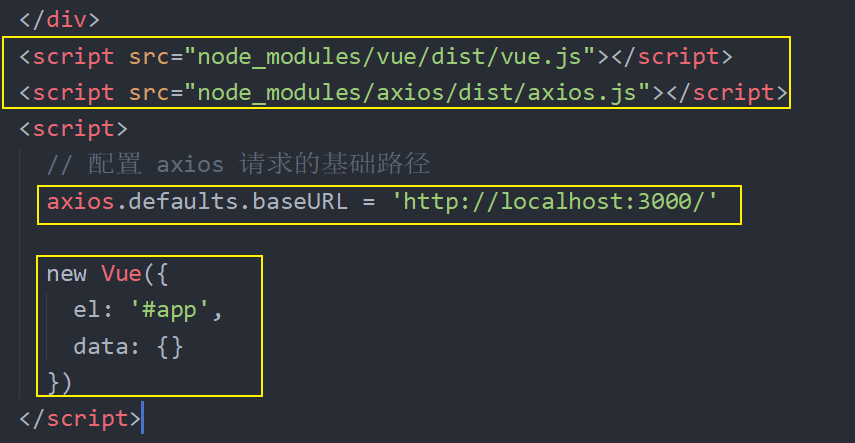
导入 Vue 和 Axios
添加
一、获取表单数据
1、根据接口和视图抽象出数据初始化到 data 中
data: {
  user: {
    name: '',
    age: '',
    gender: ''
  }
},
2、将数据绑定到对应的表单元素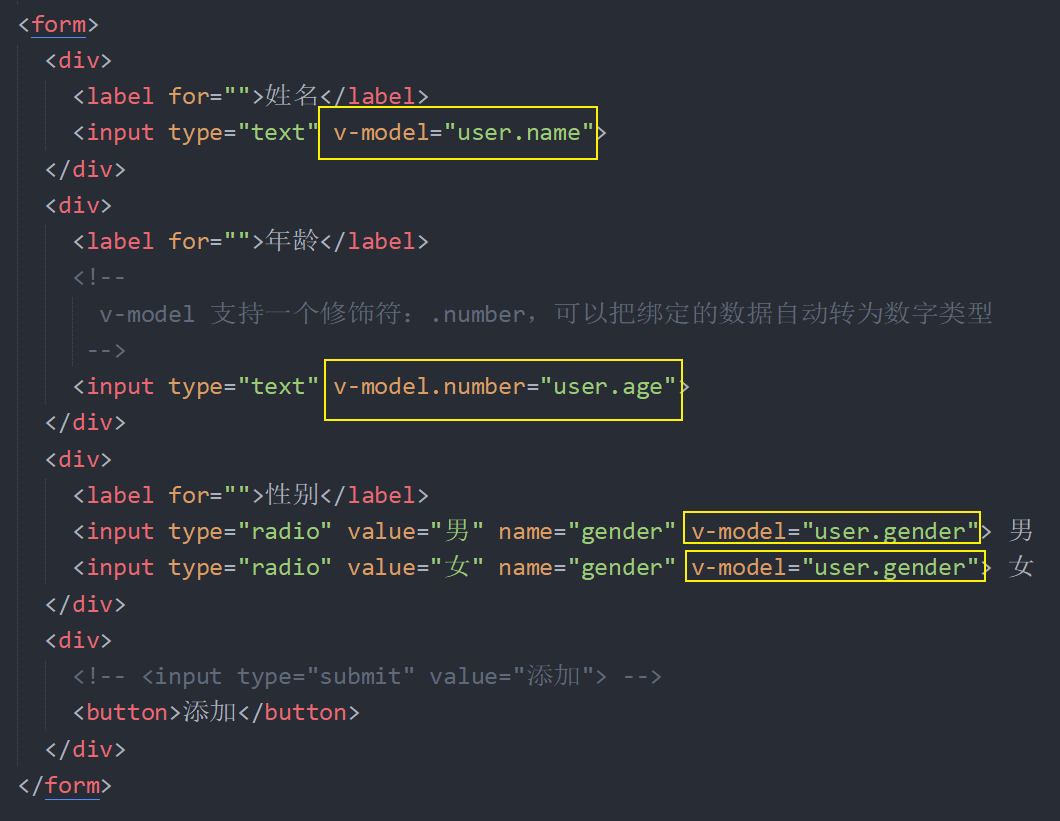
3、使用 VueDevTools 调试工具测试数据绑定是否正确。
二、注册表单提交事件
1、监听表单的 submit 事件,并绑定 onAdd 处理函数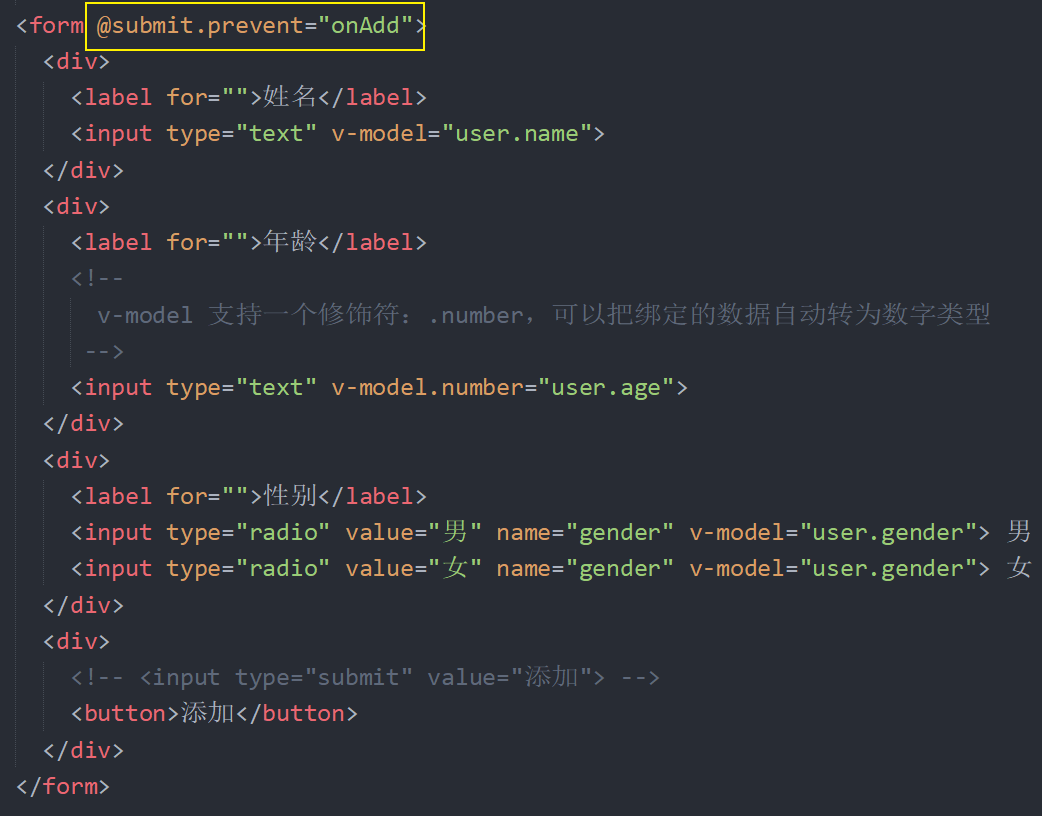
2、在 methods 中添加 onAdd 处理函数,请求提交表单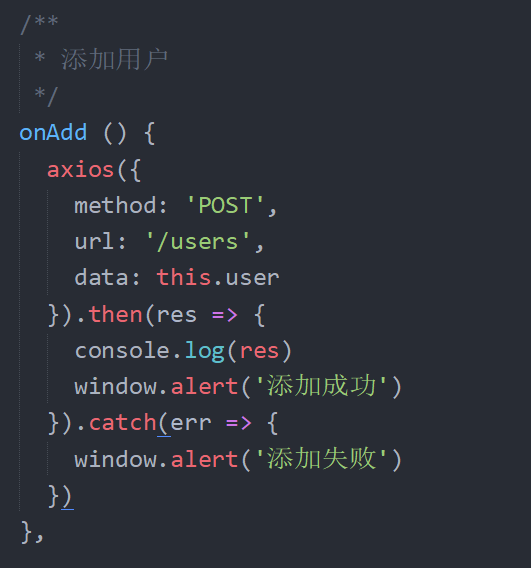
列表加载
1、在 mthods 中封装一个方法 loadUsers 用于请求获取数据并更新数据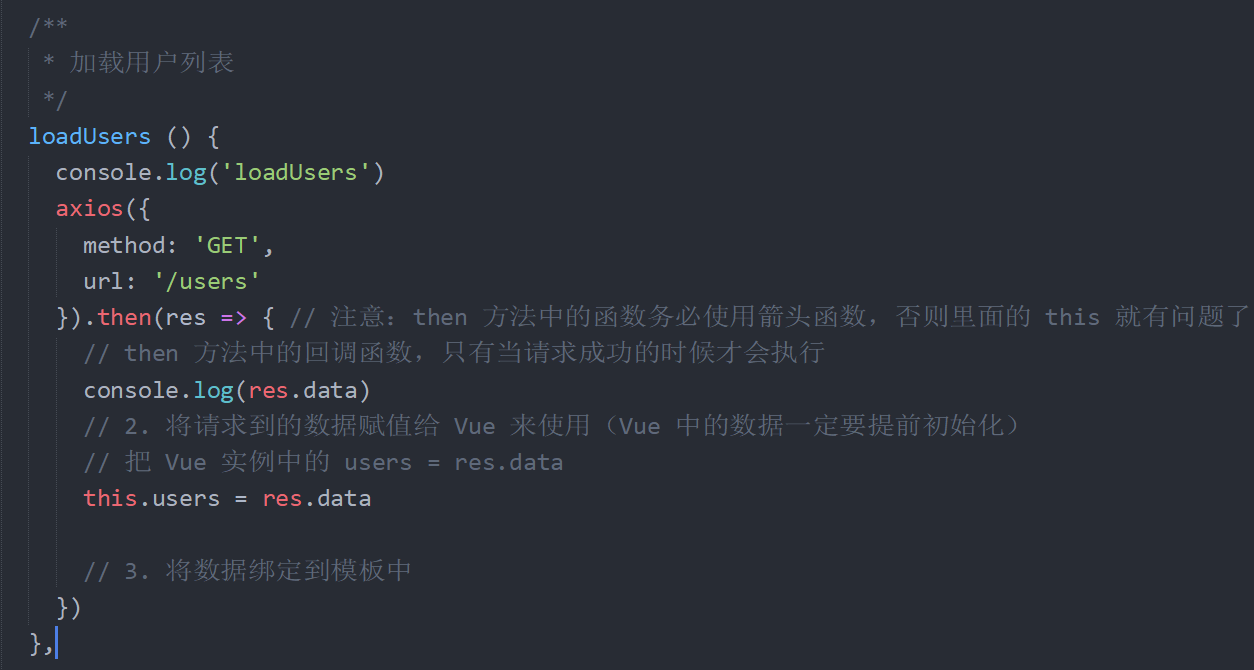
2、然后在实例选项 created 方法中调用 loadUsers 方法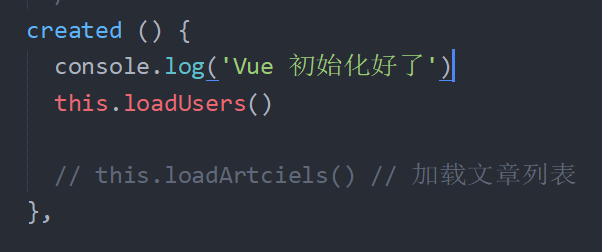
3、在模板中使用 v-for 遍历展示用户列表
4、在 onAdd 中添加用户完成的 then 回调中调用 loadUsers 更新用户列表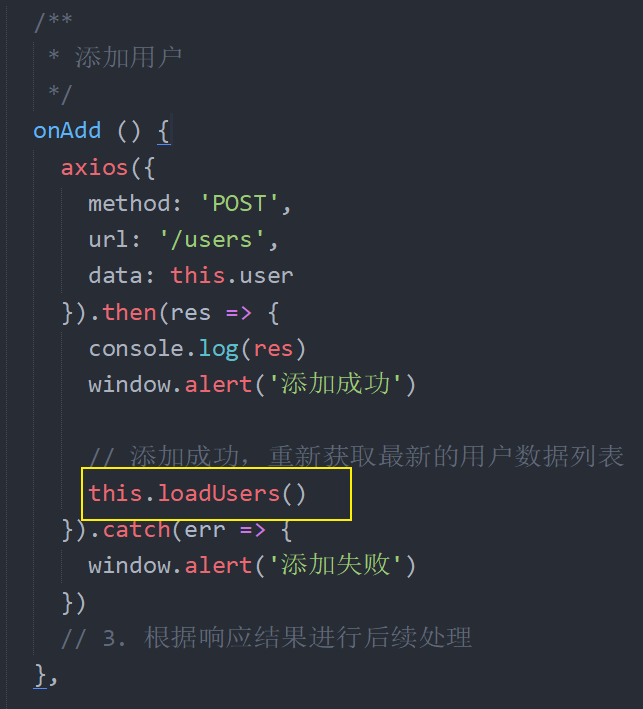
删除
1、给用户列表中的删除按钮绑定点击处理函数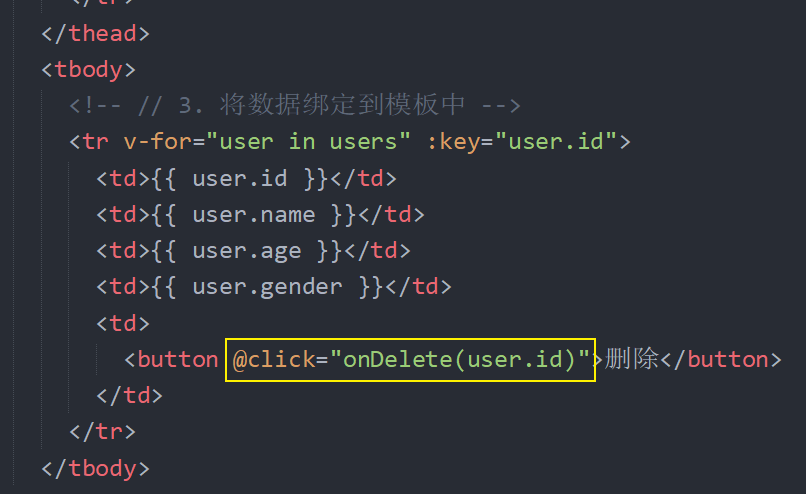
2、在 methods 中定义 onDelete 处理函数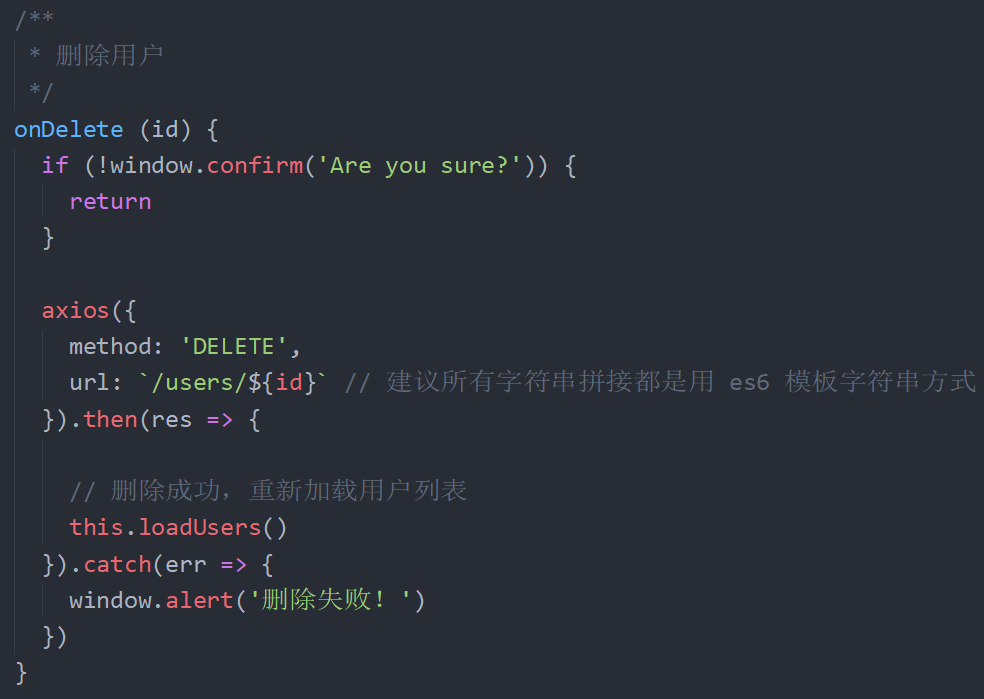
最后回到浏览器中测试删除。
完整代码如下
<!DOCTYPE html>
<html lang="en">
  <head>
    <meta charset="UTF-8" />
    <title>Document</title>
  </head>
  <body>
    <div id="app">
      <!--
      表单的 submit 事件:当表单中的 submit 或者 button 点击的时候,或者表单文本框中敲回车的时候都会触发 submit 事件
     -->
      <form @submit.prevent="onAdd">
        <div>
          <label for="">姓名</label>
          <input type="text" v-model="user.name" />
        </div>
        <div>
          <label for="">年龄</label>
          <!--
          v-model 支持一个修饰符:.number,可以把绑定的数据自动转为数字类型
         -->
          <input type="text" v-model.number="user.age" />
        </div>
        <div>
          <label for="">性别</label>
          <input type="radio" value="男" name="gender" v-model="user.gender" />
          男
          <input type="radio" value="女" name="gender" v-model="user.gender" />
          女
        </div>
        <div>
          <!-- <input type="submit" value="添加"> -->
          <button>添加</button>
        </div>
      </form>

      <table>
        <thead>
          <tr>
            <th>id</th>
            <th>姓名</th>
            <th>年龄</th>
            <th>性别</th>
            <th>操作</th>
          </tr>
        </thead>
        <tbody>
          <!-- // 3. 将数据绑定到模板中 -->
          <tr v-for="user in users" :key="user.id">
            <td>{{ user.id }}</td>
            <td>{{ user.name }}</td>
            <td>{{ user.age }}</td>
            <td>{{ user.gender }}</td>
            <td>
              <button @click="onDelete(user.id)">删除</button>
            </td>
          </tr>
        </tbody>
      </table>
    </div>
    <script src="node_modules/vue/dist/vue.js"></script>
    <script src="node_modules/axios/dist/axios.js"></script>
    <script>
      axios.defaults.baseURL = "http://localhost:3000/";

      // 1. 发送请求获取数据
      // axios({
      //   method: 'GET',
      //   url: '/users'
      // }).then(res => {
      //   // then 方法中的回调函数,只有当请求成功的时候才会执行
      //   console.log(res.data)
      //   // 2. 将请求到的数据赋值给 Vue 来使用(Vue 中的数据一定要提前初始化)
      //   // 把 Vue 实例中的 users = res.data
      //   app.users = res.data

      //   // 3. 将数据绑定到模板中
      // })

      const app = new Vue({
        el: "#app",
        data: {
          message: "Hello Vue.js!",
          // 根据接口要求包括视图,抽象出需要绑定的数据字段
          // 这里的名字也不要瞎起了,因为这个数据要提交给后端接口
          user: {
            name: "",
            age: "",
            gender: ""
          },
          users: [] // 存储用户数据列表
        },

        /**
         * 实例选项:created
         * 它是一个函数,它会在 Vue 初始化完成以后自动调用
         * 我们可以在它里面访问 this 获取 Vue 实例
         * 常见的场景就是:在页面加载好以后请求获取数据列表
         */
        created() {
          console.log("Vue 初始化好了");
          // 1. 发送请求获取数据
          // axios({
          //   method: 'GET',
          //   url: '/users'
          // }).then(res => { // 注意:then 方法中的函数务必使用箭头函数,否则里面的 this 就有问题了
          //   // then 方法中的回调函数,只有当请求成功的时候才会执行
          //   console.log(res.data)
          //   // 2. 将请求到的数据赋值给 Vue 来使用(Vue 中的数据一定要提前初始化)
          //   // 把 Vue 实例中的 users = res.data
          //   this.users = res.data

          //   // 3. 将数据绑定到模板中
          // })

          // 我们不太建议在 created 中写大量的业务逻辑代码
          // 我们更推荐把这些功能都封装成一个一个的函数放到 methods 中

          // 方法也可以直接通过 Vue 实例调用
          this.loadUsers();

          // this.loadArtciels() // 加载文章列表
        },

        methods: {
          /**
           * 添加用户
           */
          onAdd() {
            console.log(this.user);
            // 1. 获取表单数据
            // 1.1 根据接口和视图抽象出数据初始化到 data 中
            //     建议表单相关的数据放到一个单独的数据对象中
            // 1.2 然后使用 v-model 把数据分别绑定到对应的表单元素上
            // 1.3 最后利用 VueDevTools 调试工具测试数据是否绑定OK
            // 2. 请求提交
            // json-server 默认提供了 CORS 后端跨域,前端不需要做任何处理
            // 在后端的 CORS请求中,浏览器会先发出一个请求方法叫 OPTIONS 的预检请求
            // 注意:整个过程都是自动的,不需要代码参与,浏览器的默认行为
            axios({
              method: "POST",
              url: "/users",
              data: this.user
            })
              .then(res => {
                console.log(res);
                window.alert("添加成功");

                // 添加成功,重新获取最新的用户数据列表
                this.loadUsers();
              })
              .catch(err => {
                window.alert("添加失败");
              });
            // 3. 根据响应结果进行后续处理
          },

          /**
           * 加载用户列表
           */
          loadUsers() {
            console.log("loadUsers");
            axios({
              method: "GET",
              url: "/users"
            }).then(res => {
              // 注意:then 方法中的函数务必使用箭头函数,否则里面的 this 就有问题了
              // then 方法中的回调函数,只有当请求成功的时候才会执行
              console.log(res.data);
              // 2. 将请求到的数据赋值给 Vue 来使用(Vue 中的数据一定要提前初始化)
              // 把 Vue 实例中的 users = res.data
              this.users = res.data;

              // 3. 将数据绑定到模板中
            });
          },

          /**
           * 删除用户
           */
          onDelete(id) {
            if (!window.confirm("Are you sure?")) {
              return;
            }

            axios({
              method: "DELETE",
              url: `/users/${id}` // 建议所有字符串拼接都是用 es6 模板字符串方式
            })
              .then(res => {
                // 删除成功,重新加载用户列表
                this.loadUsers();
              })
              .catch(err => {
                window.alert("删除失败!");
              });
          }
        }
      });
    </script>
  </body>
</html>

若有收获,就点个赞吧
0 人点赞
