遇到的问题
由于最近一直在使用Sublime Text 3,所以不得不与它的包管理器Package Control打交道。之前使用官方的安装方式,一直相处都很和谐,除了每次安装包的时候,反应慢一些。但是今天不知为何,却怎么也无法获得完整的包目录信息了。使用 `Ctrl-`` 查看控制台,可以看到如下输出:
Package Control: Attempting to use Urllib downloader due to WinINet error: Error downloading channel. Operation timed out (errno 12002) during HTTP write phase of downloading https://packagecontrol.io/channel_v3.json.
并会弹出这样的窗口: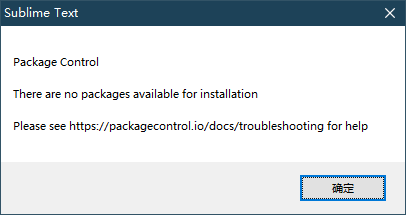
网上搜了一些帖子,了解到主要的原因还是因为网络问题无法获取这里需要的包信息文件 https://packagecontrol.io/channel_v3.json 。
解决方案
最有效的手段还是将其安置在一个更加容易获取的地址里。可以选择的方式有很多:
- 本地。可以下载下来后,配置Package Control的用户配置文件中的
channels项,将其值设为本地的路径即可。 - 使用别人提供的已经保存好的文件地址,这里修改使用即可。
但是这些方法得到的信息可能不是最新的,所以我们得想办法让这个使用的自定义地址链接的文件可以自动更新。所以这里考虑使用Github提供的Github Actions功能来实现 克隆仓库->下载文件->暂存修改->提交仓库 的流程的自动处理。于是有了第三种策略:
- 使用Github Actions自动更新自己仓库里的json文件。
我的方案
首先明确,我们的过程:克隆仓库->下载文件->暂存修改->提交仓库
其次要简单了解Github Actions的最简单的使用方式。这里我们参考文档,官方也提供了中文的,虽然不是最新,但是却也够用了:https://help.github.com/cn/actions/configuring-and-managing-workflows/configuring-a-workflow(中文文档的锚点不太好用,所以后文提供各项特定功能的链接的时候,使用的是英文文档)。
这里可以了解到Github Actions主要基于工作流程(workflows)的概念:工作流程是您可以在仓库中创建的自定义自动化流程,用于在 GitHub 上构建、测试、封装、发行或部署任何项目。 通过工作流程可以利用广泛的各种工具和服务自动化软件开发生命周期。
创建工作流程
接下来我们开始创建属于我们自己的工作流程。
您可以在仓库中创建多个工作流程。 必须将工作流程存储在仓库根目录的 .github/workflows 目录中。
在仓库根目录的 .github/workflows 目录中创建流程的YAML配置文件(https://www.codeproject.com/Articles/1214409/Learn-YAML-in-five-minutes),文件名字只要合法即可。这里我们创建文件 update_robot.yml 作为我们的配置文件。
具体的内容,参考我所使用的代码注释来解释(注释来自文档):
# https://github.com/graueneko/aktools/blob/master/.github/workflows/autoupdate.yml# https://github.com/Seniru/LineGraph-TFM/blob/master/.github/workflows/build.yml# The name of your workflow. GitHub displays the names of your workflows# on your repository's actions page. If you omit name, GitHub sets it to# the workflow file path relative to the root of the repository.name: Auto update data# 这里的空格在readme.md中的badge里需要使用`%20`替换# Required# The name of the GitHub event that triggers the workflow.# You can provide a single event string, array of events, array of event types,# or an event configuration map that schedules a workflow or restricts the# execution of a workflow to specific files, tags, or branch changes.# For a list of available events, see "Events that trigger workflows."on:push:branches:- masterschedule:- cron: '0 12 * * 1'# A workflow run is made up of one or more jobs.# Jobs run in parallel by default. To run jobs sequentially,# you can define dependencies on other jobs using the jobs.<job_id>.needs keyword.jobs:# Each job must have an id to associate with the job.# The key job_id is a string and its value is a map of the job's configuration data.# You must replace <job_id> with a string that is unique to the jobs object.# The <job_id> must start with a letter or _ and contain only alphanumeric characters, -, or _.auto-update: # job_idname: Update Files # 作业显示在 GitHub 上的名称。# Required The type of machine to run the job on.# The machine can be either a GitHub-hosted runner, or a self-hosted runner.runs-on: ubuntu-latest# A job contains a sequence of tasks called steps. Steps can run commands,# run setup tasks, or run an action in your repository, a public repository,# or an action published in a Docker registry. Not all steps run actions,# but all actions run as a step. Each step runs in its own process in the runner# environment and has access to the workspace and filesystem.# Because steps run in their own process, changes to environment variables are not# preserved between steps. GitHub provides built-in steps to set up and complete a job.# You can run an unlimited number of steps as long as you are within the workflow usage limits.steps:- name: Check out repositoryuses: actions/checkout@v2- name: Download filesrun: |curl -sO https://packagecontrol.io/channel_v3.json- name: Commit filesrun: |git config --local user.email "action@github.com"git config --local user.name "GitHub Action"git commit -m "Add changes" -a- name: Push changesuses: ad-m/github-push-action@masterwith:github_token: ${{ secrets.GITHUB_TOKEN }}# `secrets.GITHUB_TOKEN` 是由GITHUB自动生成的
从中我们可以了解到,一个合法的配置文件主要包含三个基本的key: name on jobs 。
关于配置文件中各个key的含义可以参考:
这里重点介绍 on 和 jobs.<jobs_id>.steps 下的内容。
on的设置表示何时执行该workflows,可以多种设定,具体可见https://help.github.com/en/actions/reference/workflow-syntax-for-github-actions#on。但是本文使用的是定时执行或者push触发的设定:- 定时执行,也就是
schedule,这里需要配置cron,这个配置语法可见https://www.yuque.com/lart/linux/crontab中的介绍。 push触发可以指定分支。
- 定时执行,也就是
- A job (指一个jobs_id下的内容) contains a sequence of tasks called
steps,这里存放着任务序列,会依次执行。 jobs.<job_id>.steps.nameAnamefor your step to display on GitHub. 这里可以使用name来指定每个具体的步骤,后面可以接着特定的action或者指令来实现单独的步骤。- 可以通过使用
run来运行命令行的指令 https://help.github.com/en/actions/reference/workflow-syntax-for-github-actions#jobsjob_idstepsrun- 这里我们通过
curl来下载文件到当前的目录下。 - 可以使用
run |实现多个命令的使用。
- 这里我们通过
- 可以通过使用
uses来使用特定的action https://help.github.com/en/actions/reference/workflow-syntax-for-github-actions#jobsjob_idstepsuses- 一般而言,会涉及到一些action的使用的配置,这时可以参考对应的action仓库的文档,一般都有介绍。
- 这里使用了
[actions/checkout](https://github.com/actions/checkout)来获取源码,使用的版本是v2。 - 这里使用了
[ad-m/github-push-action](https://github.com/ad-m/github-push-action)来实现修改后的仓库的提交。
- 可以通过使用
- 另外,关于这里使用的
secrets.GITHUB_TOKEN,这里对应的实际上是当前仓库的settings里的secrets的environment variables,可以用来设定一些加密的信息。但是这里使用的secrets.GITHUB_TOKEN并不需要自行创建,这个是GitHub自动生成的。
当配置完成后,我们可以通过仓库的Actions查看运行状态。
同时我们在仓库的readme.md添加一个指示工作流状态的badge:https://help.github.com/en/actions/configuring-and-managing-workflows/configuring-a-workflow#adding-a-workflow-status-badge-to-your-repository
这里有好几种方式添加,我是用的是https://help.github.com/en/actions/configuring-and-managing-workflows/configuring-a-workflow#example-using-a-workflow-name这种。
到此就OK了。
我们可以将对应的文件网址添加到Package Control的用户配置中:
"channels":["https://github.com/lartpang/AutoUpdateConfiguration/raw/master/channel_v3.json"],
相关链接

若有收获,就点个赞吧
0 人点赞
