SpringBoot + Activiti7 工作流之第 1 篇 —— 【基础篇】认识 Activiti,创建 Activiti 25 张表,流程设计器使用
SpringBoot + Activiti7 工作流之第 2 篇 —— 【基础篇】Activiti 流程定义的相关操作
SpringBoot + Activiti7 工作流之第 3 篇 —— 【进阶篇】流程实例、个人任务
SpringBoot + Activiti7 工作流之第 4 篇 —— 【进阶篇】流程变量
SpringBoot + Activiti7 工作流之第 5 篇 —— 【进阶篇】组任务
SpringBoot + Activiti7 工作流之第 6 篇 —— 【进阶篇】网关
SpringBoot + Activiti7 工作流之第 7 篇 —— 整合 SpringSecurity 项目实战(完结)
从微服务迁移到工作流的经验之谈
Activiti7 工作流之第 7 篇 —— 整合 SpringSecurity 项目实战(完结)
技术选型:SpringBoot2.0+、Activiti7、SpringSecurity、Mybatis、MySQL。
本篇博客代码地址(含全部数据库表):
代码地址:https://pan.baidu.com/s/1RNgxtVgKkv1pnIfBjyZWMA 提取码:pyuy
自动生产activiti7表
1、新建数据库
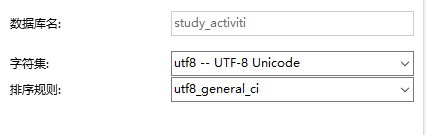
2、配置activiti.cfg.xml,执行testCreateDbTable 方法
在 test 包下找到 test01 运行 testCreateDbTable 测试方法即可自动生成 Activiti 的 25 张表,需要配置数据库的连接信息:activiti.cfg.xml
<?xml version="1.0" encoding="UTF-8"?><beans xmlns="http://www.springframework.org/schema/beans"xmlns:xsi="http://www.w3.org/2001/XMLSchema-instance"xmlns:context="http://www.springframework.org/schema/context"xmlns:tx="http://www.springframework.org/schema/tx"xsi:schemaLocation="http://www.springframework.org/schema/beanshttp://www.springframework.org/schema/beans/spring-beans.xsdhttp://www.springframework.org/schema/contexhttp://www.springframework.org/schema/context/spring-context.xsdhttp://www.springframework.org/schema/txhttp://www.springframework.org/schema/tx/spring-tx.xsd"><!-- 默认id对应的值 为processEngineConfiguration --><!-- processEngine Activiti的流程引擎 --><bean id="processEngineConfiguration"class="org.activiti.engine.impl.cfg.StandaloneProcessEngineConfiguration"><property name="jdbcDriver" value="com.mysql.jdbc.Driver"/><property name="jdbcUrl" value="jdbc:mysql://127.0.0.1:3306/study_activiti?useUnicode=true&characterEncoding=utf-8&serverTimezone=UTC"/><property name="jdbcUsername" value="root"/><property name="jdbcPassword" value="root"/><!-- activiti数据库表处理策略:自动更新 --><property name="databaseSchemaUpdate" value="true"/></bean></beans>
3、初始化用户表
这里罗列出 4 张业务表:并且有了 user 的测试数据。zhangsan -> lisi -> wangwu -> zhuliu (这是审批流程,密码都是 123)
DROP TABLE IF EXISTS `t_apply_leave`;CREATE TABLE `t_apply_leave` (`id` int(11) NOT NULL AUTO_INCREMENT COMMENT '主键ID',`apply_name` varchar(255) CHARACTER SET utf8mb4 COLLATE utf8mb4_general_ci NULL DEFAULT NULL COMMENT '请假标题',`username` varchar(255) CHARACTER SET utf8mb4 COLLATE utf8mb4_general_ci NULL DEFAULT NULL COMMENT '用户',`day` double(4, 1) NULL DEFAULT NULL COMMENT '请假天数,保留1位小数',`begin_date` date NULL DEFAULT NULL COMMENT '开始日期',`end_date` date NULL DEFAULT NULL COMMENT '结束日期',`reason` varchar(255) CHARACTER SET utf8mb4 COLLATE utf8mb4_general_ci NULL DEFAULT NULL COMMENT '请假事由',`state` int(11) NULL DEFAULT NULL COMMENT '状态:0=开始录入,1=开始审批,2=审批完成',PRIMARY KEY (`id`) USING BTREE) ENGINE = InnoDB AUTO_INCREMENT = 1 CHARACTER SET = utf8mb4 COLLATE = utf8mb4_general_ci ROW_FORMAT = Dynamic;-- ------------------------------ Table structure for t_flow-- ----------------------------DROP TABLE IF EXISTS `t_flow`;CREATE TABLE `t_flow` (`id` int(11) NOT NULL AUTO_INCREMENT COMMENT '主键id',`flow_name` varchar(255) CHARACTER SET utf8mb4 COLLATE utf8mb4_general_ci NULL DEFAULT NULL COMMENT '部署的名称',`flow_key` varchar(255) CHARACTER SET utf8mb4 COLLATE utf8mb4_general_ci NULL DEFAULT NULL COMMENT '部署的key',`file_path` varchar(255) CHARACTER SET utf8mb4 COLLATE utf8mb4_general_ci NULL DEFAULT NULL COMMENT '文件路径',`state` int(11) NULL DEFAULT NULL COMMENT '部署状态:1=已部署,0=未部署',`create_time` datetime(0) NULL DEFAULT NULL COMMENT '部署时间',PRIMARY KEY (`id`) USING BTREE) ENGINE = InnoDB AUTO_INCREMENT = 2 CHARACTER SET = utf8mb4 COLLATE = utf8mb4_general_ci ROW_FORMAT = Dynamic;-- ------------------------------ Records of t_flow-- ----------------------------INSERT INTO `t_flow` VALUES (1, '请假申请流程', 'applyLeave', 'bpmn/applyLeave.bpmn', 0, '2021-06-15 14:28:49');-- ------------------------------ Table structure for t_site_message-- ----------------------------DROP TABLE IF EXISTS `t_site_message`;CREATE TABLE `t_site_message` (`id` int(11) NOT NULL AUTO_INCREMENT COMMENT '主键id',`username` varchar(255) CHARACTER SET utf8mb4 COLLATE utf8mb4_general_ci NULL DEFAULT NULL COMMENT '用户',`type` int(11) NULL DEFAULT NULL COMMENT '类型:1=待办任务',`content` varchar(255) CHARACTER SET utf8mb4 COLLATE utf8mb4_general_ci NULL DEFAULT NULL COMMENT '消息内容',`read_flag` int(11) NULL DEFAULT NULL COMMENT '是否已读:1=已读,0=未读',`create_time` datetime(0) NULL DEFAULT NULL COMMENT '创建时间',`update_time` datetime(0) NULL DEFAULT NULL COMMENT '修改时间',PRIMARY KEY (`id`) USING BTREE) ENGINE = InnoDB AUTO_INCREMENT = 1 CHARACTER SET = utf8mb4 COLLATE = utf8mb4_general_ci ROW_FORMAT = Dynamic;-- ------------------------------ Table structure for t_user-- ----------------------------DROP TABLE IF EXISTS `t_user`;CREATE TABLE `t_user` (`id` int(11) NOT NULL AUTO_INCREMENT COMMENT '主键ID,也是用户ID',`username` varchar(50) CHARACTER SET utf8mb4 COLLATE utf8mb4_general_ci NULL DEFAULT NULL COMMENT '用户名',`password` varchar(255) CHARACTER SET utf8mb4 COLLATE utf8mb4_general_ci NULL DEFAULT NULL COMMENT '密码',`enabled` bit(1) NULL DEFAULT b'1' COMMENT '是否生效,1=true,0=false',`account_non_expired` bit(1) NULL DEFAULT b'1' COMMENT '是否未过期,1=true,0=false',`account_non_locked` bit(1) NULL DEFAULT b'1' COMMENT '是否未锁定,1=true,0=false',`credentials_non_expired` bit(1) NULL DEFAULT b'1' COMMENT '证书是否未过期,1=true,0=false',PRIMARY KEY (`id`) USING BTREE) ENGINE = InnoDB AUTO_INCREMENT = 6 CHARACTER SET = utf8mb4 COLLATE = utf8mb4_general_ci COMMENT = '用户表' ROW_FORMAT = Dynamic;-- ------------------------------ Records of t_user-- ----------------------------INSERT INTO `t_user` VALUES (1, 'admin', '202cb962ac59075b964b07152d234b70', b'1', b'1', b'1', b'1');INSERT INTO `t_user` VALUES (2, 'zhangsan', '202cb962ac59075b964b07152d234b70', b'1', b'1', b'1', b'1');INSERT INTO `t_user` VALUES (3, 'lisi', '202cb962ac59075b964b07152d234b70', b'1', b'1', b'1', b'1');INSERT INTO `t_user` VALUES (4, 'wangwu', '202cb962ac59075b964b07152d234b70', b'1', b'1', b'1', b'1');INSERT INTO `t_user` VALUES (5, 'zhuliu', '202cb962ac59075b964b07152d234b70', b'1', b'1', b'1', b'1');
Activiti7 发布正式版之后,它与SpringBoot2.x已经完全支持整合开发。注意,Activiti 默认使用 SpringSecurity 整合开发的。
查看 Activiti 的版本:https://mvnrepository.com/artifact/org.activiti/activiti-engine
在工程的pom.xml文件中引入相关的依赖,其中activiti的依赖是:activiti-spring-boot-starter
完整代码:
1、pom.xml
<?xml version="1.0" encoding="UTF-8"?><project xmlns="http://maven.apache.org/POM/4.0.0"xmlns:xsi="http://www.w3.org/2001/XMLSchema-instance"xsi:schemaLocation="http://maven.apache.org/POM/4.0.0 http://maven.apache.org/xsd/maven-4.0.0.xsd"><modelVersion>4.0.0</modelVersion><groupId>com.study</groupId><artifactId>study-activiti</artifactId><version>1.0-SNAPSHOT</version><parent><groupId>org.springframework.boot</groupId><artifactId>spring-boot-starter-parent</artifactId><version>2.0.8.RELEASE</version></parent><dependencies><!--Spring boot 集成包--><dependency><groupId>org.springframework.cloud</groupId><artifactId>spring-cloud-starter-netflix-eureka-client</artifactId></dependency><!-- SpringBoot整合Web组件 --><dependency><groupId>org.springframework.boot</groupId><artifactId>spring-boot-starter-web</artifactId></dependency><dependency><groupId>org.springframework.boot</groupId><artifactId>spring-boot-starter-test</artifactId><scope>test</scope></dependency><!-- 阿里巴巴的druid数据库连接池 --><dependency><groupId>com.alibaba</groupId><artifactId>druid-spring-boot-starter</artifactId><version>1.1.20</version></dependency><!-- 阿里巴巴 fastjson --><dependency><groupId>com.alibaba</groupId><artifactId>fastjson</artifactId><version>1.2.75</version></dependency><!-- 该 starter 会扫描配置文件中的 DataSource,然后自动创建使用该 DataSource 的 SqlSessionFactoryBean,并注册到 Spring 上下文中 --><dependency><groupId>org.mybatis.spring.boot</groupId><artifactId>mybatis-spring-boot-starter</artifactId><version>2.0.0</version></dependency><!-- 数据库MySQL 依赖包 --><dependency><groupId>mysql</groupId><artifactId>mysql-connector-java</artifactId><version>5.1.48</version></dependency><!-- mybatis 依赖包 --><dependency><groupId>org.mybatis</groupId><artifactId>mybatis</artifactId><version>3.4.6</version></dependency><!-- lombok 依赖 --><dependency><groupId>org.projectlombok</groupId><artifactId>lombok</artifactId></dependency><!--添加 Activiti工作流的支持--><dependency><groupId>org.activiti</groupId><artifactId>activiti-spring-boot-starter</artifactId><version>7.0.0.Beta2</version></dependency><!-- https://mvnrepository.com/artifact/commons-io/commons-io --><dependency><groupId>commons-io</groupId><artifactId>commons-io</artifactId><version>2.6</version></dependency></dependencies><dependencyManagement><dependencies><dependency><groupId>org.springframework.cloud</groupId><artifactId>spring-cloud-dependencies</artifactId><version>Finchley.SR4</version><type>pom</type><scope>import</scope></dependency></dependencies></dependencyManagement></project>
2、bootstrap.yml 配置:
server:port: 80# 将SpringBoot项目作为单实例部署调试时,不需要注册到注册中心eureka:client:fetch-registry: falseregister-with-eureka: falsespring:application:name: activiti-serverdatasource:# 使用阿里巴巴的 druid 数据源druid:driver-class-name: com.mysql.jdbc.Driverurl: jdbc:mysql://localhost:3306/study_activiti?characterEncoding=utf-8username: rootpassword: root# Activiti 配置activiti:#1.flase:默认值。activiti在启动时,对比数据库表中保存的版本,如果没有表或者版本不匹配,将抛出异常#2.true: activiti会对数据库中所有表进行更新操作。如果表不存在,则自动创建#3.create_drop: 在activiti启动时创建表,在关闭时删除表(必须手动关闭引擎,才能删除表)#4.drop-create: 在activiti启动时删除原来的旧表,然后在创建新表(不需要手动关闭引擎)database-schema-update: true#检测历史表是否存在 activiti7 默认没有开启数据库历史记录 启动数据库历史记录db-history-used: true#记录历史等级 可配置的历史级别有none, activity, audit, full#none:不保存任何的历史数据,因此,在流程执行过程中,这是最高效的。#activity:级别高于none,保存流程实例与流程行为,其他数据不保存。#audit:除activity级别会保存的数据外,还会保存全部的流程任务及其属性。audit为history的默认值。#full:保存历史数据的最高级别,除了会保存audit级别的数据外,还会保存其他全部流程相关的细节数据,包括一些流程参数等。history-level: full#校验流程文件,默认校验resources下的processes文件夹里的流程文件check-process-definitions: false
3 mybatis 配置
mybatis:
# Mybatis扫描的mapper文件
mapper-locations: classpath:mapper/*.xml
# 流程定义的配置,实际业务应该是让公司的管理员进行管理流程,然后通过上传文件来处理,目前写固定
process:
flowName: 请假申请流程
key: applyLeave
filePath: bpmn/applyLeave.bpmn
说明:实际项目中,bpmn 文件应该是通过文件服务器上传、读取。这里为了方便,直接读取 resources 的目录。(其实默认是在数据库已经)
4、集成了 SpringSecurity 安全框架
因为 Activiti7 与 SpringBoot整合后,默认情况下,集成了 SpringSecurity 安全框架,这样我们就要去准备 SpringSecurity 整合进来的相关用户权限配置信息。
SpringBoot的依赖包已经将SpringSecurity的依赖包也添加进项目中。
SecurityConfig 配置类:注意要有 @EnableWebSecurity 注解
package com.study.config;import com.study.handler.MyAuthenticationFailureHandler;import com.study.handler.MyAuthenticationSuccessHandler;import com.study.service.MyUserDetailService;import org.springframework.beans.factory.annotation.Autowired;import org.springframework.context.annotation.Bean;import org.springframework.context.annotation.Configuration;import org.springframework.security.config.annotation.authentication.builders.AuthenticationManagerBuilder;import org.springframework.security.config.annotation.web.builders.HttpSecurity;import org.springframework.security.config.annotation.web.builders.WebSecurity;import org.springframework.security.config.annotation.web.configuration.EnableWebSecurity;import org.springframework.security.config.annotation.web.configuration.WebSecurityConfigurerAdapter;import org.springframework.security.crypto.password.PasswordEncoder;import org.springframework.util.DigestUtils;/*** @author biandan* @description* @signature 让天下没有难写的代码* @create 2021-05-30 下午 9:38*/@Configuration@EnableWebSecuritypublic class SecurityConfig extends WebSecurityConfigurerAdapter {@Autowiredprivate MyAuthenticationSuccessHandler successHandler;@Autowiredprivate MyAuthenticationFailureHandler failureHandler;@Autowiredprivate MyUserDetailService myUserDetailService;// 配置认证用户信息和权限@Overrideprotected void configure(AuthenticationManagerBuilder auth) throws Exception {//从数据库中获取数据,并校验密码是否一致auth.userDetailsService(myUserDetailService).passwordEncoder(myPasswordEncoder());}/*** 配置放行的请求* @param web* @throws Exception*/@Overridepublic void configure(WebSecurity web)throws Exception{web.ignoring().antMatchers("/css/**");web.ignoring().antMatchers("/js/**");web.ignoring().antMatchers("/img/**");web.ignoring().antMatchers("/plugins/**");web.ignoring().antMatchers("/login.html");}// 配置拦截请求资源@Overrideprotected void configure(HttpSecurity http) throws Exception {//其他任何路径都需要管理员登录http.authorizeRequests().antMatchers("/**").access("hasRole('ADMIN')");//登录相关配置http.formLogin().loginPage("/login.html") //指定登录地址.loginProcessingUrl("/login") //指定处理登录的请求地址.successHandler(successHandler) //登录成功的回调.failureHandler(failureHandler); //登录失败的回调//登出配置http.logout().logoutUrl("/logout"). //登出地址为/logoutinvalidateHttpSession(true); //并且登出后销毁session//设置用户只允许在一处登录,在其他地方登录则挤掉已登录用户,被挤掉的已登录用户则需要返回/login.html重新登录http.sessionManagement().maximumSessions(1).expiredUrl("/login.html");//关闭CSRF安全策略http.csrf().disable();//允许跳转显示iframehttp.headers().frameOptions().disable();//异常处理页面,例如没有权限访问等http.exceptionHandling().accessDeniedPage("/error.html");}//自定义加密方式@BeanPasswordEncoder myPasswordEncoder() {PasswordEncoder passwordEncoder = new PasswordEncoder() {//重写加密方法@Overridepublic String encode(CharSequence charSequence) {String md5Pwd = DigestUtils.md5DigestAsHex(((String) charSequence).getBytes());return md5Pwd;}/*** 判断密码是否匹配** @param charSequence 请求的密码* @param sqlPwd 数据库密码* @return*/@Overridepublic boolean matches(CharSequence charSequence, String sqlPwd) {String reqPwd = encode(charSequence);boolean result = reqPwd.equals(sqlPwd);System.out.println("matches reqPwd=" + reqPwd + ";sqlPwd=" + sqlPwd + ",匹配结果:result=" + result);return result;//只有返回 true 的情况才会验证成功}};return passwordEncoder;}}
我们创建一个工具类:SpringContextUtil,用于获取 Spring 容器的 Bean:
package com.study.util;import org.springframework.beans.BeansException;import org.springframework.context.ApplicationContext;import org.springframework.context.ApplicationContextAware;import org.springframework.stereotype.Component;/*** @author biandan* @description Spring 上下文工具,可用于获取Spring容器的Bean* @signature 让天下没有难写的代码* @create 2021-06-14 下午 9:55*/@Componentpublic class SpringContextUtil implements ApplicationContextAware {private static ApplicationContext applicationContext;@Overridepublic void setApplicationContext(ApplicationContext applicationContext) throws BeansException {this.applicationContext = applicationContext;}/*** 获取 Spring 容器中的 Bean,通过 bean 名称获取* @param beanName* @return 返回 Object,需要做强制类型转换*/public static Object getBean(String beanName){return applicationContext.getBean(beanName);}/*** 获取 Spring 容器中的 Bean,通过 bean 类型获取* @param beanClass* @param <T> 返回指定类型的 bean 实例* @return*/public static <T> T getBean(Class<T> beanClass){return applicationContext.getBean(beanClass);}/*** 获取 Spring 容器中的 Bean,通过 bean 类型获取* @param beanName 名称* @param beanClass bean 类型* @param <T> 返回泛型T,需要强转* @return*/public static <T> T getBean(String beanName,Class<T> beanClass){return applicationContext.getBean(beanName,beanClass);}}
5、applyLeave.xml 代码:
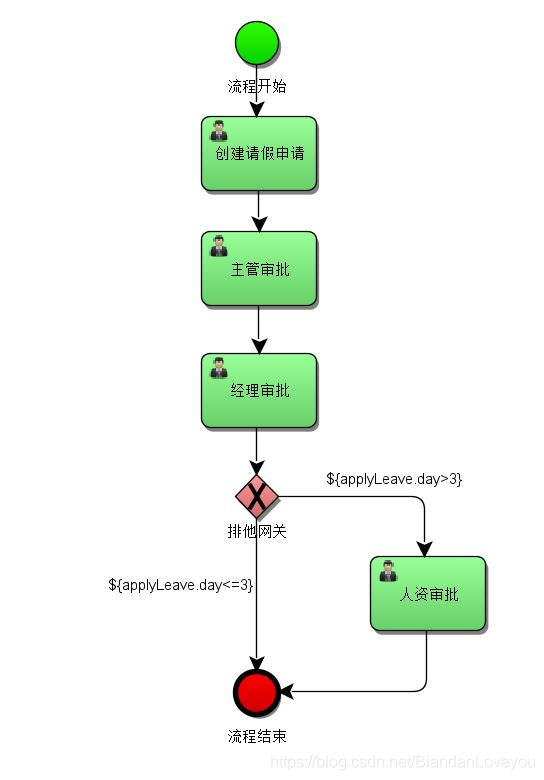
<?xml version="1.0" encoding="UTF-8" standalone="yes"?><definitions xmlns="http://www.omg.org/spec/BPMN/20100524/MODEL" xmlns:activiti="http://activiti.org/bpmn" xmlns:bpmndi="http://www.omg.org/spec/BPMN/20100524/DI" xmlns:omgdc="http://www.omg.org/spec/DD/20100524/DC" xmlns:omgdi="http://www.omg.org/spec/DD/20100524/DI" xmlns:tns="http://www.activiti.org/test" xmlns:xsd="http://www.w3.org/2001/XMLSchema" xmlns:xsi="http://www.w3.org/2001/XMLSchema-instance" expressionLanguage="http://www.w3.org/1999/XPath" id="m1623737360299" name="" targetNamespace="http://www.activiti.org/test" typeLanguage="http://www.w3.org/2001/XMLSchema"><process id="applyLeave" isClosed="false" isExecutable="true" name="请假申请流程" processType="None"><startEvent id="_2" name="流程开始"/><endEvent id="_3" name="流程结束"><extensionElements><activiti:executionListener class="com.study.listener.MyExecutionListener" event="end"/></extensionElements></endEvent><userTask activiti:assignee="${assignee0}" activiti:exclusive="true" id="_4" name="创建请假申请"><extensionElements><activiti:taskListener class="com.study.listener.MyTaskListener" event="create"/></extensionElements></userTask><userTask activiti:assignee="${assignee1}" activiti:exclusive="true" id="_5" name="主管审批"><extensionElements><activiti:taskListener class="com.study.listener.MyTaskListener" event="create"/></extensionElements></userTask><sequenceFlow id="_6" sourceRef="_2" targetRef="_4"/><sequenceFlow id="_7" sourceRef="_4" targetRef="_5"/><userTask activiti:assignee="${assignee2}" activiti:exclusive="true" id="_8" name="经理审批"><extensionElements><activiti:taskListener class="com.study.listener.MyTaskListener" event="create"/></extensionElements></userTask><sequenceFlow id="_9" sourceRef="_5" targetRef="_8"/><exclusiveGateway gatewayDirection="Unspecified" id="_10" name="排他网关"/><sequenceFlow id="_11" sourceRef="_8" targetRef="_10"/><sequenceFlow id="_12" sourceRef="_10" targetRef="_3"><conditionExpression xsi:type="tFormalExpression"><![CDATA[${applyLeave.day<=3}]]></conditionExpression></sequenceFlow><userTask activiti:assignee="${assignee3}" activiti:exclusive="true" id="_13" name="人资审批"><extensionElements><activiti:taskListener class="com.study.listener.MyTaskListener" event="create"/></extensionElements></userTask><sequenceFlow id="_14" sourceRef="_10" targetRef="_13"><conditionExpression xsi:type="tFormalExpression"><![CDATA[${applyLeave.day>3}]]></conditionExpression></sequenceFlow><sequenceFlow id="_15" sourceRef="_13" targetRef="_3"/></process><bpmndi:BPMNDiagram documentation="background=#FFFFFF;count=1;horizontalcount=1;orientation=0;width=842.4;height=1195.2;imageableWidth=832.4;imageableHeight=1185.2;imageableX=5.0;imageableY=5.0" id="Diagram-_1" name="New Diagram"><bpmndi:BPMNPlane bpmnElement="applyLeave"><bpmndi:BPMNShape bpmnElement="_2" id="Shape-_2"><omgdc:Bounds height="32.0" width="32.0" x="285.0" y="20.0"/><bpmndi:BPMNLabel><omgdc:Bounds height="32.0" width="32.0" x="0.0" y="0.0"/></bpmndi:BPMNLabel></bpmndi:BPMNShape><bpmndi:BPMNShape bpmnElement="_3" id="Shape-_3"><omgdc:Bounds height="32.0" width="32.0" x="285.0" y="500.0"/><bpmndi:BPMNLabel><omgdc:Bounds height="32.0" width="32.0" x="0.0" y="0.0"/></bpmndi:BPMNLabel></bpmndi:BPMNShape><bpmndi:BPMNShape bpmnElement="_4" id="Shape-_4"><omgdc:Bounds height="55.0" width="85.0" x="260.0" y="90.0"/><bpmndi:BPMNLabel><omgdc:Bounds height="55.0" width="85.0" x="0.0" y="0.0"/></bpmndi:BPMNLabel></bpmndi:BPMNShape><bpmndi:BPMNShape bpmnElement="_5" id="Shape-_5"><omgdc:Bounds height="55.0" width="85.0" x="260.0" y="175.0"/><bpmndi:BPMNLabel><omgdc:Bounds height="55.0" width="85.0" x="0.0" y="0.0"/></bpmndi:BPMNLabel></bpmndi:BPMNShape><bpmndi:BPMNShape bpmnElement="_8" id="Shape-_8"><omgdc:Bounds height="55.0" width="85.0" x="260.0" y="265.0"/><bpmndi:BPMNLabel><omgdc:Bounds height="55.0" width="85.0" x="0.0" y="0.0"/></bpmndi:BPMNLabel></bpmndi:BPMNShape><bpmndi:BPMNShape bpmnElement="_10" id="Shape-_10" isMarkerVisible="false"><omgdc:Bounds height="32.0" width="32.0" x="285.0" y="355.0"/><bpmndi:BPMNLabel><omgdc:Bounds height="32.0" width="32.0" x="0.0" y="0.0"/></bpmndi:BPMNLabel></bpmndi:BPMNShape><bpmndi:BPMNShape bpmnElement="_13" id="Shape-_13"><omgdc:Bounds height="55.0" width="85.0" x="385.0" y="415.0"/><bpmndi:BPMNLabel><omgdc:Bounds height="55.0" width="85.0" x="0.0" y="0.0"/></bpmndi:BPMNLabel></bpmndi:BPMNShape><bpmndi:BPMNEdge bpmnElement="_12" id="BPMNEdge__12" sourceElement="_10" targetElement="_3"><omgdi:waypoint x="301.0" y="387.0"/><omgdi:waypoint x="301.0" y="500.0"/><bpmndi:BPMNLabel><omgdc:Bounds height="-6.0" width="0.0" x="0.0" y="-56.0"/></bpmndi:BPMNLabel></bpmndi:BPMNEdge><bpmndi:BPMNEdge bpmnElement="_15" id="BPMNEdge__15" sourceElement="_13" targetElement="_3"><omgdi:waypoint x="426.0" y="470.0"/><omgdi:waypoint x="426.0" y="515.0"/><omgdi:waypoint x="316.9687194226713" y="515.0"/><bpmndi:BPMNLabel><omgdc:Bounds height="0.0" width="0.0" x="0.0" y="0.0"/></bpmndi:BPMNLabel></bpmndi:BPMNEdge><bpmndi:BPMNEdge bpmnElement="_14" id="BPMNEdge__14" sourceElement="_10" targetElement="_13"><omgdi:waypoint x="317.0" y="371.0"/><omgdi:waypoint x="425.0" y="415.0"/><omgdi:waypoint x="425.0" y="415.0"/><bpmndi:BPMNLabel><omgdc:Bounds height="0.0" width="10.0" x="0.0" y="11.0"/></bpmndi:BPMNLabel></bpmndi:BPMNEdge><bpmndi:BPMNEdge bpmnElement="_6" id="BPMNEdge__6" sourceElement="_2" targetElement="_4"><omgdi:waypoint x="301.0" y="52.0"/><omgdi:waypoint x="301.0" y="90.0"/><bpmndi:BPMNLabel><omgdc:Bounds height="0.0" width="0.0" x="0.0" y="0.0"/></bpmndi:BPMNLabel></bpmndi:BPMNEdge><bpmndi:BPMNEdge bpmnElement="_7" id="BPMNEdge__7" sourceElement="_4" targetElement="_5"><omgdi:waypoint x="302.5" y="145.0"/><omgdi:waypoint x="302.5" y="175.0"/><bpmndi:BPMNLabel><omgdc:Bounds height="0.0" width="0.0" x="0.0" y="0.0"/></bpmndi:BPMNLabel></bpmndi:BPMNEdge><bpmndi:BPMNEdge bpmnElement="_9" id="BPMNEdge__9" sourceElement="_5" targetElement="_8"><omgdi:waypoint x="302.5" y="230.0"/><omgdi:waypoint x="302.5" y="265.0"/><bpmndi:BPMNLabel><omgdc:Bounds height="0.0" width="0.0" x="0.0" y="0.0"/></bpmndi:BPMNLabel></bpmndi:BPMNEdge><bpmndi:BPMNEdge bpmnElement="_11" id="BPMNEdge__11" sourceElement="_8" targetElement="_10"><omgdi:waypoint x="301.0" y="320.0"/><omgdi:waypoint x="301.0" y="355.0"/><bpmndi:BPMNLabel><omgdc:Bounds height="0.0" width="0.0" x="0.0" y="0.0"/></bpmndi:BPMNLabel></bpmndi:BPMNEdge></bpmndi:BPMNPlane></bpmndi:BPMNDiagram></definitions>
流程图:
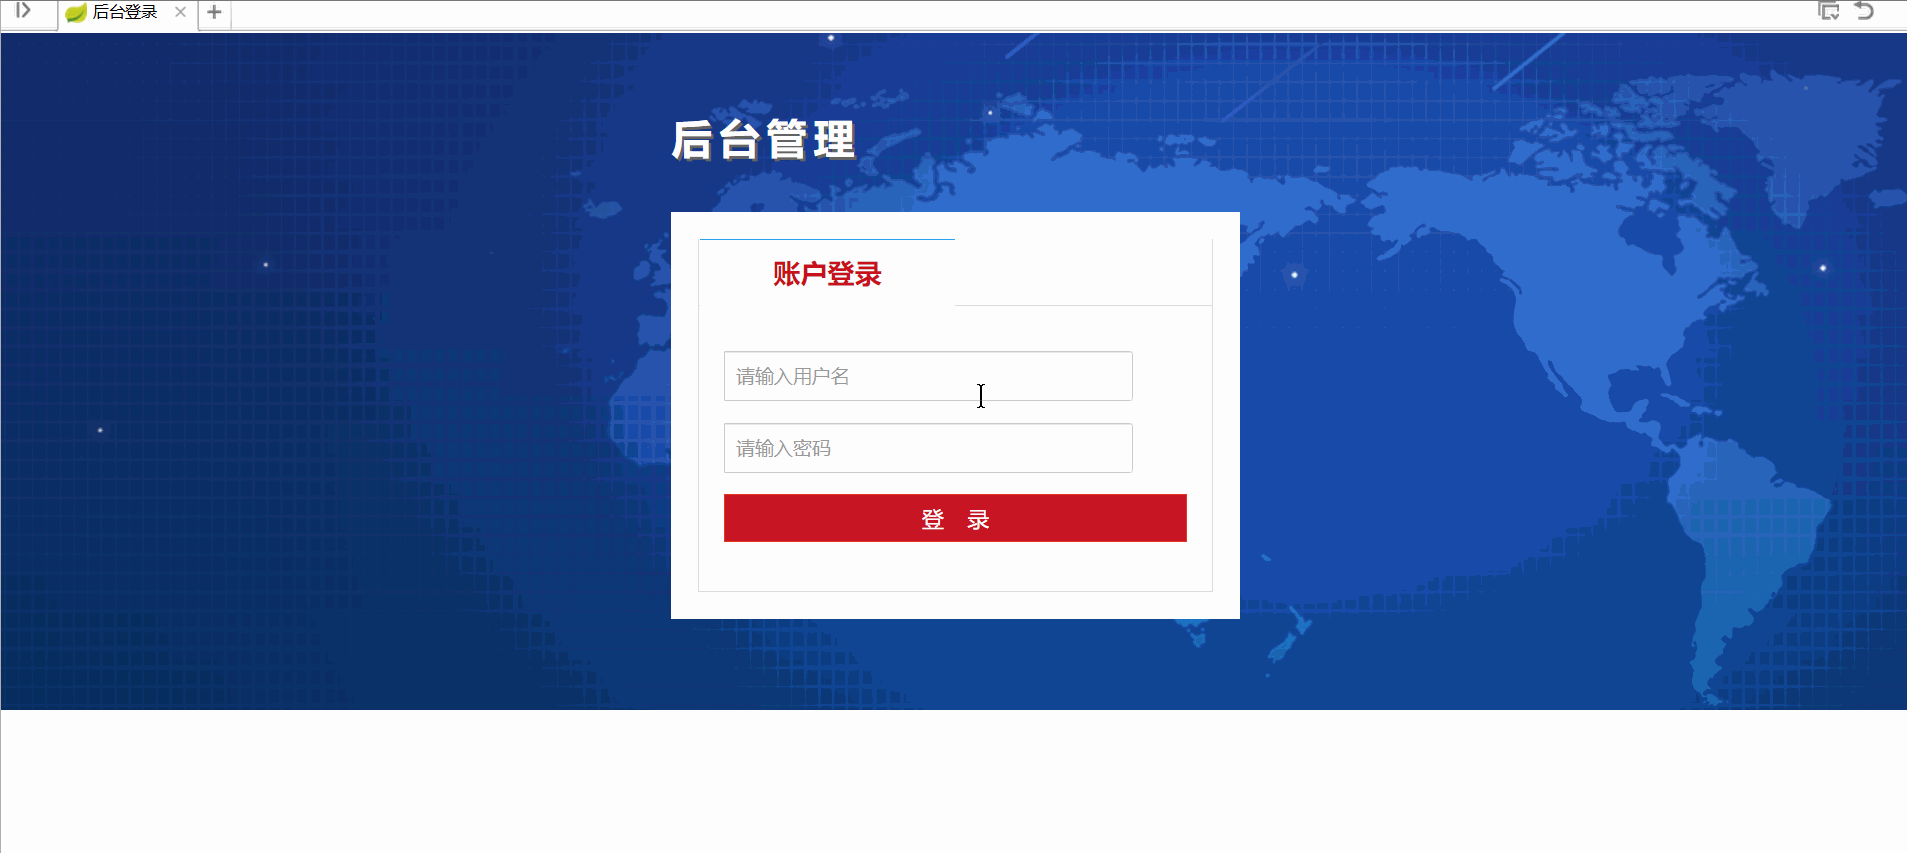
项目演示效果:http://127.0.0.1/
1、使用其中一个账号(目前都是管理员权限)在【流程管理】菜单里,部署【请假申请流程】。

2、然后切换到 lisi 的账号进行审批
3、然后切换到 wangwu 的账号审批。因为请假天数小于 3 天,所以直接审批结束。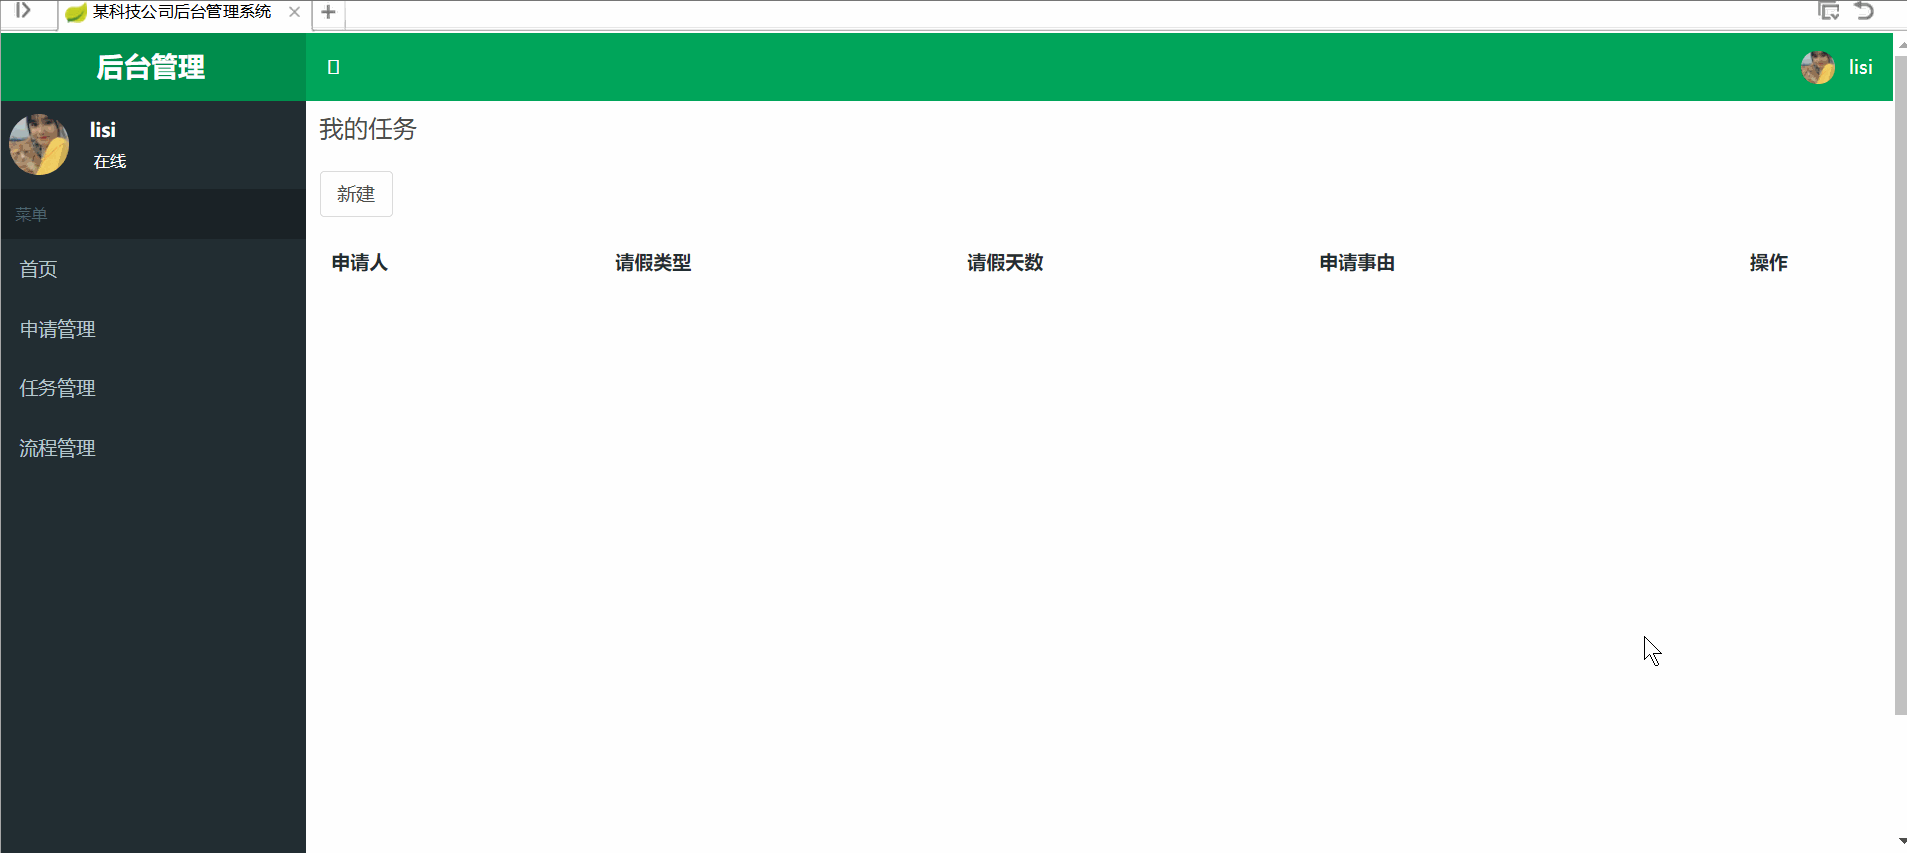
4、最后切换回 zhangsan 的账号查看。

OK,Activiti 学习到这。
[
](https://blog.csdn.net/BiandanLoveyou/article/details/117909703)

若有收获,就点个赞吧
0 人点赞
