官网:https://docs.pytest.org/en/6.2.x/
安装pytest
pip install pytest
基本使用
test_sample.py
"""自动化测试用例文件名 test_ 开头"""# 定义普通函数def inc(x):return x+1# pytest在运行的时候会自动的将 test_ 开头的函数当作自动化测试用例来执行def test_answer():assert inc(x=3) == 10
在命令行中执行 命令 pytest
(venv) C:\Users\zengy\PycharmProjects\apptesting>pytest========================================================== test session starts ==========================================================platform win32 -- Python 3.9.1, pytest-6.2.4, py-1.10.0, pluggy-0.13.1rootdir: C:\Users\zengy\PycharmProjects\apptestingcollected 1 itemtest_sample.py F [100%]=============================================================== FAILURES ================================================================______________________________________________________________ test_answer ______________________________________________________________def test_answer():> assert inc(x=3) == 10E assert 4 == 10E + where 4 = inc(x=3)test_sample.py:11: AssertionError======================================================== short test summary info ========================================================FAILED test_sample.py::test_answer - assert 4 == 10=========================================================== 1 failed in 0.11s ===========================================================
pytest运行
当在命令行执行pytest 命令的时候,运行对应在项目根目录下的 venv\Scripts\pytest.exe 这个文件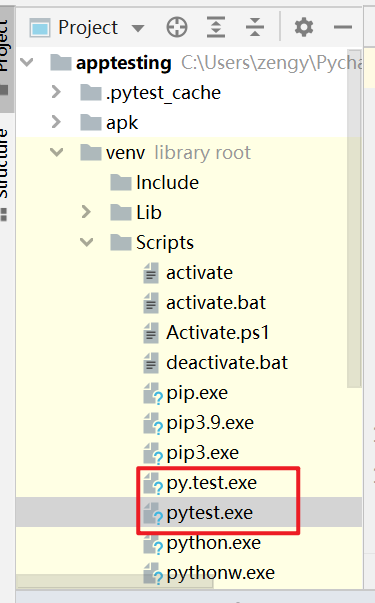
运行过程中, pytest会自动搜索当前运行目录下所有的以 test_ 开头的文件或者是目录, 将这些以 test 开始的文件或目录当作自动化测试用例来执行, 执行时 会将文件中定义的 以test开头的函数 作为自动化测试用例执行。
写测试用例的时候,要遵循一定的规则:
- 所有的测试用例都放在
testcases目录 - 所有的测试用例文件名以 test_ 开头
pytest的脚手架
在执行自动化测试用例的时候,执行的先后顺序。
这里有
testcases/test_users/test_login.py
def test_user_login_success():"""测试用户登录成功:return:"""print('测试用户登录成功')assert Truedef test_user_login_failed():"""测试用户登录失败:return:"""print('测试用户登录失败')assert True
testcases/test_users/test_register.py
def test_user_register_success():"""测试用户注册成功:return:"""print("测试用户注册成功")assert Truedef test_user_register_failed():"""测试用户注册失败:return:"""print("测试用户注册失败")assert True
testcases/test_bussiness.py
def test_business_success():"""测业务成功:return:"""print('测业务成功')assert Truedef test_business_failed():"""测试用户登录失败:return:"""print('测业务成功')assert True
在命令中执行
pytest -s -v
- -s 打印出自动化测试用例中使用 print() 的输出
- -v 显示出详细的执行日志 会将每个执行的函数名显示出来
(venv) C:\Users\zengy\PycharmProjects\apptesting>pytest -s -v========================================================== test session starts ==========================================================platform win32 -- Python 3.9.1, pytest-6.2.4, py-1.10.0, pluggy-0.13.1 -- c:\users\zengy\pycharmprojects\apptesting\venv\scripts\python.execachedir: .pytest_cacherootdir: C:\Users\zengy\PycharmProjects\apptestingcollected 6 itemstestcases/test_bussiness.py::test_business_success 测业务成功PASSEDtestcases/test_bussiness.py::test_business_failed 测业务成功PASSEDtestcases/test_users/test_login.py::test_user_login_success 测试用户登录成功PASSEDtestcases/test_users/test_login.py::test_user_login_failed 测试用户登录失败PASSEDtestcases/test_users/test_register.py::test_user_register_success 测试用户注册成功PASSEDtestcases/test_users/test_register.py::test_user_register_failed 测试用户注册失败PASSED
设置conftest.py
项目的根目录下创建 conftest.py 文件,是pytest的配置文件。文件会自动被pytest识别。
import pytest@pytest.fixture(scope="session",autouse=True)def session():print("在所有的测试用例执行之前执行")yieldprint("执行所有的用例执行之后的操作")@pytest.fixture(scope='module',autouse=True)def module():print('每个py文件运行之前的操作')yieldprint('每个py文件运行之后的操作')@pytest.fixture(scope='class',autouse=True)def object():print('每个class类运行之前')yieldprint('每个class类运行之后的操作')@pytest.fixture(scope='function',autouse=True)def func():print('每个函数执行之前')yieldprint('每个函数执行之后')
pytest 支持4个级别的执行顺序。
- session 所有的测试用例之执行先后
- module 整个py文件执行先后
- class 每一个class 测试类执行之前和之后的操作
- function 每一个函数执行之前之后
在使用pytest脚手架的时候, 主要使用到两个参数
- scope= “” 表示区域
- autouse = 是否自动使用。
pytest的数据驱动
在做手工功能测试的时候,比如测试登录操作,除了要测试正常的业务场景之外,还要对异常场景进行测试,比如使用错误的用户名或者错误的密码登录,登录应该失败。
错误的信息可以有不同的组合,测试这一类业务的时候,操作步骤都一样,只是操作的数据不一样。
在自动化测试过程中,可以使用pytest中参数化的功能实现 数据驱动。
testcases/test_ddt.py
import pytest@pytest.mark.parametrize('test_input,expected',[('2+2',4),('2+3',5),('3+3',6),('2*2',4)])def test_eval(test_input,expected):print(test_input,expected)assert eval(test_input) == expected
使用pytest参数化功能
'test_input,expected'定义为test函数中传入参数名[('2+2',4),('2+3',5),('3+3',6),('2*2',4)]测试数据,可以根据自己的测试业务场景添加不同的数据test_input,expected函数中使用的参数为上述定义
运行,如果要单独执行某个文件, 后面跟上相对路径即可。
pytest testcases\test_ddt.py -s -v
执行结果,因为上面有4个数据,所以运行时有4个测试用例
(venv) C:\Users\zengy\PycharmProjects\apptesting>pytest testcases\test_ddt.py -s -v========================================================== test session starts ==========================================================platform win32 -- Python 3.9.1, pytest-6.2.4, py-1.10.0, pluggy-0.13.1 -- c:\users\zengy\pycharmprojects\apptesting\venv\scripts\python.execachedir: .pytest_cacherootdir: C:\Users\zengy\PycharmProjects\apptestingcollected 4 itemstestcases/test_ddt.py::test_eval[2+2-4] 在所有的测试用例执行之前执行每个py文件运行之前的操作每个class类运行之前每个函数执行之前2+2 4PASSED每个函数执行之后每个class类运行之后的操作testcases/test_ddt.py::test_eval[2+3-5] 每个class类运行之前每个函数执行之前2+3 5PASSED每个函数执行之后每个class类运行之后的操作testcases/test_ddt.py::test_eval[3+3-6] 每个class类运行之前每个函数执行之前3+3 6PASSED每个函数执行之后每个class类运行之后的操作testcases/test_ddt.py::test_eval[2*2-4] 每个class类运行之前每个函数执行之前2*2 4PASSED每个函数执行之后每个class类运行之后的操作每个py文件运行之后的操作执行所有的用例执行之后的操作=========================================================== 4 passed in 0.04s ===========================================================

若有收获,就点个赞吧
0 人点赞
