web开发要解决的问题
- 导入静态资源
- 首页
- 模版引擎
- 装配扩展
SpringMVC - 增删改查
- 拦截器
- 国际化
导入静态资源
打开源码,有一个
WebMVCAutoConfig的自动配置类,打开,有一个方法:addResourceHandlers

- 假如我们自己自定义了配置,那么直接返回这个配置> 说明方法二和方法三都失效了
- 假如我们使用目录
/webjars/**,那么会直接映射到目录结构:classpath:/META-INF/resources/webjars/> 那么这个META-INF路径是不是非常眼熟?没错,就是
maven坐标导入的jar包,这也就是说这个`webjars能够访问的其实是我们的插件目录结构 去百度搜索一下webjars,发现webjars的官方网址(https://www.webjars.org/) 其中有存在着maven坐标的插件: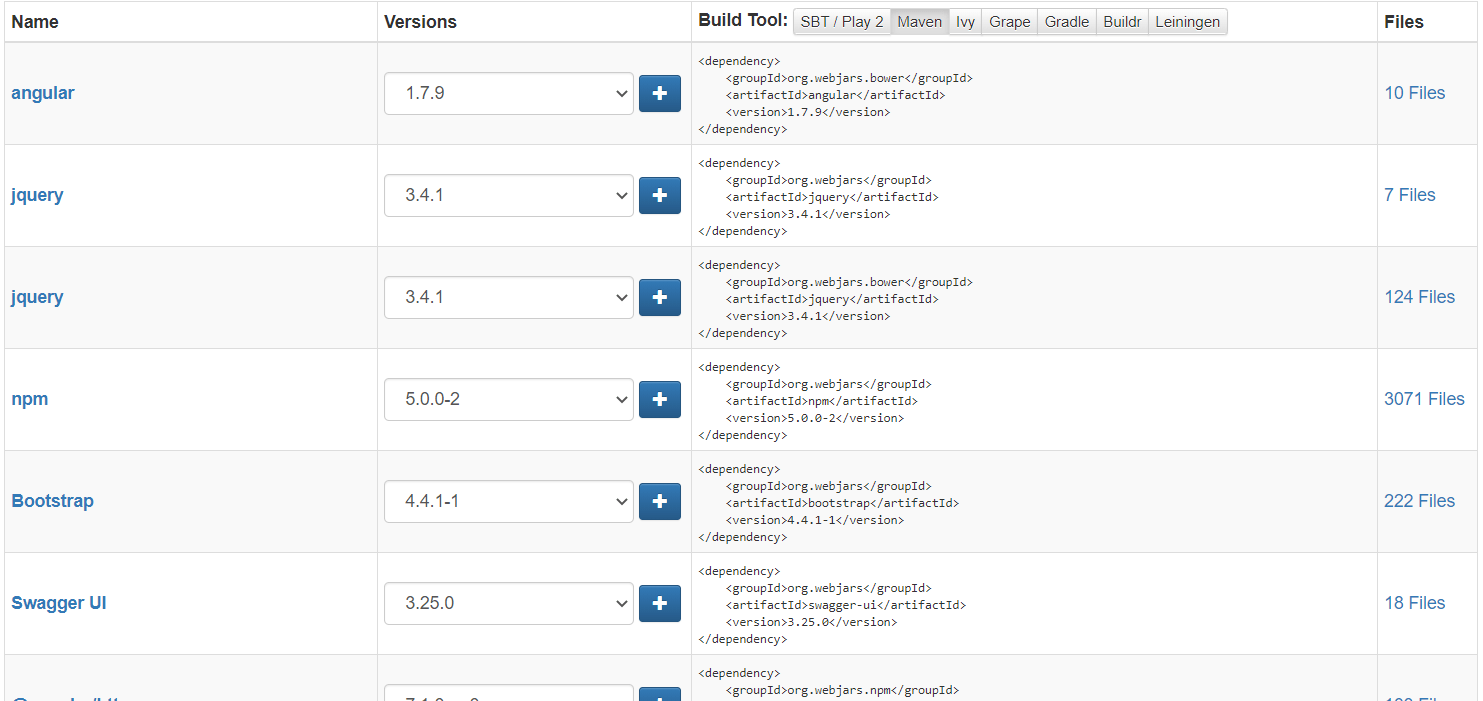 随便找一个,比如
JQuery的,导入我们的项目<dependency><groupId>org.webjars</groupId><artifactId>jquery</artifactId><version>3.4.1</version></dependency>
注意要找到一个
META-INF/resource/webjars的路径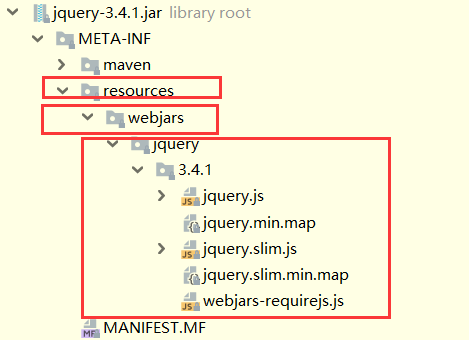 我们发现这个路径完全复合
webjars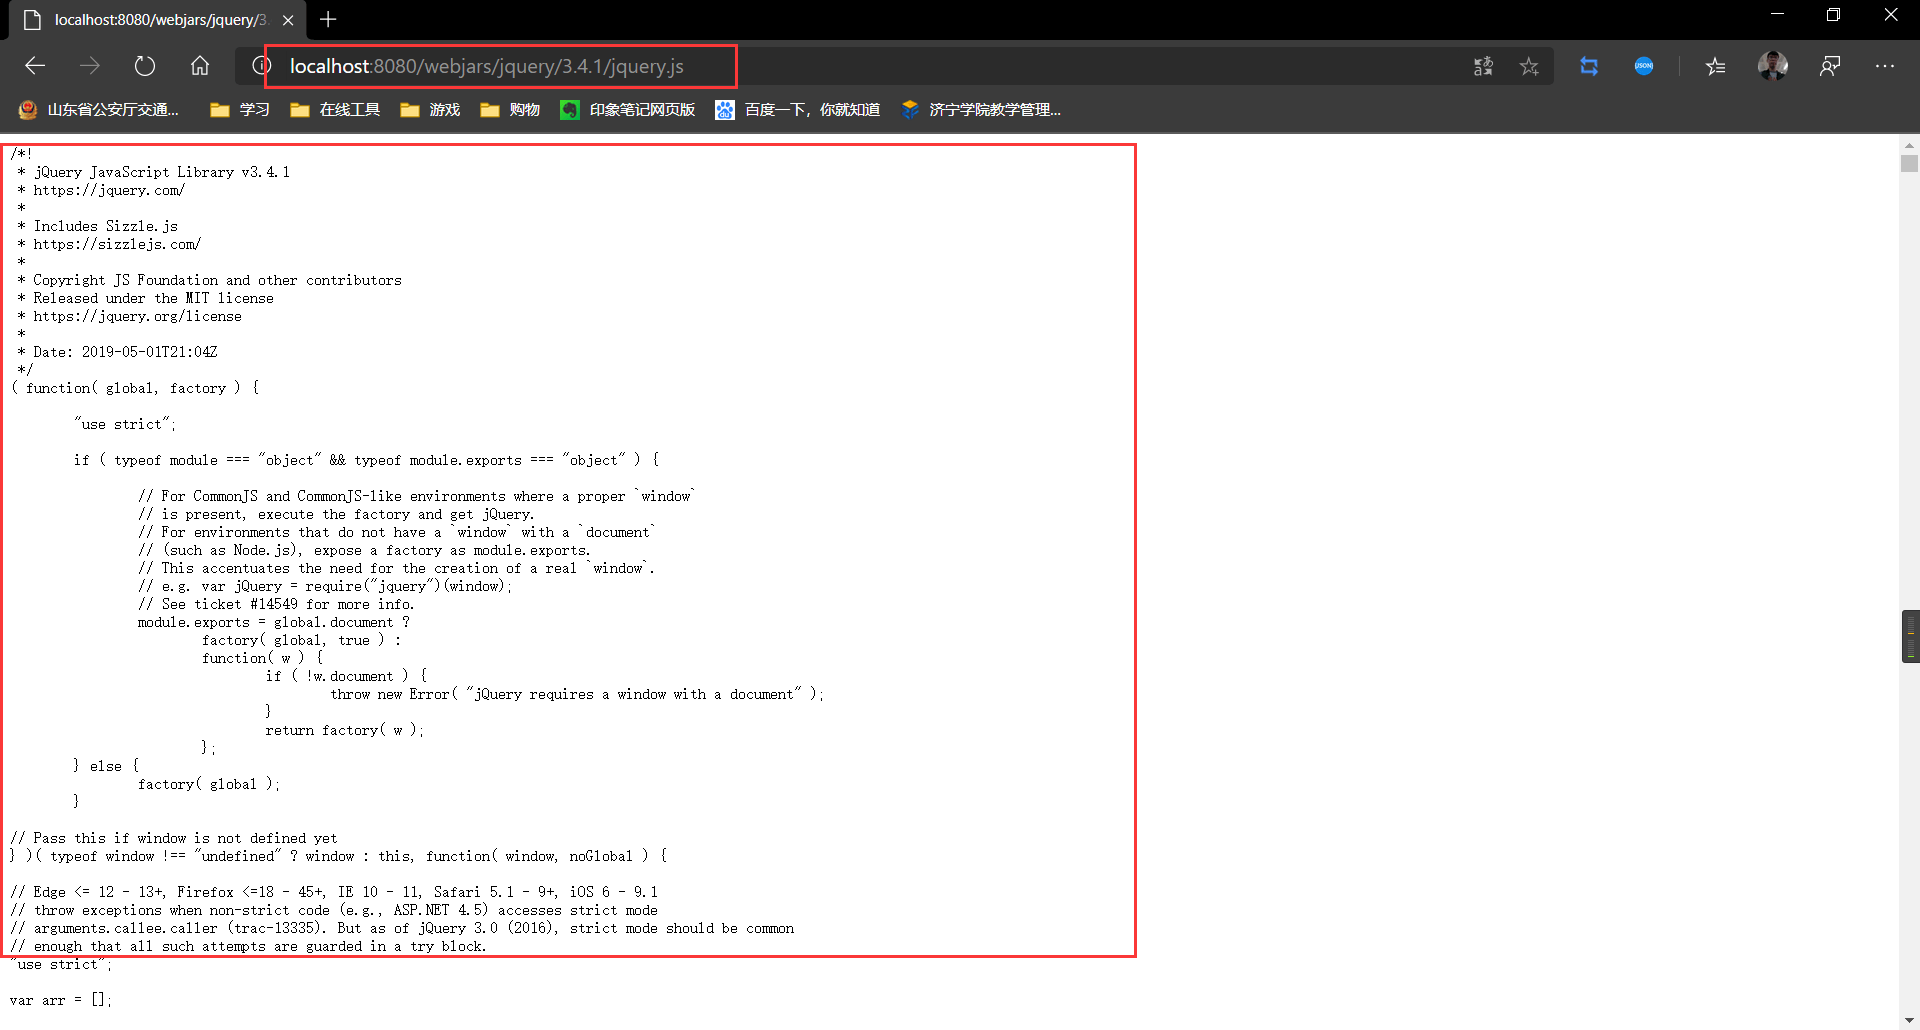
- 映射路径
resource路径> 通过读源码我们可以看到这个resource路径有这么几个:
classpath:/META-INF/resources/:就是第二个点,上面已经讲过了classpath:/resources/classpath:/static/classpath:/public/
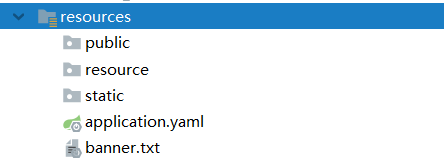 注意一个
注意一个resource/resource,第一个resource指的是classpath,第二个才是resource
优先级:
注意,资源位置的优先级为:
resource>static(默认)>public
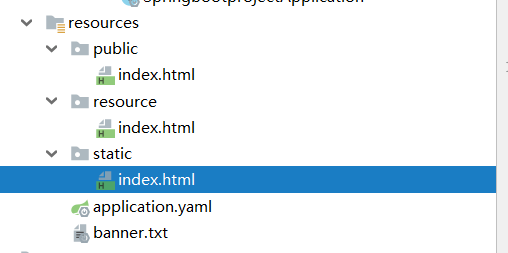
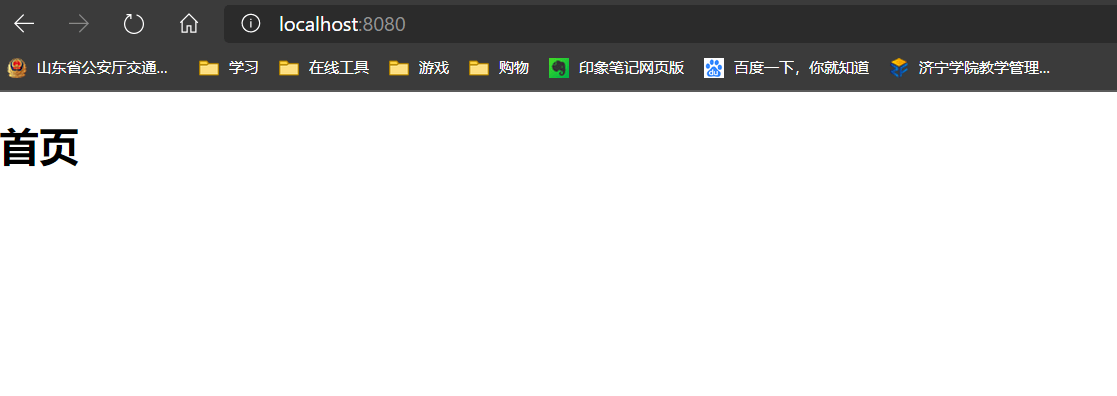
首页
在源码里面,可以看到方法:
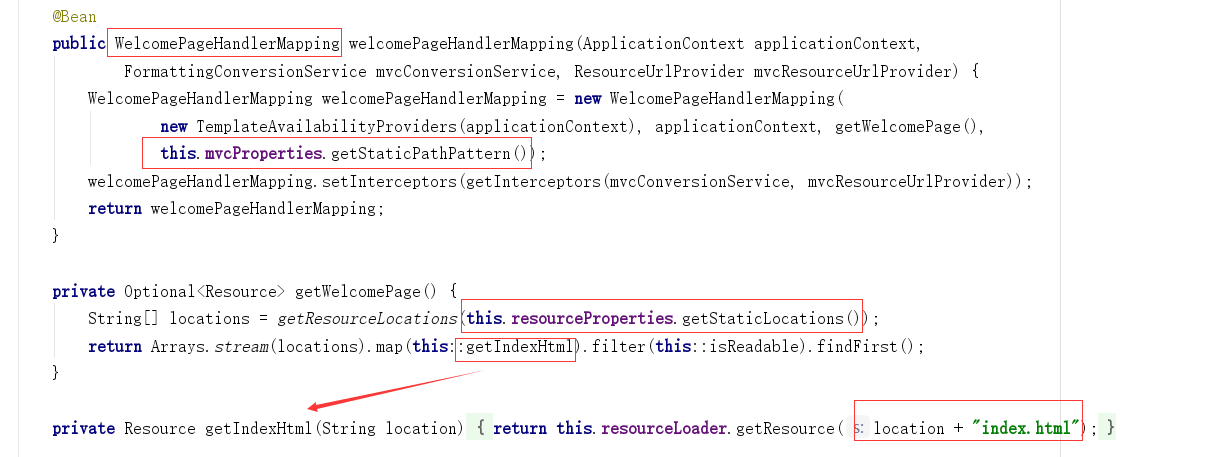
我们发现这个提示我们去静态资源的目录下的index.html,就是首页,静态资源目录就是我们说的四个:
classpath:/META-INF/resources/classpath:/resources/classpath:/static/classpath:/public/
所以,我们可以随便放置,根据优先级的排序会自动排列
模版引擎
以前我们用的模版引擎是JSP,我们可以使用模版引擎来将数据渲染到前端,但是现在Spring Boot已经不支持jsp了
模版引擎有很多替代品,比如freemarker,比如Thymeleaf
Spring Boot推荐的是Thymeleaf,所以我们学习
1、Thymeleaf官网:https://www.thymeleaf.org/
2、Thymeleaf在Github的主页:https://github.com/thymeleaf/thymeleaf
3、Spring官方文档:“https://docs.spring.io/spring-boot/docs/2.1.6.RELEASE/reference/htmlsingle/#using-boot-starter” , 找到我们对应的版本
有了
Thymeleaf,就可以使用Controller来跳转页面了,否则跳不过去
环境配置
去官网找到thymeleaf的启动器:spring-boot-starter-thymeleaf
    <dependencies>
        <dependency>
            <groupId>org.springframework.boot</groupId>
            <artifactId>spring-boot-starter</artifactId>
        </dependency>
        <dependency>
            <groupId>org.thymeleaf</groupId>
            <artifactId>thymeleaf-spring5</artifactId>
        </dependency>
        <dependency>
            <groupId>org.thymeleaf.extras</groupId>
            <artifactId>thymeleaf-extras-java8time</artifactId>
        </dependency>
    </dependencies>
注意:假如Spring Boot使用Thymeleaf的默认版本是2.x的,我们都是基于3.x开发的,所以注意一下,如果是2.x那么就要手动改变了
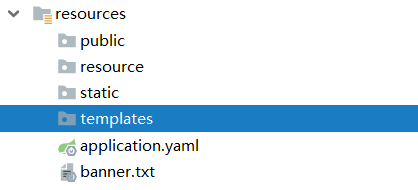
页面
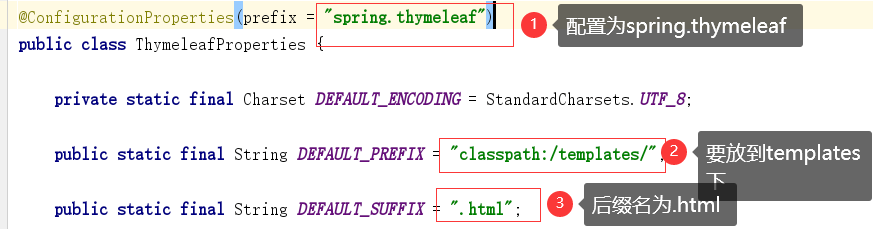
thymeleaf的所有页面都是写在templates下面,后缀名为.html
举例:
@Controller
public class HelloController {
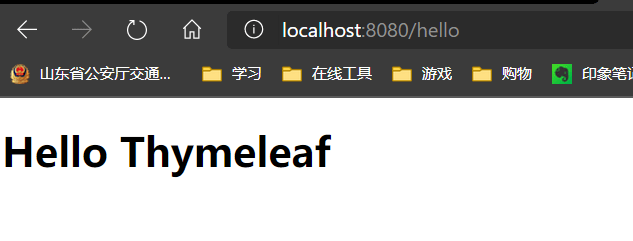
@RequestMapping("/hello")
public String Hello(){
return "hello";
}
}
<!DOCTYPE html>
<html lang="en">
<head>
    <meta charset="UTF-8">
    <title>Title</title>
</head>
<body>

    <h1>Hello Thymeleaf</h1>

</body>
</html>
去除
thymeleaf缓存:spring.thymeleaf.cache=falses
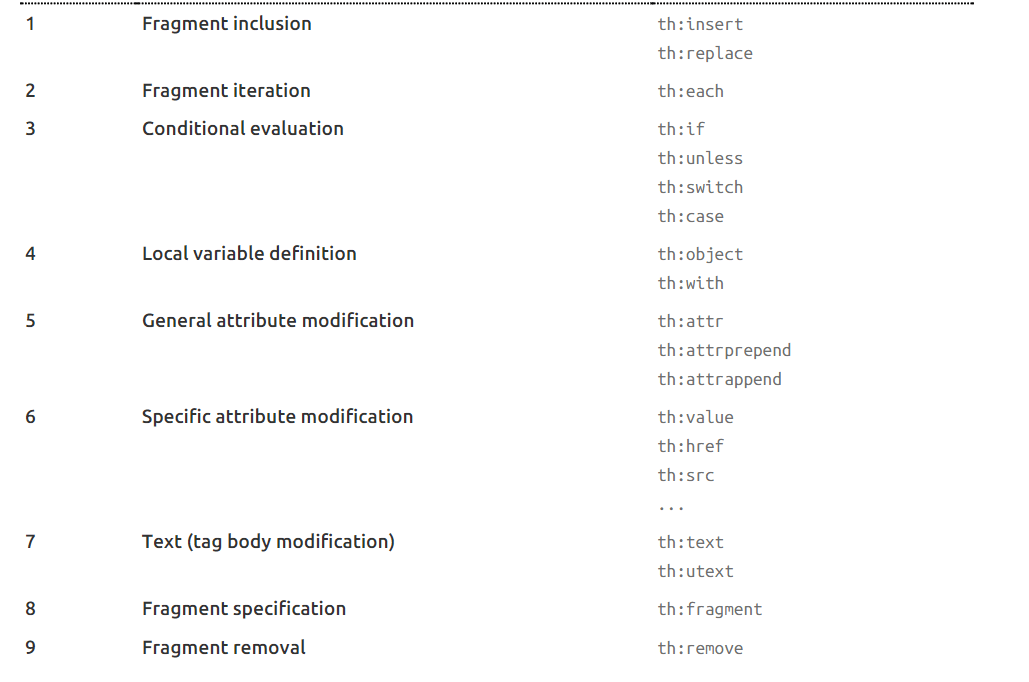
Thymeleaf语法
起步
在Thymeleaf文档中我们可以看到起步
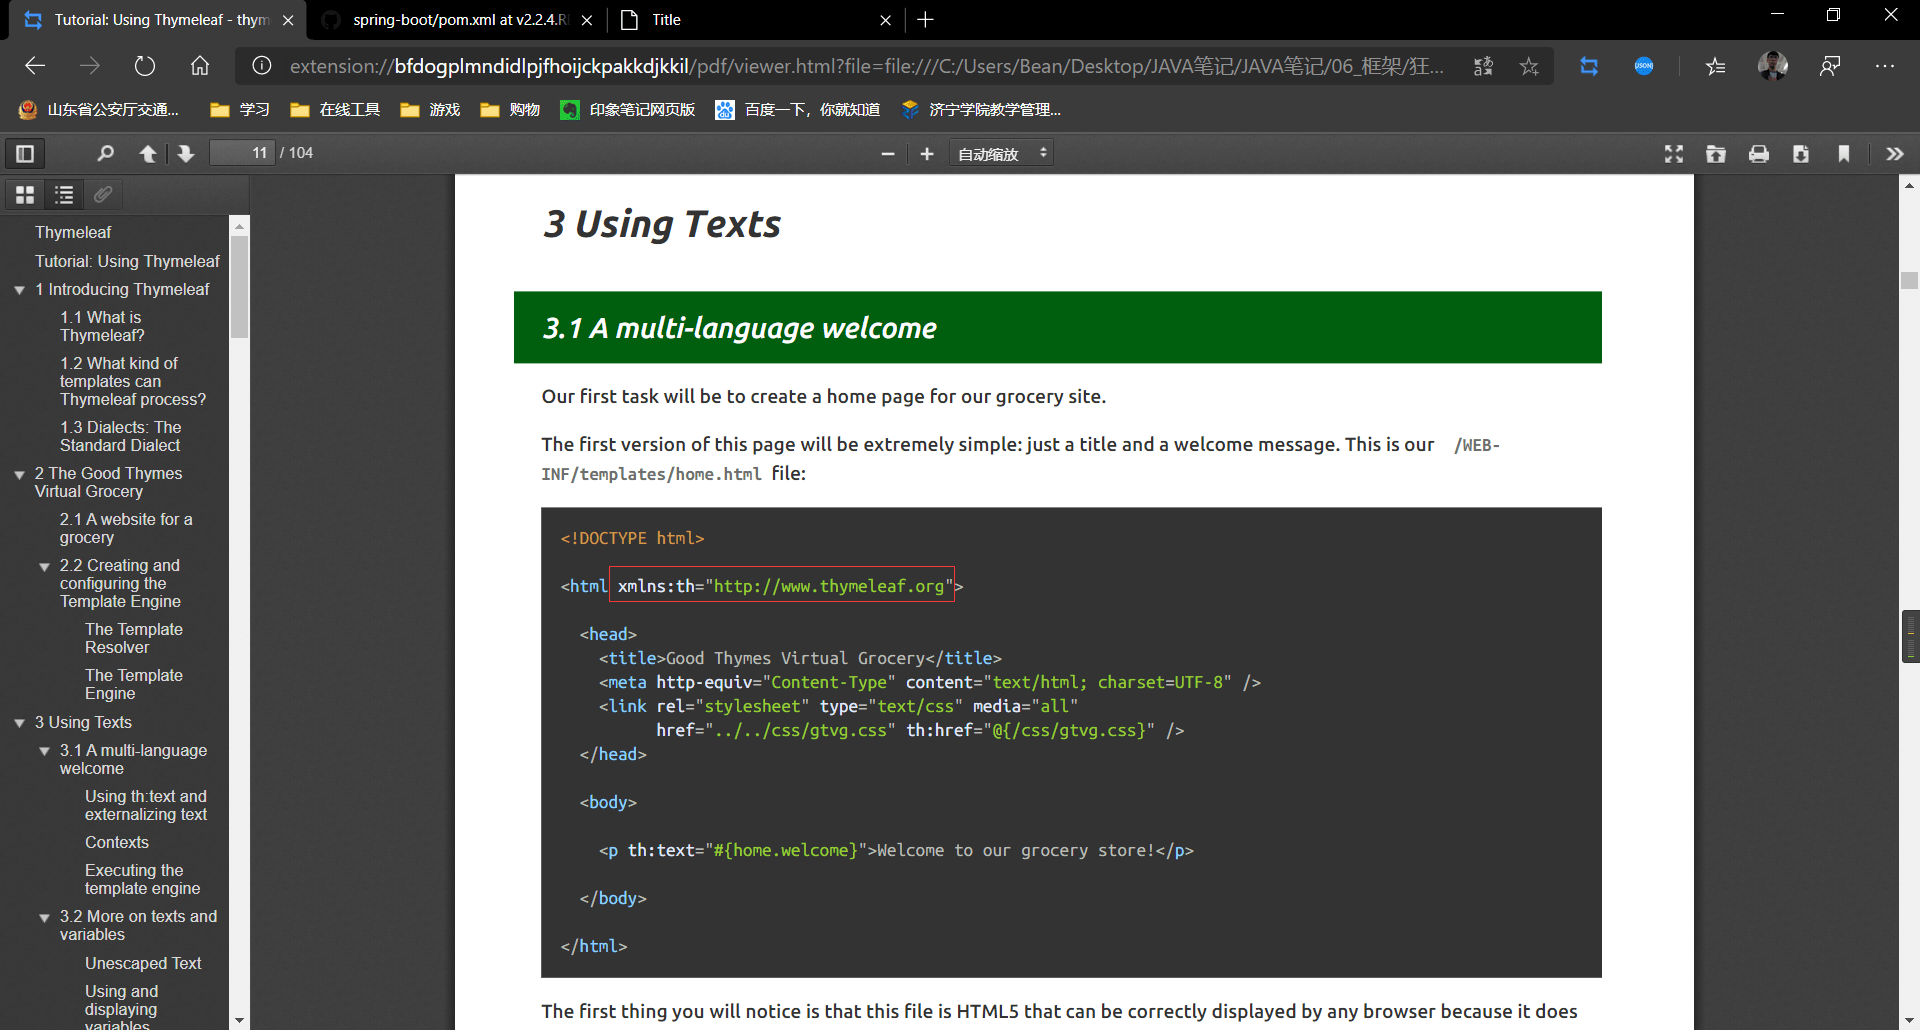
- 导入头文件:
<html xmlns:th="http://www.thymeleaf.org">
- 标准例子
链接:
href="../../css/gtvg.css" <--> th:href="@{/css/gtvg.css}
文本:
th:text="#{home.welcome}"
基本语法
首先th:xxx可以替换html中的任何元素,比如:text—>th:text,class—>th:class
基本:
变量:${...}
选择:*{...}
消息:#{...}
URL:@{...}
碎片:~{...}
文本:
文本:'文本'
数字:0,34,3.0,12.3
Boolean:true,false
Null:null
文本操作:
连接符:+
替换:|The name is ${name}|
算数:
+,-,*,/,%
布尔运算:
短路:and,or,
取反:!,not
比较:
>,<,=,>=,<=,==,!=(gt,lt,ge,le,eq,ne)
条件:
if-then:if?(then)
if-then-else:(if)?(then):(else)
(value)?:(defaultValue)
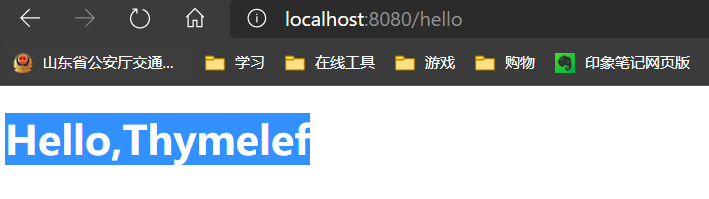
例子:
@Controller
public class HelloController {

    @RequestMapping("/hello")
    public String Hello(Model model){
        model.addAttribute("message","Hello,Thymelef");
        return "hello";
    }
}
<!DOCTYPE html>
<html lang="en" xmlns:th="http://www.thymeleaf.org">
<head>
    <meta charset="UTF-8">
    <title>Title</title>
</head>
<body>

    <h1 th:text="${message}"></h1>

</body>
</html>
标签语法
循环
使用th:each遍历
@Controller
public class HelloController {

    @RequestMapping("/hello")
    public String Hello(Model model){

        ArrayList<String> users = new ArrayList<>();
        users.add("A");
        users.add("B");
        users.add("C");
        users.add("D");

        model.addAttribute("users",users);
        return "hello";
    }
}
<!DOCTYPE html>
<html lang="en" xmlns:th="http://www.thymeleaf.org">
<head>
    <meta charset="UTF-8">
    <title>Title</title>
</head>
<body>

    <p th:each="user:${users}" th:text="${user}"></p>

</body>
</html>

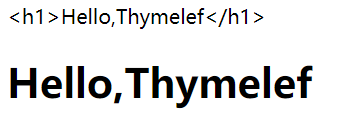
转译和不转译
有几个有意思的,比如第9个th:text,th:utext,为转译和不转译:
@Controller
public class HelloController {

    @RequestMapping("/hello")
    public String Hello(Model model){
        model.addAttribute("message","<h1>Hello,Thymelef</h1>");
        return "hello";
    }
}
<!DOCTYPE html>
<html lang="en" xmlns:th="http://www.thymeleaf.org">
<head>
    <meta charset="UTF-8">
    <title>Title</title>
</head>
<body>
    <!--<h1>Hello,Thymelef</h1>-->
    <div th:text="${message}"></div>

    <!--Hello,Thymelef(h1版的)-->
    <div th:utext="${message}"></div>

</body>
</html>s
MVC配置

从官网上看,它说要想扩展MVC,只需要添加一个@Configuration的注解到你的类型为WebMvcConfigurer的类上,并且不要添加@EnableWebMvc注解即可
从上面这句话,我们总结出两个条件:
- 要有一个继承(因为查看源码这是一个接口)
WebMvcConfigurer的类 - 类上要有
Configuration注解 - 类上不要有
@EnableWebMvc注解(使用这个注解会全面接管)
扩展视图解析器
扩展的前提的三个条件在MVC配置中已经说过了
第一个方法:
- 配置视图解析器
MyViewResolver
//首先来一个类,实现试图解析器,我们知道实现视图解析器的类就是视图解析器
public class MyViewResolver implements ViewResolver {
    @Override
    public View resolveViewName(String viewName, Locale locale) throws Exception {
        return null;
    }
}
- MVC总配置
//1.使用注解声明这是一个配置类
@Configuration
public class MyMvcConfig implements WebMvcConfigurer {
    //2. 实现WebMvcConfigurer

    /*扩展视图解析器
    使用这个注解把试图解析器交给Spring来进行管理,我们什么也不用做
    这就相当于我们已经配置了一个视图解析器
    */
    @Bean
    public ViewResolver myViewResolver(){
        return new MyViewResolver();
    }
}
更简单的方法:
直接重写这里面的方法
@Configuration
public class MyMvcConfig implements WebMvcConfigurer {

    //试图跳转
    @Override
    public void addViewControllers(ViewControllerRegistry registry) {
        //走bean就会走到hello页面
        registry.addViewController("/bean").setViewName("hello");
    }
}
在Spring Boot中,有非常多的
xxxConfiguration帮助我们进行扩展配置,只要看见了这个东西,就说明我们可以进行扩展了
员工管理系统
以员工管理系统作为一个例子,做一个网站
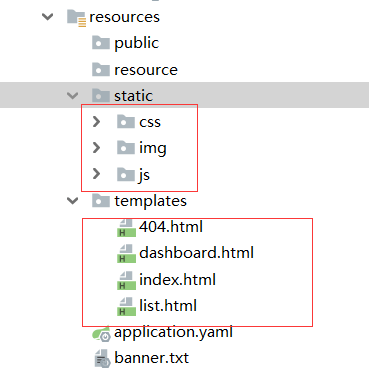
准备工作
- 前段页面,随便去百度搜索前端模版,比如bootstrap模版,下载下来,这里使用员工管理系统模版
- 页面引入到
templates下面,资源引入到static下面(也可以是其他的,不过默认是static)
- 使用
pojo
Department部门表
//部门表
@Data
@NoArgsConstructor
@AllArgsConstructor
public class Department {

    private Integer id;
    private String departmentName;
}
Employee员工表
//员工表
@Data
@NoArgsConstructor
public class Employee {
    private Integer id;
    private String lastName;
    private String email;
    private Integer gender;

    private Department department;
    private Date birth;

    public Employee(Integer id, String lastName, String email, Integer gender, Department department) {
        this.id = id;
        this.lastName = lastName;
        this.email = email;
        this.gender = gender;
        this.department = department;
        this.birth = new Date();
    }
}
- 因为没有学习
Mybatis,所以先伪造数据库
DepartmentDao
//部门dao
@Repository
public class DepartmentDao {

    //模拟数据库中的数据
    private static Map<Integer, Department> departments = null;

    static {

        departments = new HashMap<>();

        departments.put(101,new Department(101,"教学部"));
        departments.put(102,new Department(102,"市场部"));
        departments.put(101,new Department(103,"教研部"));
        departments.put(101,new Department(104,"运营部"));
        departments.put(101,new Department(105,"后勤部"));
    }


    //模拟对数据库的操作
    public Collection<Department> getDepartments(){
        return departments.values();
    }

    //通过id得到部门
    public Department getDepartmentById(Integer id){
        return departments.get(id);
    }

}
Employee
//员工dao
@Repository
public class EmployeeDao {

    //模拟数据库中的数据
    private static Map<Integer, Employee> employees = null;

    //员工所属的部门
    @Autowired
    private DepartmentDao departmentDao;

    static {

        employees = new HashMap<>();

        employees.put(101,new Employee(1001,"A","xxx@qq.com",1,new Department(101,"教学部")));
        employees.put(102,new Employee(1001,"B","xxx@qq.com",0,new Department(102,"市场部")));
        employees.put(101,new Employee(1001,"C","xxx@qq.com",1,new Department(103,"教研部")));
        employees.put(101,new Employee(1001,"D","xxx@qq.com",0,new Department(104,"运营部")));
        employees.put(101,new Employee(1001,"E","xxx@qq.com",1,new Department(105,"后勤部")));
    }

    //增加一个员工
    private static Integer initId = 1006;
    public void save(Employee employee){
        if (employee.getId()==null){
            employee.setId(initId++);
        }
        employee.setDepartment(departmentDao.getDepartmentById(employee.getDepartment().getId()));

        employees.put(employee.getId(),employee);
    }

    //查询全部员工
    public Collection<Employee> getAll(){
        return employees.values();
    }

    //通过Id查询员工
    public Employee getEmployeeById(Integer id){
        return employees.get(id);
    }

    //删除员工通过id
    public void delete(Integer id){
        employees.remove(id);
    }

}
首页映射
@Controller
public class IndexController {

    @RequestMapping({"/","index.html"})
    public String index(){
        return "index";
    }
}
加上之后我们去访问,发现的确跳转了,但是还有个问题,就是页面太难看了
之所以出现这种原因是因为我们没有使用
thymeleaf去接管
- 首先我们去掉
thymeleaf的缓存:>yml spring: thymeleaf: cache: false
- 然后我们使用
thymeleaf接管html <link th:href="@{/css/dashboard.css}" rel="stylesheet">
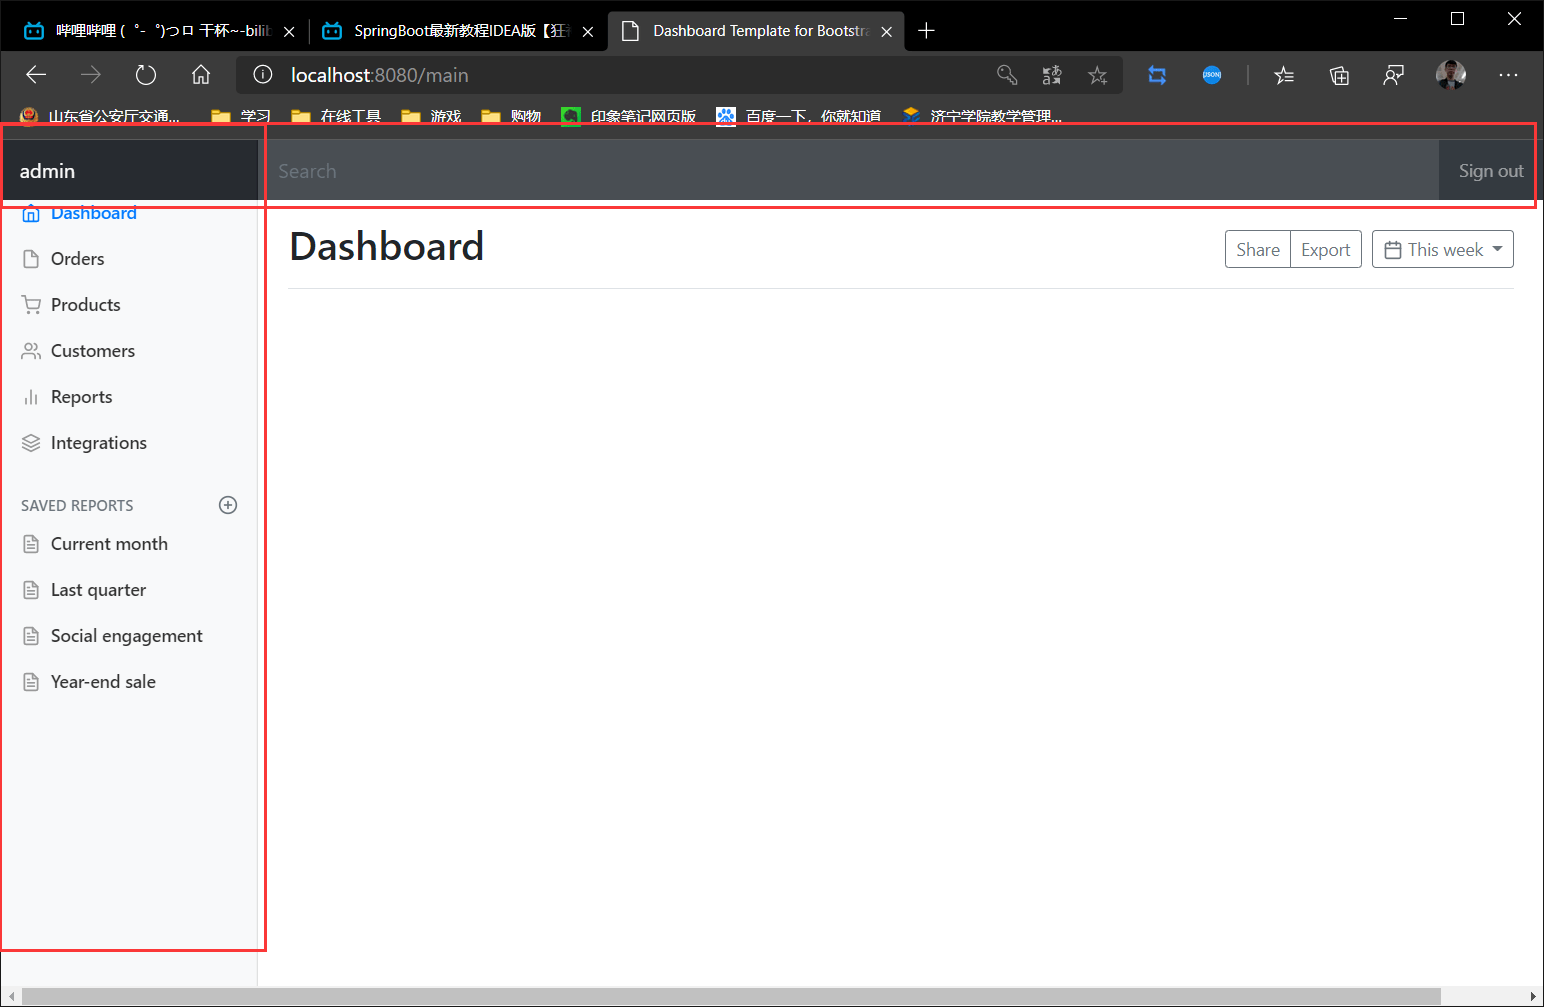
最后的页面类似与这个效果:
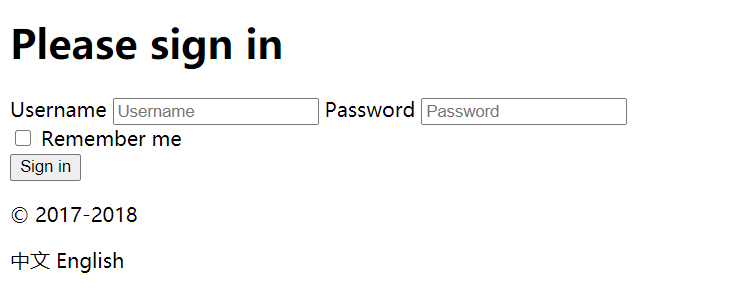
页面的国际化
页面的国际化是可以切换中文和外文的,比如上面那张图,有中文和英文
- 在页面国际化之前确认IDEA的编码方式为UTF-8
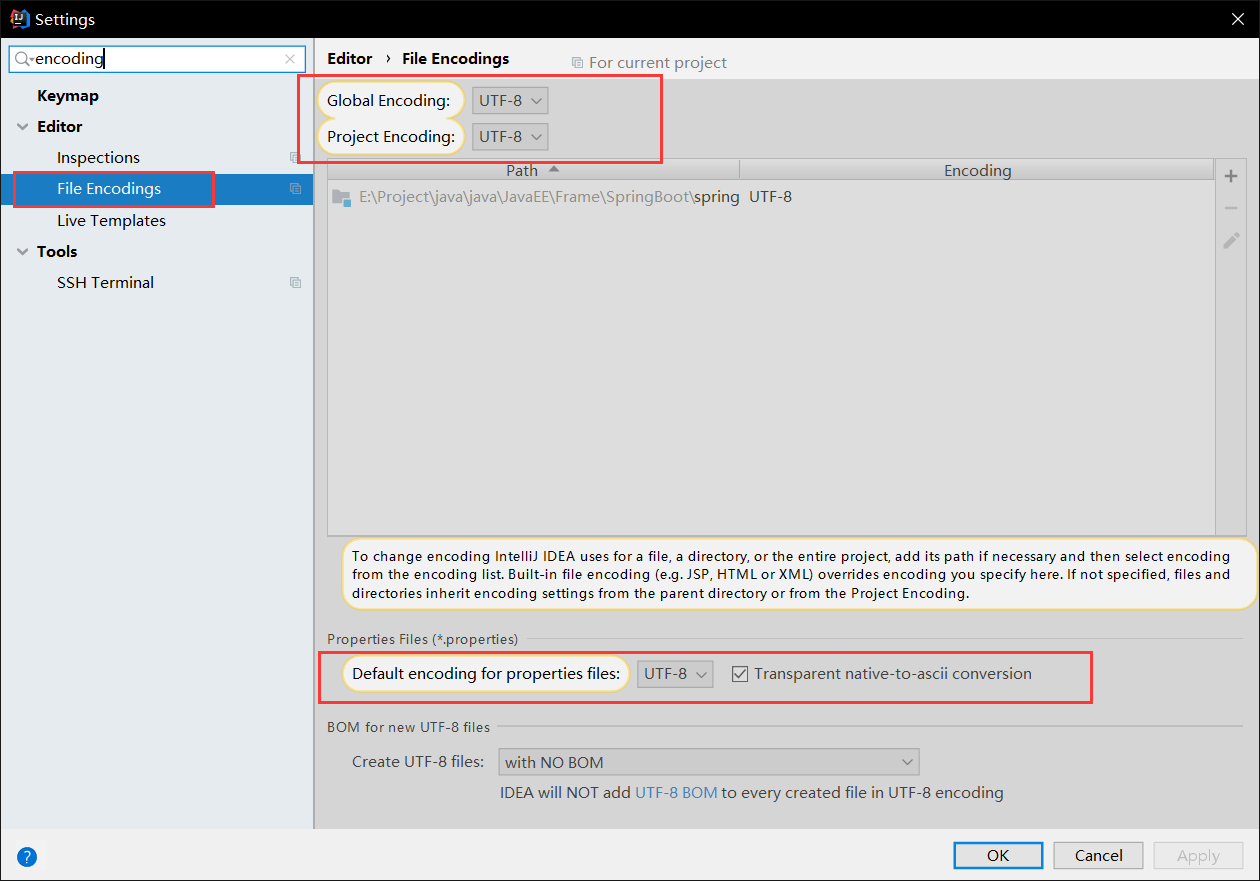
- 我们在
resrouce目录下建立一个文件夹叫做i18n> i18n(其来源是英文单词internationalization的首末字符i和n,18为中间的字符数)是“国际化”的简称类似的还有
k8s,
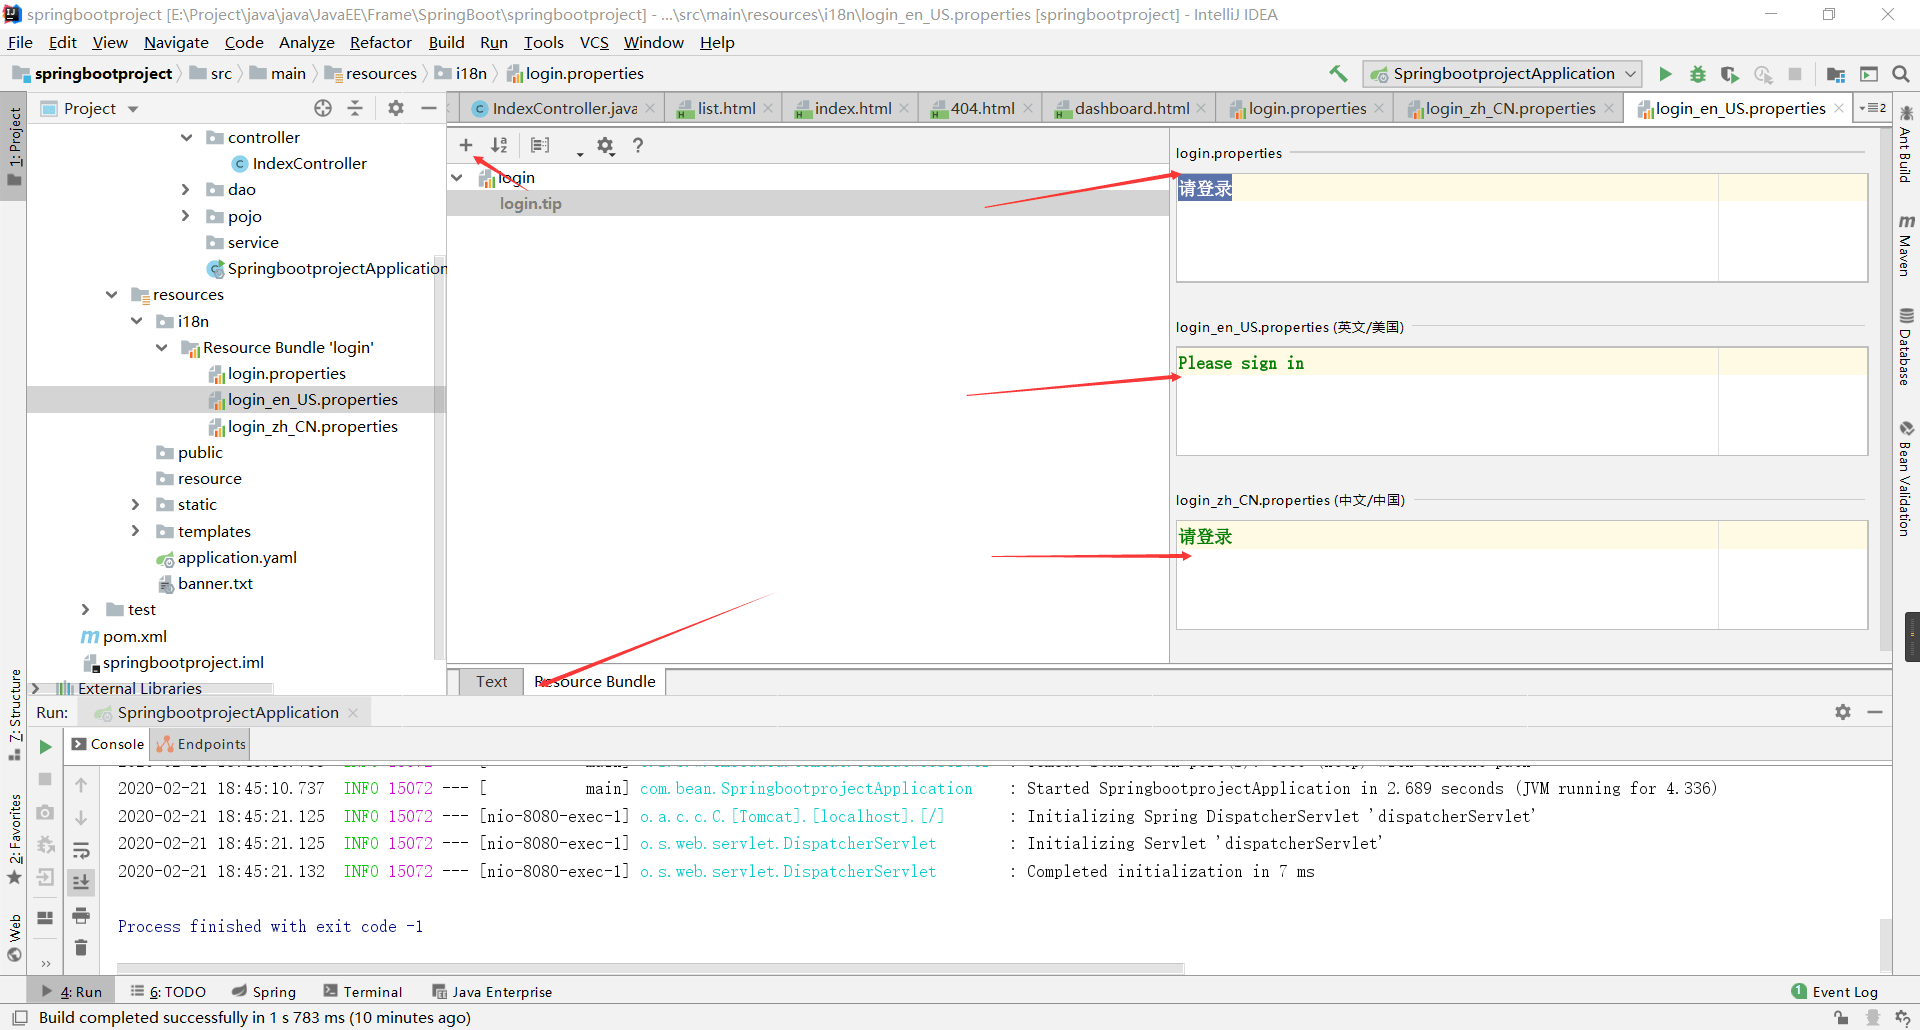
- 我们在
i18n下面建立文件,比如>login.properties:默认配置login_zh_CN.properties:中文配置login_login_en_US.properties:英文配置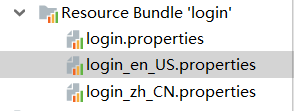 IDEA自动帮我们合成了一个
在IDEA还有一个高级之处,就是可以可视化配置
- 配置完成之后,我们还要使用这个配置:
MessageSourceAutoConfiguration
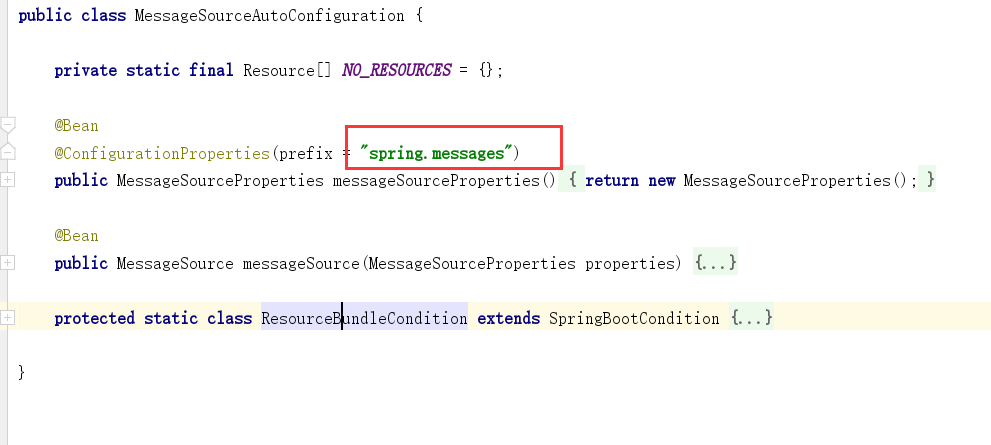
#我们的配置文件放到了这里
spring.messages.basename=i18n.login
- 指定好路径之后,我们还要在
html中使用thymeleaf来接管文本
<h1 class="h3 mb-3 font-weight-normal" th:text="#{login.tip}"></h1>
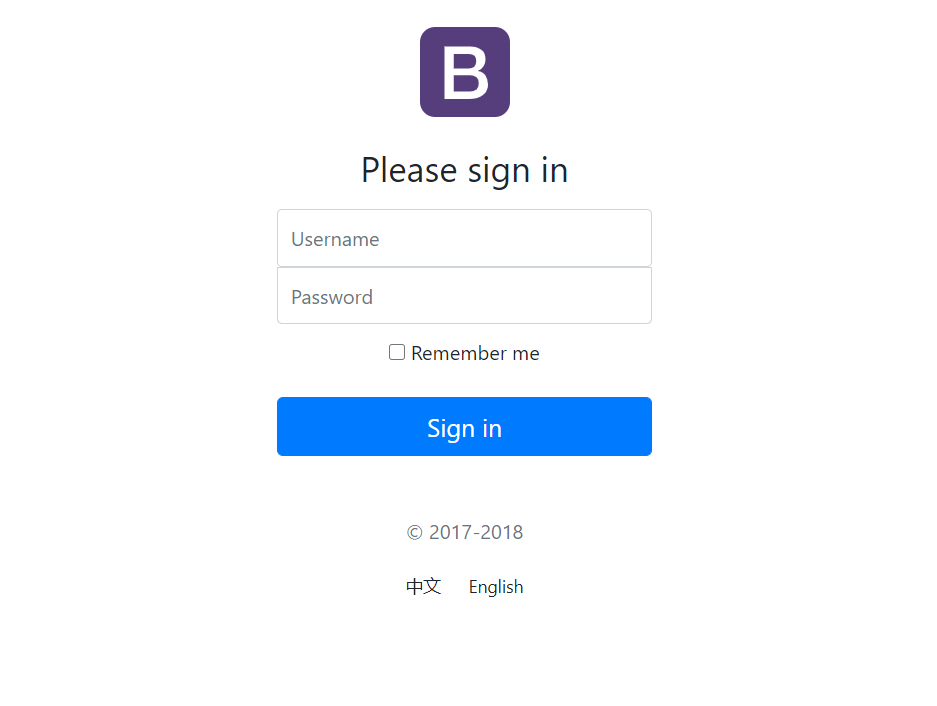
全部接管之后,我们的初始页面如下:
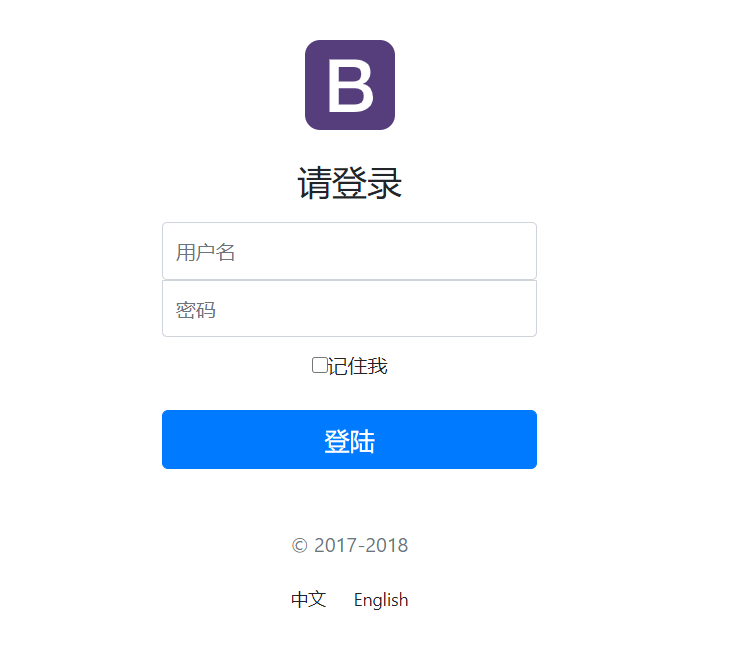
但是我们依然没有达到点击切换的效果,所以继续
首先我们需要在a标签下面加上请求链接,这个链接的参数使用
(key=value)而不是`?key=value`html <a class="btn btn-sm" th:href="@{index.html(l='zh_CN')}">中文</a> <a class="btn btn-sm" th:href="@{index.html(l='en_US')}">English</a>重写地区解析器,解析传进来的参数值> 在
WebMvcAutoConfiguration中我们可以发现一个重写的本地化解析器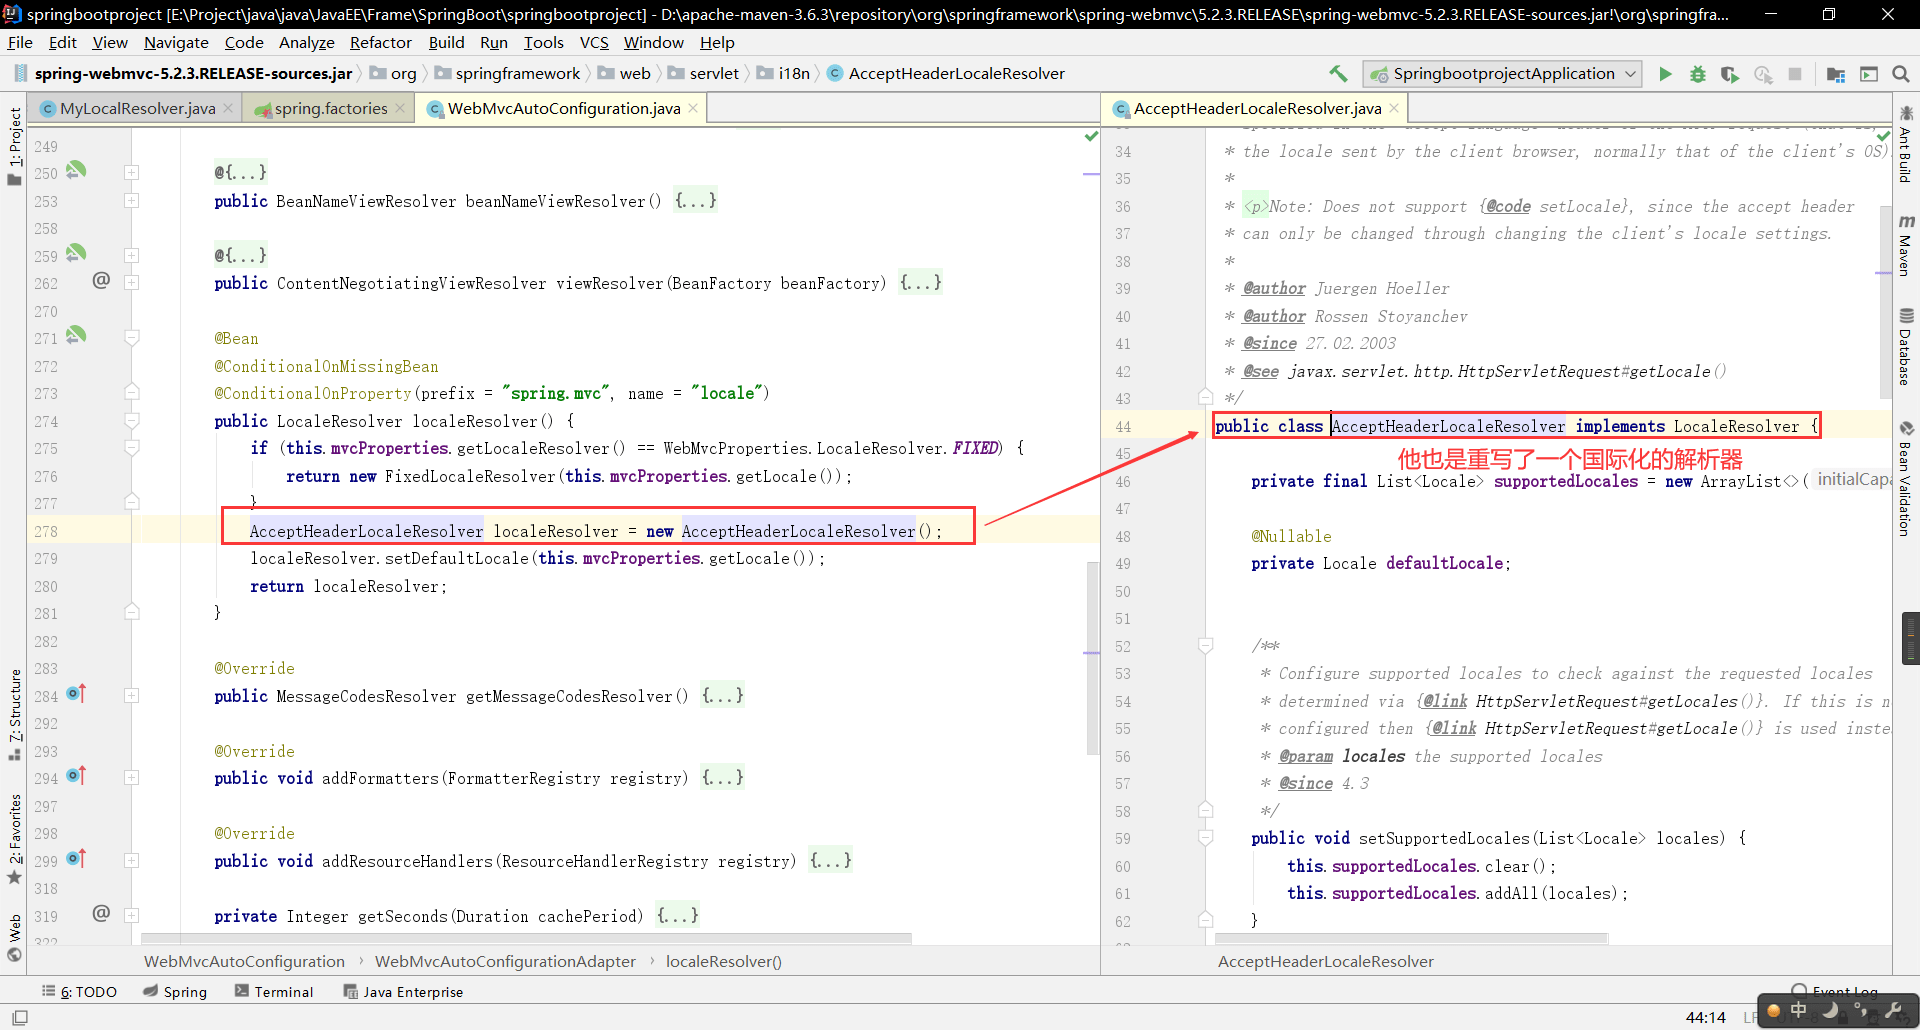 我们照猫画虎,也做一个自己的本地化解析器,然后交给扩展配置
- 自定义国际化解析器
import javax.servlet.http.HttpServletRequest;
import javax.servlet.http.HttpServletResponse;
import java.util.Locale;

//自定义的国际化解析器
public class MyLocaleResolver implements LocaleResolver {

    //解析请求
    @Override
    public Locale resolveLocale(HttpServletRequest request) {

        //获取语言
        String language = request.getParameter("l");

        //获取默认的,如果没有就使用默认的
        Locale locale = Locale.getDefault();

        //假如language不为空
        if (!StringUtils.isEmpty(language)){

            //分割字符串,分别获得国家和地区
            String[] split = language.split("_");
            locale = new Locale(split[0],split[1]);
        }
        return locale;
    }

    @Override
    public void setLocale(HttpServletRequest request, HttpServletResponse response, Locale locale) {

    }
}
- 加入到`WebMvc扩展`中

```java
@Configuration
public class MyMvcConfig implements WebMvcConfigurer {

    @Bean
    public LocaleResolver localeResolver(){
        return new MyLocaleResolver();
 }

}
成功:
登陆
在这里我们要实现几件事情:
- 输入用户名和密码点击登录
- 正确:直接跳转到登陆页面
- 错误:提示错误消息
- 编写视图解析器
@Configuration
public class MyMvcConfig implements WebMvcConfigurer {
    @Override
    public void addViewControllers(ViewControllerRegistry registry) {

        registry.addViewController("/").setViewName("index");
        registry.addViewController("/index").setViewName("index");
        registry.addViewController("/index.html").setViewName("index");

        registry.addViewController("/main").setViewName("dashboard");
        registry.addViewController("/main.html").setViewName("dashboard");
    }
}
- 在
index.html中编写
<form class="form-signin" th:action="@{/login}">

<!--注意这里:th:if="${! #strings.isEmpty(msg)},这里使用了一个thymeleaf的if语句+取反+工具类 来对是否显示这个标签进行判断-->
    <p style="color: red" th:text="${msg}" th:if="${! #strings.isEmpty(msg)}"></p>

    <input type="text" name="username" class="form-control" th:placeholder="#{login.username}"/>

    <input type="password" name="password" class="form-control" th:placeholder="#{login.password}"/>

    <input type="checkbox" th:text="#{login.remember}">

    <button class="btn btn-lg btn-primary btn-block" type="submit" th:text="#{login.btn}"></button>
</form>
- 编写
Controller
@Controller
public class LoginController {

    @RequestMapping("/login")
    public String login(@RequestParam("username") String username, @RequestParam("password") String password, Model model){

        /*
        * 注意这里的两个重定向:这两个重定向都是具体的请求
        * 这两个请求都是写在我们自定义的视图解析器中
        * 但是如果不使用重定向,而是直接返回,比如 return "index",那么输入的用户名和密码都会在屏幕上显示出来
        * */
        if (!StringUtils.isEmpty(username) && password.equals("123456")){
            return "redirect:/main";
        }else {
            model.addAttribute("msg","用户名或者密码错误");
            return "redirect:/index";
        }
    }
}
注意点:
- 注意
controller的两个重定向:这两个重定向都是具体的请求- 这两个请求都是写在我们自定义的视图解析器中
- 但是如果不使用重定向,而是直接返回,比如 return “index”,那么输入的用户名和密码都会在屏幕上显示出来
- 注意表单中的
form中一定要有name属性,否则跳转页面的时候会报错
- 注意在
thymeleaf取值做判断的时候,取得值可能会爆红,根据提示随便加个注释就行了

拦截器
我们已经实现了登陆,但是还有问题:直接输入这个网址就可以进入页面,翻过了登陆这个步骤,所以我们也需要拦截器
- 实现拦截器
//继承拦截器
public class LoginHandlerInterceptor implements HandlerInterceptor {

    @Override
    public boolean preHandle(HttpServletRequest request, HttpServletResponse response, Object handler) throws Exception {

        //登陆成功之后应该存在用户的session
        Object session = request.getSession().getAttribute("session");

        if (session==null){
            //没有登录,不放行
            request.setAttribute("msg","请先登录");
            request.getRequestDispatcher("/index").forward(request,response);
            return false;
        }
        //登录之后就放行
        return true;
    }
}
- 添加到
WebMvc中的配置中去
@Configuration
public class MyMvcConfig implements WebMvcConfigurer {

    @Bean
    public LocaleResolver localeResolver(){
        return new MyLocaleResolver();
    }

    @Override
    public void addViewControllers(ViewControllerRegistry registry) {
        registry.addViewController("/").setViewName("index");
        registry.addViewController("/index.html").setViewName("index");
        registry.addViewController("/index").setViewName("index");

        /*假如请求的路径为:/main.html,则映射到dashboard*/
        registry.addViewController("/main").setViewName("dashboard");
        registry.addViewController("/main.html").setViewName("dashboard");
    }

    @Override
    public void addInterceptors(InterceptorRegistry registry) {
        //添加一个拦截器,拦截所有请求,除了 / , /index , /index.html , login,所有的静态资源
        registry.addInterceptor(new LoginHandlerInterceptor())
            .addPathPatterns("/**")
            .excludePathPatterns("/","/index","/index.html","/login","/css/**","/js/**","/img/**");
    }
}
- 登录页面
<form class="form-signin" th:action="@{/login}">
    <!--图片也是url,所以也是用@{}代替-->
    <img class="mb-4" th:src="@{/img/bootstrap-solid.svg}" alt="" width="72" height="72">
    <h1 class="h3 mb-3 font-weight-normal" th:text="#{login.tip}"></h1>


    <!--注意这里:th:if="${! #strings.isEmpty(msg)},这里使用了一个thymeleaf的if语句+取反+工具类 来对是否显示这个标签进行判断-->
    <!--/*@thymesVar id="msg" type="com"*/-->
    <p style="color: red" th:text="${msg}" th:if="${! #strings.isEmpty(msg)}"></p>


    <input type="text" name="username" class="form-control" th:placeholder="#{login.username}"/>

    <input type="password" name="password" class="form-control" th:placeholder="#{login.password}"/>
    <div class="checkbox mb-3">
        <label>
            <input type="checkbox" th:text="#{login.remember}">
        </label>
    </div>
    <button class="btn btn-lg btn-primary btn-block" type="submit" th:text="#{login.btn}"></button>
    <p class="mt-5 mb-3 text-muted">© 2017-2018</p>
    <a class="btn btn-sm" th:href="@{index.html(l='zh_CN')}">中文</a>
    <a class="btn btn-sm" th:href="@{index.html(l='en_US')}">English</a>
</form>
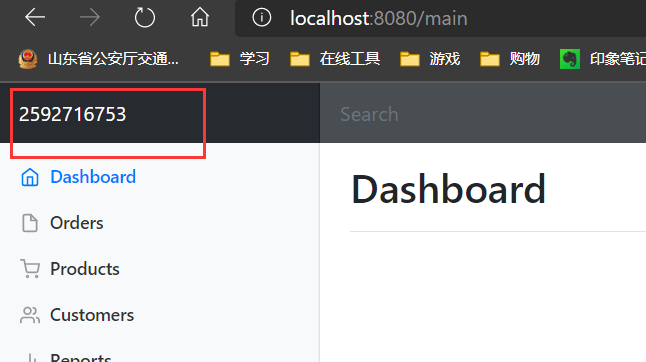
- 登录之后的页面
<!--这里取到了session中的值,成功地在首页上显示了名字-->
<a class="navbar-brand col-sm-3 col-md-2 mr-0"href="http://getbootstrap.com/docs/4.0/examples/dashboard/#" th:text="${session.session}">
</a>
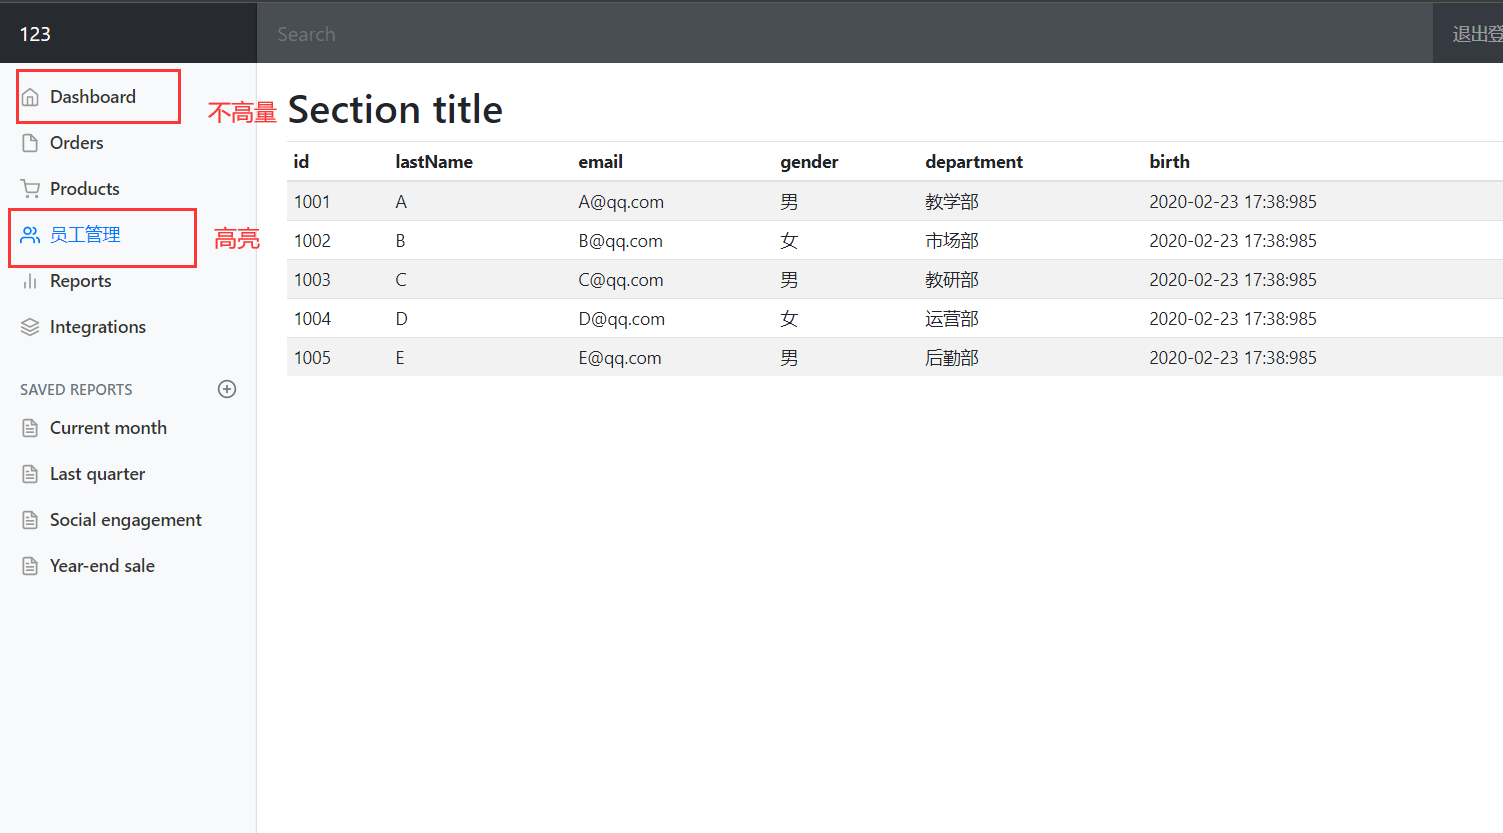
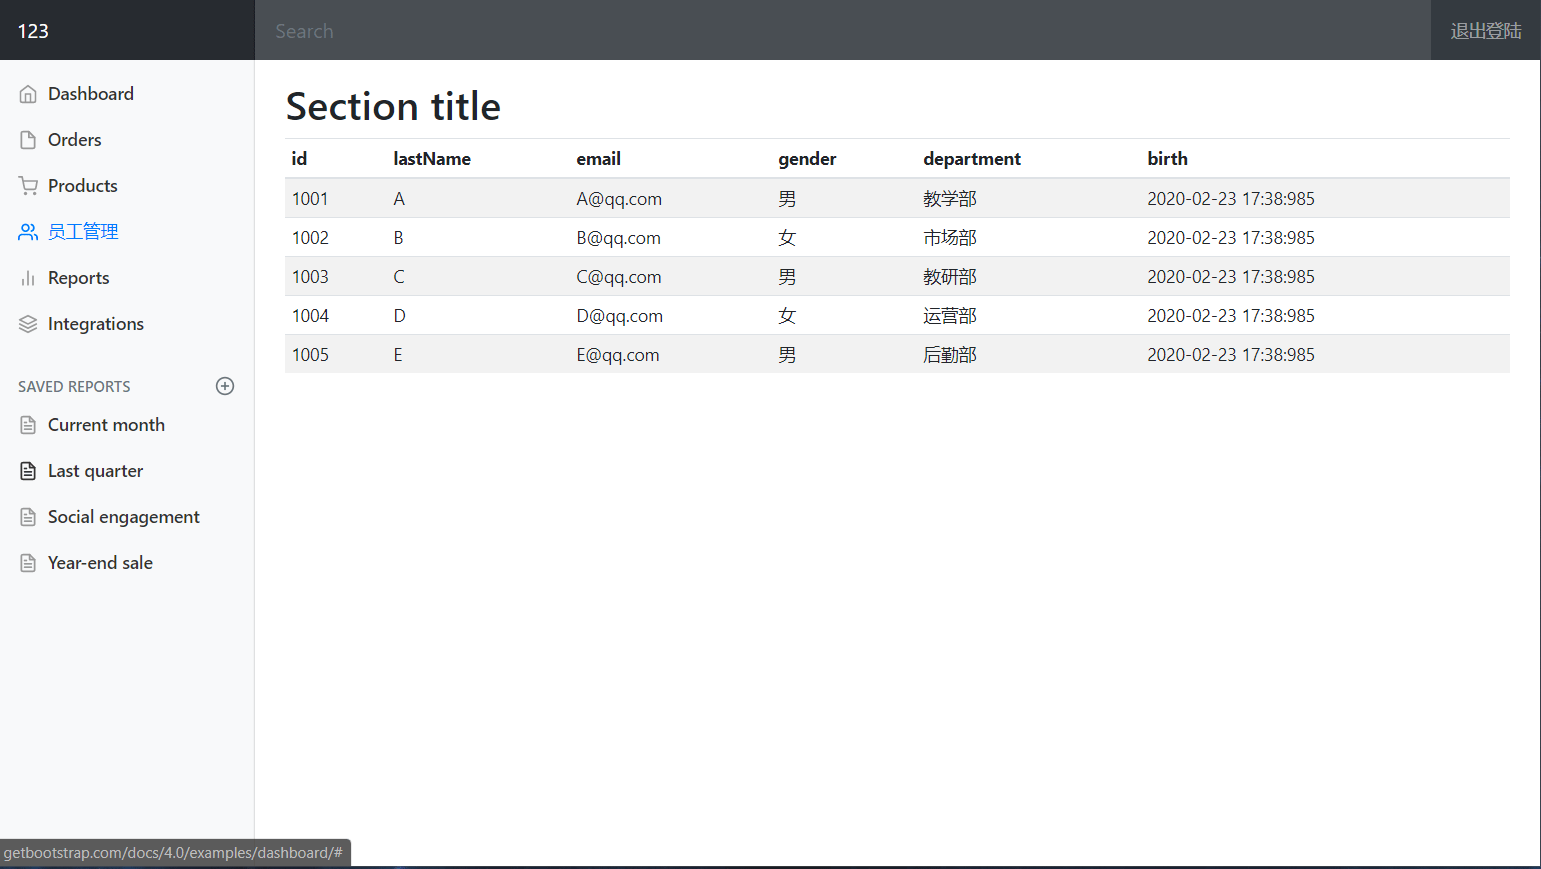
显示员工列表
- 提取前端公共页面
- 编写列表
编写前端公共页面
在thymeleaf中有一个比较友好的功能,就是把一个模块抽取出来作为一个组件,这样就可以进行组件化开发
比较几个公共界面,我们发现有很多的内容都是重复的,比如侧边栏,顶部导航等等,所以我们要把这些内容给抽取出来
查找文档,果然发现有这种用法
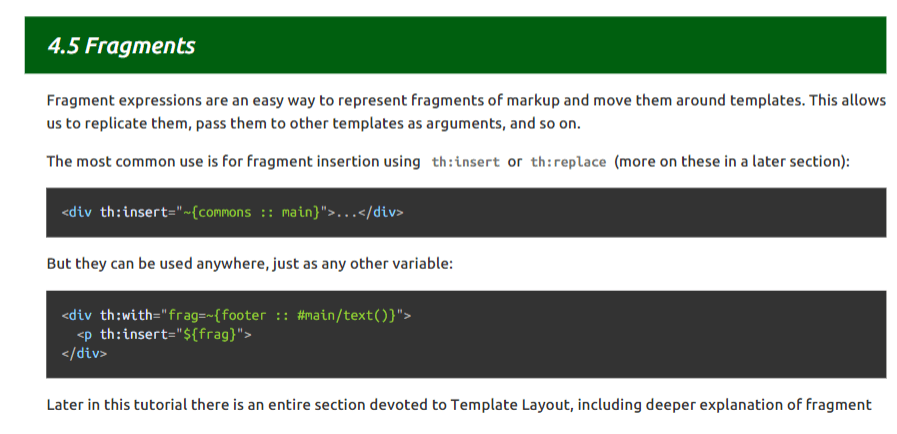

那么我们开始编写共同界面,并组件化使用,插在各个页面上
- 提取出两个组件部分,放到公共组件中,因为内容太多,只显示部分:
templates/common/common.html
<!DOCTYPE html>
<!--首先要引用thymeleaf-->
<html lang="en" xmlns:th="http://www.thymeleaf.org">


<!--顶部导航栏,注意th:fragment="topbar"规定了这是一个碎片,可以引用到各个页面中的,名字叫做topbar-->
<nav class="navbar navbar-dark sticky-top bg-dark flex-md-nowrap p-0" th:fragment="topbar">
</nav>


<!--侧边栏,th:fragment="siderbar"-->
<!--我们使用thymeleaf来接管这个,判断,假如页面传过来的值为null,那么图标就处于激活状态,否则不激活-->
    <a th:class="(${order}==null)?('nav-link active'):('nav-link')" href="http://getbootstrap.com/docs/4.0/examples/dashboard/#">
    </a>
    <!--我们使用thymeleaf来接管这个,判断,假如页面传过来的值为list,那么图标就处于激活状态,否则不激活-->
    <a th:class="(${order}=='list')?('nav-link active'):('nav-link')" th:href="@{/customers}">
</html>
注意点:
- 引用
thymeleaf- 碎片的使用就要声明
th:fragment="xxx"- 使用
thymeleaf来接管class,对于传过来的值进行判断,然后决定图标是不是高亮状态
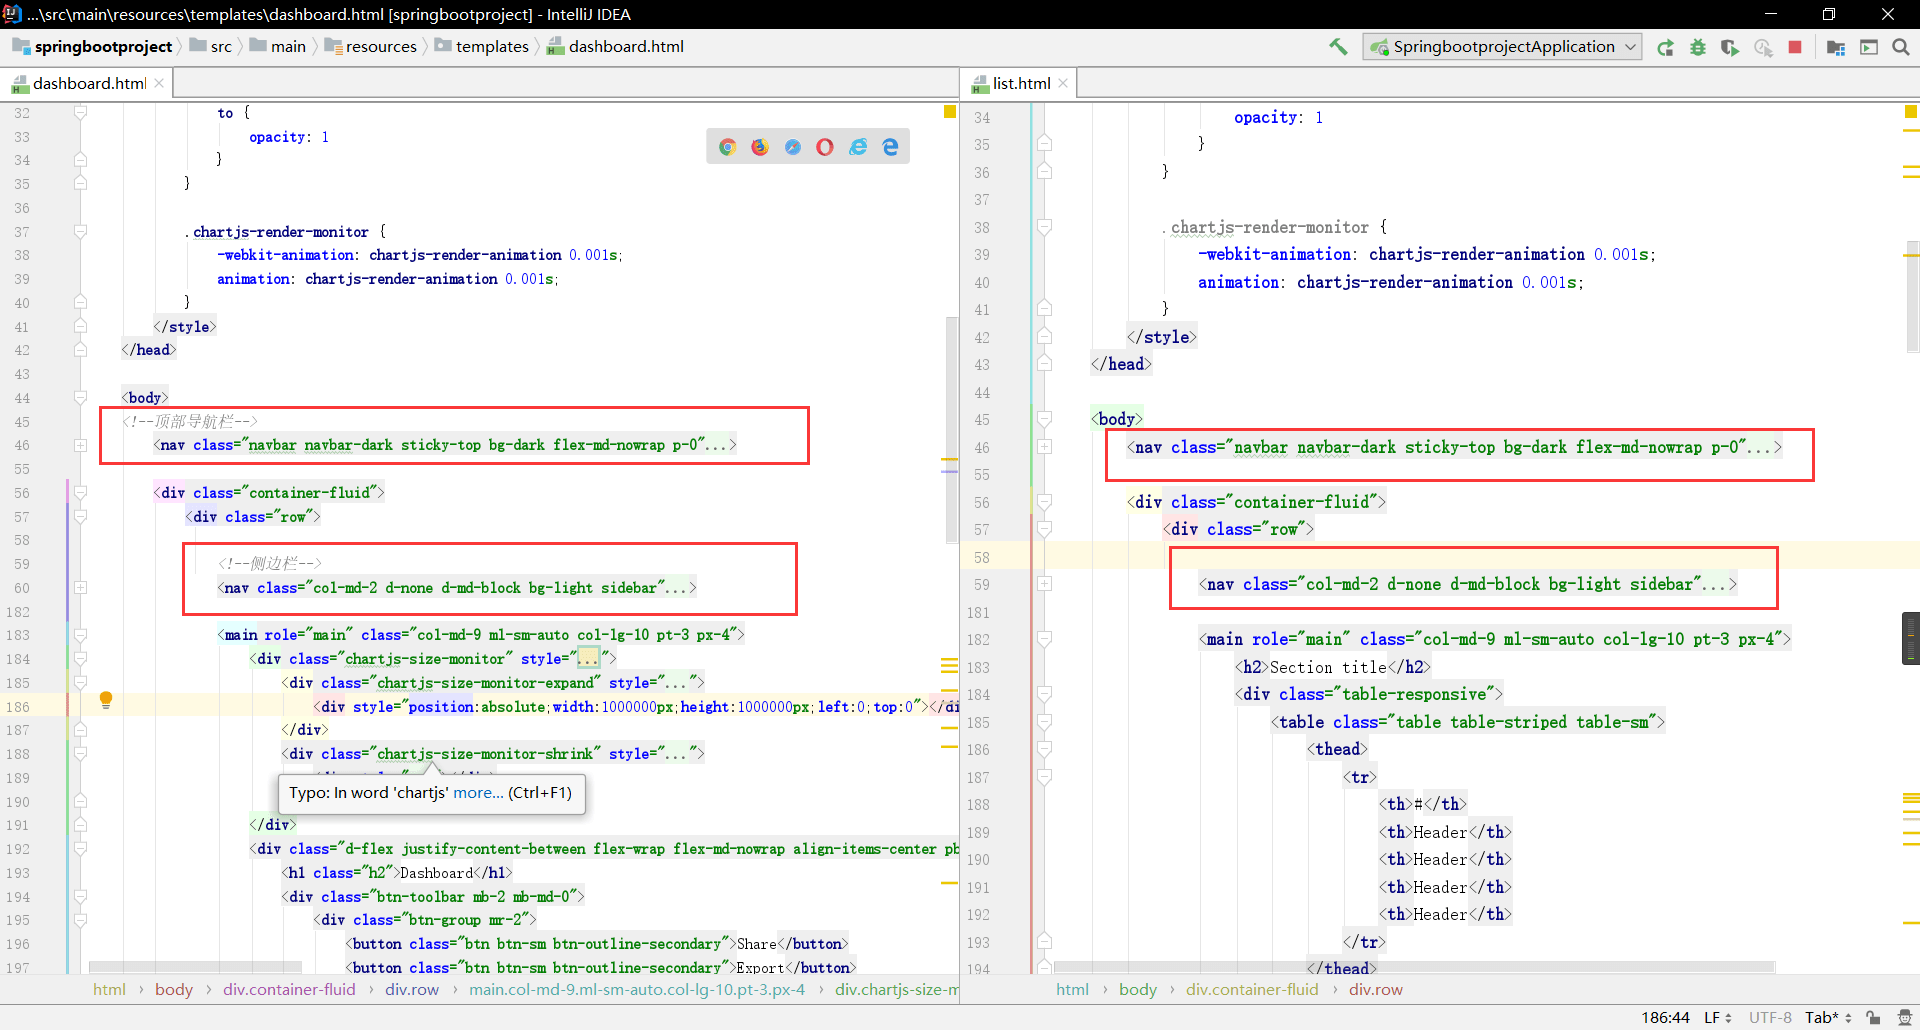
- 下面是两个页面,用于对比,同样只放出部分
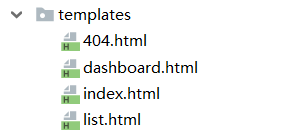
templates/dashboard.html
<!--顶部导航栏,使用的是common/common页面下的topbar这个碎片-->
<div th:replace="~{common/common::topbar}"></div>
<!--侧边栏,传递的值为null-->
<div th:replace="~{common/common::siderbar}"></div>
templates/customers/list.html
<!--顶部导航栏-->
<div th:replace="~{common/common::topbar}"></div>
<!--侧边栏,传递的值为list-->
<div th:replace="~{common/common::siderbar(order='list')}"></div>
页面传值
要使用页面传值,则首先需要编写接口
因为侧边栏都放到了公共页面去,所以直接在公共页的a标签出编写跳转路径
templates/common/common.html
<a th:class="(${order}=='list')?('nav-link active'):('nav-link')" th:href="@{/customers}">
重点是这里的
th:href,不要被前面的图标显示弄乱了
controller
@Controller
public class CustomersController {

    @Autowired
    EmployeeDao employeeDao;

    @RequestMapping("/customers")
    public String customers(Model model){
        /*这里将员工数据添加进去,并且返回到指定的页面*/
        model.addAttribute("customers",employeeDao.getAll());
        return "customers/list";
    }

}
本来
controller层应该调用service的,但是没有链接数据库,连数据都是伪造的,所以一切从简
templates/customers/list.html
<table class="table table-striped table-sm">
    <thead>
        <tr>
            <th>id</th>
            <th>lastName</th>
            <th>email</th>
            <th>gender</th>
            <th>department</th>
            <th>birth</th>
        </tr>
    </thead>
    <tbody>
        <tr th:each="customer : ${customers}">
            <td th:text="${customer.getId()}"></td>
            <td th:text="${customer.getLastName()}"></td>
            <td th:text="${customer.getEmail()}"></td>
            <!--因为这里只有0和1两个选项,但是性别又不能为0或者1,所以在这里进行一次判断-->
            <td th:text="(${customer.getGender()}==0)?'女':'男'"></td>
            <!--市场是一个pojo,所以只显示名字-->
            <td th:text="${customer.getDepartment().getDepartmentName()}"></td>
            <!--thymeleaf对日期也有处理-->
            <td th:text="${#calendars.format(customer.getBirth(),'yyyy-MM-dd HH:mm:SS')}"></td>
        </tr>
    </tbody>
</table>
有几个点需要注意一下:
- 性别选项将纯数字变为男和女
pojo复杂类型选择输出thymeleaf的函数问题,比如对日期的支持,除了对日期的支持还有很多函数,可以去看
最后截图:
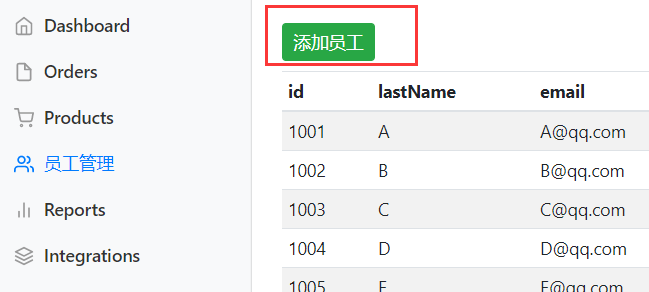
添加员工
首先我们需要在最后面加一个按钮,叫做添加员工
<h2><button class="btn btn-sm btn-success">添加员工</button></h2>
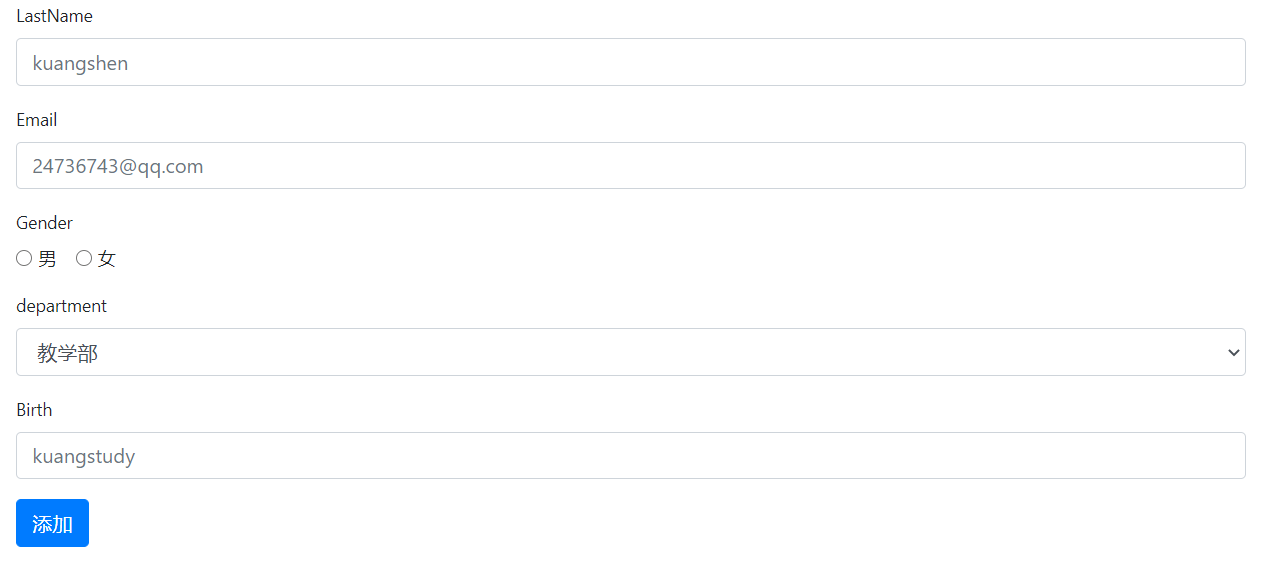
然后我们需要一个添加员工的界面,只显示部分
<!--添加员工界面-->
<main role="main" class="col-md-9 ml-sm-auto col-lg-10 pt-3 px-4">
    <form th:action="@{/addcustomers}" method="post">

        <input type="text" class="form-control" placeholder="kuangshen" name="lastName">

        <input type="email" class="form-control" placeholder="24736743@qq.com" name="email">

        <input class="form-check-input" type="radio" name="gender"  value="1">
        <input class="form-check-input" type="radio" name="gender"  value="0">

        <!--这里显示的部门信息要从后端读取-->
        <select class="form-control" name="department.id">
            <!--注意这里的text和value不是一个,text是前段显示,但是到后台提交到时候需要value
                还有注意name和value的值到了后台要一样,否则会报错,
                尤其是department,这个不能传递pojo,所以两者要符合
            -->
            <option th:each="department:${departments}" th:text="${department.getDepartmentName()}" th:value="${department.getId()}"></option>
        </select>

        <input type="text" class="form-control" placeholder="kuangstudy" name="birth">

        <button type="submit" class="btn btn-primary">添加</button>

    </form>
</main>
注意点虽然在注释里都写好了,但是还是要说一遍:
- 部门等信息动态获取显示,详情看显示员工列表
- 注意部门是一个实体类,而实体类中假如只传输一个id,那么name和value要对应起来
- 注意
select下拉列表中,name是在select中,而value在具体的option里
Controller接口
@Controller
public class CustomersController {

    @Autowired
    EmployeeDao employeeDao;
    @Autowired
    DepartmentDao departmentDao;

    /*具体的作用是跳转到员工列表*/
    @RequestMapping("/customers")
    public String customers(Model model){
        /*这里将员工数据添加进去,并且返回到指定的页面*/
        model.addAttribute("customers",employeeDao.getAll());
        return "customers/list";
    }


    /*具体的作用是跳转到添加员工界面,并且交给部门的动态数据*/
    @GetMapping("/addcustomers")
    public String addCustomers(Model model){
        Collection<Department> departments = departmentDao.getDepartments();
        model.addAttribute("departments",departments);
        return "customers/addcustomers";
    }

    /*具体的作用是添加员工信息,其实应该调用service层*/
    @PostMapping("/addcustomers")
    public String addCustomers(Employee employee){

        employeeDao.save(employee);

        /*重定向到 /customers 请求下,让他再去访问一遍员工数据*/
        return "redirect:/customers";
    }

}
最后修改一下birth传递值的格式:
#日期格式修改
spring.mvc.date-format=yyyy-MM-dd
修改员工信息
类似于添加员工信息,我们需要一个修改按钮
<td>
    <a class="btn btn-sm btn-warning" th:href="@{/updatecustomers/}+${customer.getId()}" th:text="修改">
    </a>
</td>
注意这里的传递参数值就是这样传递,在idea中会报错,但是其实并没有错误
然后我们需要一个页面
<main role="main" class="col-md-9 ml-sm-auto col-lg-10 pt-3 px-4">
    <form th:action="@{/updatecustomers}" method="post">
        <input type="text" class="form-control" name="lastName" th:value="${employee.getLastName()}">

        <input type="email" class="form-control" name="email" th:value="${employee.getEmail()}">

        <input class="form-check-input" type="radio" name="gender" value="1" th:checked="${employee.getGender()}==1">

        <input class="form-check-input" type="radio" name="gender"  value="0" th:checked="${employee.getGender()}==0">

        <select class="form-control" name="department.id">
            <option th:each="department:${departments}" th:text="${department.getDepartmentName()}" th:value="${department.getId()}"
                    th:selected="${employee.getDepartment().getId()}==${department.getId()}">
            </option>
        </select>

        <input type="text" class="form-control" name="birth" th:value="${#calendars.format(employee.getBirth(),'yyyy-MM-dd')}">

        <button type="submit" class="btn btn-primary">修改</button>
    </form>
</main>
选择选中的时候使用了
thymeleaf的表达式进行了判断 进行日期的格式化
Controller
@Controller
public class CustomersController {

    @Autowired
    EmployeeDao employeeDao;
    @Autowired
    DepartmentDao departmentDao;

    /*具体的作用是跳转到员工列表*/
    @RequestMapping("/customers")
    public String customers(Model model){
        /*这里将员工数据添加进去,并且返回到指定的页面*/
        model.addAttribute("customers",employeeDao.getAll());
        return "customers/list";
    }

    /*进入到修改页面*/
    @GetMapping("/updatecustomers/{id}")
    public String updateCustomers(@PathVariable("id") Integer id,Model model){

        Employee employee = employeeDao.getEmployeeById(id);

        Collection<Department> departments = departmentDao.getDepartments();

        model.addAttribute("employee",employee);
        model.addAttribute("departments",departments);


        return "customers/updatecustomers";
    }

    /*修改后跳转界面*/
    @PostMapping("/updatecustomers")
    public String updateCustomers(Employee employee){

        //虽然这里应该有一个修改的内容,但是我没写,就当修改完了,走一遍流程

        return "redirect:/customers";
    }
}
虽然没有进行具体的修改,但是流程已经走完了
删除员工信息
首先需要一个按钮
<td>
    <a class="btn btn-sm btn-danger" th:href="@{/deletecustomers/}+${customer.getId()}" th:text="删除">
    </a>
</td>
然后需要一个Controller
@Controller
public class CustomersController {

    @Autowired
    EmployeeDao employeeDao;
    @Autowired
    DepartmentDao departmentDao;

    /*具体的作用是跳转到员工列表*/
    @RequestMapping("/customers")
    public String customers(Model model){
        /*这里将员工数据添加进去,并且返回到指定的页面*/
        model.addAttribute("customers",employeeDao.getAll());
        return "customers/list";
    }

    /*进入到删除页面*/
    @GetMapping("/deletecustomers/{id}")
    public String deleteCustomers(@PathVariable("id") Integer id,Model model){

        employeeDao.delete(id);

        return "redirect:/customers";
    }
}
网站应该如何写
后端没什么,关键是前端
- 模版:别人写好的,我们拿来改成自己需要的
- 框架:组件:自己手动安装。比如
Bootstarp,Layui,semantic-ui- 栅格系统
- 导航栏
- 侧边栏
- 表单
快速搭建web应用
- 前端搞定,要知道前端页面是什么样子
- 设计数据库(难点)
- 前端可以独立运行
- 数据接口如何对接:json
- 前后端联调
- 有一套自己熟悉的后台模版,比如
x-admin- 前端页面:至少能够自己通过前端框架,组合出来一个网站页面
indexaboutblogpostuser

若有收获,就点个赞吧
0 人点赞
