本地安装教程
只需几个简单的步骤即可启动并运行Flink示例程序。
设置:下载并启动Flink
Flink可在Linux,Mac OS X和Windows上运行。为了能够运行Flink,唯一的要求是安装一个有效的Java 8.x. Windows用户,请查看Windows上的Flink指南,该指南介绍了如何在Windows上运行Flink以进行本地设置。
您可以通过发出以下命令来检查Java正确安装:
java -version
如果你有Java 8,输出将如下所示:
java version "1.8.0_111"Java(TM) SE Runtime Environment (build 1.8.0_111-b14)Java HotSpot(TM) 64-Bit Server VM (build 25.111-b14, mixed mode)
下载并编译
从我们的某个存储库克隆源代码,例如:
$ git clone https://github.com/apache/flink.git$ cd flink$ mvn clean package -DskipTests # this will take up to 10 minutes$ cd build-target # this is where Flink is installed to
启动本地Flink群集
$ ./bin/start-cluster.sh # Start Flink
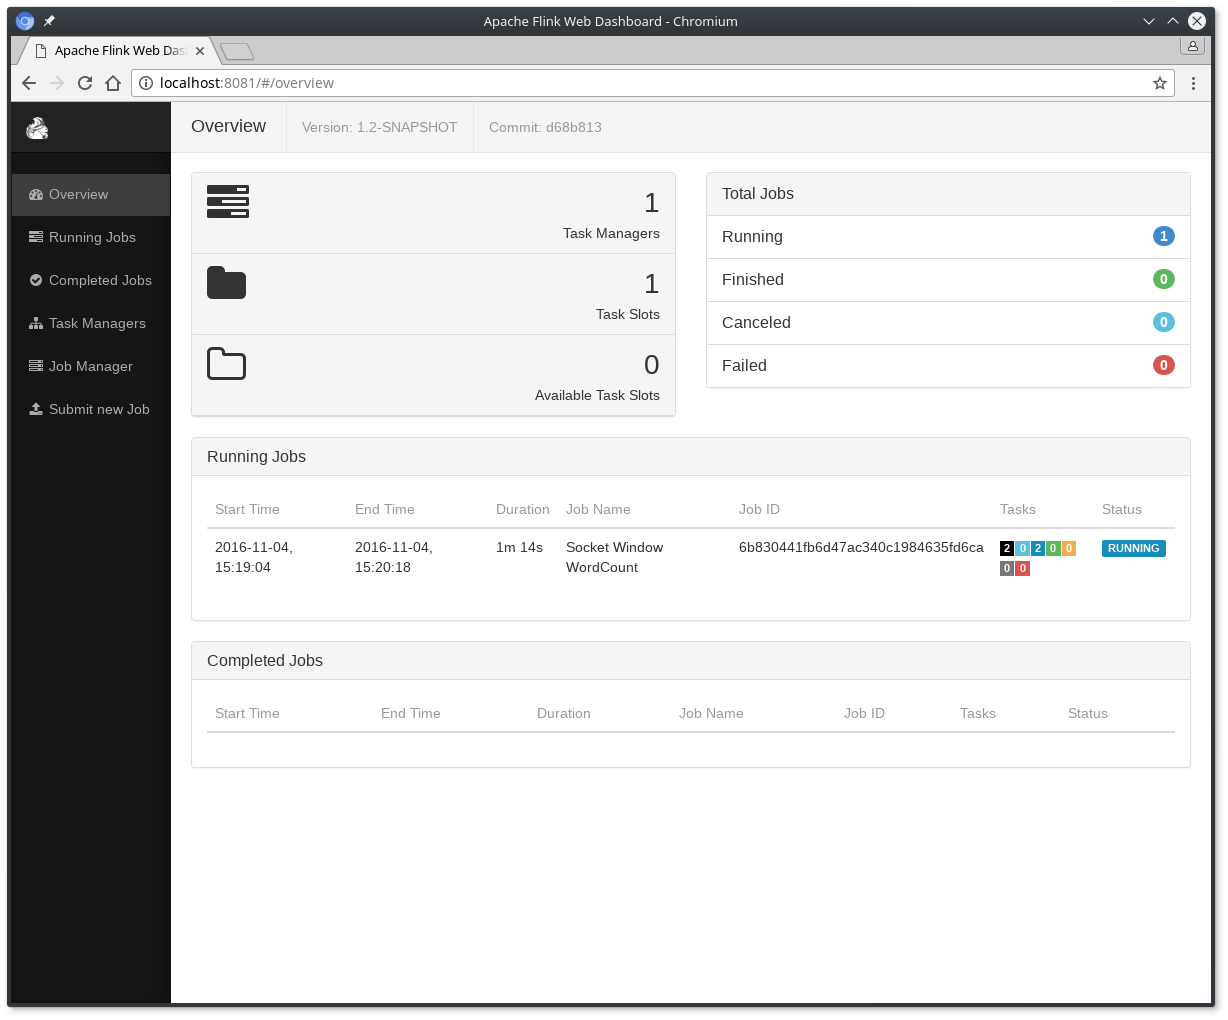
检查分派器的web前端在HTTP://localhost:8081,并确保一切都正常运行。Web前端应报告单个可用的TaskManager实例。

您还可以通过检查logs目录中的日志文件来验证系统是否正在运行:
$ tail log/flink-*-standalonesession-*.logINFO ... - Rest endpoint listening at localhost:8081INFO ... - http://localhost:8081 was granted leadership ...INFO ... - Web frontend listening at http://localhost:8081.INFO ... - Starting RPC endpoint for StandaloneResourceManager at akka://flink/user/resourcemanager .INFO ... - Starting RPC endpoint for StandaloneDispatcher at akka://flink/user/dispatcher .INFO ... - ResourceManager akka.tcp://[[email protected]](/cdn-cgi/l/email-protection):6123/user/resourcemanager was granted leadership ...INFO ... - Starting the SlotManager.INFO ... - Dispatcher akka.tcp://[[email protected]](/cdn-cgi/l/email-protection):6123/user/dispatcher was granted leadership ...INFO ... - Recovering all persisted jobs.INFO ... - Registering TaskManager ... under ... at the SlotManager.
阅读代码
您可以在Scala和Java上的GitHub上找到此SocketWindowWordCount示例的完整源代码。
object SocketWindowWordCount {def main(args: Array[String]) : Unit = {// the port to connect toval port: Int = try {ParameterTool.fromArgs(args).getInt("port")} catch {case e: Exception => {System.err.println("No port specified. Please run 'SocketWindowWordCount --port <port>'")return}}// get the execution environmentval env: StreamExecutionEnvironment = StreamExecutionEnvironment.getExecutionEnvironment// get input data by connecting to the socketval text = env.socketTextStream("localhost", port, '\n')// parse the data, group it, window it, and aggregate the countsval windowCounts = text.flatMap { w => w.split("\\s") }.map { w => WordWithCount(w, 1) }.keyBy("word").timeWindow(Time.seconds(5), Time.seconds(1)).sum("count")// print the results with a single thread, rather than in parallelwindowCounts.print().setParallelism(1)env.execute("Socket Window WordCount")}// Data type for words with countcase class WordWithCount(word: String, count: Long)}
public class SocketWindowWordCount {public static void main(String[] args) throws Exception {// the port to connect tofinal int port;try {final ParameterTool params = ParameterTool.fromArgs(args);port = params.getInt("port");} catch (Exception e) {System.err.println("No port specified. Please run 'SocketWindowWordCount --port <port>'");return;}// get the execution environmentfinal StreamExecutionEnvironment env = StreamExecutionEnvironment.getExecutionEnvironment();// get input data by connecting to the socketDataStream<String> text = env.socketTextStream("localhost", port, "\n");// parse the data, group it, window it, and aggregate the countsDataStream<WordWithCount> windowCounts = text.flatMap(new FlatMapFunction<String, WordWithCount>() {@Overridepublic void flatMap(String value, Collector<WordWithCount> out) {for (String word : value.split("\\s")) {out.collect(new WordWithCount(word, 1L));}}}).keyBy("word").timeWindow(Time.seconds(5), Time.seconds(1)).reduce(new ReduceFunction<WordWithCount>() {@Overridepublic WordWithCount reduce(WordWithCount a, WordWithCount b) {return new WordWithCount(a.word, a.count + b.count);}});// print the results with a single thread, rather than in parallelwindowCounts.print().setParallelism(1);env.execute("Socket Window WordCount");}// Data type for words with countpublic static class WordWithCount {public String word;public long count;public WordWithCount() {}public WordWithCount(String word, long count) {this.word = word;this.count = count;}@Overridepublic String toString() {return word + " : " + count;}}}
运行示例
现在,我们将运行此Flink应用程序。它将从套接字读取文本,并且每5秒打印一次前5秒内每个不同单词的出现次数,即处理时间的翻滚窗口,只要文字漂浮在其中。
- 首先,我们使用netcat来启动本地服务器
$ nc -l 9000
- 提交Flink计划:
$ ./bin/flink run examples/streaming/SocketWindowWordCount.jar --port 9000Starting execution of program
程序连接到套接字并等待输入。您可以检查Web界面以验证作业是否按预期运行:

- 单词在5秒的时间窗口(处理时间,翻滚窗口)中计算并打印到
stdout。监视TaskManager的输出文件并写入一些文本nc(输入在点击后逐行发送到Flink <return>):</return>
$ nc -l 9000lorem ipsumipsum ipsum ipsumbye
该.out文件将在每个时间窗口结束时,只要打印算作字浮在,例如:
$ tail -f log/flink-*-taskexecutor-*.outlorem : 1bye : 1ipsum : 4
要停止Flink当你做类型:
$ ./bin/stop-cluster.sh
下一步

若有收获,就点个赞吧
0 人点赞
