1 harbor
1.1 单机部署
1.1.1 安装
1.安装docker和docker-compose
yum install -y docker-ce docker-compose
2.下载harbor安装包到/opt目录下并解压
[root@docker01 opt]# tar xf harbor-offline-installer-v1.8.3.tgz
3.修改harbor.cfg配置文件
hostname = 10.0.0.210
harbor_admin_password = abc123..
4.执行install.sh
1.1.2 使用方法
1.修改各个节点的docker配置文件
{
“registry-mirrors”: [“https://“],
“insecure-registries”: [“10.0.0.210:5000”,”10.0.0.210”],
“live-restore”: true
}
2.重启docker服务
systemctl restart docker
3.在harbor中添加项目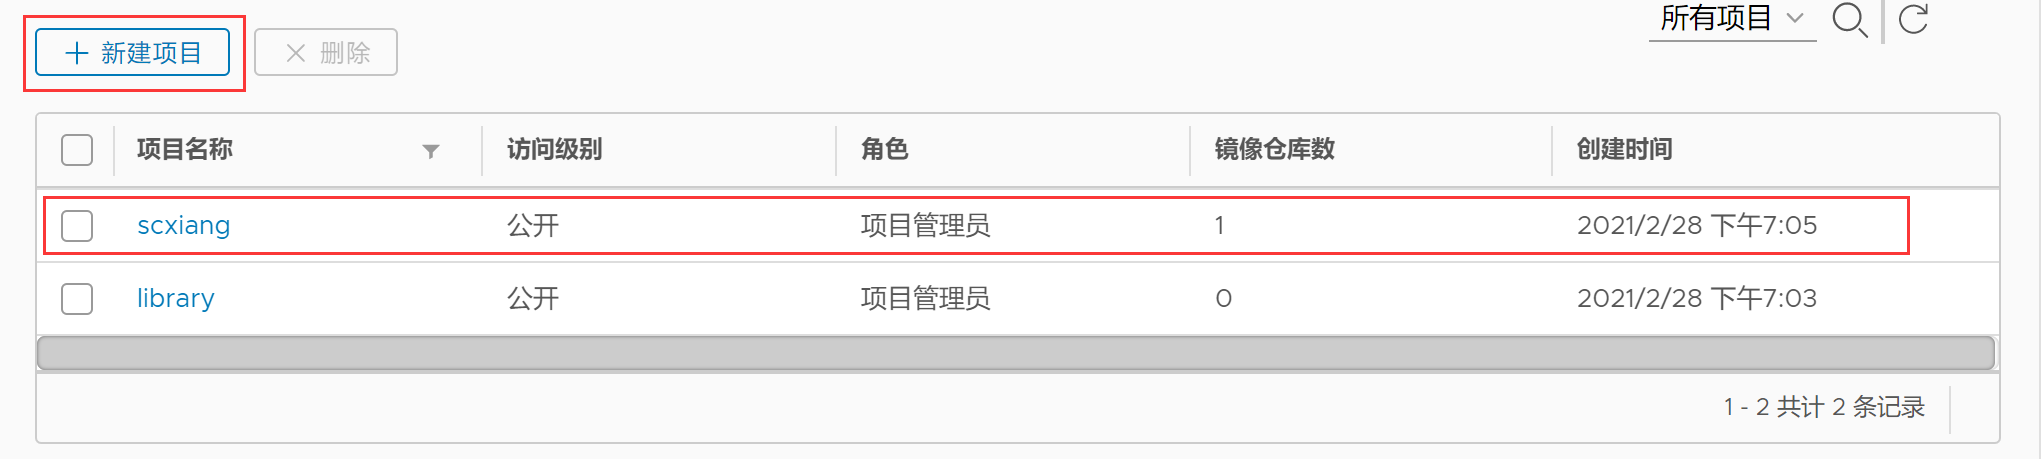
4.制作镜像并上传到harbor
[root@docker01 ~]# docker tag centos:6.9 10.0.0.210/scxiang/centos6:v1
[root@docker01 ~]# docker login 10.0.0.210
[root@docker01 ~]# docker push 10.0.0.210/scxiang/centos6:v1
5.其他客户端拉取镜像
[root@docker02 ~]# docker pull 10.0.0.210/scxiang/centos6:v1
1.2 高可用部署
1.2.1 架构图
数据同步有两种方式可以实现,第一种是Harbor界面提供了同步复制的配置方法,类似与数据库的主从数据同步
第二种方法是两台Harbor挂载同一个NFS目录,这样就可实现使用同一个存储,实现数据共享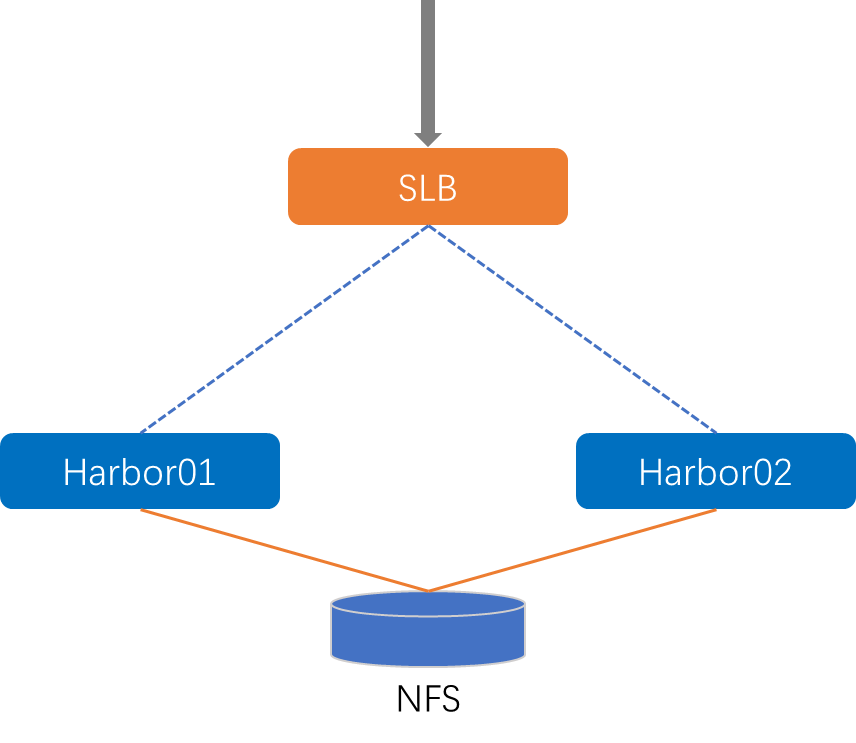
1.2.2 高可用部署
| 主机 | IP |
|---|---|
| SLB | 10.0.0.200 |
| Harbor01 | 10.0.0.201 |
| Harbor02 | 10.0.0.202 |
以同步复制为例
1、安装docker和docker-compose
[root@harbor01 ~]# yum install -y docker-ce docker-compose
[root@harbor02 ~]# yum install -y docker-ce docker-compose
2、将harbor上传至服务器并解压
3、修改配置文件harbor.yml,harbor02配置一样,修改hostname即可
hostname: 10.0.0.201http:port: 80# https:# port: 443# certificate: /your/certificate/path# private_key: /your/private/key/pathharbor_admin_password: abc123..data_volume: /harbor
4、安装
[root@harbor01 harbor]# ./install.sh
5、在harbor01上做配置,仓库管理—>新建目标
6、复制管理—>新建规则,创建复制规则
7、同理在harbor02上做以上相同的配置
8、测试,在harbor01上传镜像看harbor02是否同步
1)修改配置,并登录harbor
[root@Infrastructure ~]# cat /etc/docker/daemon.json{"insecure-registries": ["10.0.0.201"]}[root@Infrastructure ~]# systemctl daemon-reload[root@Infrastructure ~]# systemctl restart docker[root@Infrastructure ~]# docker login 10.0.0.201Username: adminPassword:WARNING! Your password will be stored unencrypted in /root/.docker/config.json.Configure a credential helper to remove this warning. Seehttps://docs.docker.com/engine/reference/commandline/login/#credentials-storeLogin Succeeded
2)添加标签,推送到Harbor01
[root@Infrastructure ~]# docker tag 2218fcda1ff0 10.0.0.201/evnrepo/nginx-photon:v1[root@Infrastructure ~]# docker imagesREPOSITORY TAG IMAGE ID CREATED SIZE10.0.0.201/evnrepo/nginx-photon v1 2218fcda1ff0 6 weeks ago 45MBgoharbor/nginx-photon v2.3.4 2218fcda1ff0 6 weeks ago 45MB[root@Infrastructure ~]# docker push 10.0.0.201/evnrepo/nginx-photon:v1The push refers to repository [10.0.0.201/evnrepo/nginx-photon]e1768f3b0fc8: Pushed103405848fd2: Pushedv1: digest: sha256:fde18ca6ae5fd7fb0bf69aaab9a24acdd7d9a5b8725fa612be5a2aa3cab7d3ca size: 74
3)在Harbor02上检查,已经看到从Harbor01复制过来的镜像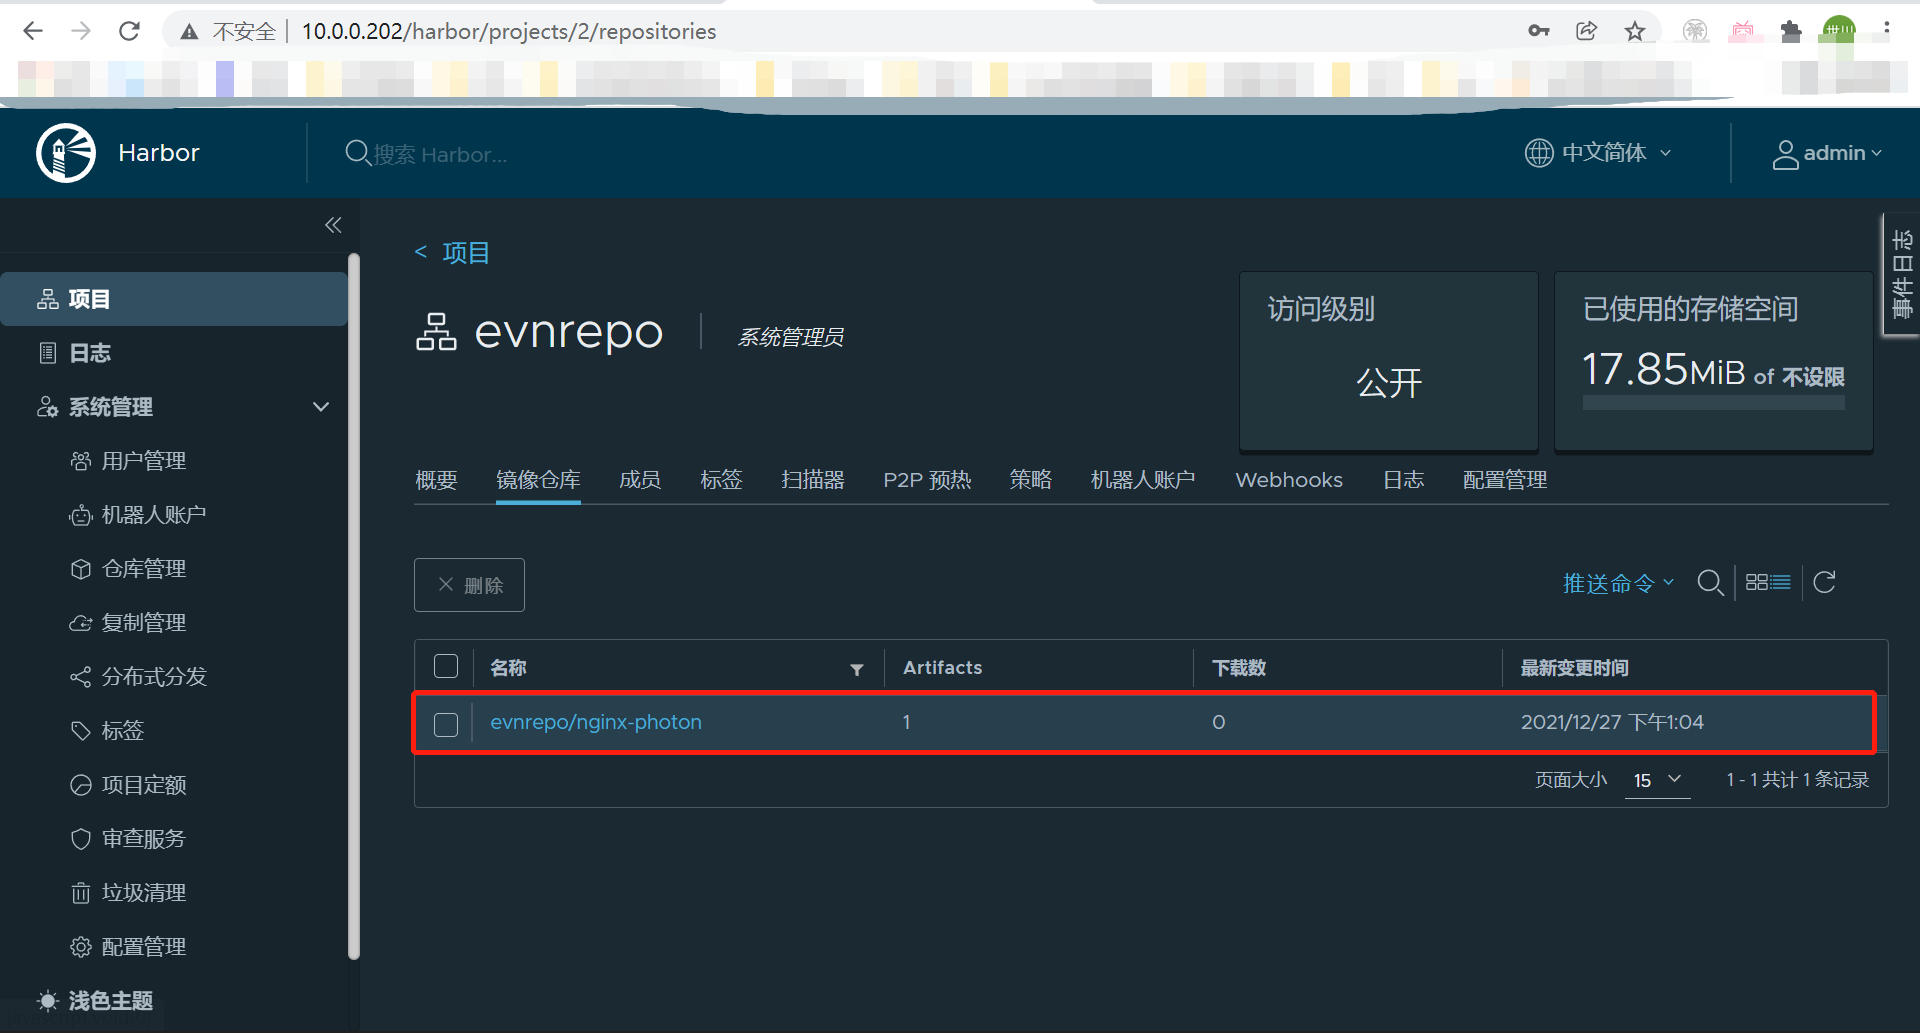
9、配置高可用负载均衡
1)配置nginx反向代理
vim /etc/nginx/conf.d/slb.conf
- 负载均衡的模式配置为基于IP的hash,可以将一个请求代理到相同的后端;
- 一定要配置client_max_body_size 500m;否则推送镜像时会提示如下错误,具体大小依据镜像大小而定

2)通过nginx反向代理的IP进行推送镜像 ```shell [root@Infrastructure ~]# cat /etc/docker/daemon.jsonupstream harborgp {ip_hash;server 10.0.0.201:80;server 10.0.0.202:80;}server{listen 80;server_name 10.0.0.200;client_max_body_size 500m;location / {proxy_pass http://harborgp;}}
{
} [root@Infrastructure ~]# systemctl restart docker"insecure-registries": ["10.0.0.200"]
[root@Infrastructure ~]# docker login 10.0.0.200 Username: admin Password: Error response from daemon: login attempt to http://10.0.0.200/v2/ failed with status: 401 Unauthorized [root@Infrastructure ~]# systemctl daemon-reload [root@Infrastructure ~]# systemctl restart docker [root@Infrastructure ~]# docker login 10.0.0.200
Username: admin Password: WARNING! Your password will be stored unencrypted in /root/.docker/config.json. Configure a credential helper to remove this warning. See https://docs.docker.com/engine/reference/commandline/login/#credentials-store
Login Succeeded [root@Infrastructure ~]# docker tag 41f7fb260d0d 10.0.0.200/evnrepo/exporter:v1 [root@Infrastructure ~]# docker push 10.0.0.200/evnrepo/exporter:v1 The push refers to repository [10.0.0.200/evnrepo/exporter] c8fa87f0c432: Pushed 30cf2783eb4e: Layer already exists 90182ef8d6af: Pushed 1fce02e2f0b2: Pushed 103405848fd2: Pushed v1: digest: sha256:7e2332f1d90a31e0aa1a775aaa81ba4e60651c4676918253286cfc9cd77685c4 size: 1369
3)查看镜像,后端harbor上已成功上传<br />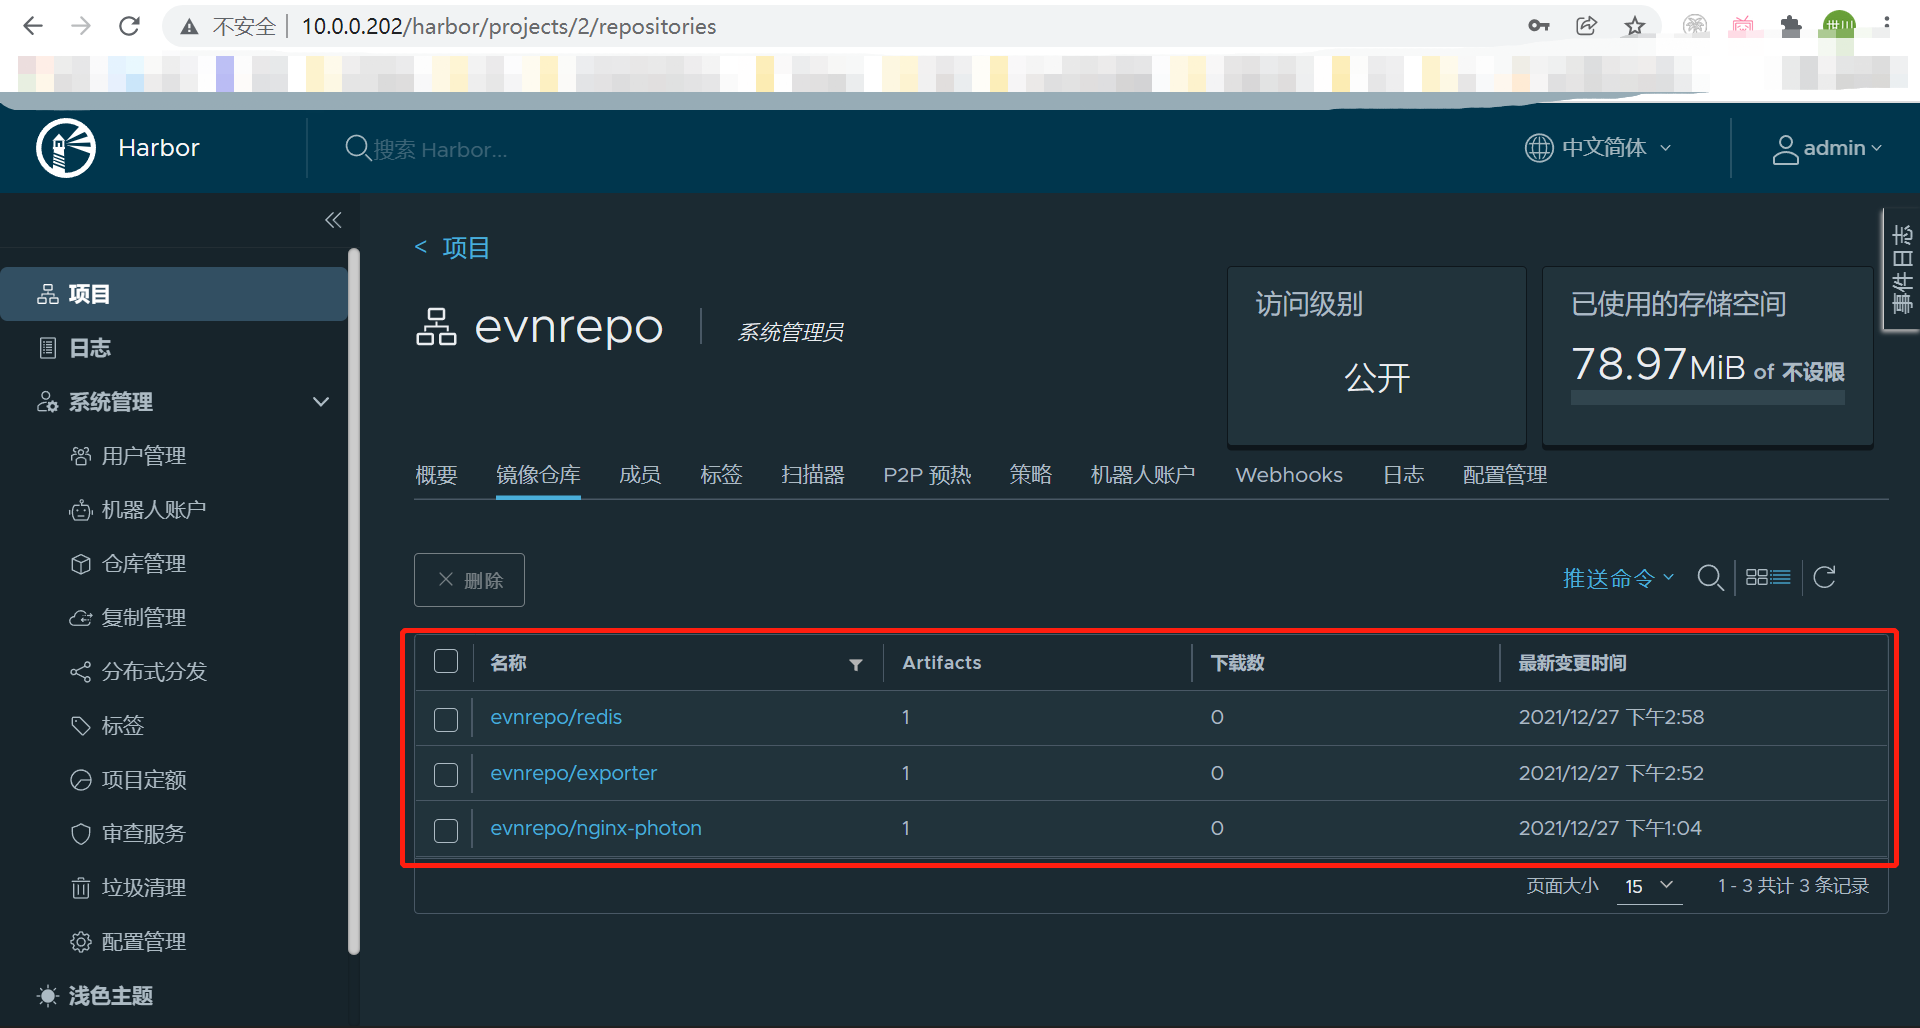<br />4)同时也可通过10.0.0.200的地址进行登录<br />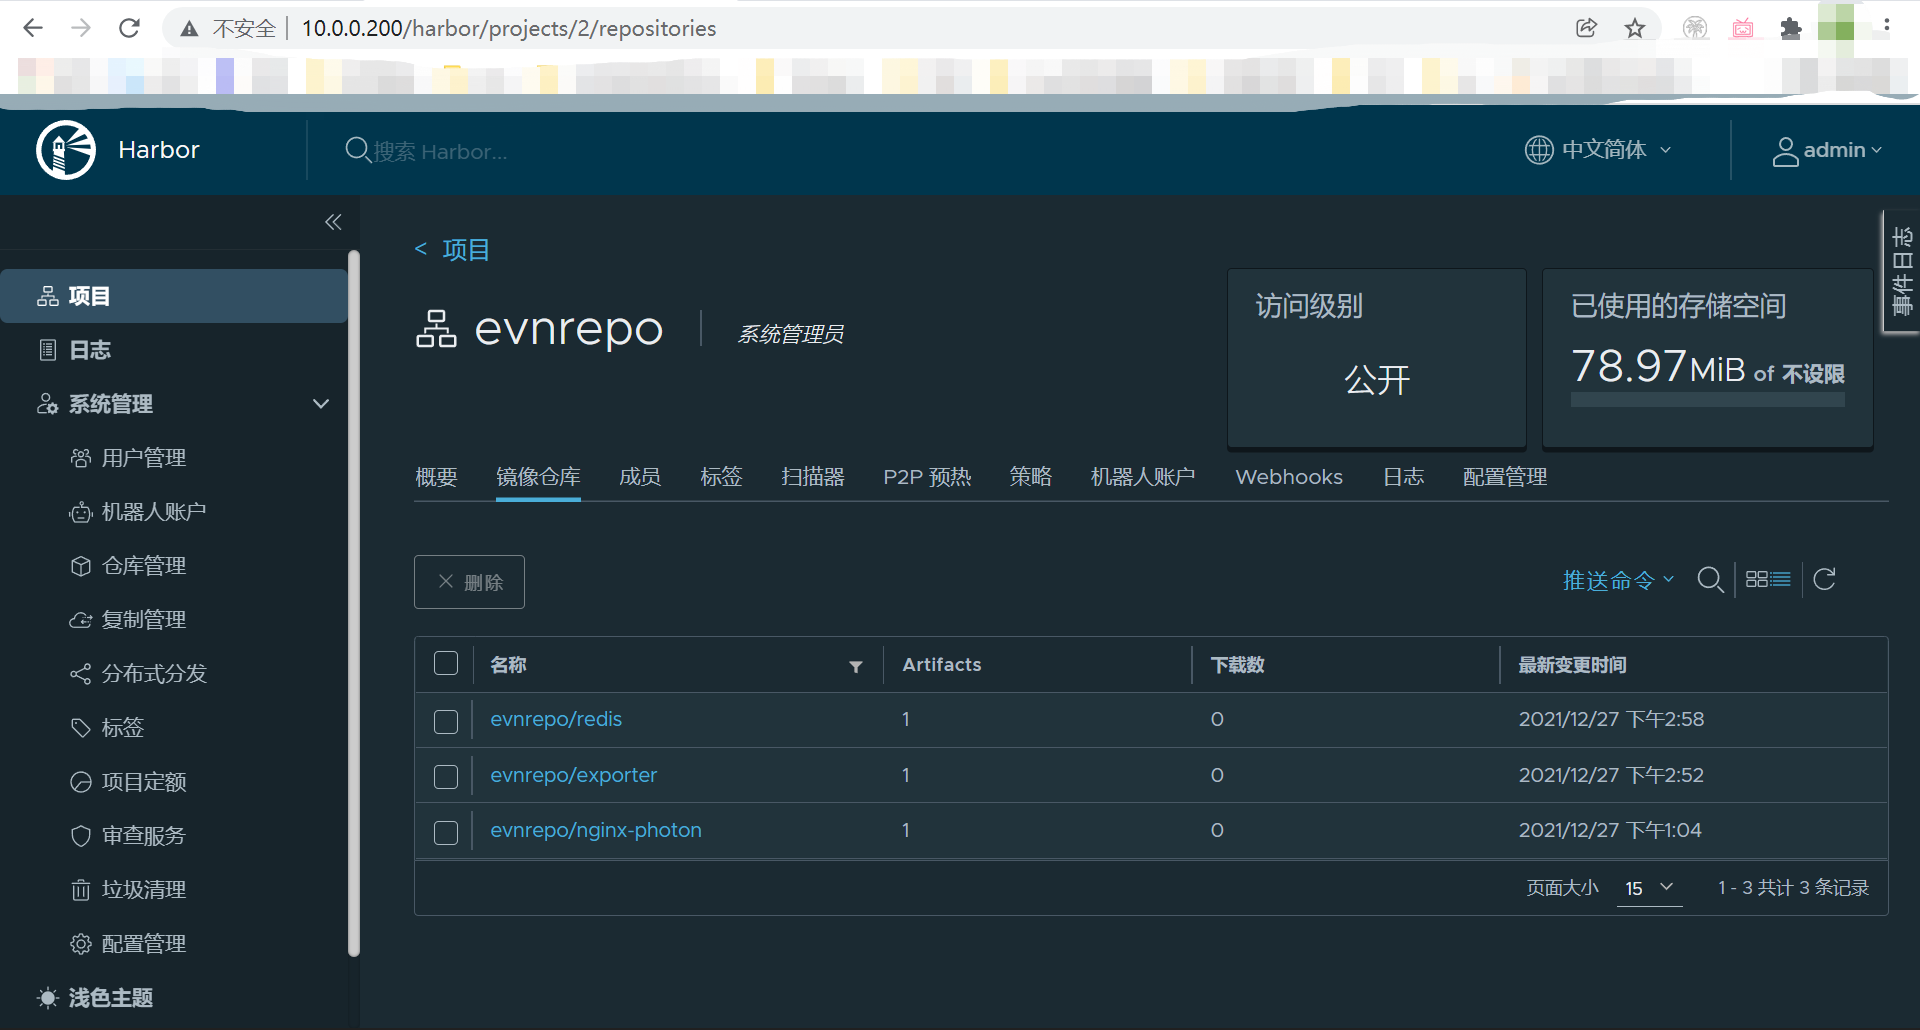<a name="tuQAY"></a>### 1.2.3 给主机添加根证书因为上面的部署采用了域名的方式,且使用了https,因此会涉及到证书的问题,需要给其他拉取镜像的节点添加受信任的根证书,否则在docker login的时候会出现问题```shell#CentOS主机:#将根证书拷贝至下面的目录mv CA.crt /etc/pki/ca-trust/source/anchors/#更新证书update-ca-trust#ubuntu主机#将根证书拷贝至下面的目录mv CA.crt /usr/local/share/ca-certificates/#更新证书update-ca-certificates

若有收获,就点个赞吧
0 人点赞
